

Transform your family’s mealtime with this unbelievably simple and efficient baked grilled cheese recipe! Preparing grilled cheese in the oven allows you to effortlessly cook up to 8 sandwiches simultaneously, freeing you from constant stove-top attention and making meal prep a breeze.
In many households, including ours, a classic grilled cheese sandwich isn’t just a meal; it’s a culinary institution. While often associated with quick kids’ lunches, my husband and I confess our own deep appreciation for a perfectly golden, cheesy sandwich. This baked grilled cheese recipe revolutionizes how we enjoy this beloved comfort food, making it possible to create a large batch for everyone all at once.
Gone are the days of standing over a hot stove, flipping sandwiches one by one. This oven-baked approach is not only a fantastic accompaniment to a hearty soup night but also an indispensable solution for an easy, satisfying lunch at home. Say hello to less mess, less stress, and more delicious, crispy grilled cheese for the whole family.

Why Choose the Oven for Your Grilled Cheese?
For years, my routine for making grilled cheese involved carefully buttering multiple slices of bread, layering cheese, and then patiently frying them one or two at a time in a pan until golden brown. This traditional method, while yielding delicious results, presents several challenges, especially when feeding a hungry crowd.
The main issue? Time and logistics. If you’re attempting to get lunch ready for several people simultaneously, or if you’re dealing with “hangry” family members, the stovetop method can be a struggle. You either end up juggling multiple pans, attempting to squeeze too many sandwiches into one, or serving them in shifts, leaving some sandwiches to cool while others are still cooking. This constant attention and sequential cooking can be exhausting and inefficient.
Enter the baked grilled cheese method – a true game-changer that addresses all these pain points. By utilizing your oven, you unlock a world of convenience:
- Unmatched Efficiency: Cook up to 8 sandwiches (or more!) at once on a single sheet pan. No more waiting, no more staggered serving.
- Hands-Off Cooking: Once assembled and in the oven, you’re free to attend to other tasks, prepare sides, or simply relax. This makes it an ideal option for busy weeknights or larger gatherings.
- Consistent Results: The even heat of the oven ensures uniform browning and perfectly melted cheese across all sandwiches. You won’t find one sandwich perfectly crisp while another is still pale.
- Simplified Cleanup: A single sheet pan typically means less grease splatter and an easier wash-up compared to multiple frying pans. Using parchment paper can make cleanup almost non-existent!
- Less Stress: Say goodbye to the pressure of timing each flip and ensuring every sandwich is perfect. The oven takes care of the hard work, leaving you with satisfyingly cheesy results.
Beyond the practical benefits, there’s something incredibly satisfying about pulling a sheet pan brimming with beautifully browned, cheesy sandwiches from the oven. The ease, the aroma, and the joy of serving everyone simultaneously make this method an instant family favorite.
Essential Ingredients for Perfect Baked Grilled Cheese
Crafting the ultimate baked grilled cheese requires just a few key components, but the quality and type of each ingredient can significantly impact the final taste and texture. Here’s what you’ll need:
- Bread: The foundation of any great grilled cheese is the bread. While my kids often prefer soft white bread, I typically opt for a high-fiber loaf, like this one from Cobbs, for added nutritional value. Sourdough offers a delightful tangy note and a firm crust that holds up wonderfully, while brioche can add a touch of sweetness and richness. The key is to choose a sturdy bread that is approximately 1/2-inch thick. Avoid overly thin or flimsy slices, as they can become soggy or tear easily when buttered. Experiment with different varieties to find your family’s favorite, whether it’s whole wheat, rye, or a classic Texas toast.
- Sliced Cheese: The star of the show! For the most captivating flavor and melt, I love to combine different cheeses. A blend of sharp cheddar for its robust flavor and mozzarella for its incredible stretch and creamy texture is always a winning combination. For convenience and a beautiful marbled effect, I often use pre-sliced marble cheese. When selecting your cheese, aim for slices about 1/8-inch thick. Pre-sliced cheese saves time, but freshly sliced from a block can sometimes offer a superior melt. Consider options like Gruyere for a nutty depth, Monterey Jack for mildness and excellent melt, or even a spicy jalapeño cheddar for a kick. Don’t be afraid to mix and match!
- Butter: This is non-negotiable for achieving that signature golden, crispy crust. The biggest secret to successful buttering is using soft, spreadable room temperature butter. Trying to spread cold, rock-hard butter will inevitably tear your bread, leading to a less-than-perfect sandwich. If you’re short on time, you can gently soften butter in the microwave for a few seconds (be careful not to melt it completely). Alternatively, some prefer using mayonnaise on the outside for an extra-crispy, savory crust, or even a light olive oil spray for a slightly healthier twist, though butter truly delivers the classic flavor.
- Optional: Flaky Sea Salt for Topping: A sprinkle of flaky sea salt on top of the grilled cheese sandwiches immediately after they come out of the oven elevates the flavor profile significantly. It provides a subtle crunch and a burst of savory seasoning that perfectly complements the rich cheese and buttery bread. This small touch makes a big difference in presentation and taste.
Having these ingredients ready and at the right temperature will set you up for success in making the best oven-baked grilled cheese imaginable.
Mastering Oven-Baked Grilled Cheese: A Step-by-Step Guide
This recipe is designed for maximum convenience and yields 4 perfectly sized sandwiches using a quarter sheet pan, like this one. If you’re catering to a larger gathering or simply want to maximize your efforts, easily double all ingredients and use a half sheet pan to make 8 delicious sandwiches at once.
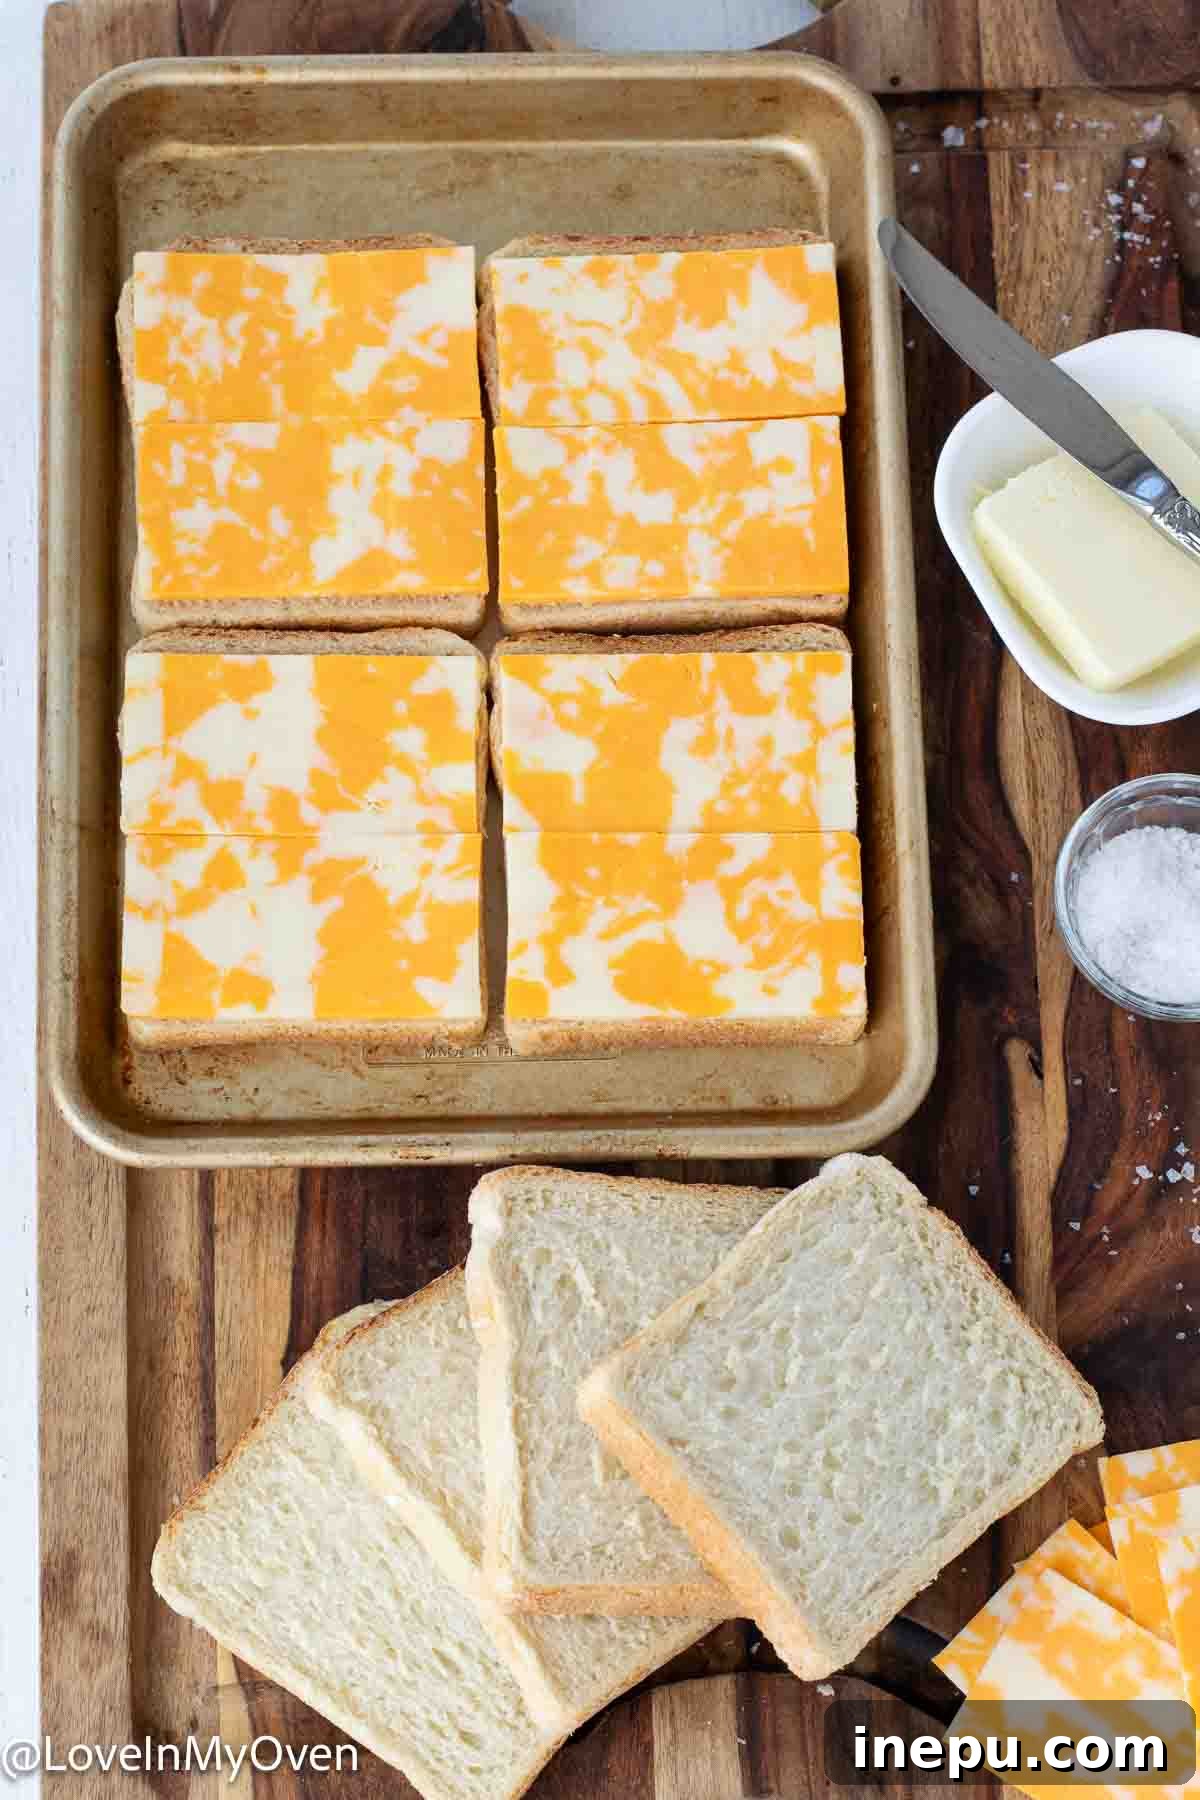
- Prepare Your Oven and Pan: Begin by preheating your oven to a precise 425°F (220°C). This ensures the oven is at the optimal temperature for even cooking and crisping. While the oven preheats, arrange 4 slices of your chosen bread in a single layer on the quarter sheet pan. For easier cleanup, you can line the pan with parchment paper, which also helps prevent sticking.
- Layer the Cheese Generously: Once the bread is laid out, place one layer of cheese slices over each slice of bread. For 4 sandwiches, this would typically mean 8 individual slices of cheese (two per sandwich base). Follow this with an additional layer of cheese on top, ensuring maximum melty goodness. Don’t skimp on the cheese – it’s the heart of the sandwich!
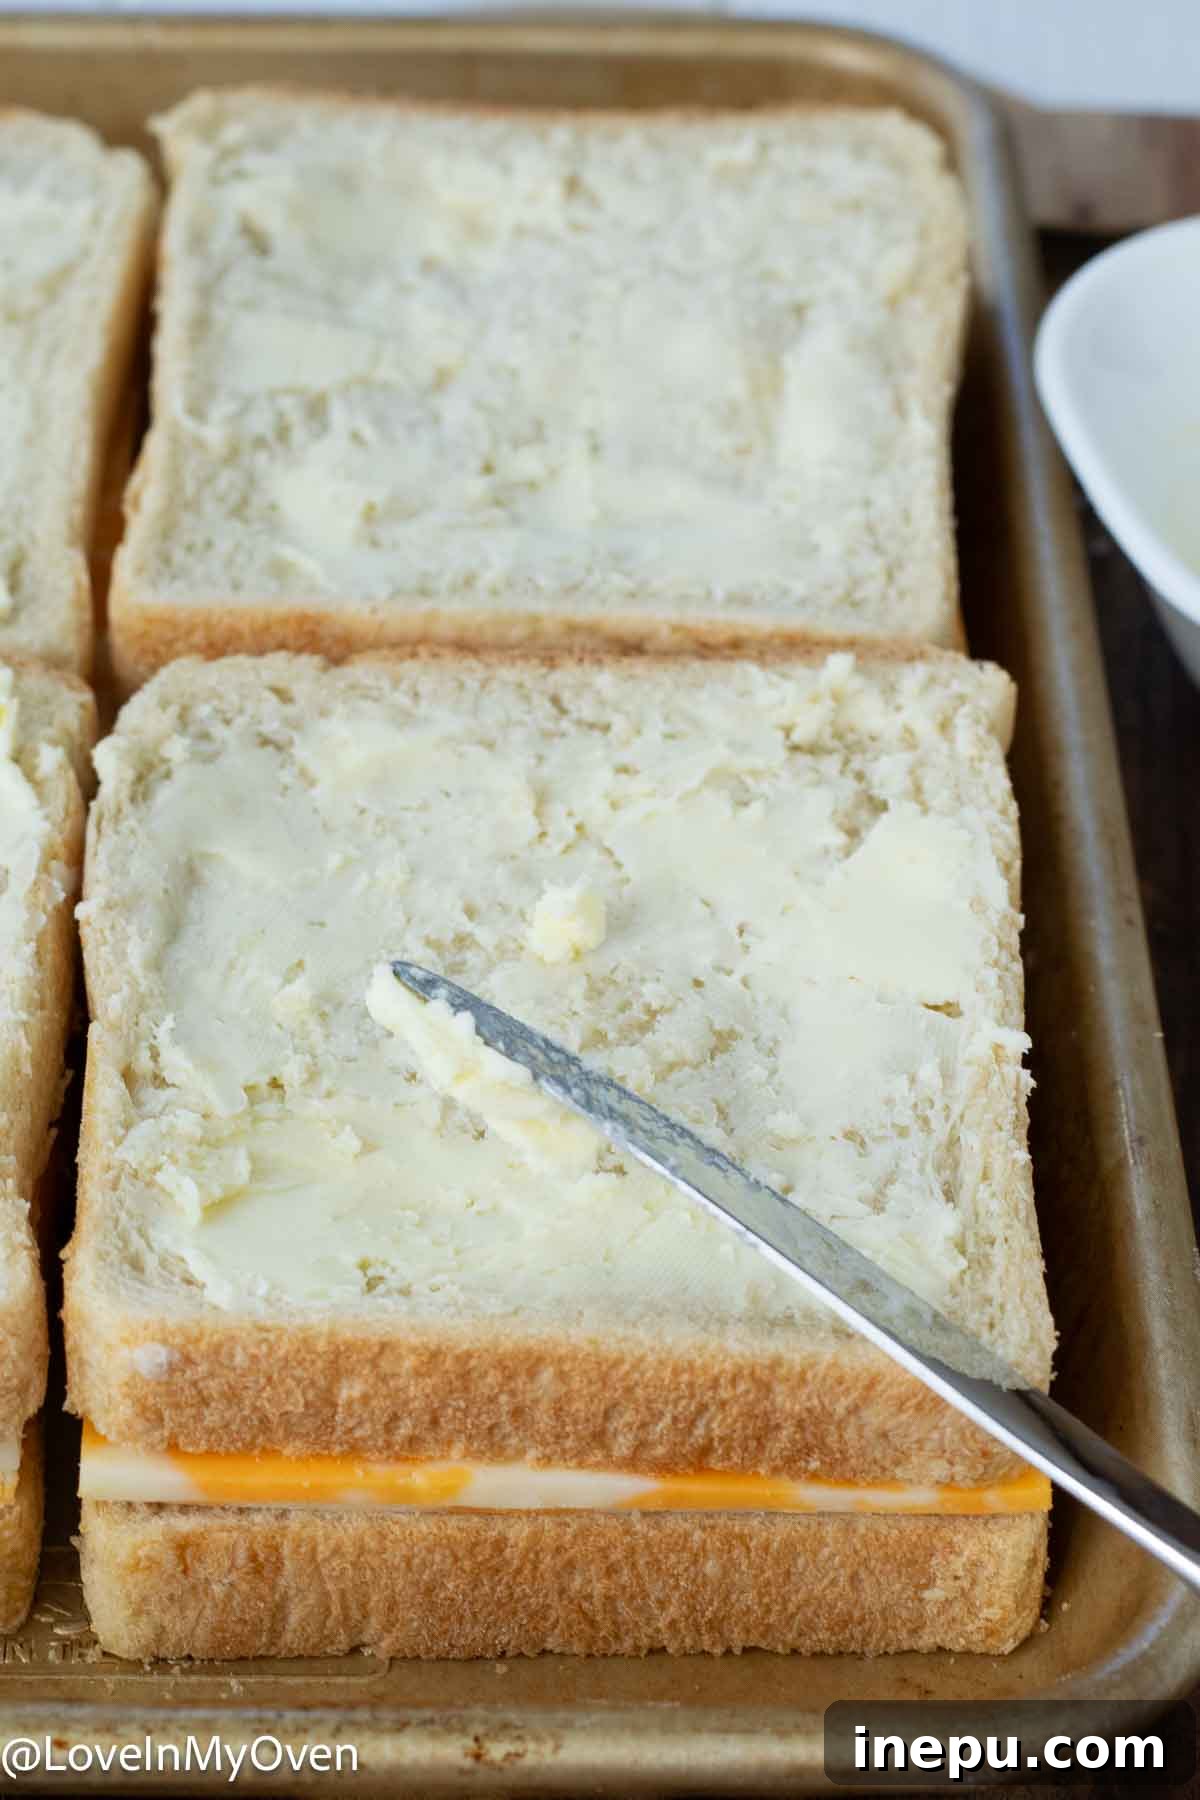
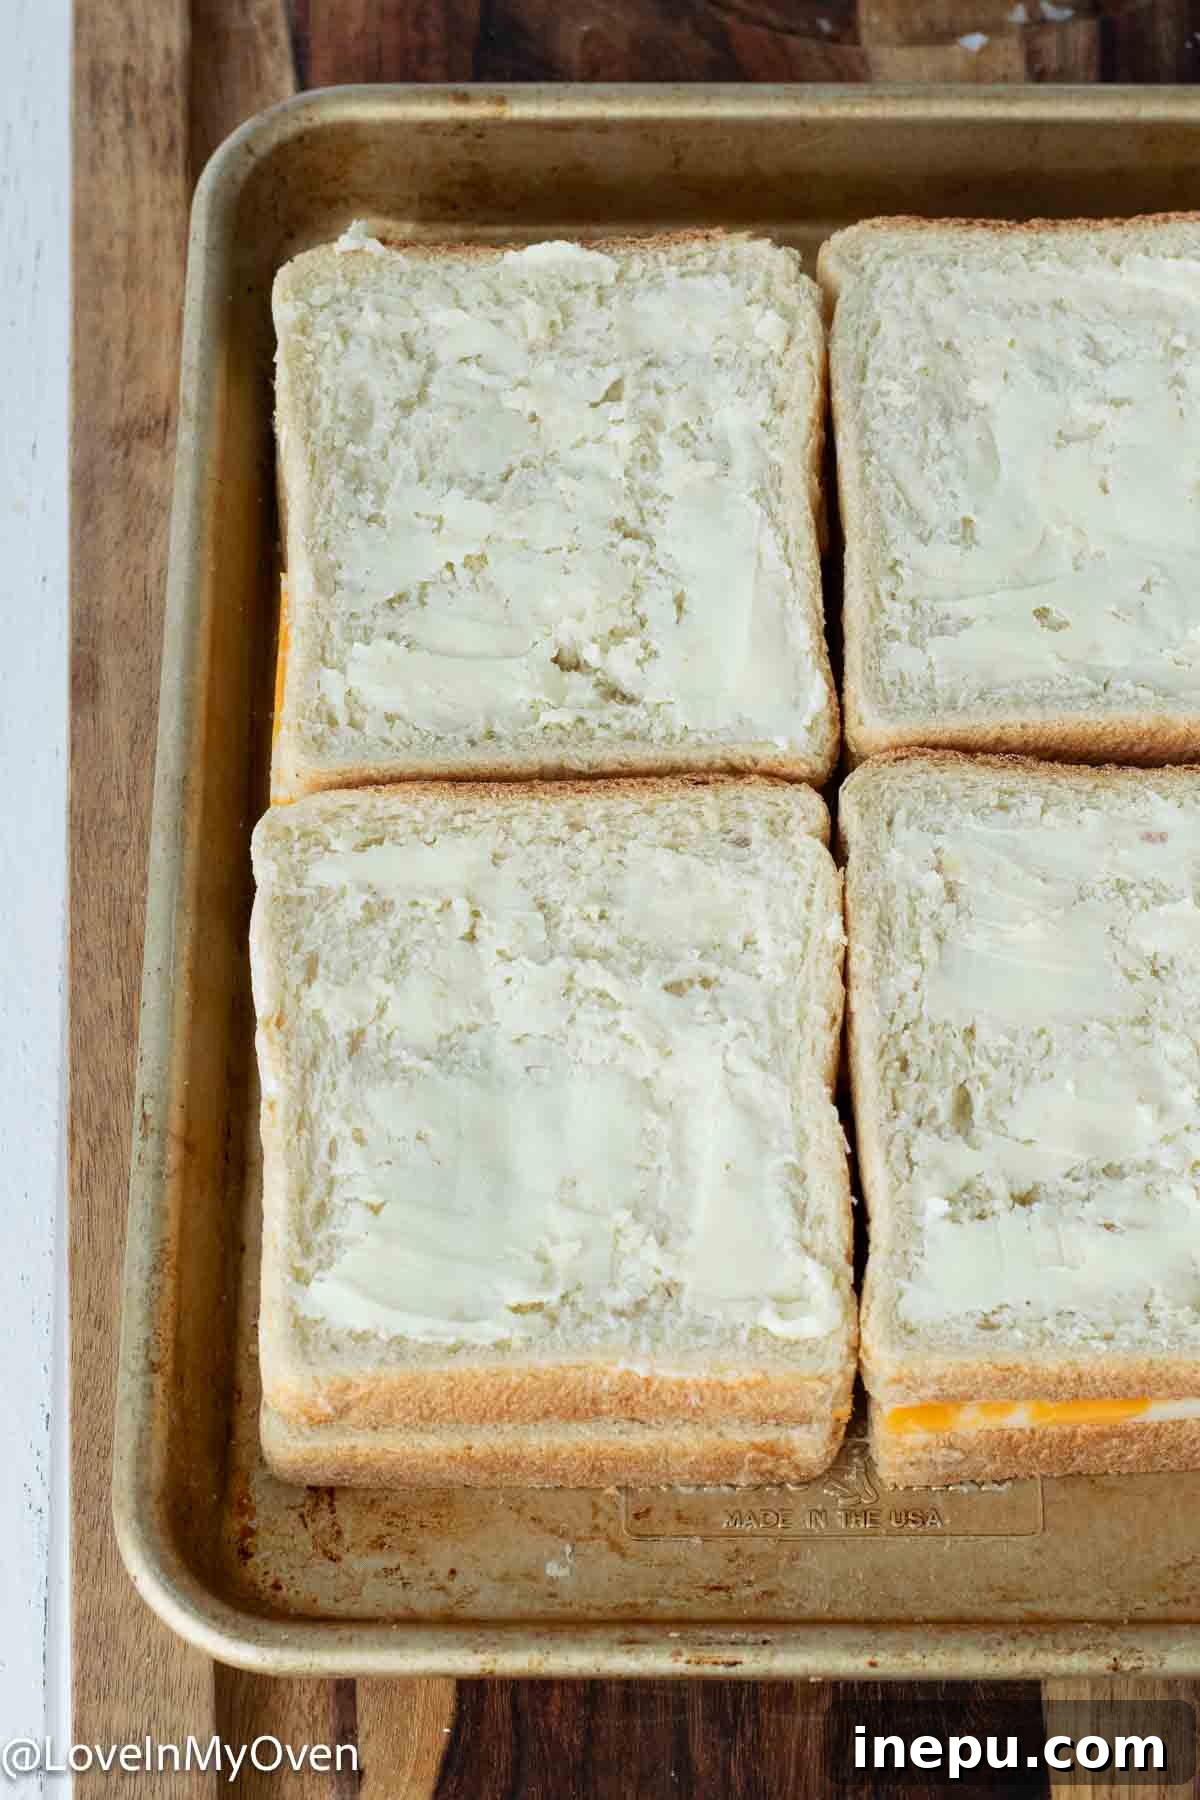
- Assemble and Butter: Carefully place the remaining 4 slices of bread on top of the cheese layers, forming your complete sandwiches. Now, it’s time for the crucial buttering step. Generously spread the room temperature butter over the top side of all the sandwiches. Ensure full coverage for that beautiful golden crust. Once buttered, gently flip each sandwich over on the pan and butter the other side of the bread slices. This two-sided buttering guarantees crispiness and flavor throughout.
- First Bake: Achieve Golden Perfection: Place the prepared sheet pan into your preheated oven. Bake for 8-9 minutes. During this time, the bottom side of the sandwiches will begin to crisp up and turn a beautiful golden brown, and the cheese will start to soften. After the initial bake, carefully remove the pan from the oven.
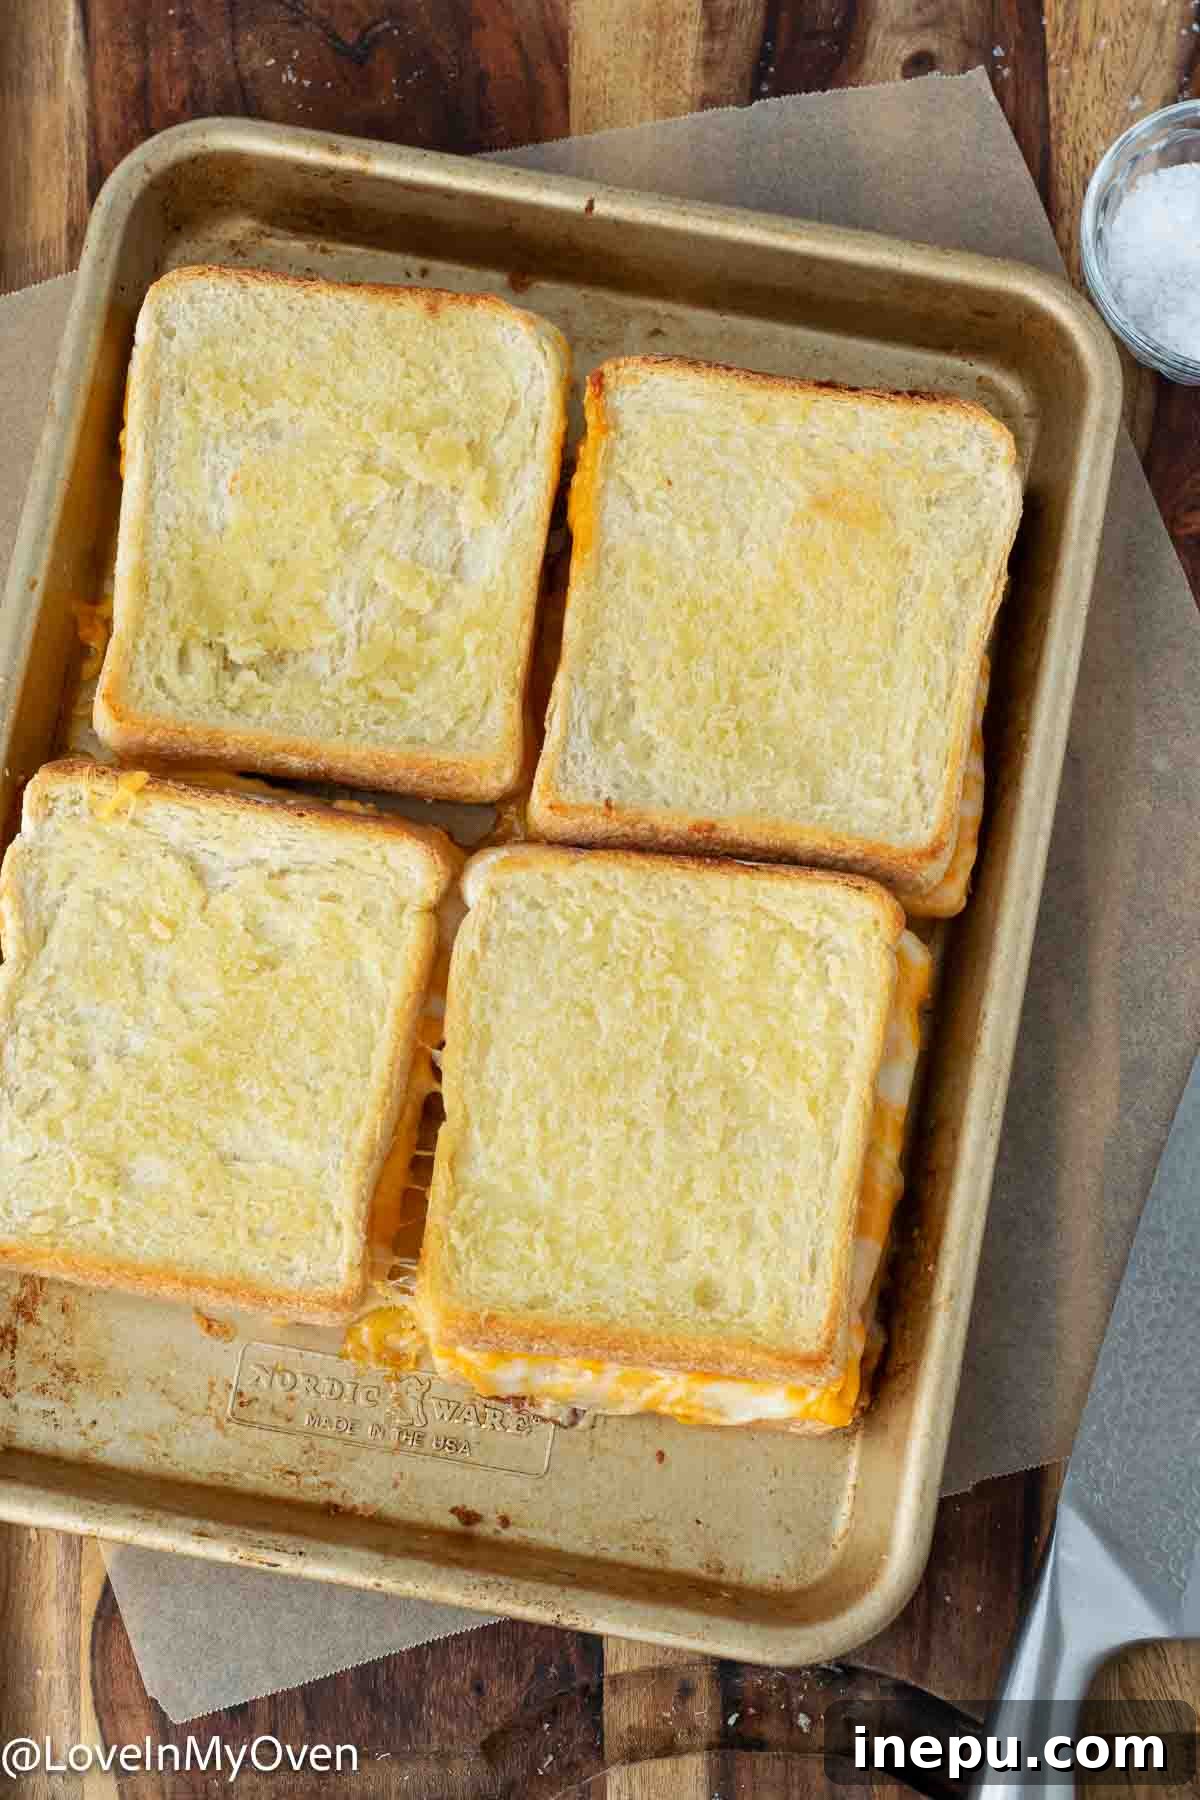
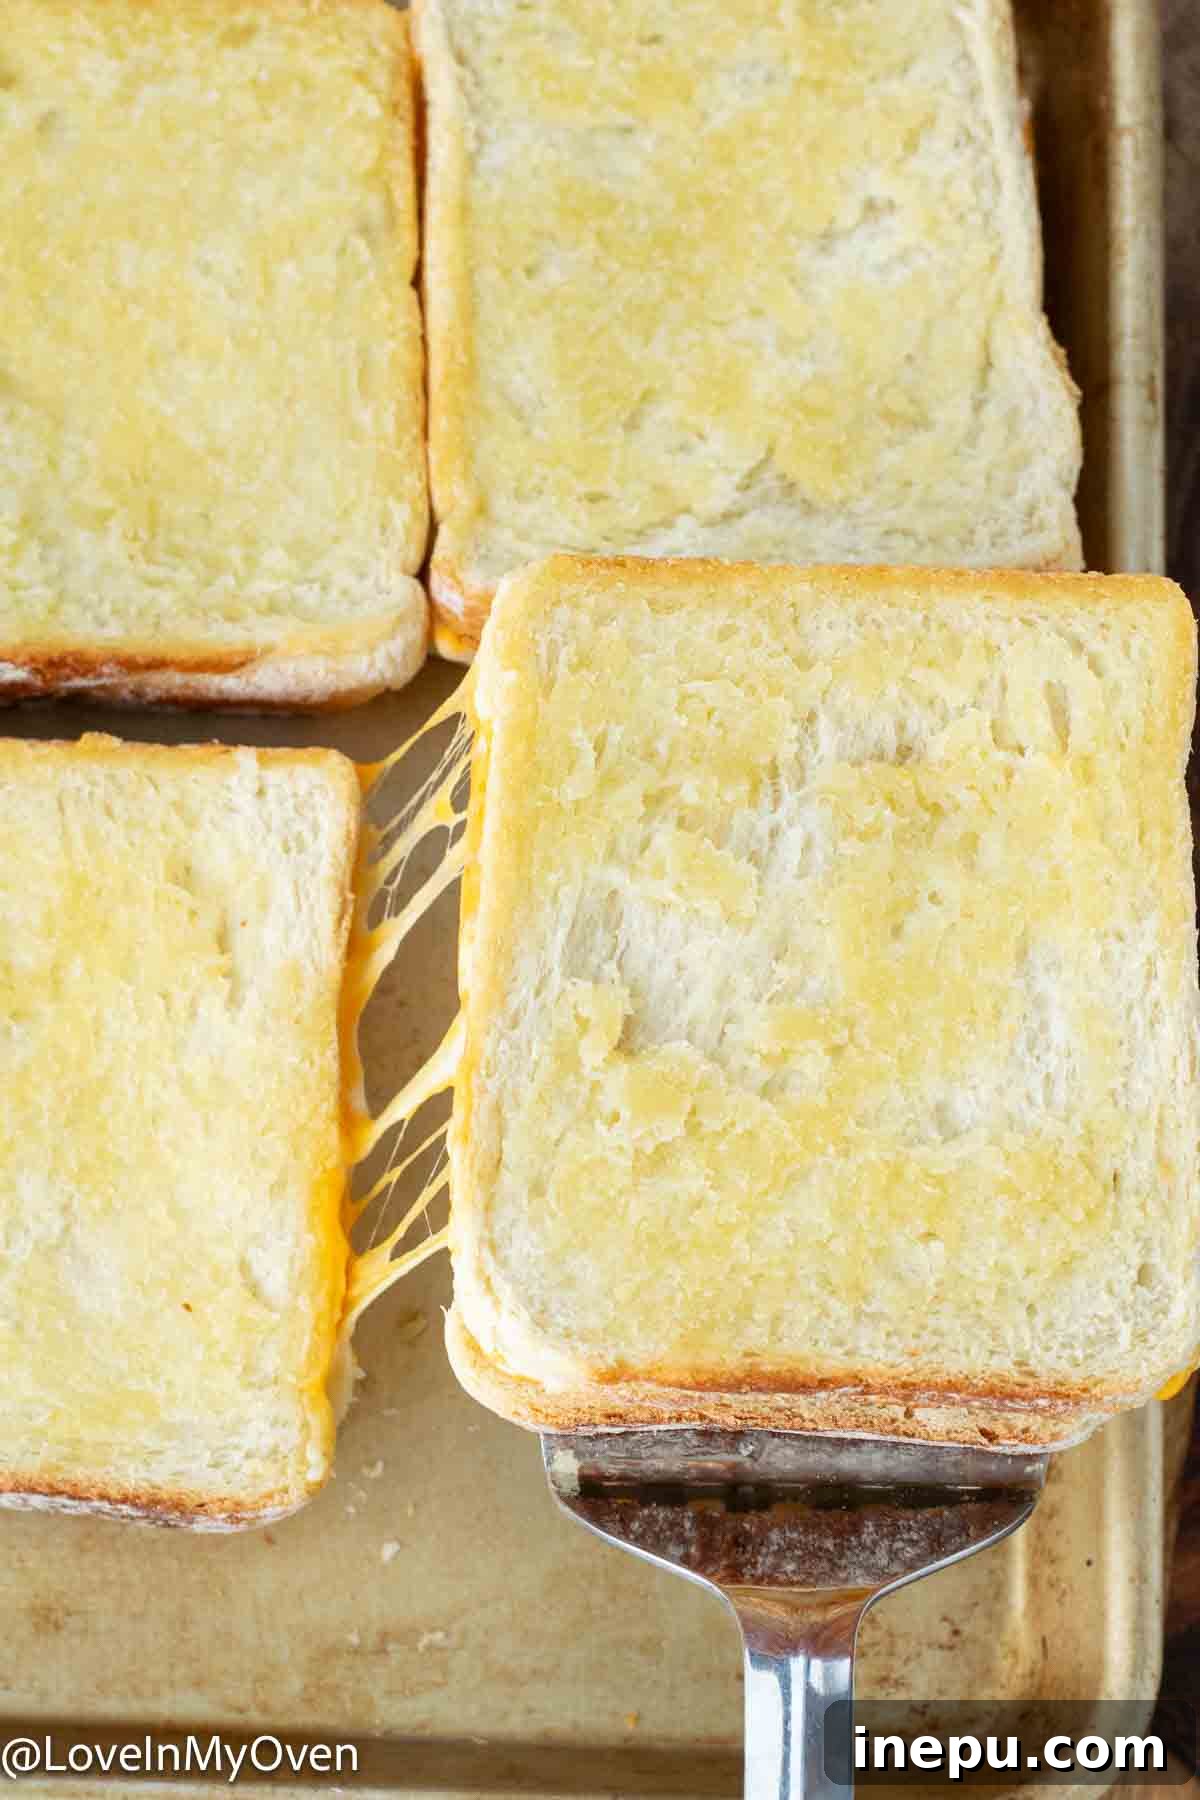
- Flip and Second Bake: The Grand Finale: Using a spatula, meticulously flip each sandwich on the pan. This step is essential for even browning and ensures both sides are equally crispy. Return the pan to the oven and bake for an additional 5-6 minutes. Keep a close eye on them during this final stage to prevent burning and ensure the top side achieves that perfect golden hue with beautifully melted cheese.
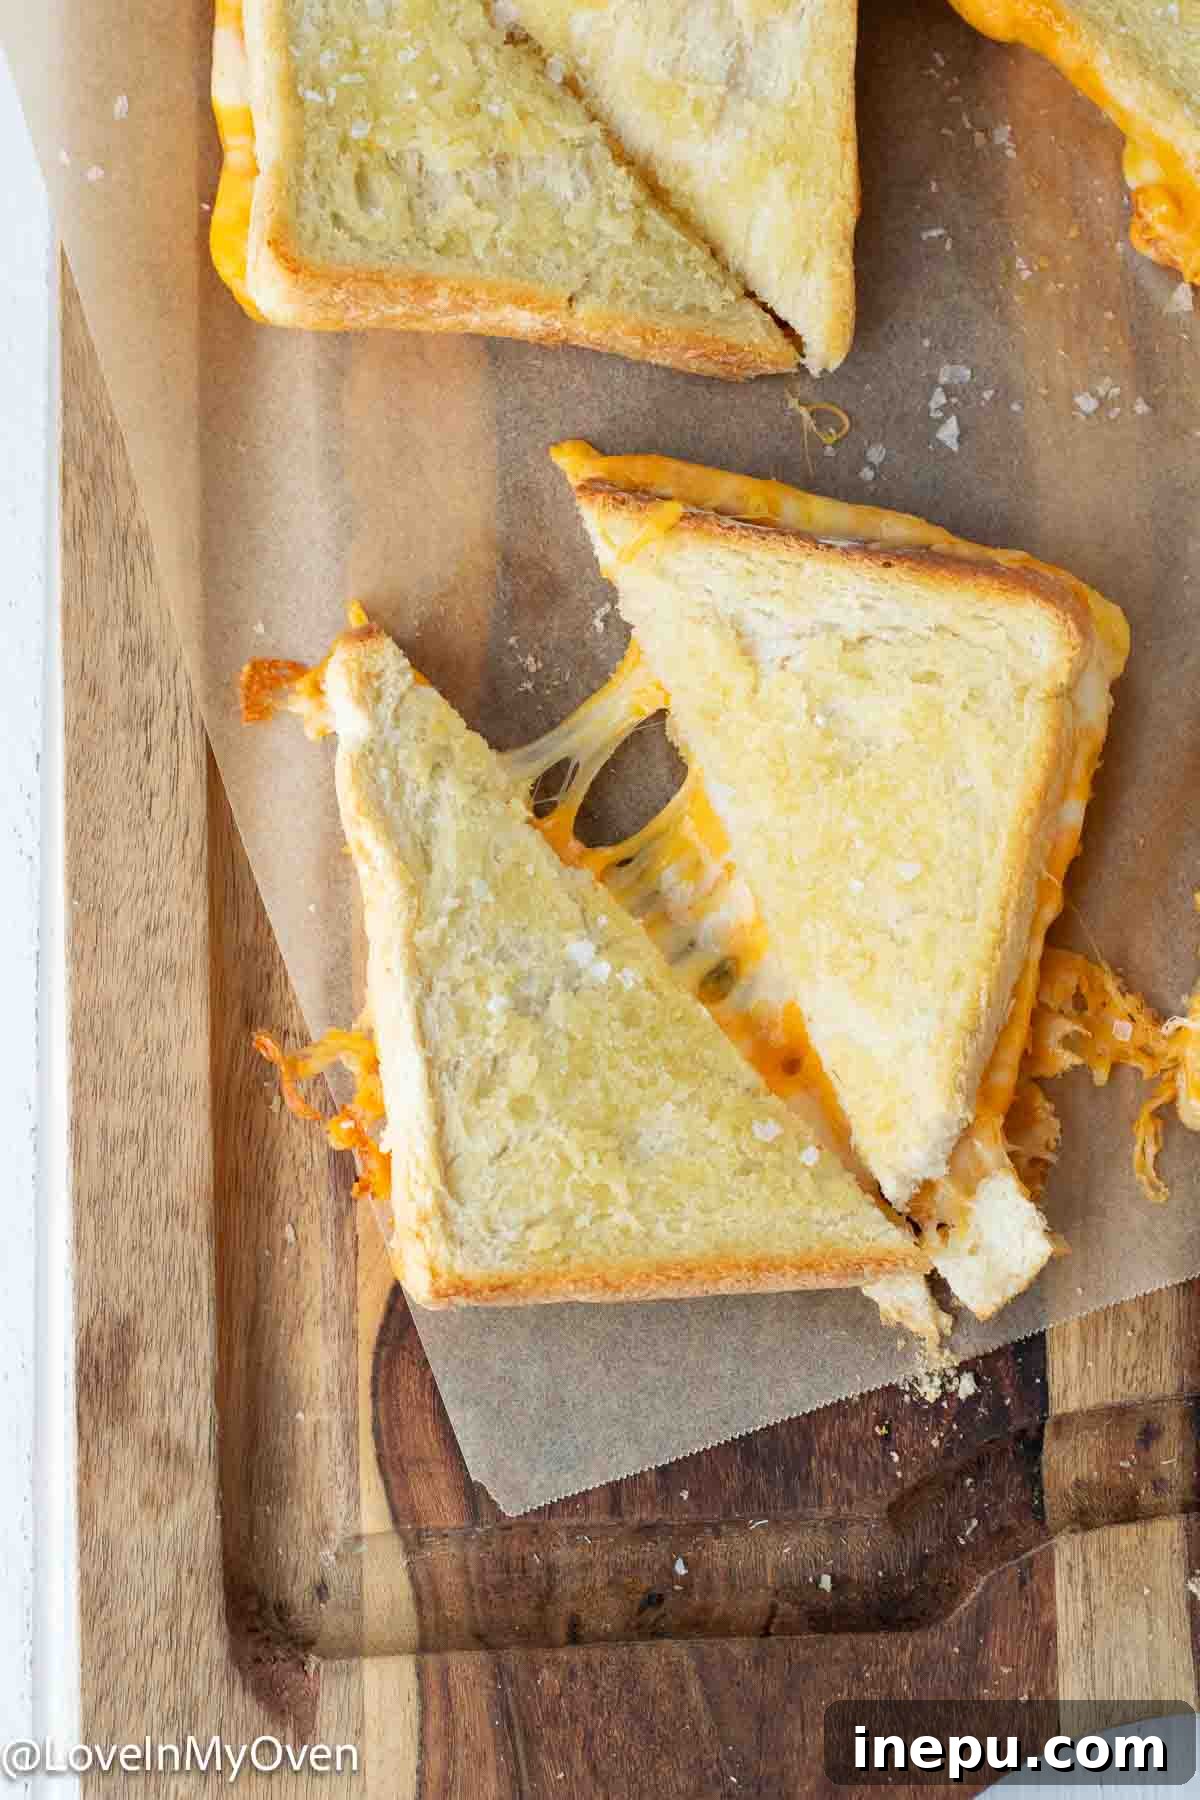
- Serve and Savor: Once both sides are golden brown and the cheese is perfectly molten, remove the sandwiches from the oven. For an extra touch of flavor and a delicate crunch, sprinkle a bit of flaky sea salt over the top of each sandwich. Using a spatula, transfer the sandwiches off the pan onto a cutting board or individual plates. Cut them in half – either diagonally or straight across – and serve immediately. Grilled cheese is truly best enjoyed fresh from the oven, when the cheese is still warm and gooey, and the bread is crisp.
Pro Tips for the Best Oven-Baked Grilled Cheese
Achieving grilled cheese perfection in the oven is easy with a few simple tricks. Keep these tips in mind to elevate your sandwiches from good to absolutely fantastic:
- Butter Temperature is Key: Always, and we mean always, ensure you have soft, room temperature butter or a quality spreadable butter before you attempt to coat your bread. Cold, hard butter will inevitably tear the delicate slices, leading to an uneven crust and frustration. If your butter is too firm, a quick 10-15 seconds in the microwave on a low setting can help, but be careful not to fully melt it.
- Unleash Your Inner Cheese Connoisseur: While classic cheddar and mozzarella are superb, don’t be afraid to switch things up! Experiment with different cheeses to discover new flavor profiles. A smoky Gouda, a spicy jalapeño Monterey Jack, or even a creamy Havarti can transform your sandwich. Combine cheeses for layers of flavor and texture – a sharp cheese for zing, and a mild, melty cheese for gooeyness.
- Don’t Overcrowd the Pan: While the oven method allows for batch cooking, ensure there’s a little space between each sandwich on the sheet pan. This allows for proper air circulation, which is crucial for achieving that crispy, golden crust. Overcrowding can lead to steaming, resulting in soggy bread rather than perfectly toasted.
- Consider Parchment Paper: For the easiest cleanup imaginable, line your sheet pan with parchment paper. This prevents sticking, contains any minor cheese leaks, and makes transferring the hot sandwiches a breeze. It’s a small step that saves significant time on dishes.
- Season the Butter (Optional but Recommended): For an extra layer of flavor, consider mixing a pinch of garlic powder, onion powder, or even some dried herbs (like oregano or thyme) into your softened butter before spreading. This infuses the crust with an aromatic boost that complements the cheese beautifully.
- Bring Cheese to Room Temperature: Just like butter, allowing your cheese slices to come to room temperature for about 10-15 minutes before assembly can help them melt more evenly and quickly in the oven.
- Serve Immediately for Best Experience: While these sandwiches are great for lunchboxes, they are undeniably at their peak when served hot and fresh from the oven, with the cheese still wonderfully gooey and the bread perfectly crispy.
Perfect for Lunchboxes & Meal Prep!
While the undisputed champion experience of grilled cheese is undoubtedly hot and fresh from the oven, with that glorious molten cheese stretching with every bite, this baked version holds up exceptionally well for packed lunches. I’ve frequently packed these oven-baked grilled cheese sandwiches in my kids’ lunchboxes, and they consistently give them rave reviews!
If you’re planning to prepare these for later enjoyment, a crucial step is to ensure the sandwiches have cooled down completely to room temperature before sealing them in a lunchbox or airtight container. Packing warm sandwiches traps steam, which will lead to soggy bread – a culinary tragedy we all want to avoid before lunchtime! Once cooled, they retain their structure and flavor, making them a delicious and convenient meal on the go.

Serving Suggestions & Pairings
A baked grilled cheese is a meal in itself, but it truly shines when paired with complementary sides. The classic pairing, of course, is a warm bowl of creamy tomato soup. The tanginess of the soup perfectly cuts through the richness of the cheese, creating a comforting and nostalgic duo. Beyond soup, consider these delicious ideas:
- Fresh Salad: A crisp green salad with a light vinaigrette adds freshness and a welcome contrast in texture.
- Fruit Skewers: Grapes, apple slices, or melon cubes offer a refreshing, sweet counterpoint.
- Pickles or Olives: The briny notes of pickles or olives can awaken the palate and add a zingy element.
- Dipping Sauces: Beyond soup, consider a small dish of marinara, a sweet and tangy ketchup, or even a spicy sriracha mayo for an adventurous twist.
Troubleshooting Common Oven Grilled Cheese Issues
Even with the simplest recipes, sometimes things don’t go exactly as planned. Here are solutions to common challenges you might encounter when making oven-baked grilled cheese:
- Soggy Bread: If your bread turns out soggy instead of crispy, it could be due to a few factors. Ensure your oven is fully preheated to the correct temperature. Not enough baking time on each side can also prevent proper crisping. Lastly, avoid overcrowding the pan, as this can trap steam and lead to sogginess.
- Burned Outside, Cold Inside: This usually indicates an oven that’s too hot, causing the exterior to brown too quickly before the cheese has a chance to fully melt. Try reducing the oven temperature slightly or shortening the initial baking time. Also, ensure your cheese slices are at room temperature before assembly for more efficient melting.
- Cheese Not Melted: If your cheese remains stubbornly solid, it might be too cold when it goes into the oven, or you haven’t baked the sandwiches long enough. Again, room temperature cheese helps immensely. You can also try adding a thin layer of cream cheese or a splash of milk between the cheese slices to encourage melting.
More Quick & Easy 3-Ingredient Recipes!
If you love the simplicity and efficiency of this baked grilled cheese, you’ll adore these other favorite 3-ingredient recipes from the blog. They’re all designed for speed and ease, ensuring delicious results with minimal effort!
- Cheesy Tortellini Bake
- 3-Ingredient No-Knead Bread
- Decadent Chocolate Mug Cake
And if you’re craving more delightful sandwich ideas, I have you covered there too! Explore these additional options for every craving:
- Zesty Grilled Buffalo Turkey Sandwich
- Flavorful Turkey Pesto Sandwich
- Hearty Slow Cooker Italian Beef Sandwiches

Baked Grilled Cheese
5 Stars 4 Stars 3 Stars 2 Stars 1 Star
No reviews
- Author: Katherine | Love In My Oven
- Total Time: 15 minutes
- Yield: 4 sandwiches 1x
Description
Feed your hungry family easily with this super simple baked grilled cheese recipe! Grilled cheese in the oven means you can make up to 8 sandwiches all at once and it’s all hands off!
Ingredients
- 8 slices sandwich bread* (sturdy, about 1/2″ thick)
- 16 slices marble cheese** (or your preferred blend, about 1/8″ thick)
- 2–3 tablespoons unsalted butter, room temperature (soft and spreadable)
- Optional: flaky sea salt for topping (adds flavor and texture)
Instructions
- Preheat your oven to 425 F (220 C). Line a quarter sheet pan with parchment paper for easy cleanup. Lay 4 slices of bread next to each other on the prepared pan. Place one layer of cheese slices (8 pieces of cheese total, two per sandwich base) on the bread slices, followed by an additional layer of cheese on top for maximum melty goodness.
- Place the remaining slices of bread on top of the cheese layers to complete the sandwiches. Generously butter the top of all the sandwiches, ensuring full coverage. Carefully flip each sandwich over on the pan and butter the other side of the bread slices thoroughly. This ensures even crisping and flavor on both sides.
- Transfer the pan into the preheated oven and bake for 8-9 minutes. After this initial bake, quickly peek at the underside of the sandwiches; they should be golden brown. Remove the pan from the oven and carefully flip each sandwich using a spatula. Return the pan to the oven and bake for an additional 5-6 minutes, or until the top side is also golden brown and the cheese is perfectly melted and gooey.
- Once done, remove the sandwiches from the oven. For an extra touch of flavor and a delicate crunch, sprinkle a bit of flaky sea salt over the top of each sandwich. Use a spatula to transfer the sandwiches off the pan onto a cutting board or individual plates. Cut them in half – diagonally or straight across – and serve immediately to enjoy them at their best!
Sandwiches are best enjoyed immediately, but if you plan to store them, allow them to cool completely to room temperature. Once cooled, they can be stored in an airtight container in the fridge for later enjoyment, preventing sogginess.
Notes
*I like to use a high-fibre white bread, but any sturdy type of bread will work wonderfully for this recipe. Experiment with sourdough, whole wheat, or brioche for different flavor profiles and textures.
**I love to use marble cheese, sliced about 1/8″ thick, for its appealing color and blend of flavors. However, feel free to use your favorite cheese combination, such as cheddar, Monterey Jack, Gruyere, or Havarti, to customize your sandwiches!
- Prep Time: 5 minutes
- Cook Time: 10 minutes
- Category: sandwiches, lunch, dinner
- Method: oven bake, baking
- Cuisine: american