
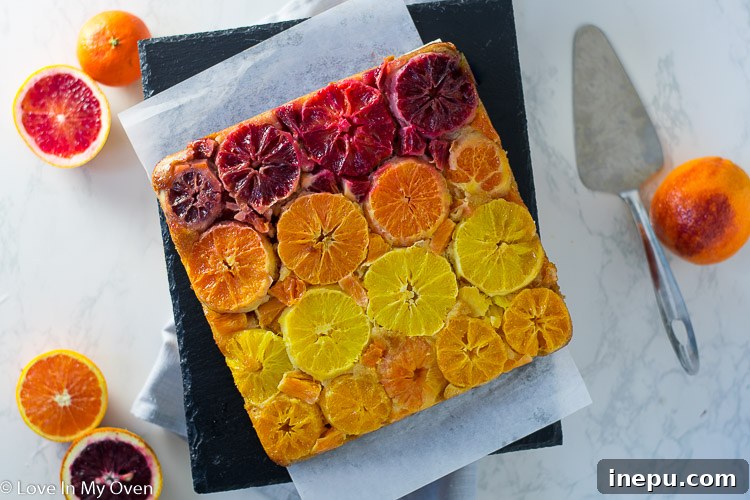
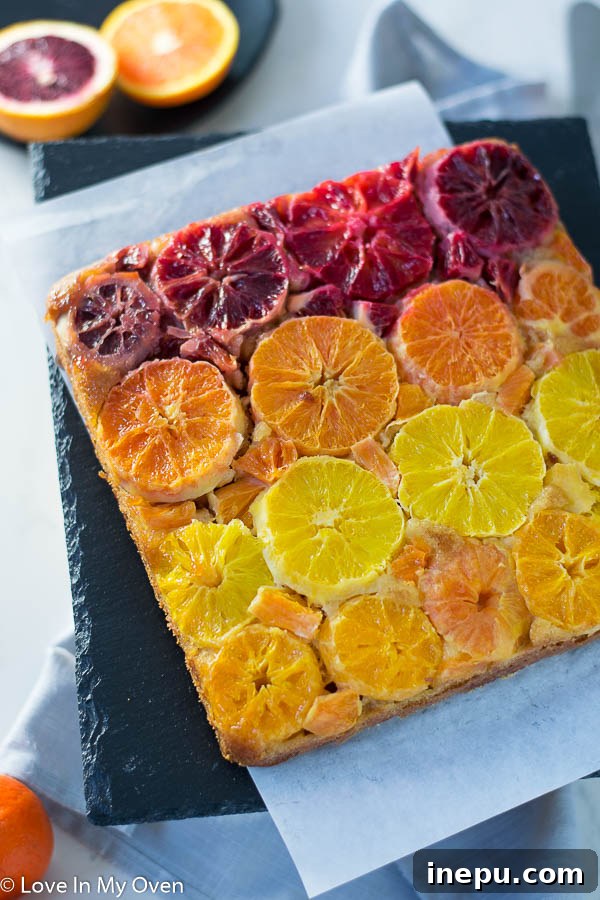
Experience the joy of citrus season with this breathtaking Orange Upside Down Cake! This incredibly easy recipe transforms simple ingredients into a show-stopping dessert, featuring three different types of oranges for a stunning kaleidoscope of colors and flavors. Get ready to impress your guests and awaken your taste buds with every moist, flavorful bite.
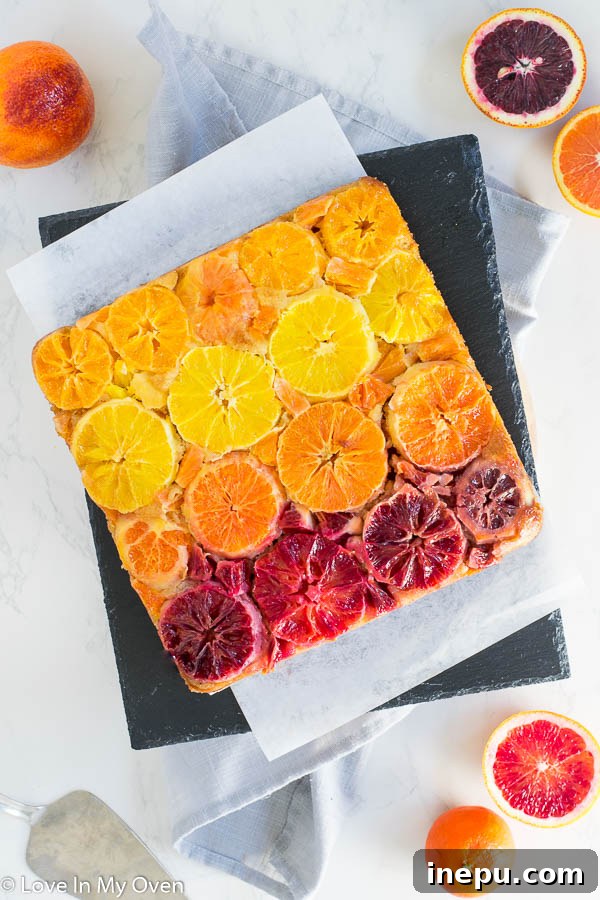
As the glorious season of oranges, grapefruits, and other delightfully round, juicy fruits begins to wind down, I’m making sure to savor every last moment and transform these vibrant gems into as many delicious creations as possible. While some might be moving on to chocolates for Valentine’s Day, my heart still belongs to the bright, tangy zest of citrus, especially when it comes to baking a truly exceptional cake.
While I’m not one for strict New Year’s resolutions, I did make a promise to myself: to indulge in more cake and chocolate (a rather delightful, albeit unconventional, goal!). Life is too short to deny oneself the simple pleasures, and honestly, baking and decorating cakes brings me immense joy. This particular Orange Upside Down Cake is a true testament to that philosophy, as it requires minimal decorating effort – the oranges do all the dazzling work themselves!
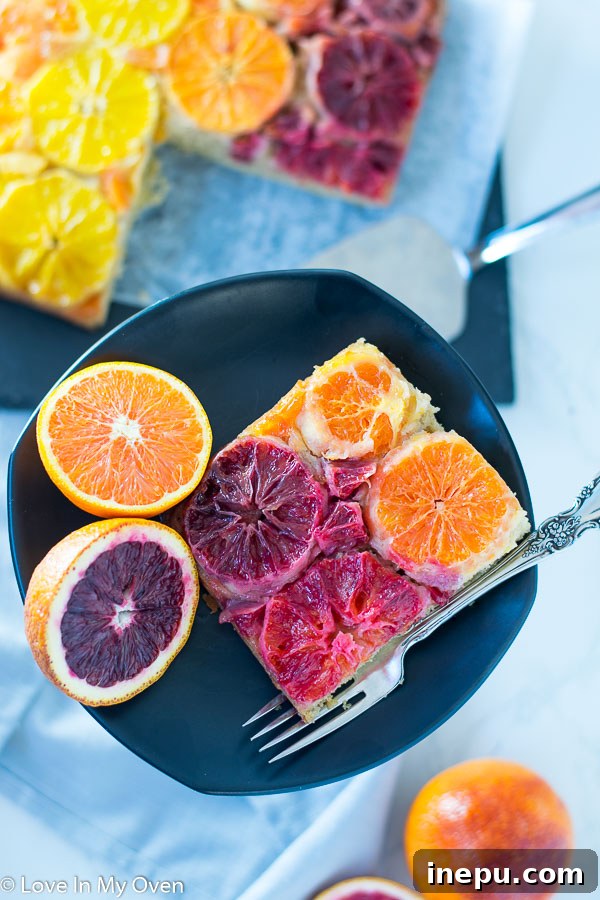
And oh, what a cake it is! Each slice offers a perfect balance of texture and flavor. The cake itself is wonderfully moist and slightly dense, boasting a delicate citrus essence that’s utterly refreshing. The star of the show, of course, is the vibrant layer of oranges, which become beautifully caramelized and infused with a sweet, sticky glaze during baking. It’s a dessert that’s as beautiful to look at as it is delicious to eat, promising to be the highlight of any gathering or a delightful treat just for yourself.
Unleash a Symphony of Citrus: What Oranges Work Best?
The beauty of this citrus upside-down cake lies in its versatility and visual appeal, allowing you to use a variety of oranges to create a truly stunning presentation. You can choose to stick with a single type of orange for a consistent flavor and color, or mix and match for an eye-catching, multi-hued effect. For a truly captivating display and a nuanced flavor profile, I highly recommend incorporating a diverse selection.
Some of the best oranges to consider include:
- Blood Oranges: Known for their dramatic crimson flesh and berry-like undertones, blood oranges add a beautiful deep red or purple hue to your cake, along with a distinct, slightly tart flavor.
- Navel Oranges: These are a classic choice, offering a bright orange color, sweet flavor, and easy-to-segment flesh. They provide a lovely contrast to other varieties.
- Cara Cara Oranges: Often called “pink navels,” Cara Caras have a beautiful pinkish-orange interior and a complex, sweet flavor with notes of cherry and rose. They add a soft, warm tone to the cake.
- Mandarin Oranges: Smaller and intensely sweet, mandarins (or tangerines) can be used for smaller gaps or even as whole, thinner slices for a more delicate look and concentrated sweetness.
Feel free to experiment with any combination of these or other citrus fruits you adore. The goal is to create a delightful mosaic that’s both visually appealing and bursting with diverse, fresh flavors.

Choosing Your Baking Pan: Does Shape Matter for Upside Down Cake?
While the original recipe calls for a standard 8″x8″ square baking pan, this versatile Orange Upside Down Cake can be successfully baked in a few different shapes. The key is to ensure the pan size is appropriate for the batter volume and to prepare it correctly to prevent sticking and allow for easy inversion.
For this specific recipe, an 8″x8″ square pan or a 9″ round cake pan will work beautifully. The bake time will remain relatively similar for both options, typically ranging from 40 to 45 minutes. Regardless of the pan shape you choose, always perform a toothpick test by inserting it into the center of the cake; if it comes out clean, your cake is perfectly baked and ready to be removed from the oven.
A crucial step for any upside-down cake is proper pan preparation. To make your life significantly easier when it comes time to flip, I highly recommend lining the bottom of your pan with a piece of parchment paper. Ensure the edges of the parchment paper generously overhang the sides of the pan. These overhangs will serve as convenient handles, allowing you to lift the cake out of the pan with ease after it has cooled slightly, preventing any frustrating sticking or breakage. This simple trick guarantees a flawless reveal of your beautifully caramelized citrus top!
Mastering the Orange Arrangement: What If They Don’t Fit Perfectly?
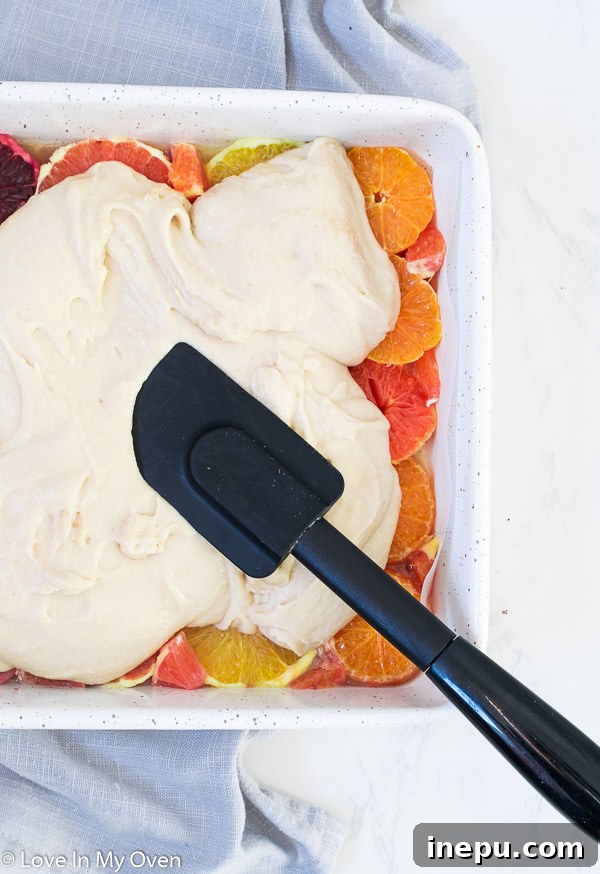
It’s completely normal for your orange slices not to fit perfectly into the pan like puzzle pieces – in fact, it’s expected! The beauty of this cake often comes from a slightly rustic, yet artful, arrangement of fruit. The trick to achieving a cohesive and beautiful cake despite uneven gaps is surprisingly simple and incredibly effective.
After you’ve laid down your primary, larger orange slices, you’ll inevitably notice small spaces between them. Don’t worry about these! The solution is to take smaller pieces of orange, or even halves of slices, and gently insert them into these gaps. You can gently press them down to ensure they adhere to the glaze layer. Once the cake bakes, these smaller pieces will meld together with the larger slices, creating a unified and visually stunning fruit layer across the entire top of your cake. This technique ensures that every single bite of your cake features that wonderful citrus flavor and gorgeous caramelized texture. The final result will look fantastic, as if the oranges were always meant to fit together perfectly.
Pro Tip for Achieving Perfect Orange Slices:
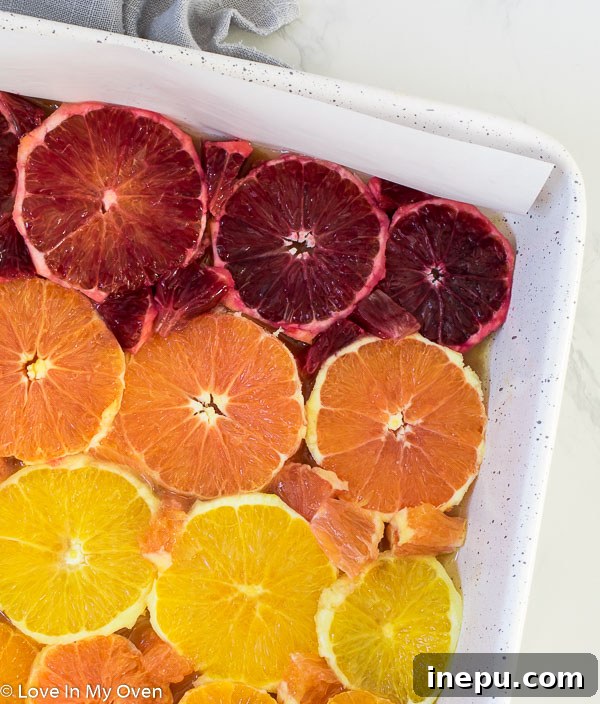
After a few attempts that resulted in messy or uneven slices, I discovered a game-changing technique that I wholeheartedly recommend: **slice the oranges into rounds BEFORE peeling them.** This method provides significantly more stability, allowing you to achieve perfectly even, uniform 1/2-inch thick slices with much greater ease. Trying to slice an already peeled orange can be frustrating, as the softened fruit tends to lose its shape and consistency.
Once you have your beautifully even 1/2-inch orange rounds, it’s time to tackle the peel. Using a small, sharp paring knife, carefully make small cuts around the edge of each orange slice, just beneath the peel. This makes it incredibly easy to gently remove the peel while leaving the integrity of the fruit intact. As you peel, make an effort to remove as much of the white pith as possible. The pith, located between the peel and the fruit, tends to carry a bitter flavor, and removing it ensures that your cake’s citrus topping is nothing but sweet, tangy perfection.
Storing Your Citrus Upside Down Cake: Keeping It Fresh and Delicious
One of the many great qualities of this Orange Upside Down Cake is its relatively good shelf life, allowing you to enjoy its delightful flavors for several days. Proper storage is key to maintaining its moisture and freshness, ensuring that every slice tastes just as wonderful as the first.
You can certainly store the cake at room temperature, provided it’s kept in an airtight container. This method will keep it fresh and delicious for approximately 2 to 3 days. The airtight container is crucial as it prevents the cake from drying out and absorbing any ambient odors. However, if you anticipate the cake lasting longer than a few days (which might be a challenge once everyone tastes it!), or if your kitchen is particularly warm, I would recommend transferring it to the refrigerator. When stored in an airtight container in the fridge, the cake will remain fresh for 4 to 5 days.
While the cake holds up well in the fridge, I generally don’t recommend freezing this specific prepared cake. The texture of the oranges, particularly the caramelized layer, can sometimes become a bit watery or change after thawing, affecting the overall quality and presentation. For the best experience, enjoy this cake fresh within the recommended storage times.
Embrace the vibrant flavors and stunning presentation of this Orange Upside Down Cake. It’s truly a ray of sunshine on a plate, guaranteed to brighten any day and impress any guest. Bake one today and put some delicious sunshine into your life!
Looking for more ways to celebrate the invigorating taste of citrus? Here are some other delightful recipes you might enjoy from Love In My Oven:
- Winter Citrus Salad
- Sunny Citrus Tart
- Glazed Grapefruit Scones
- Cranberry Orange Smoothie

Orange Upside Down Cake
5 Stars 4 Stars 3 Stars 2 Stars 1 Star
5 from 9 reviews
Author: Katherine | Love In My Oven
Total Time: 1 hour
Yield: 5–6 servings 1x
Description
Delight your guests with this effortlessly elegant citrus cake! This Orange Upside Down Cake uses a blend of 3 different orange varieties, creating a vibrant visual and flavorful experience that celebrates the best of citrus season. It’s a truly moist and simple recipe that promises a show-stopping dessert.
Ingredients
Scale
For the Glaze
- 3 tbsp unsalted butter, melted
- 3 tbsp brown sugar
For the Cake
- 3–4 oranges*, sliced into 1/2” thick rounds, with peels carefully removed
- 1 1/2 cups all-purpose flour
- 1/2 tsp baking powder
- 1/2 tsp baking soda
- 1/4 tsp salt
- 1/3 cup unsalted butter, softened
- 1/2 cup brown sugar, packed
- 1/4 cup granulated white sugar
- 1 large egg
- 1 tsp pure vanilla extract
- 1/2 cup milk**
- 1/4 cup fresh orange juice
Instructions
- Preheat your oven to 350°F (175°C). Line an 8″x8″ standard baking pan with parchment paper, allowing the paper to overhang generously on the sides; these will serve as handles. In a small bowl, whisk together the melted butter and brown sugar until well combined. Pour this delicious glaze mixture evenly over the bottom of your prepared pan, spreading it with a spatula.
- Carefully arrange the peeled orange slices side-by-side on top of the glaze layer at the bottom of the pan. Don’t worry if they don’t fit perfectly! Fill any small gaps between the larger slices with smaller pieces of orange to create a beautiful, continuous fruit layer (refer to the images and tips in the blog post above for visual guidance).
- In a separate large mixing bowl, whisk together the dry ingredients: all-purpose flour, baking powder, baking soda, and salt. Set this mixture aside. In the bowl of a stand mixer fitted with the paddle attachment (or using a handheld electric mixer), cream the softened butter with both the brown and granulated white sugars on medium-high speed until the mixture is light and fluffy, usually about 1 minute. Add the large egg and pure vanilla extract, mixing again until just combined. Gradually add half of the dry ingredients to the wet mixture, mixing on low speed for about 30 seconds until partially incorporated. Next, add the milk, followed by the remaining dry ingredients, mixing on low for another 15-20 seconds. Finally, pour in the orange juice and mix on low speed until all ingredients are fully incorporated and the batter is smooth. Pour the cake batter evenly over the prepared oranges in the pan, spreading it gently with a spatula to ensure an even layer. Place the pan into the preheated oven and bake for 40-45 minutes. To check for doneness, insert a toothpick into the center of the cake; if it comes out clean, your cake is ready. If there is wet batter clinging to the toothpick, continue baking for an additional 5 minutes. Once baked, remove the cake from the oven and allow it to cool in the pan for 10-15 minutes before carefully inverting it onto a serving plate or cake stand.***
- Allow the cake to cool completely before slicing and serving. This resting period helps the glaze set and the flavors meld beautifully. Enjoy this delightful citrus treat!
For optimal freshness, store the cooled cake in an airtight container at room temperature for 2-3 days, or extend its life by refrigerating it for 4-5 days. Freezing the prepared cake is not recommended as it may affect the texture of the fruit layer.
Notes
*The exact number of oranges you’ll need (3-4) will vary depending on their size and how tightly you arrange them. For a beautiful array of colors and flavors, I used a mixture of blood oranges, cara cara, medium navel oranges, and mandarins. Remember to check the blog post above for detailed tips on the best way to slice and peel your oranges for the most appealing presentation and flavor.
**You have flexibility with your milk choice! Feel free to use either dairy milk (such as whole milk or 2%) or a non-dairy alternative like almond or coconut milk.
***If you find that the top of your cake (which will be the bottom after baking, but before inverting) is slightly uneven or rounded, you can use a serrated knife to carefully level it out a bit before flipping. This small step ensures a perfectly flat and stable base for your stunning orange topping.
- Prep Time: 20 minutes
- Cook Time: 40 minutes
- Category: cakes
- Method: baking