
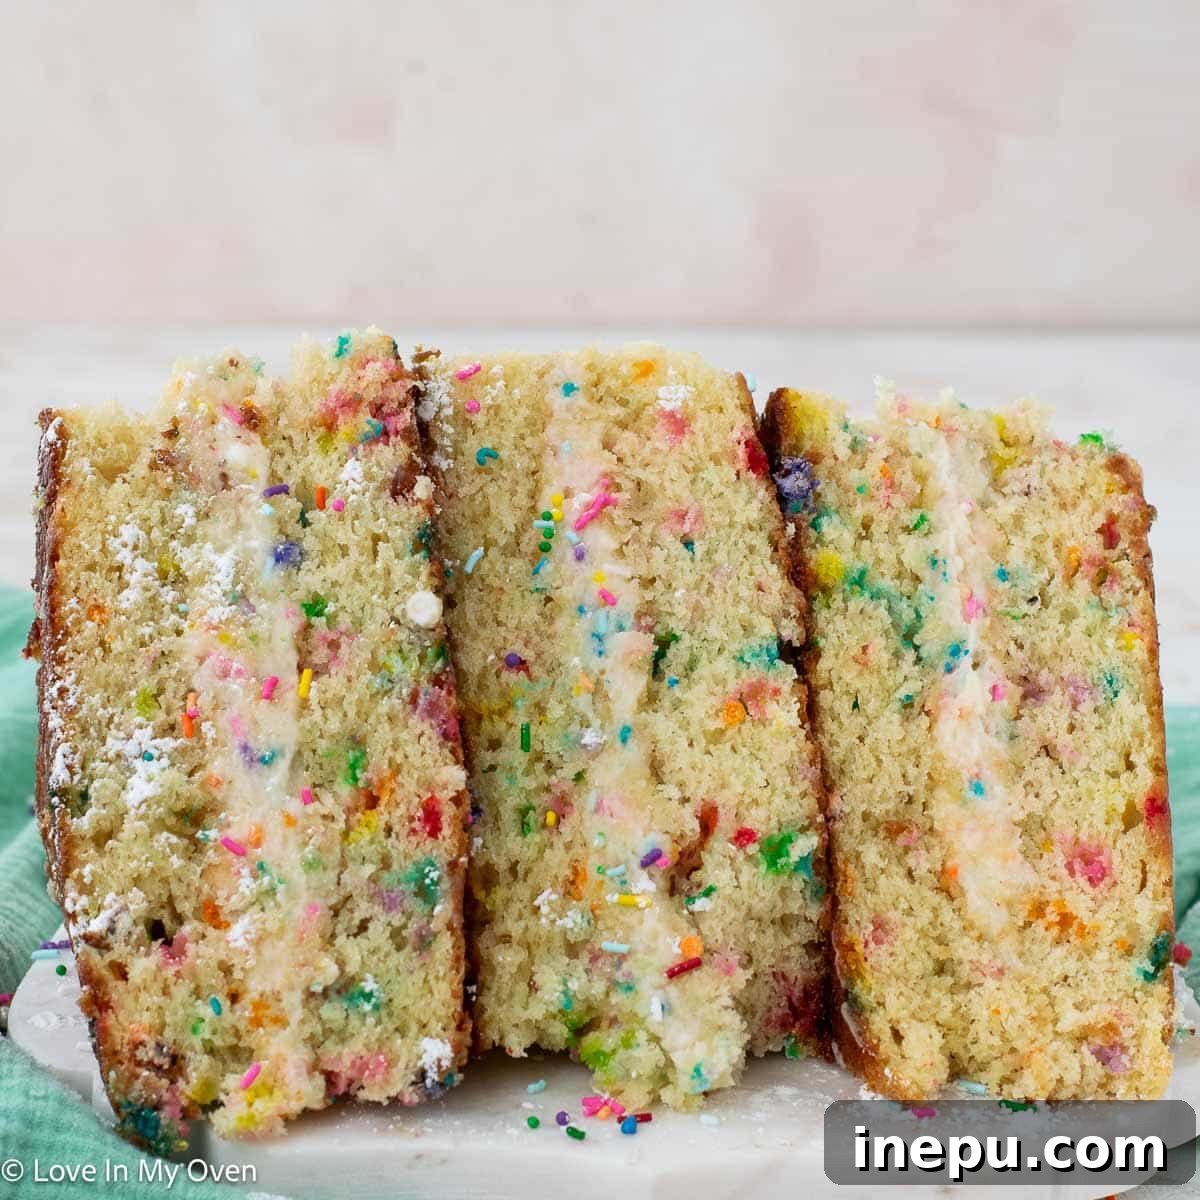
Tired of the same old birthday cake routine? Elevate your dessert game with these incredible birthday cake sandwiches! This creative twist turns a classic sheet pan vanilla sprinkle cake into a collection of delightful, easy-to-eat cake sandwiches – making any celebration extra special and undeniably fun.
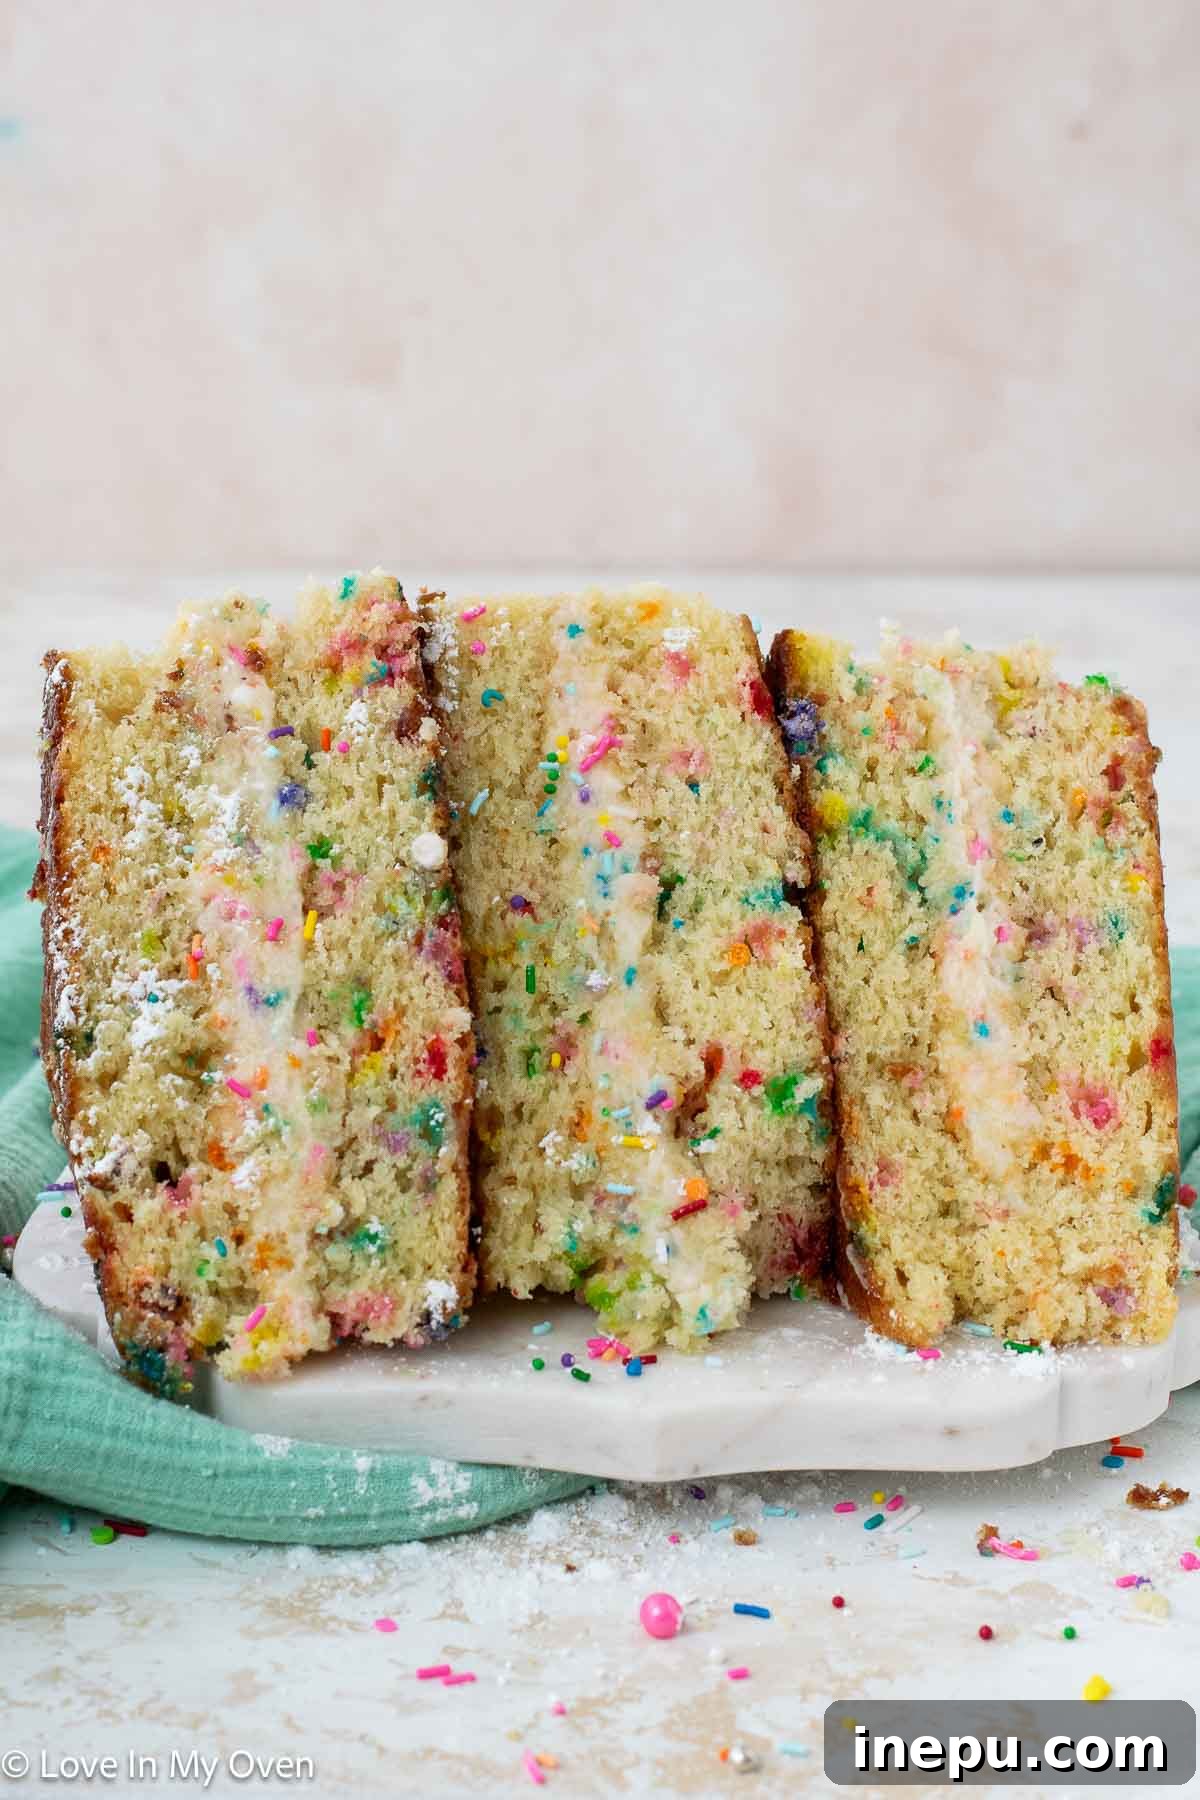
Table of Contents
- The Rise of Cake Sandwiches: From Vending Machines to Homemade Delights
- Ingredients for the Perfect Birthday Cake Sandwiches
- Mastering the Sprinkle Sheet Cake: Step-by-Step Instructions
- Crafting Creamy Vanilla Sprinkle Buttercream
- Assembling Your Irresistible Cake Sandwiches
- Customize Your Cake Sandwiches: Flavor Variations
- Other Delicious Cakes and Cupcakes to Try
- Cake Sandwiches Recipe Card
Over the past year, while exploring bustling malls and busy airports, you might have noticed a fascinating new trend: cake vending machines. These automated sweet shops dispense neatly packaged cake slices or, more often, pre-made cake sandwiches. Many attribute the popularization of this concept to renowned pastry chefs like the “Cake Boss,” who has seemingly perfected the art of creating perfectly portioned and portable cake treats.
While I’ve always been intrigued by these “cake ATMs,” I’ve yet to stop and purchase one. Instead, my culinary curiosity led me to an even more exciting challenge: developing my own homemade cake sandwich recipe! There’s something uniquely satisfying about creating a beloved treat from scratch, especially when it results in a dessert that’s not only delicious but also incredibly fun to make and share.
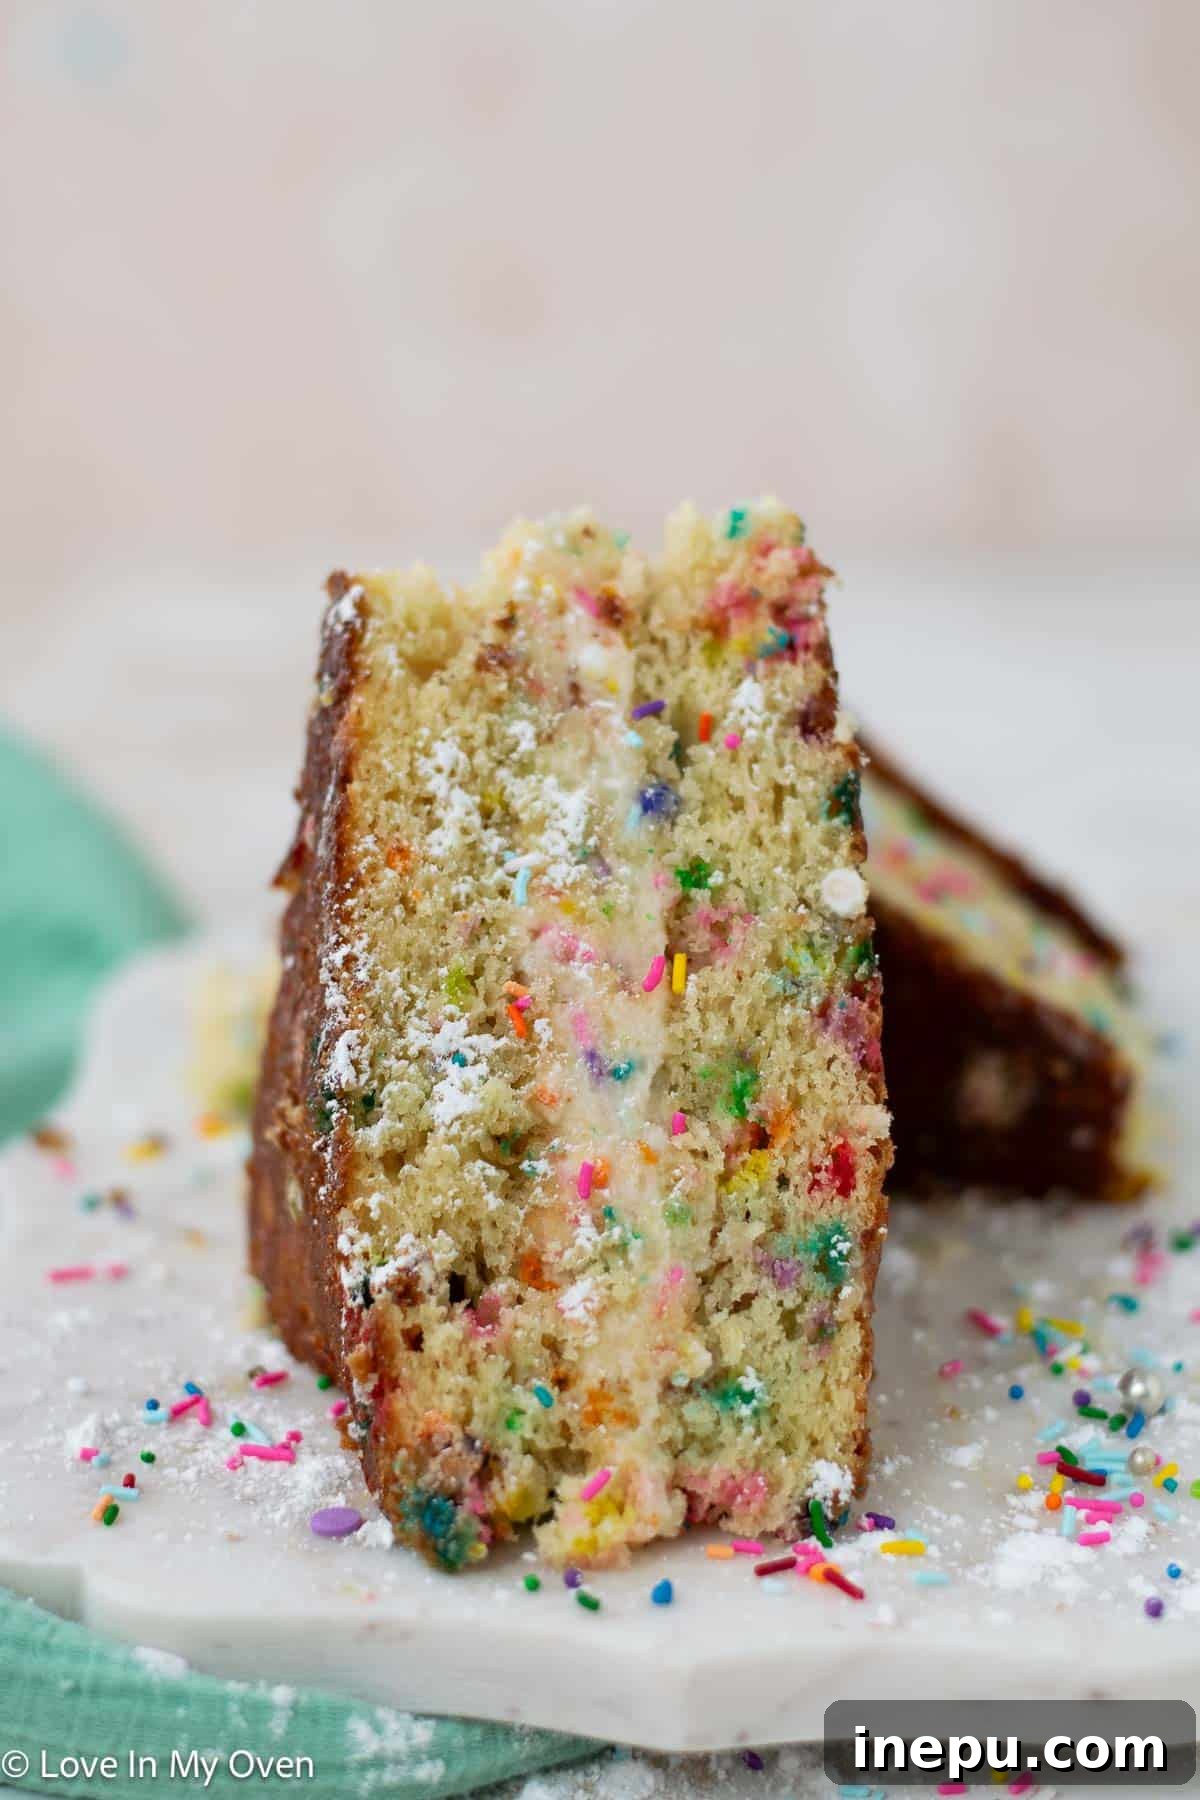
And what better way to kick off this sweet adventure than with a festive birthday cake version? Imagine a fluffy vanilla cake, generously studded with colorful sprinkles, layered with a rich and creamy vanilla buttercream. Then, instead of traditional slices, you transform it into charming, handheld sandwiches – a playful and practical dessert that’s sure to be the highlight of any celebration. Let’s dive into how you can create these show-stopping birthday cake sandwiches right in your own kitchen.
Ingredients for the Perfect Birthday Cake Sandwiches
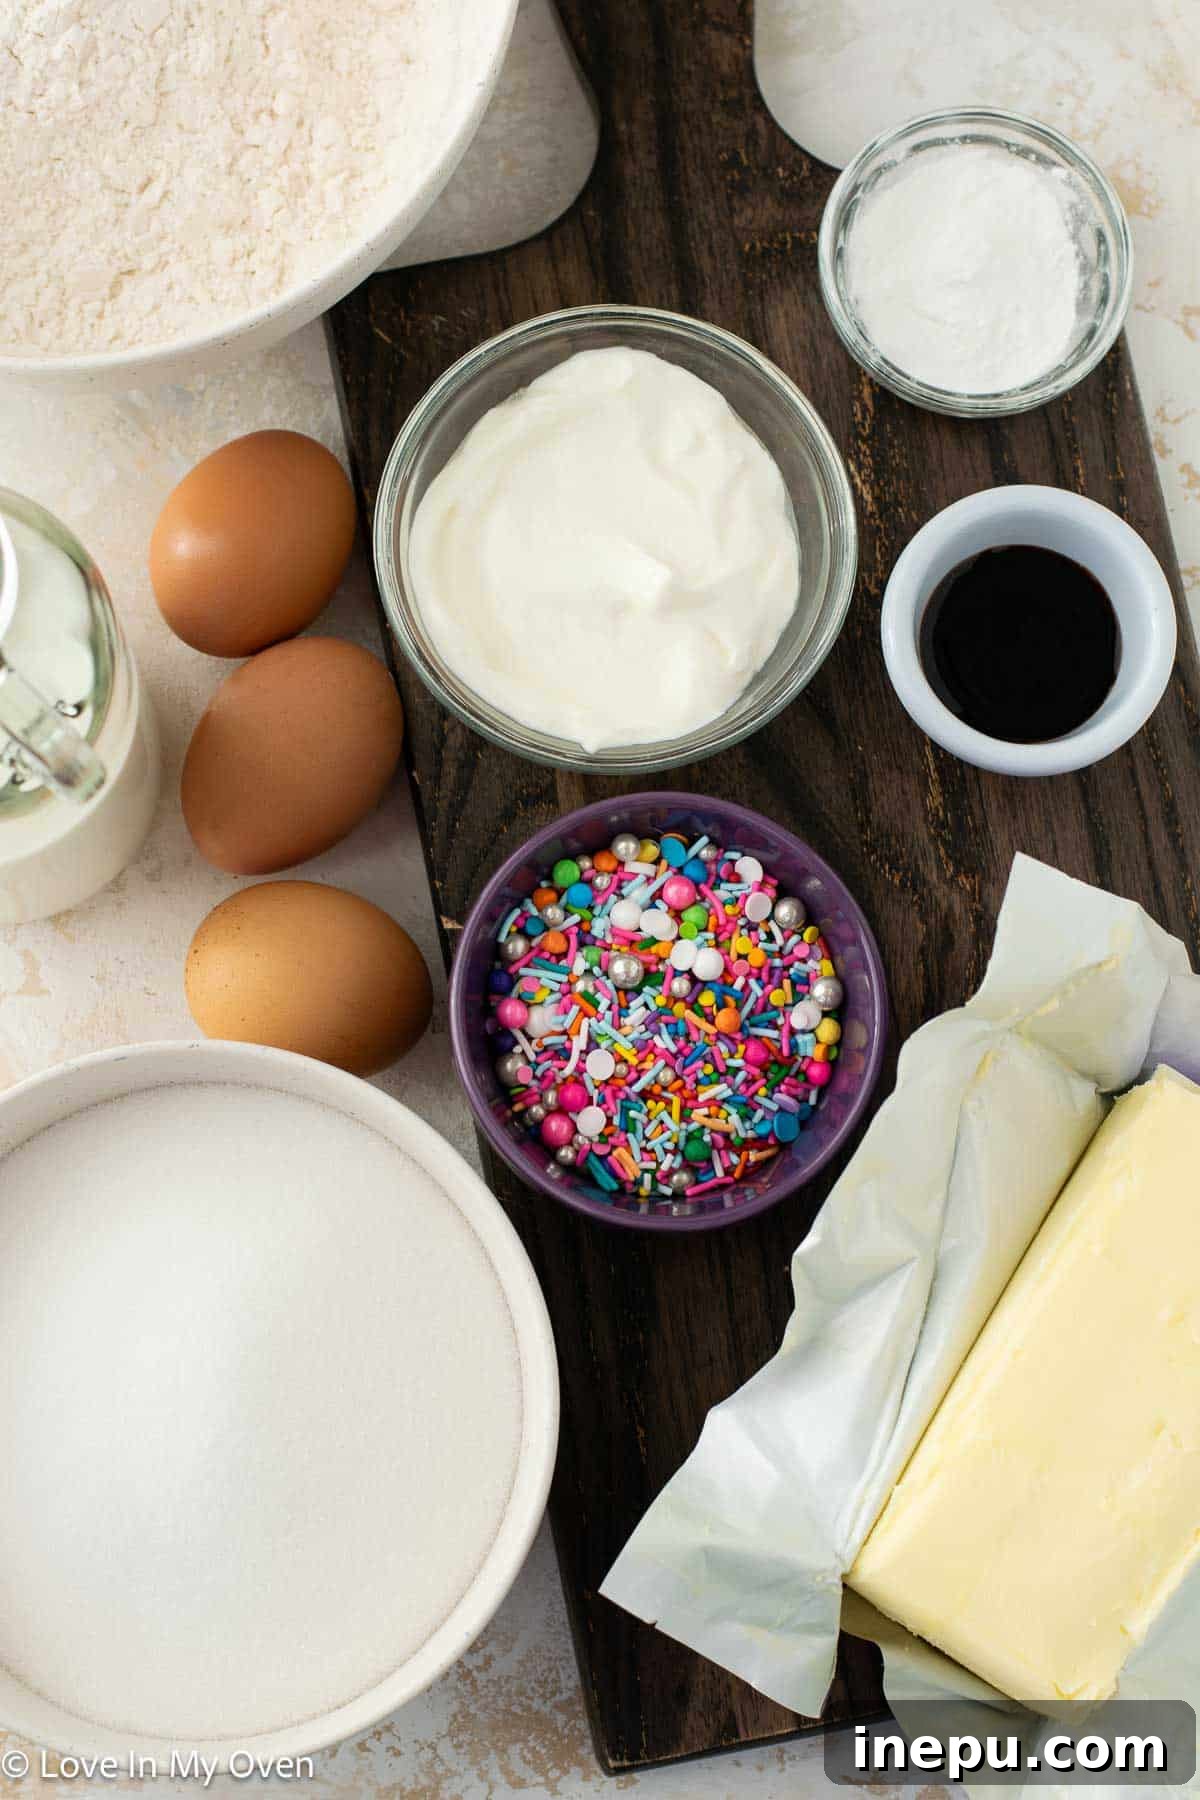
If you’re already familiar with baking a classic vanilla sheet cake, the ingredient list for this delightful recipe will feel like a comfortable friend. We’re focusing on staples that come together to create a moist, tender crumb – the ideal foundation for our sprinkle-filled cake sandwiches.
To embark on your cake sandwich journey, you’ll need the following:
- Unsalted butter, softened to room temperature for optimal creaming
- Granulated sugar, to provide the perfect sweetness and texture
- Large eggs, binding our ingredients and adding richness
- Sour cream, a secret weapon for incredible moisture and tenderness
- Pure vanilla extract, for that classic, comforting vanilla flavor
- All-purpose flour, the structural base of our cake
- Baking soda and baking powder, the leavening agents for a light, airy rise
- Fine sea salt, to balance the sweetness and enhance all flavors
- Buttermilk, contributing to the cake’s tender texture and slight tang
- An abundance of colorful sprinkles, to make it a true funfetti celebration!
Ingredient Spotlight: Tips for Best Results
Sour Cream: This ingredient is a game-changer, infusing the cake with an unparalleled level of moisture and creating a delightfully tender crumb. The acidity in sour cream also reacts with the baking soda, promoting a beautiful rise. If sour cream isn’t readily available, a full-fat plain Greek yogurt makes an excellent substitute, offering similar benefits to the cake’s texture and flavor profile.
Buttermilk: While homemade buttermilk works in a pinch, I highly recommend using store-bought buttermilk for consistent and superior results. Its consistent acidity and thickness are ideal for this recipe. However, if you find yourself without it, you can easily create a DIY version: simply add 1 tablespoon of white vinegar or lemon juice to a standard measuring cup, then fill the rest with whole milk (up to the 1-cup mark). Let it sit for 5-10 minutes until it visibly curdles, then stir and use as directed.
Sprinkles: The choice of sprinkles can truly elevate the visual appeal of your birthday cake sandwiches! Feel free to use your favorite mix of jimmies or confetti sprinkles. However, a word of caution: avoid non-pareils (the tiny, round, hard sprinkles) as they tend to “bleed” their color significantly into the cake batter during baking, potentially leading to a muddy appearance rather than vibrant spots. Stick to the longer, rod-like jimmies or flat confetti sprinkles for the best vibrant results.
Mastering the Sprinkle Sheet Cake: Step-by-Step Instructions
Creating the perfect sheet pan vanilla sprinkle cake is the foundation for our delicious cake sandwiches. Follow these steps carefully to ensure a light, moist, and perfectly baked cake that’s ready for assembly.
- **Prepare Your Pan and Oven:** Begin by preheating your oven to 350°F (175°C). Take a 12 x 17-inch sheet pan and spray it thoroughly with nonstick baking spray. For easy removal of the baked cake, line the pan with parchment paper, ensuring there’s enough overhang on the sides to use as “handles” later. This simple step prevents sticking and makes lifting the delicate cake a breeze.
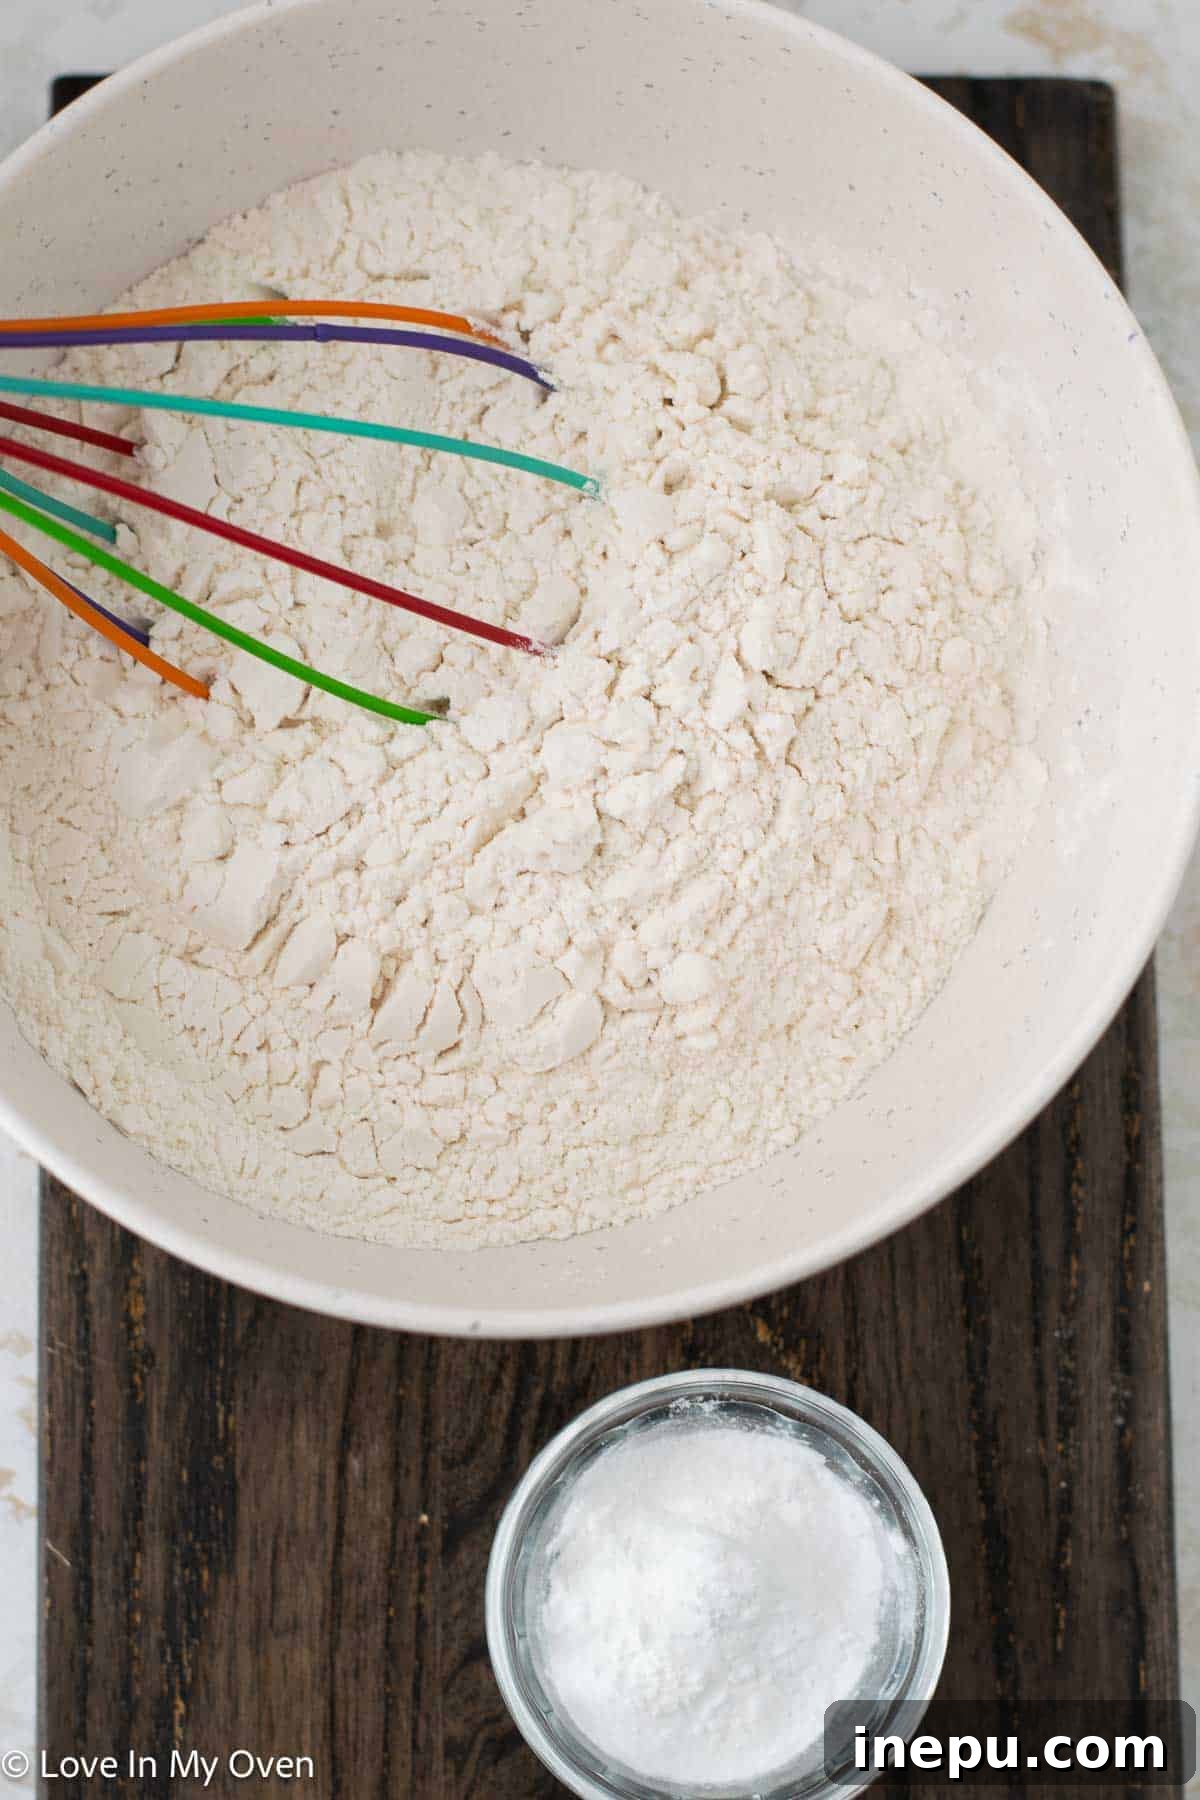
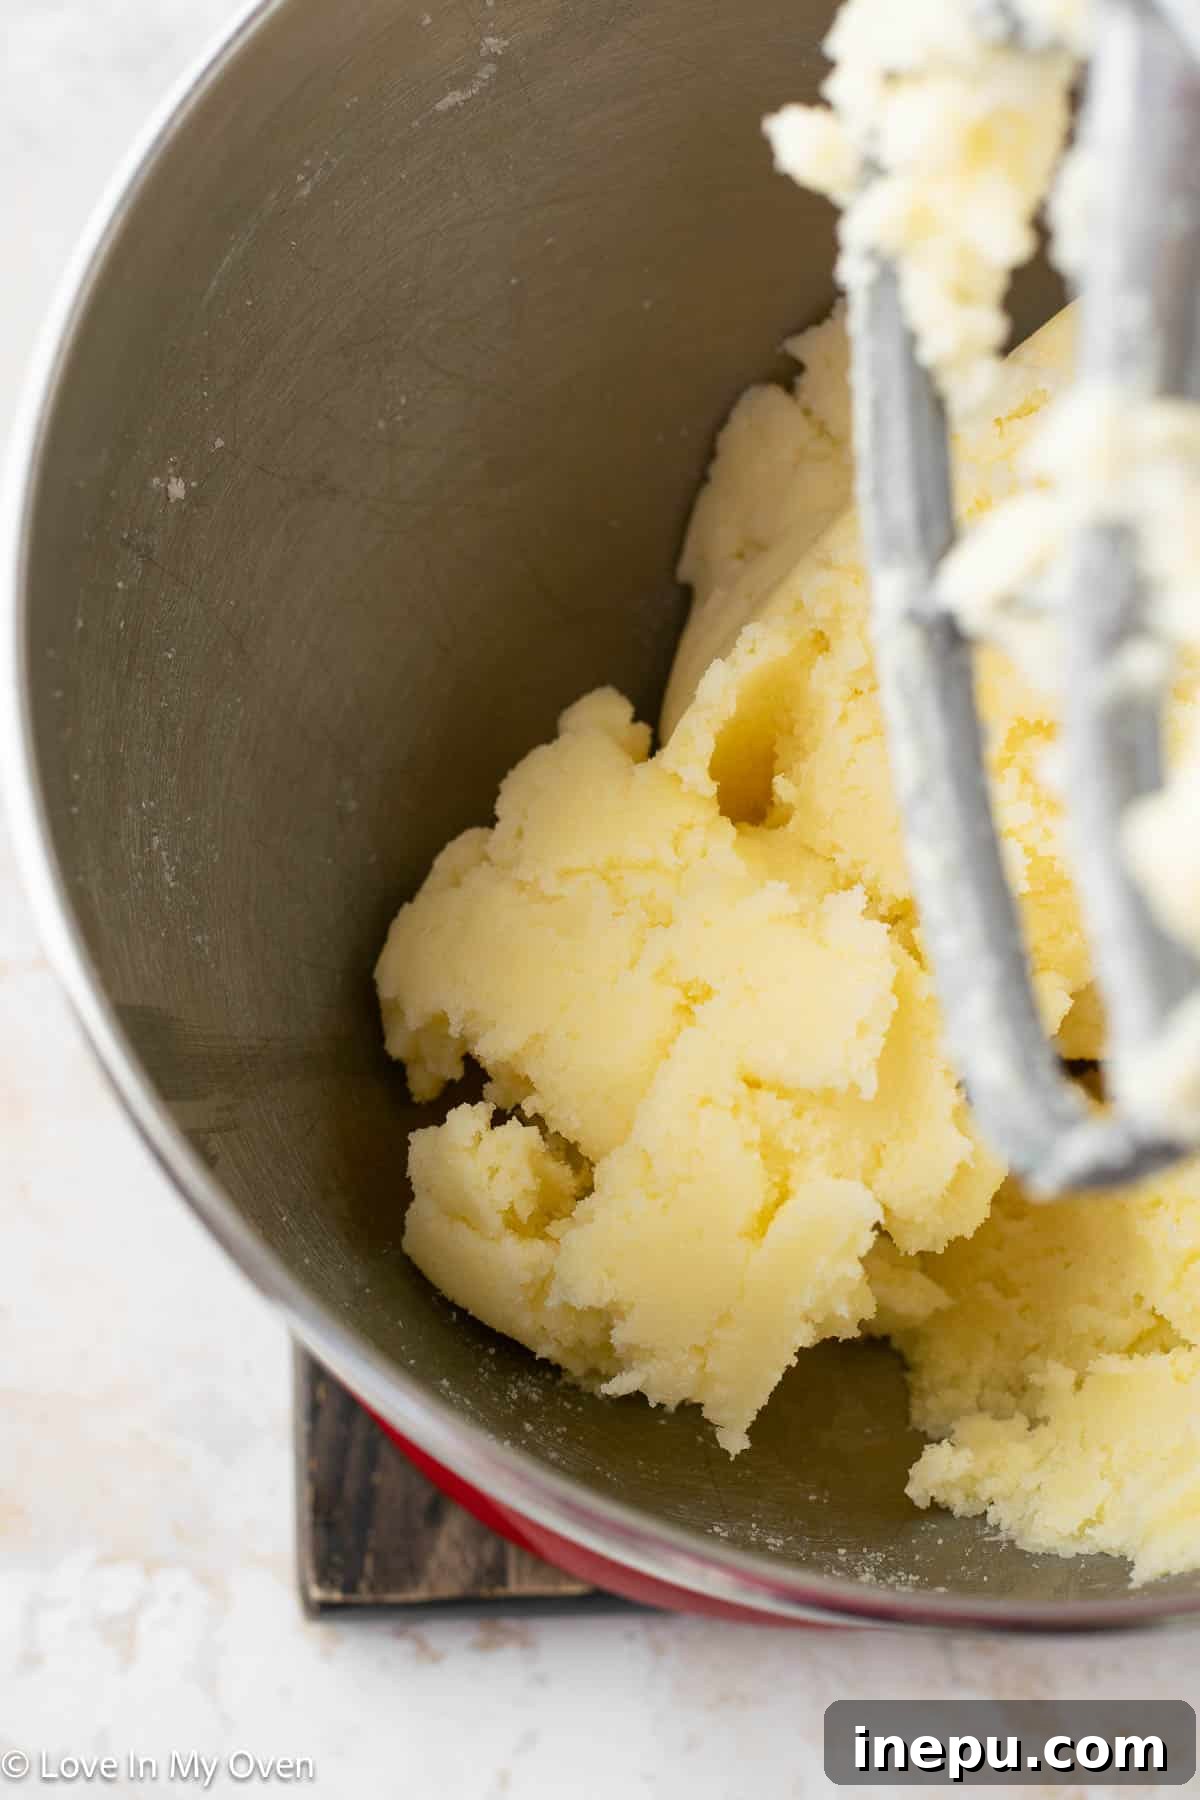
- **Combine Dry and Wet Ingredients (Separately):** In a large mixing bowl, whisk together the all-purpose flour, baking powder, baking soda, and salt. Set this aside. In the bowl of a stand mixer fitted with the paddle attachment (or using a handheld electric mixer), beat the softened unsalted butter on high speed for 1-2 minutes until it’s light and creamy. Gradually add the granulated sugar and continue beating on high for another 1-2 minutes until the mixture is pale and fluffy.
- **Incorporate Eggs and Flavor:** With the mixer running on low speed, add the large eggs one at a time, mixing well after each addition until just combined. Scrape down the sides of the bowl as needed. Follow with the pure vanilla extract and then the sour cream. Increase the mixer speed to medium and mix until all ingredients are thoroughly combined and smooth, but be careful not to overmix at this stage.
- **Alternate Wet and Dry:** Reduce the mixer speed to low. Add approximately half of the dry ingredient mixture to the wet ingredients, mixing until just barely combined. Then, pour in half of the buttermilk and mix until incorporated. Repeat this process with the remaining dry ingredients, followed by the remaining buttermilk. Continue mixing on low speed only until the batter is smooth and no streaks of flour remain. Overmixing can lead to a tough cake, so stop as soon as it’s combined.
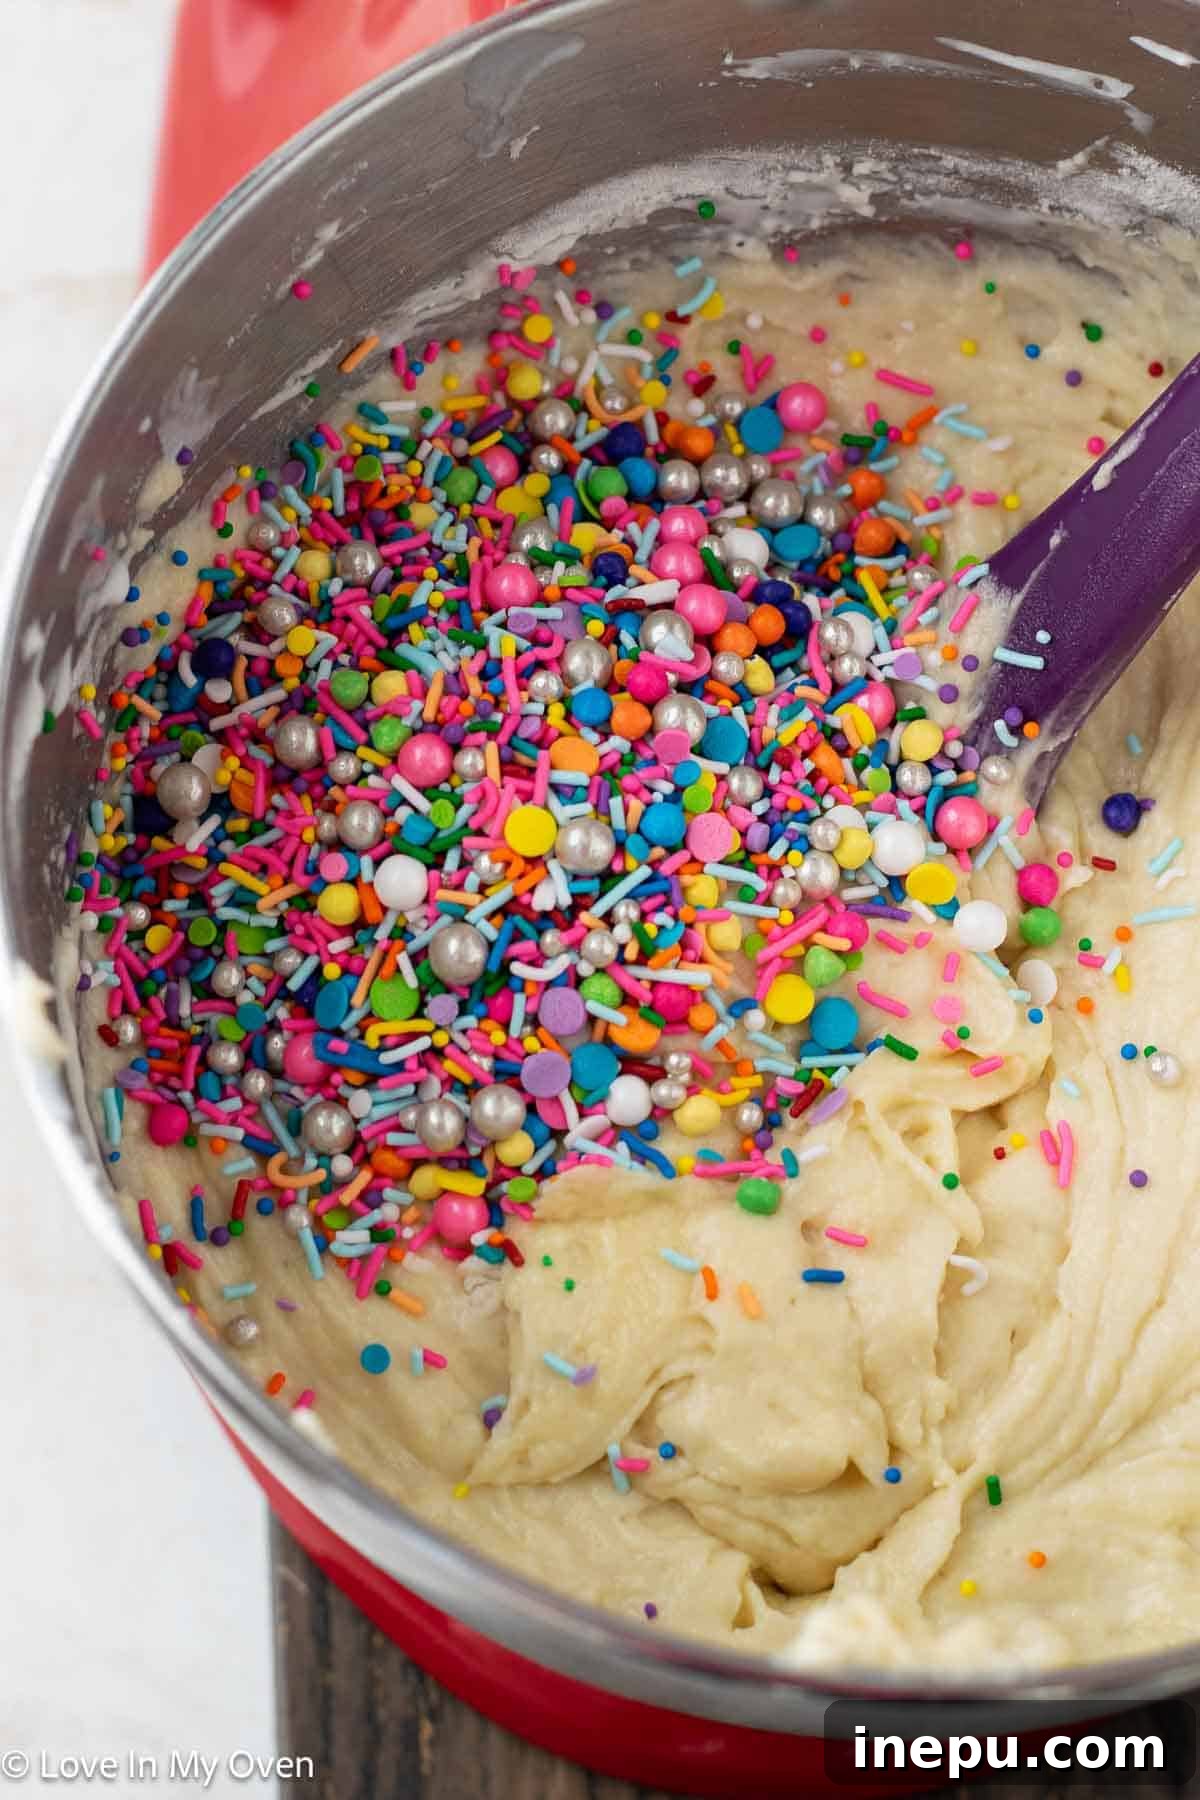
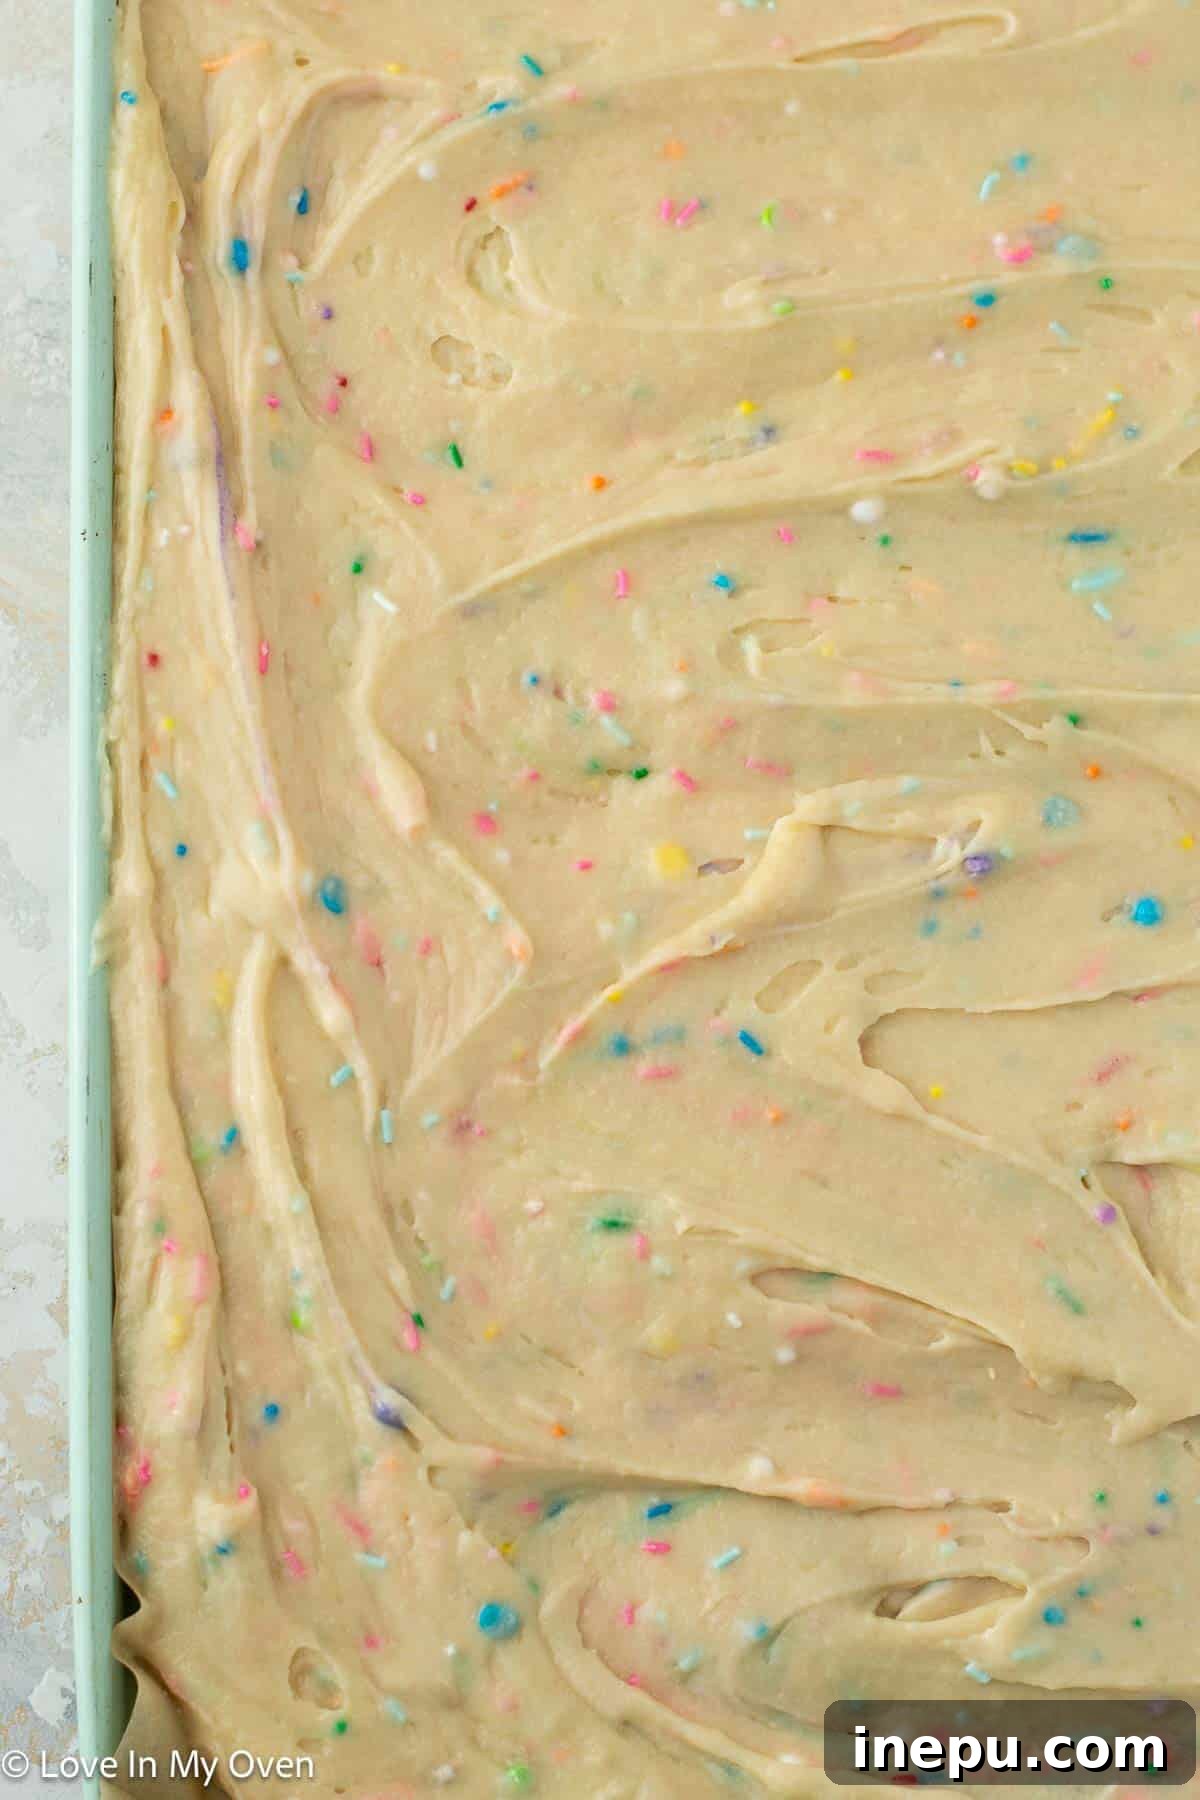
- **Add Sprinkles and Bake:** Gently fold in the rainbow sprinkles using a spatula. Be mindful not to overmix the sprinkles to prevent their colors from bleeding. Pour the prepared cake batter evenly into the lined sheet pan. Use your spatula to spread it smoothly to all edges. Bake the cake for 20-25 minutes, or until a toothpick inserted into the center comes out clean. The exact baking time may vary slightly depending on your oven.
- **Cooling and Preparing for Assembly:** Once baked, remove the cake from the oven and let it cool in the pan for 15-20 minutes. This allows the cake to set properly and makes it easier to handle. After this initial cooling, gently run a knife along any edges not covered by parchment paper. Then, carefully grab the parchment paper overhang and lift the entire cake out of the pan and transfer it to a large cutting board or a wire rack to cool completely before frosting. A fully cooled cake is crucial for clean cuts and preventing melted frosting.
Crafting Creamy Vanilla Sprinkle Buttercream
No cake sandwich is complete without a rich, smooth, and utterly delicious frosting! This vanilla sprinkle buttercream will serve as the delectable filling, tying all the flavors and textures together. It’s a simple, classic recipe that’s incredibly versatile and easy to whip up. Gather these essential ingredients:
- Unsalted butter, at perfect room temperature for maximum creaminess
- Powdered sugar (also known as confectioners’ sugar), for a fine, smooth texture
- Pure vanilla extract, to infuse a warm, inviting flavor
- Heavy cream, to adjust consistency and add richness
- A small pinch of salt, to balance the sweetness
- And, of course, more sprinkles for that festive touch!
- **Whip the Butter:** In the bowl of a stand mixer fitted with the paddle attachment (or using a handheld electric mixer), beat the softened unsalted butter on high speed for 2-4 minutes. Continue until the butter is noticeably light, fluffy, and creamy. This initial whipping step is crucial for incorporating air and achieving a smooth final buttercream.
- **Gradually Add Sugar and Vanilla:** With the mixer on low, begin adding the powdered sugar, about one cup at a time, along with the pure vanilla extract. Once the sugar starts to incorporate, increase the speed to medium-high. Continue adding the powdered sugar in increments, alternating with splashes of heavy cream. After each addition, beat well until smooth and creamy. The heavy cream helps achieve the desired consistency and luxurious mouthfeel.
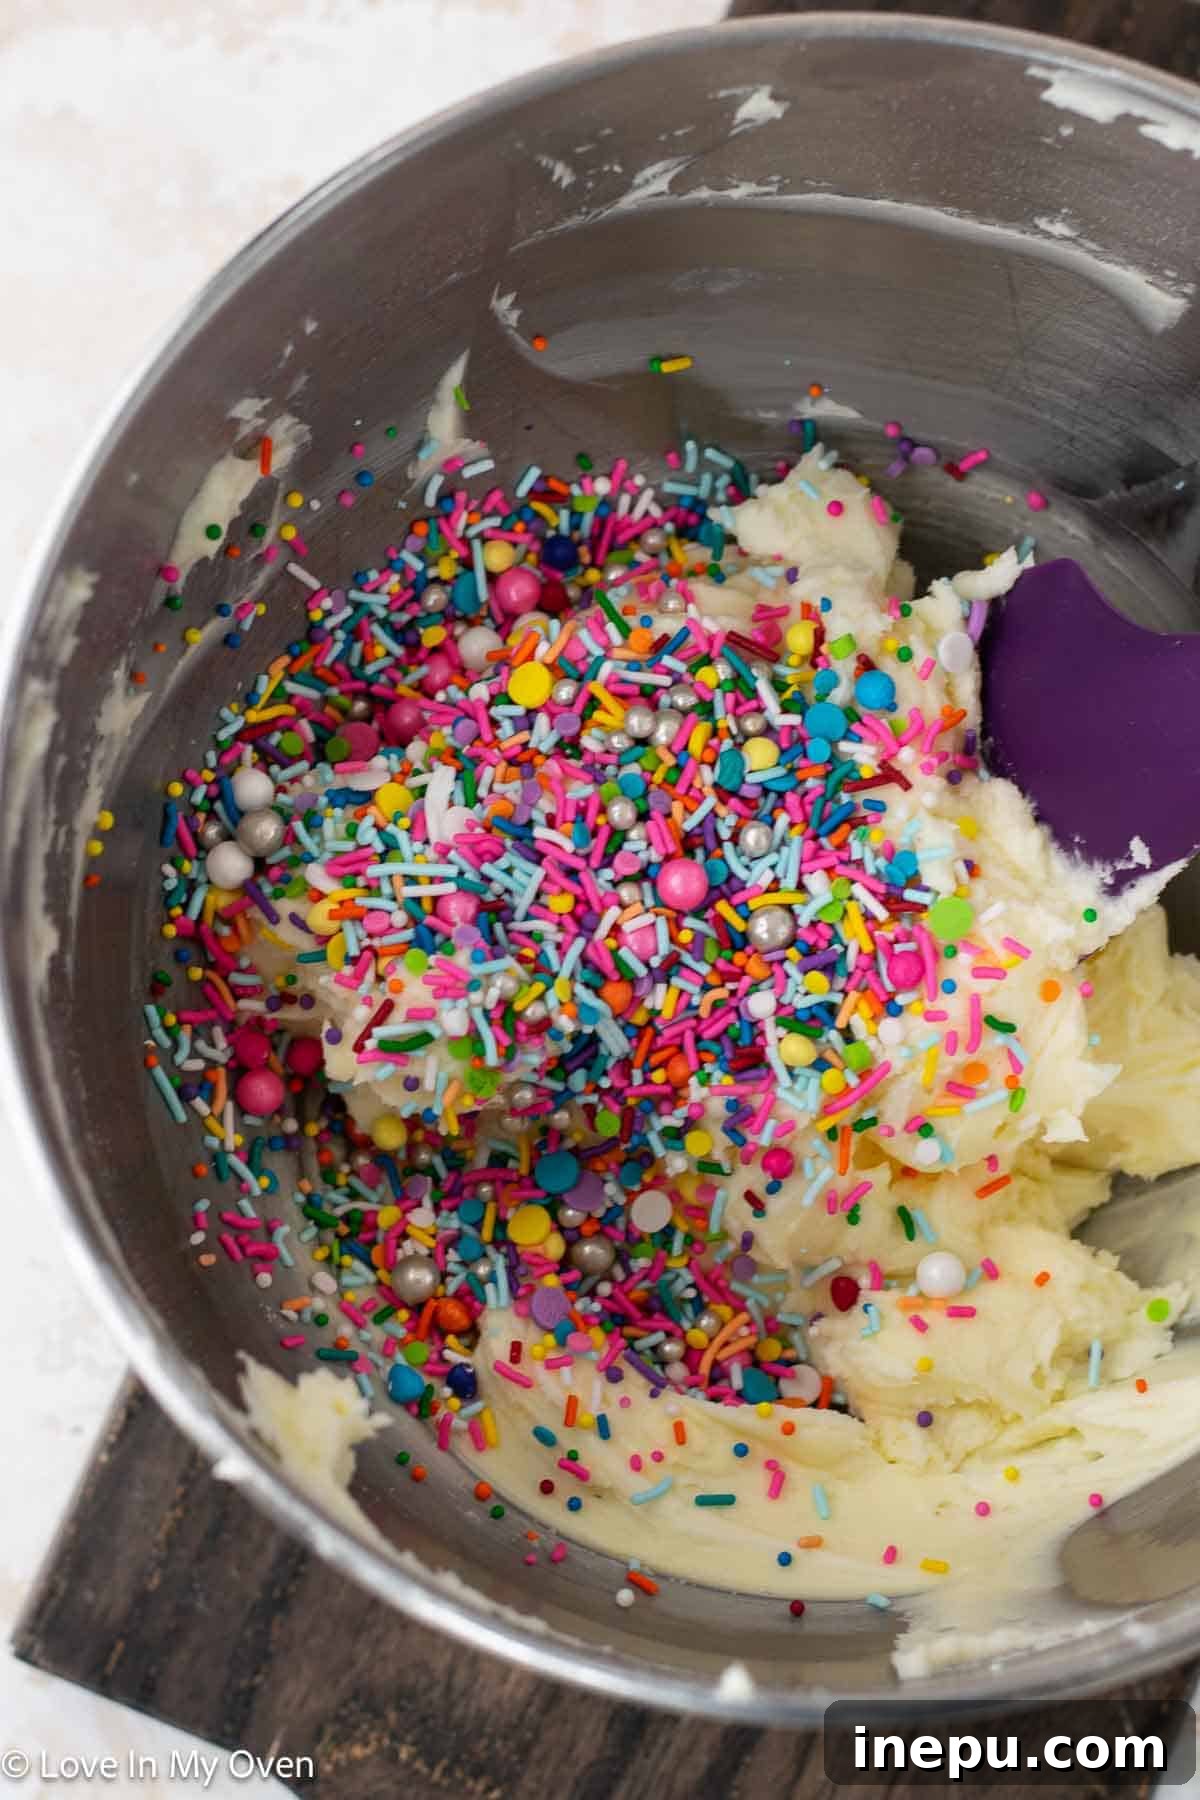
- **Adjust Consistency and Add Sprinkles:** Once all the powdered sugar and cream are added, beat the buttercream on medium-high for another 1-2 minutes until it’s light, airy, and perfectly smooth. If the frosting seems too thick, add a tiny bit more heavy cream (about a teaspoon at a time) until it reaches your desired spreadable consistency. If it’s too thin, a tablespoon or two of extra powdered sugar can help firm it up. Finally, gently fold in the remaining sprinkles with a spatula, distributing them evenly without overmixing.
Assembling Your Irresistible Cake Sandwiches
Now comes the most exciting part: transforming your beautifully baked sheet cake and creamy buttercream into delightful, portable cake sandwiches! This assembly method is surprisingly simple and creates perfectly layered treats.
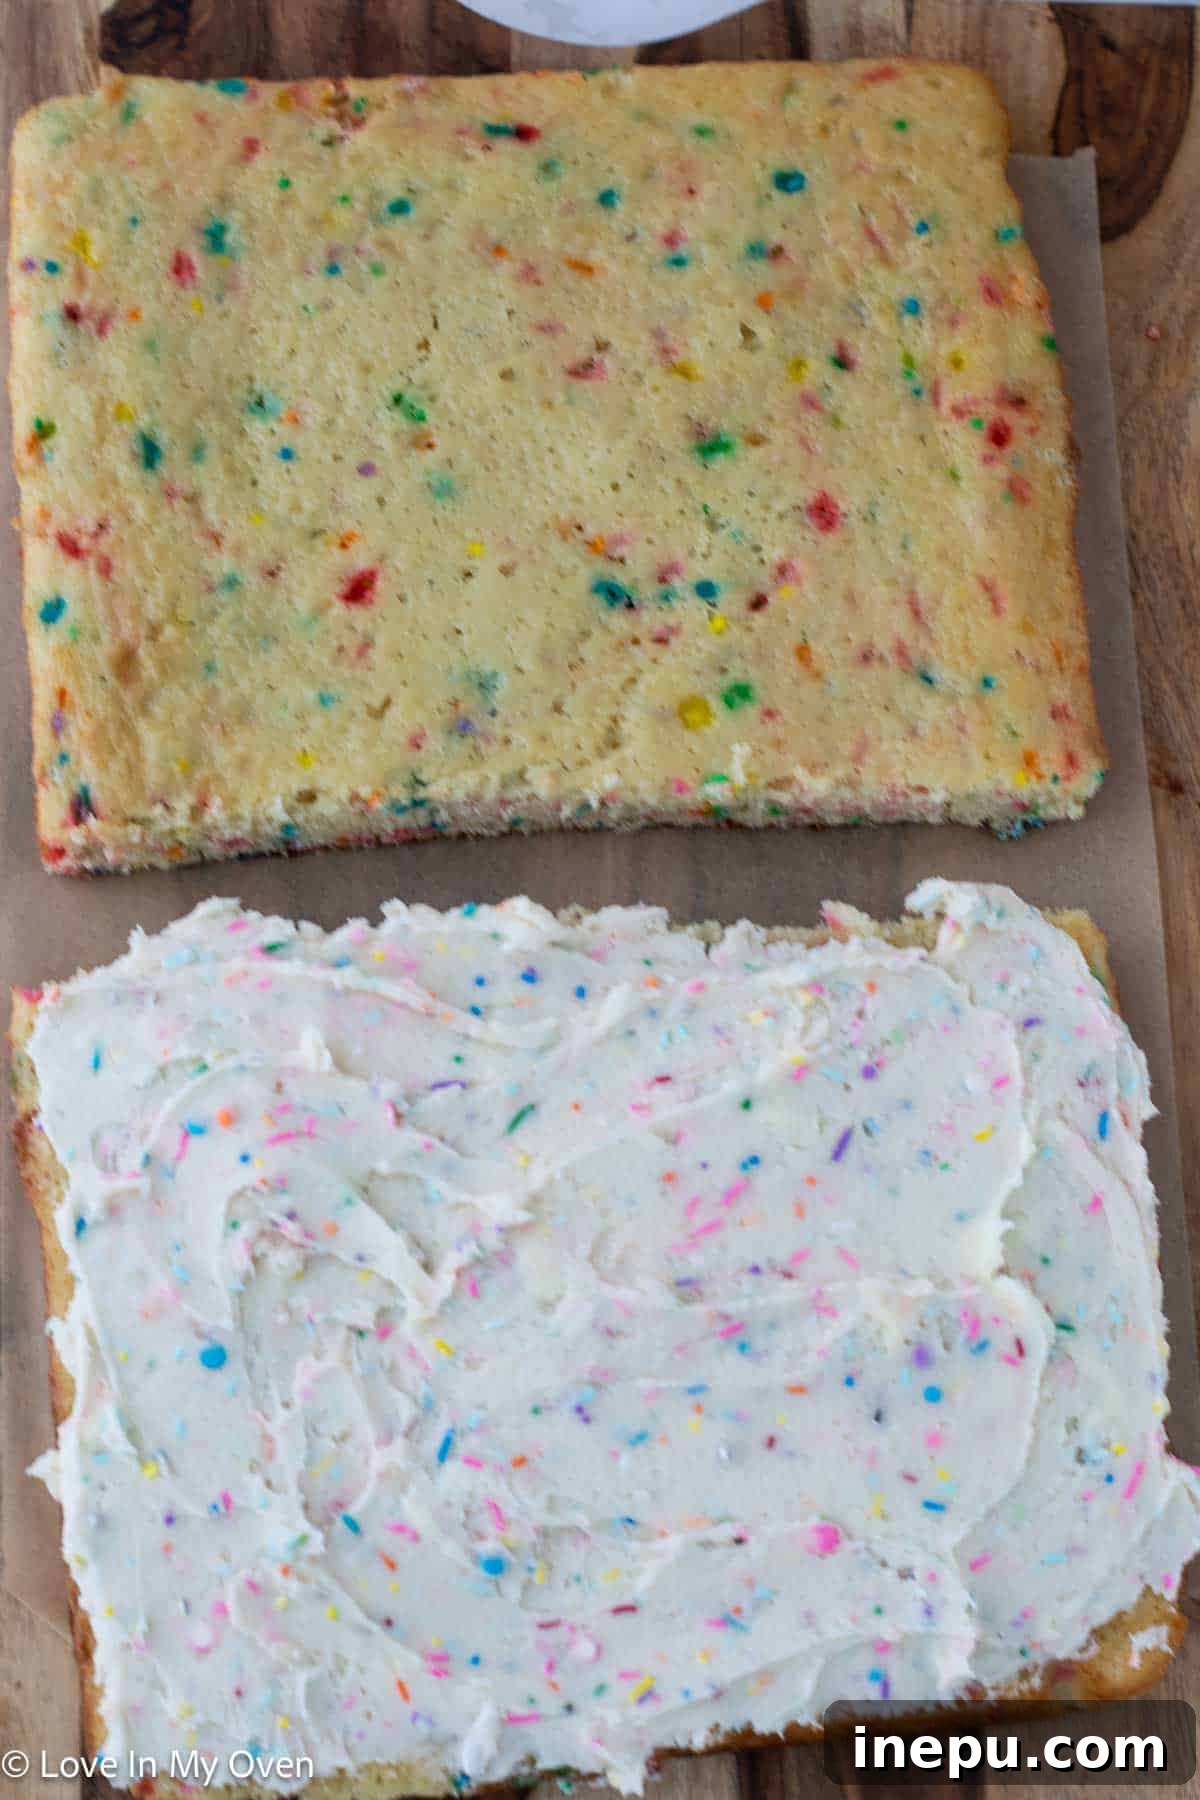
- **Halve the Cake:** Once your sheet cake has cooled completely (this is key for clean cuts!), carefully cut the entire cake horizontally into two equal halves. Using a large, sharp serrated knife works best for a smooth cut. Ensure you have the cake resting on a cutting board, ideally still on its parchment paper for easier handling.
- **Frost One Half Generously:** Take one half of the horizontally cut cake. Spread all of the prepared vanilla sprinkle buttercream evenly over its entire surface. Aim for a generous, consistent layer of frosting that reaches all edges.
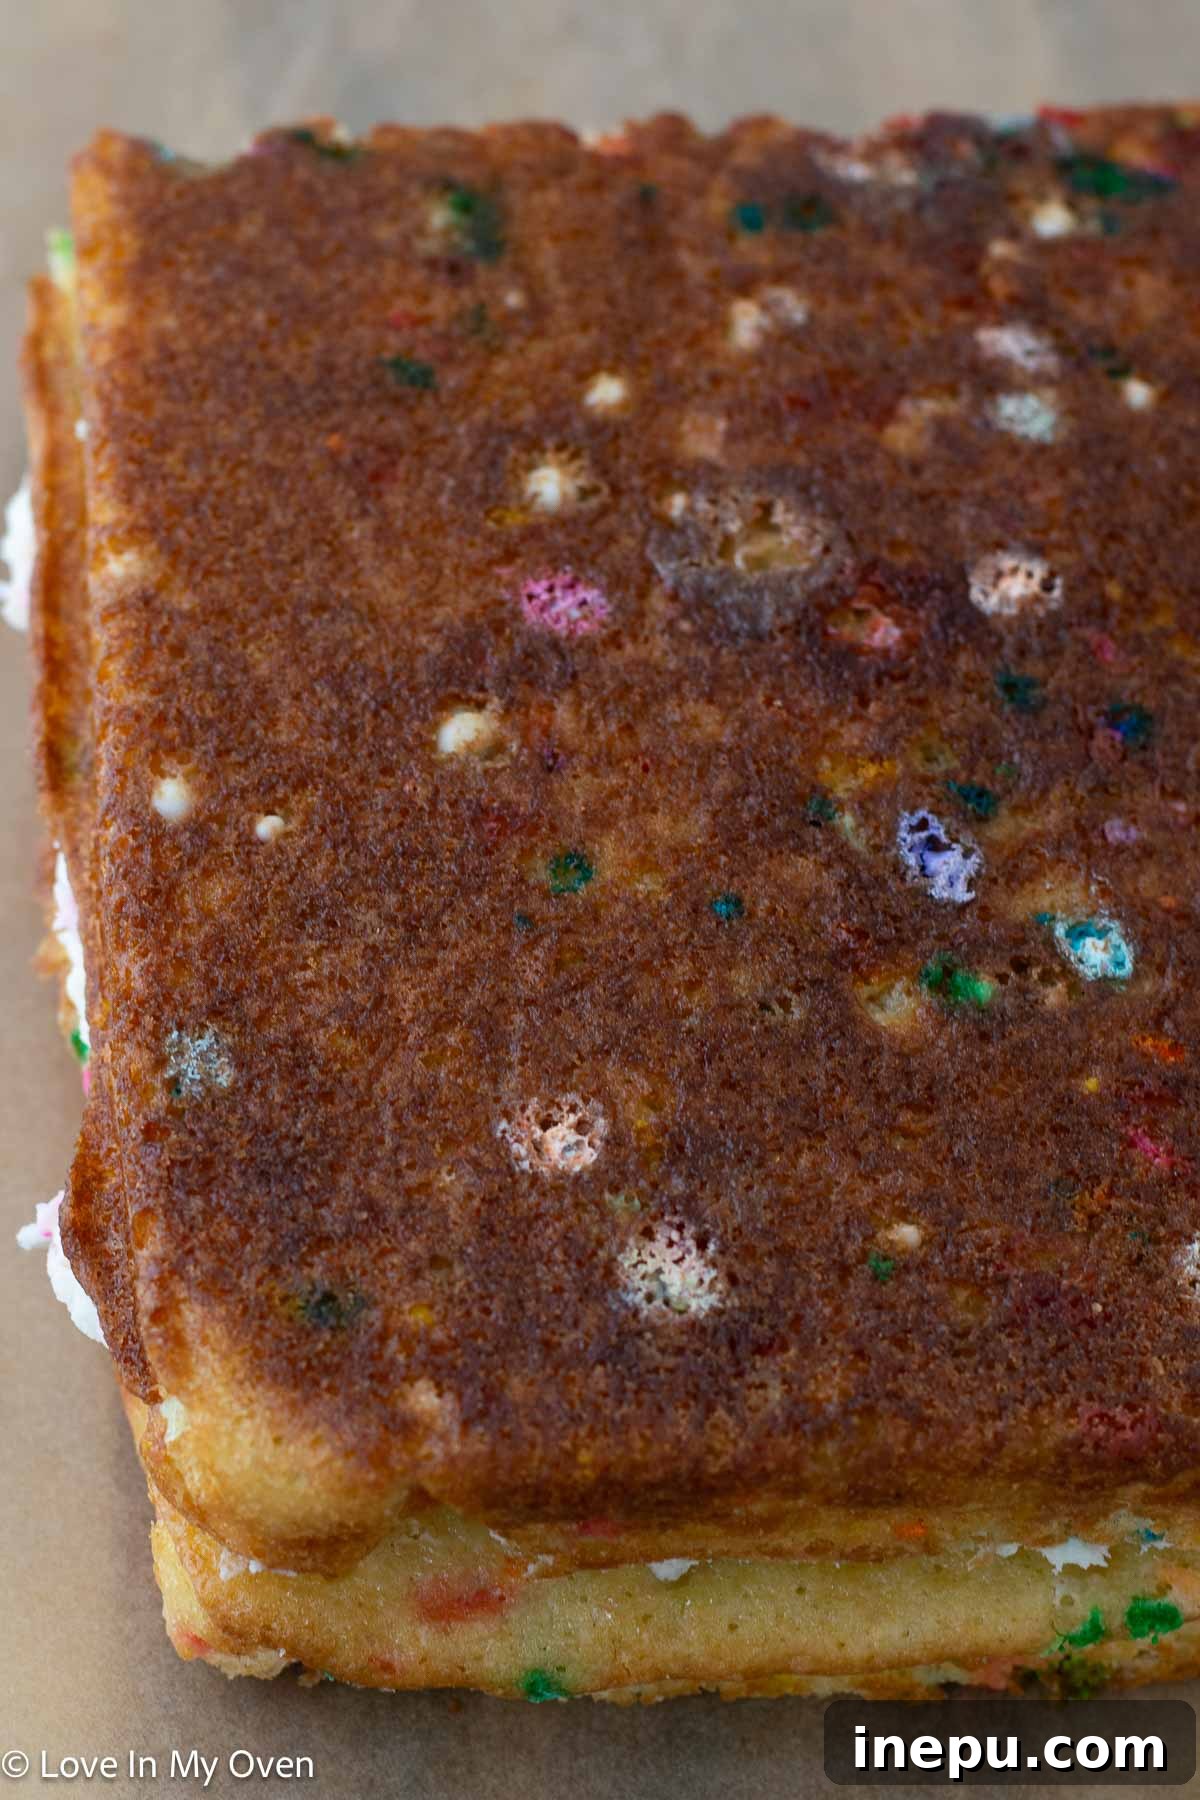
- **The “Flip” Technique:** This step requires a bit of care, but it’s the secret to a perfectly layered cake sandwich. With both hands, gently slide them under the parchment paper on the side of the cake that is frosted. In one smooth, deliberate motion, carefully flip the frosted cake half over onto the unfrosted cake half. Align the edges as best as you can to create a clean, two-layer cake with frosting in the middle.
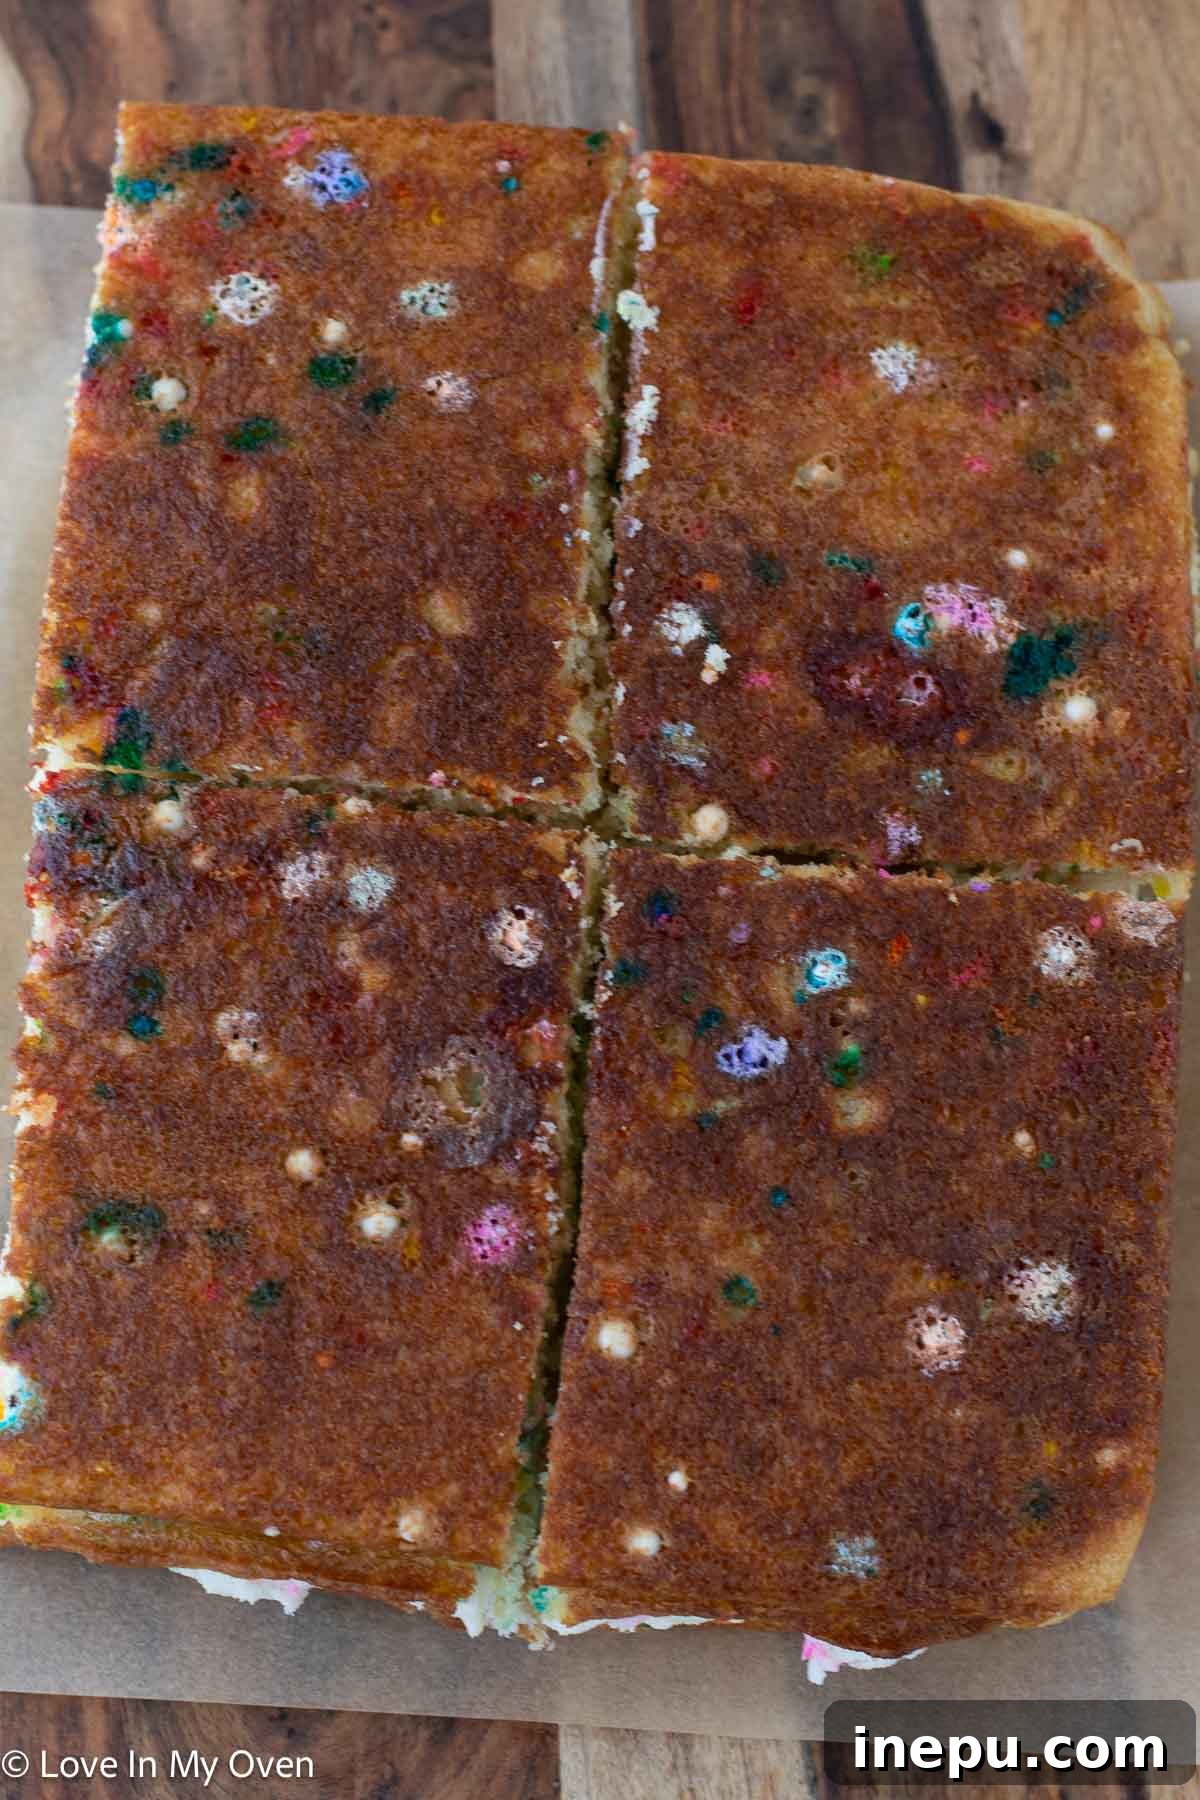
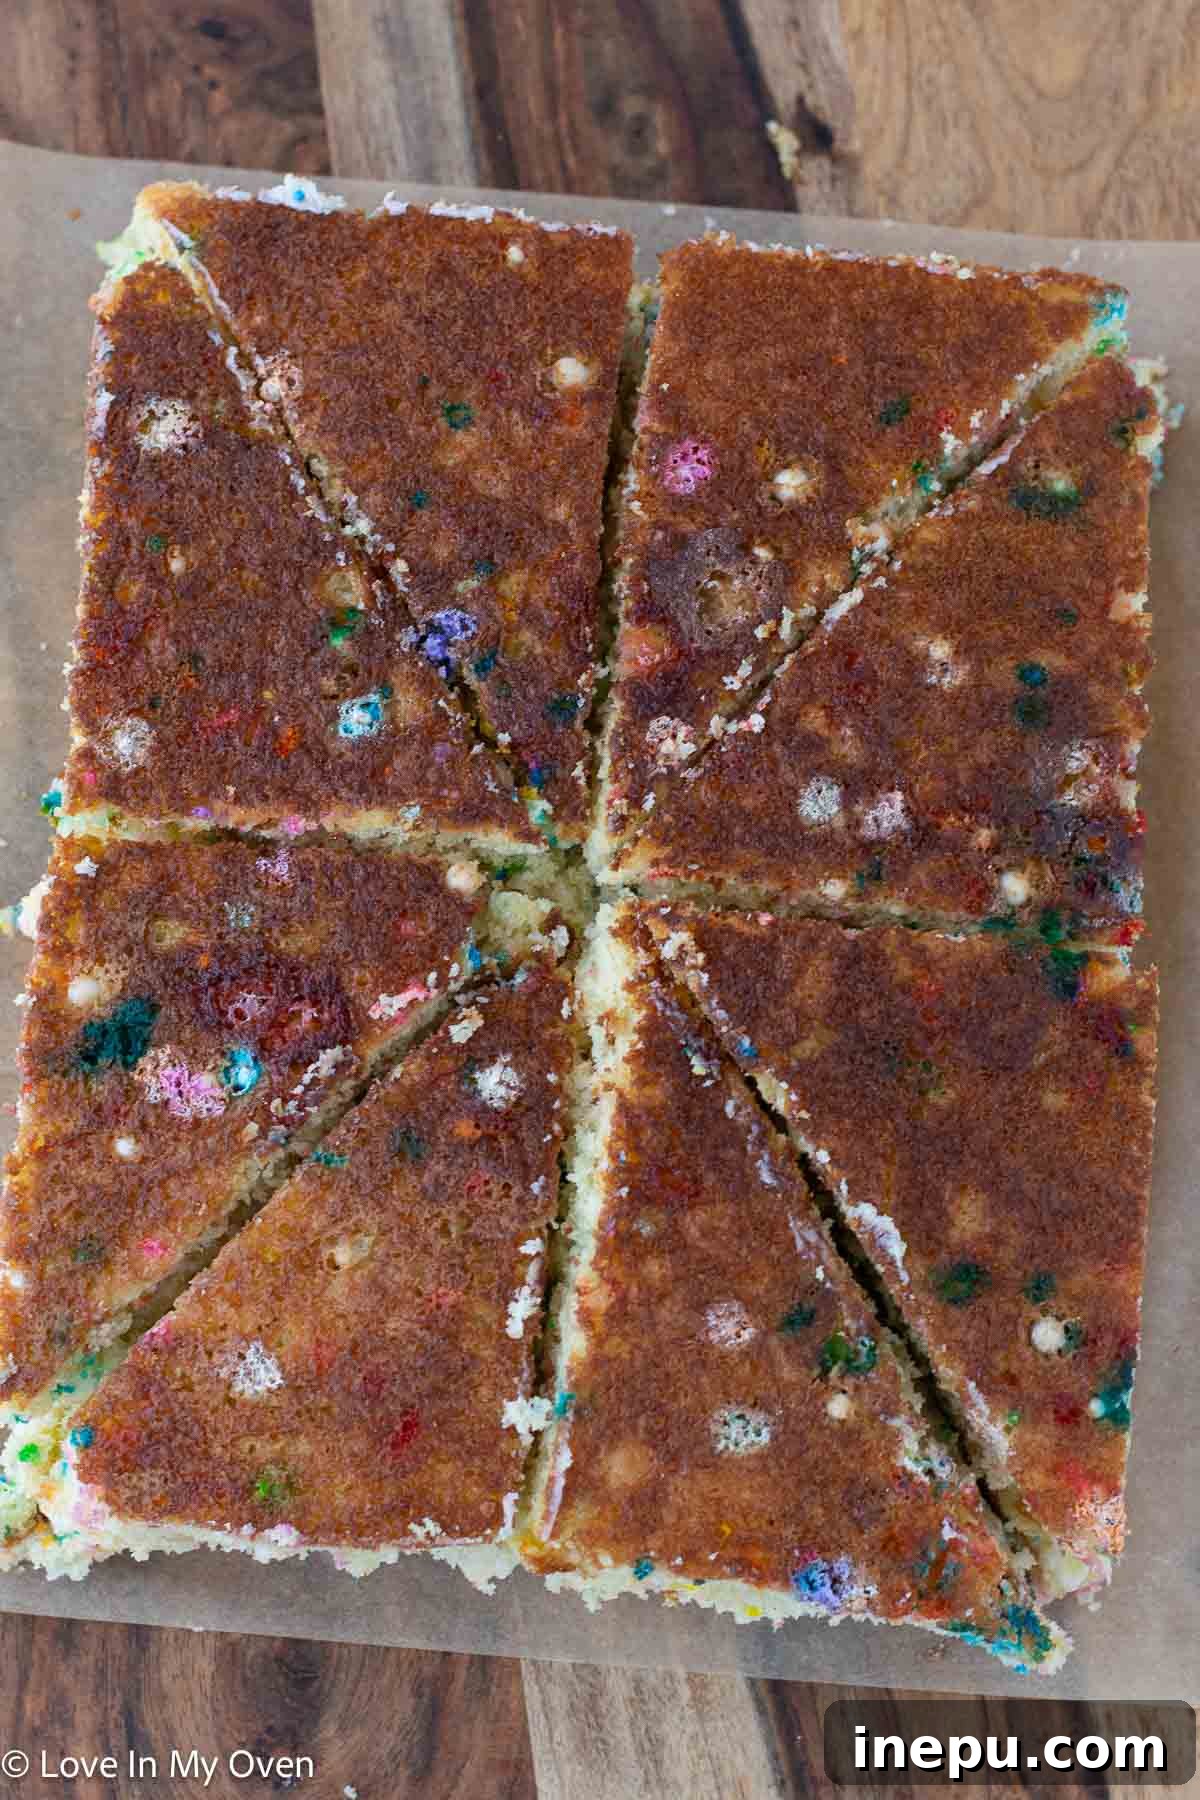
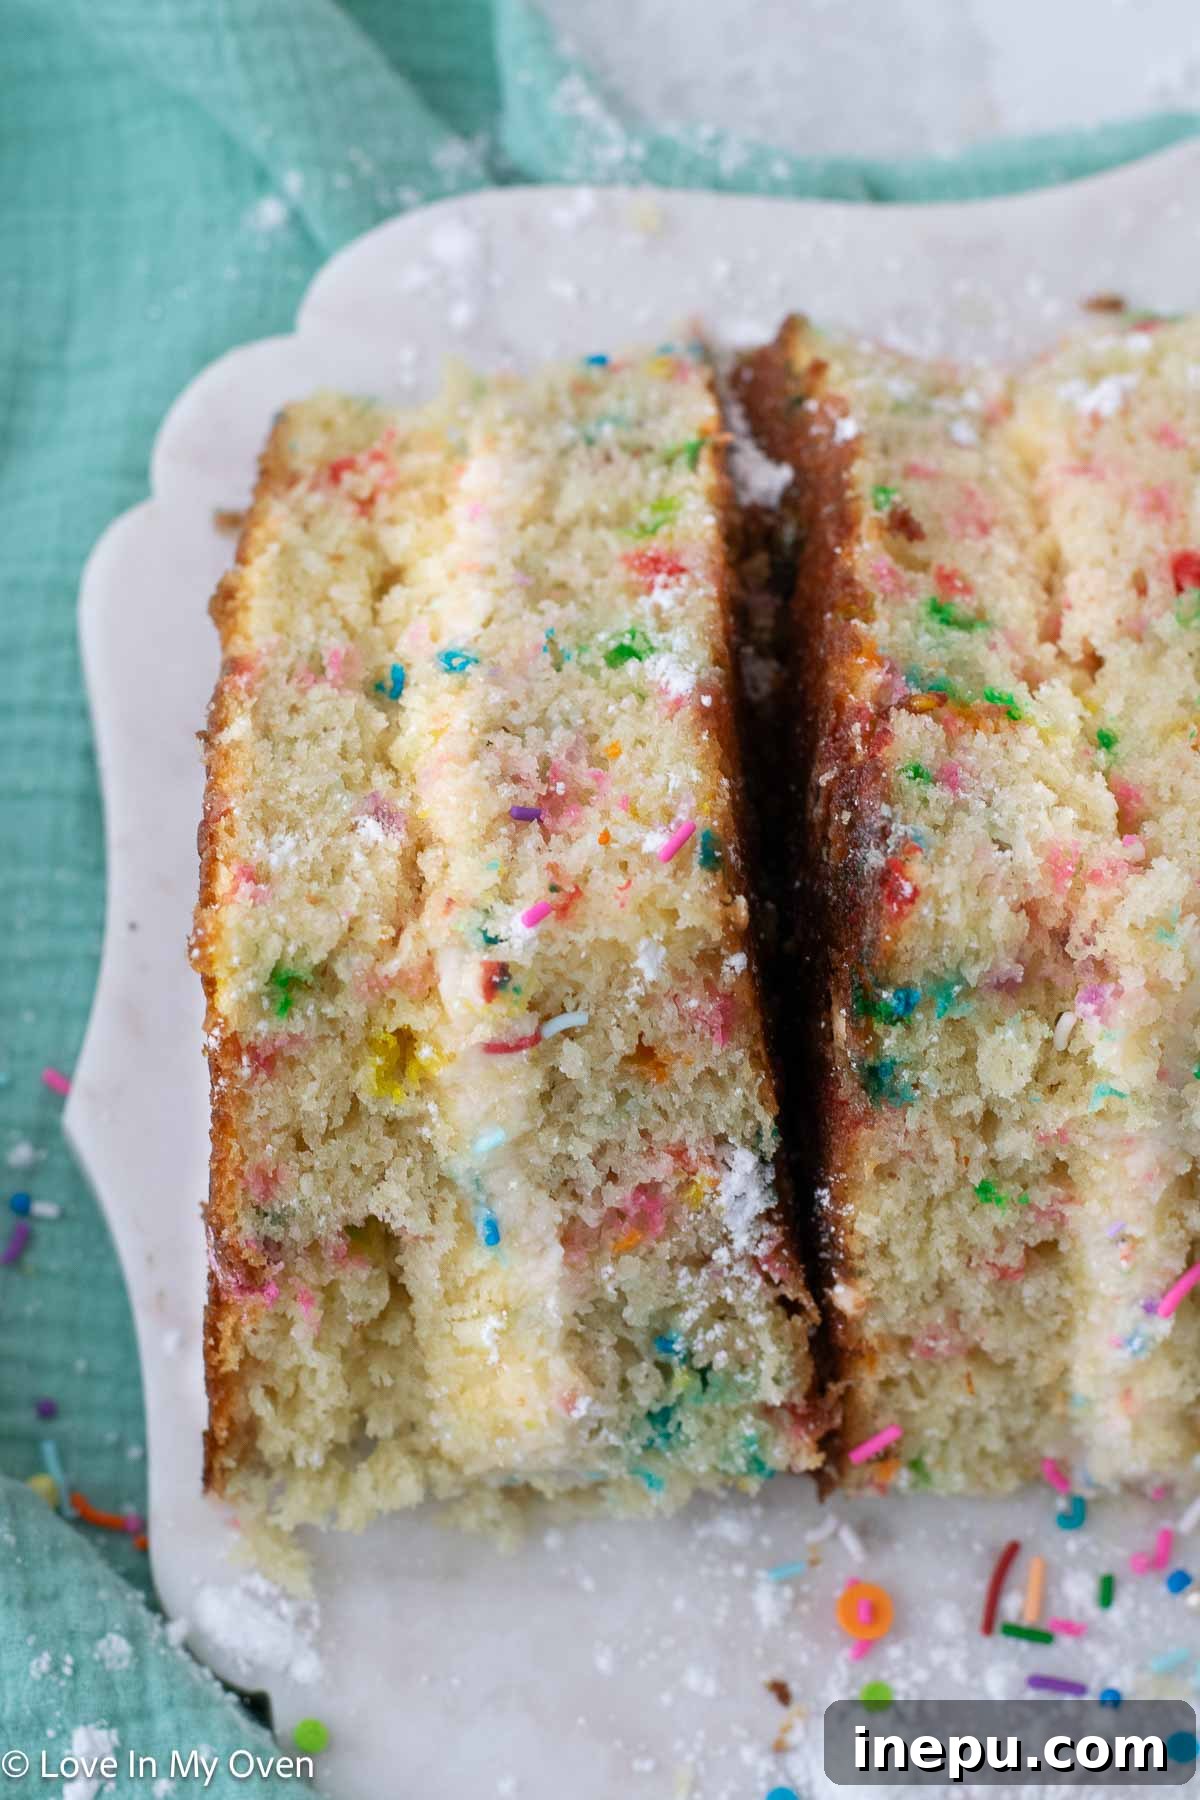
- **Cut into Sandwich Portions:** Now that you have your layered cake, it’s time to cut it into individual sandwiches. First, make another cut horizontally through both cake halves, effectively quartering the cake lengthwise. Next, make one more vertical cut down the middle. Finally, make two diagonal cuts through the cake halves. This sequence of cuts will yield 8 perfectly sized, triangular cake sandwiches. You can adjust the number and shape of cuts to create smaller or differently shaped pieces if desired.
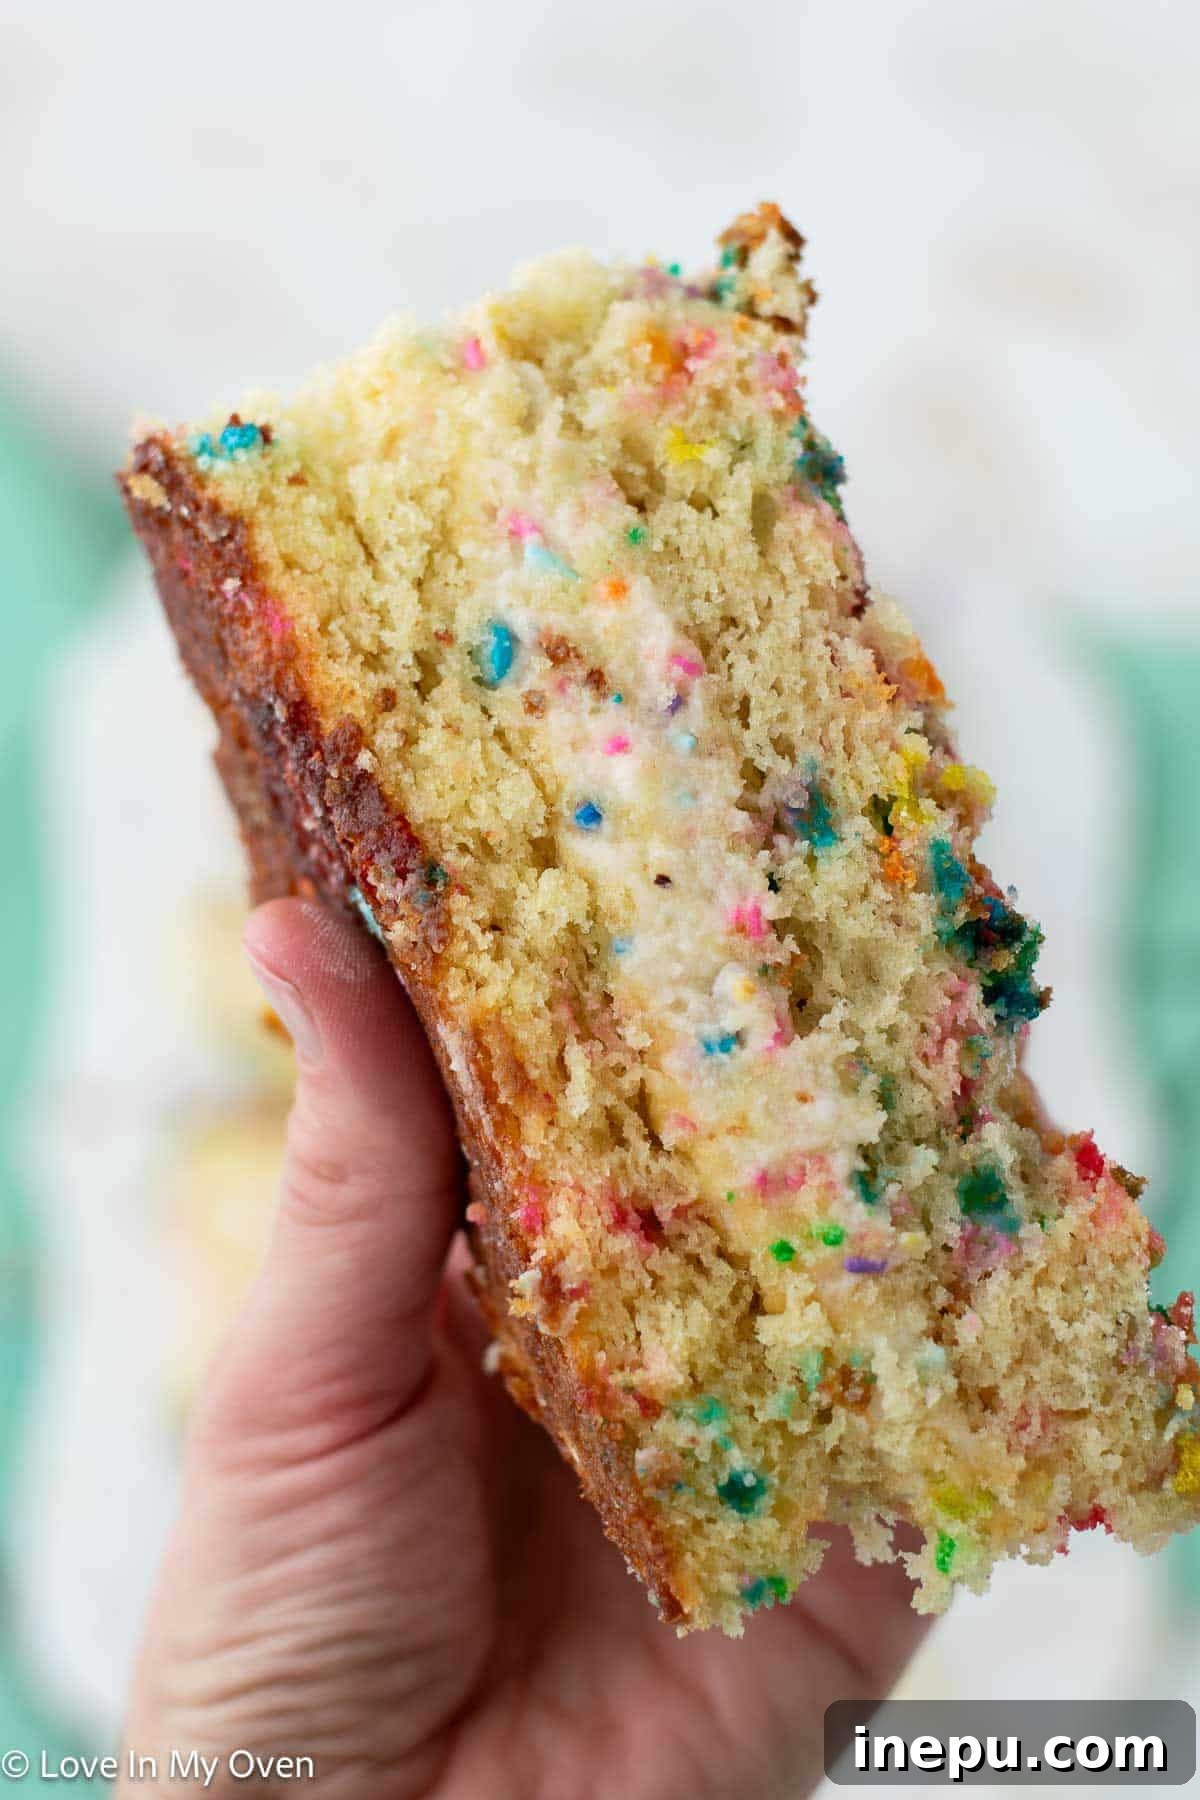
- **Serve and Enjoy:** Use a spatula or cake lifter to carefully scoop up and plate each individual cake sandwich. These are wonderful served with a fork, but their sandwich-like nature also makes them incredibly fun to pick up and eat with your hands – just like a regular sandwich!
Follow on Instagram
Follow
Customize Your Cake Sandwiches: Flavor Variations
While our vanilla sprinkle cake sandwiches are undeniably delicious, the beauty of this recipe lies in its incredible versatility. The “cake sandwich” concept can be adapted to almost any flavor profile you adore, making it a fantastic canvas for your creativity. If you have a cherished sheet pan cake recipe, you can absolutely transform it into a unique cake sandwich!
The key to successful flavor customization is ensuring you have the right amount of frosting to create a well-balanced sandwich. Generally, you’ll need about 3 cups of frosting in total to adequately fill a sheet cake prepared this way. Don’t be afraid to experiment with different cake and frosting combinations!
Cake Flavor Ideas:
- **Chocolate Cake Sandwiches:** Imagine a rich, fudgy chocolate sheet cake paired with a classic chocolate buttercream, a vibrant raspberry filling, or even a luscious peanut butter frosting.
- **Red Velvet Delights:** A moist red velvet cake, with its subtle cocoa flavor and striking color, would be divine with a traditional cream cheese frosting filling.
- **Carrot Cake Wonders:** For a more autumnal or spiced treat, a tender carrot cake with its delightful spices and textures would be perfect with a tangy cream cheese frosting.
- **Lemon or Orange Zest:** Infuse your vanilla cake batter with lemon or orange zest for a bright, citrusy twist, then pair it with a complementary citrus-flavored buttercream.
- **Mocha Indulgence:** Add instant espresso powder to your vanilla batter for a coffee-infused cake, then frost it with a coffee or chocolate buttercream.
Frosting Flavor Ideas:
The frosting is just as important as the cake itself in a cake sandwich. Here are some ideas to switch up your buttercream:
- **Chocolate Buttercream:** Simply melt some quality chocolate and incorporate it into your vanilla buttercream recipe, or use cocoa powder for a rich, dark chocolate flavor.
- **Fruit Flavored Buttercream:** Add fruit purees (like raspberry or strawberry), fruit extracts, or even finely minced zest to your buttercream for a fresh, fruity kick.
- **Peanut Butter Frosting:** Creamy peanut butter can be whipped into buttercream for a delightful nutty flavor that pairs wonderfully with chocolate or vanilla cakes.
- **Cream Cheese Frosting:** For tangy richness, cream cheese frosting is a beloved choice that complements many cake flavors, especially red velvet or carrot.
- **Coffee Buttercream:** A touch of instant espresso powder or strong brewed coffee can transform your vanilla buttercream into a sophisticated coffee-flavored treat.
The possibilities are truly endless! Feel free to mix and match your favorite cake and frosting flavors to create your ultimate personalized cake sandwich experience.
Other Delicious Cakes and Cupcakes to Try
If you’ve enjoyed venturing into the world of creative cake recipes, you’ll love exploring more sweet treats from my kitchen. Here are some other favorite cakes and cupcakes from the blog that you might enjoy, each offering its own unique flavor and charm:
- Healthy Birthday Cake: A delicious option for those seeking a slightly lighter indulgence without compromising on flavor.
- Birthday Cake Ice Cream Sandwiches: Combine two favorite desserts into one amazing, refreshing treat – perfect for warmer weather!
- Tuxedo Cupcakes: Elegant and decadent, these cupcakes are a beautiful balance of dark and white chocolate flavors.
Birthday Cake Sandwiches
No reviews yet
- Author: Katherine | Love In My Oven
- Total Time: 35 minutes
- Yield: 8 sandwiches
Description
Give your usual birthday cake a fun and exciting makeover with these charming birthday cake sandwiches! It’s a delightful way to transform a simple sheet pan vanilla sprinkle cake into individual, easy-to-eat cake sandwiches that are perfect for any celebration or party. Prepare for smiles and sweet enjoyment!
Ingredients
For the Vanilla Sprinkle Sheet Cake
- 2 1/2 cups all-purpose flour
- 1 tsp baking soda
- 1 1/4 tsp baking powder
- 1/2 tsp salt
- 1 cup unsalted butter, softened to room temperature
- 2 cups granulated sugar
- 3 large eggs, at room temperature
- 1/2 cup sour cream, at room temperature (or full-fat Greek yogurt)
- 1 tbsp pure vanilla extract
- 1 cup buttermilk, at room temperature (store-bought or homemade)
- 1/2 cup rainbow sprinkles (avoid non-pareils)
For the Funfetti Buttercream
- 1 cup unsalted butter, softened to room temperature
- 3 1/2 cups powdered sugar, sifted
- 1 tsp pure vanilla extract
- 2 tbsp heavy cream (plus more if needed for consistency)
- pinch salt
- 1/4 cup rainbow sprinkles
Instructions
- Preheat your oven to 350°F (175°C). Spray a 12 x 17-inch sheet pan with nonstick spray, then line it with parchment paper, leaving generous overhang on all sides. In a large mixing bowl, whisk together the flour, baking powder, baking soda, and salt. Set aside.
- In the bowl of a stand mixer (or using a handheld electric mixer), beat the softened butter on high speed for 1-2 minutes until creamy. Add the granulated sugar and beat on high for another 1-2 minutes until pale and fluffy.
- With the mixer running on low, add the eggs one at a time, mixing after each addition. Then, add the vanilla extract and sour cream. Mix on medium speed until thoroughly combined, scraping down the bowl as needed.
- Reduce mixer speed to low. Add half of the dry ingredients, mixing until just combined. Follow with half of the buttermilk, mixing until incorporated. Repeat with the remaining dry ingredients and buttermilk. Mix only until just combined; do not overmix.
- Gently fold in the rainbow sprinkles with a spatula. Pour the cake batter into the prepared sheet pan and spread it evenly with a spatula. Bake for 20-25 minutes, or until a toothpick inserted into the center comes out clean.
- Cool the cake in the pan for 15-20 minutes. Then, gently run a knife along any unlined edges, grab the parchment overhang, and lift the cake out onto a large cutting board or wire rack to cool completely.
- **Prepare the Funfetti Buttercream:** In a clean stand mixer bowl (or with a handheld mixer), beat the softened unsalted butter on high speed for 2-4 minutes until light and creamy.
- Gradually add the sifted powdered sugar, one cup at a time, along with the vanilla extract and heavy cream. Beat on high speed until the frosting is smooth, light, and creamy. Adjust consistency with more powdered sugar (for thicker) or heavy cream (for thinner) if needed. Gently fold in the rainbow sprinkles with a spatula.
- **Assemble the Cake Sandwiches:** Once the cake is completely cool, carefully cut it horizontally in half using a long, sharp serrated knife. Spread all of the prepared Funfetti buttercream evenly over one half of the cake.
- Working carefully, place both hands under the parchment paper supporting the frosted cake half. In one smooth motion, gently flip the frosted cake half over onto the unfrosted cake half, aligning the edges to create a layered cake.
- To form the sandwiches, make a horizontal cut through both cake halves. Then, make one vertical cut down the center. Finally, make two diagonal cuts through the cake, forming 8 triangular pieces (sandwiches). You can adjust cuts for smaller pieces.
- Use a spatula to scoop and plate the individual cake sandwiches. Serve immediately, or store them for later enjoyment.
Cake sandwiches will stay fresh at room temperature for 2-3 days when stored in an airtight container. For longer storage, you can freeze the cake sandwiches for up to 2 months. Thaw in the refrigerator or at room temperature before serving.
Notes
*If you don’t have sour cream, feel free to substitute it with an equal amount of full-fat plain Greek yogurt. Both options will ensure a wonderfully moist and tender cake!
- Prep Time: 10 minutes
- Cook Time: 25 minutes
- Category: Cakes, Desserts, Party Food
- Method: Oven Bake
- Cuisine: American