
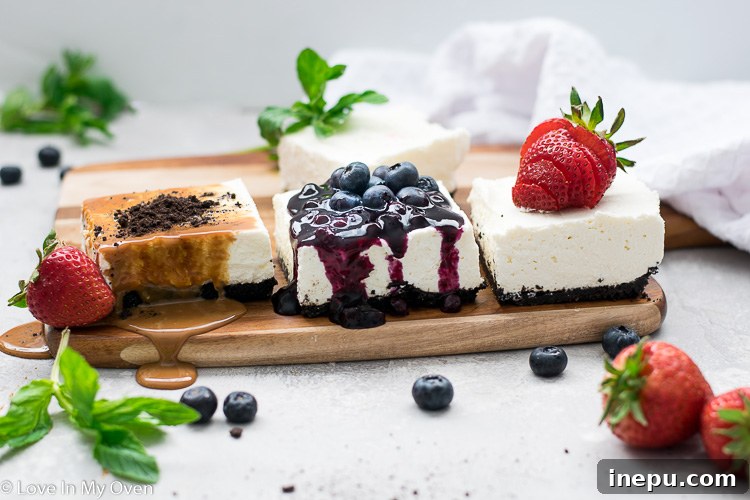
No oven? No problem! Discover the secret to effortlessly creating the most fantastic, creamy, and delicious no-bake cheesecake bars with an irresistible Oreo crust. Perfect for any season and endlessly customizable with your favorite toppings, these bars save you time and keep your kitchen cool.
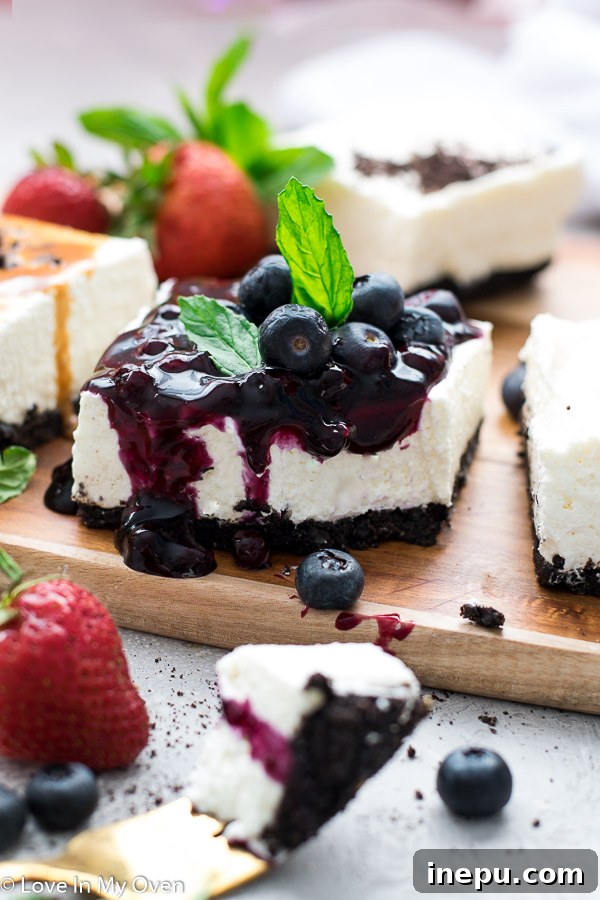
Before we dive into the delightful world of no-bake desserts, a quick personal note: Today marks my sweet Hattie’s 2nd birthday! It truly feels like just yesterday she joined our family. While I could gush about her adorableness for hours, I’ll spare you the lengthy ode. Just know my heart overflows with love for my little girl.
Speaking of special occasions, this isn’t another quick 3-ingredient recipe, but it is something truly special and incredibly versatile. I’m thrilled to be collaborating with some wonderful blogger friends to bring you a diverse collection of no-bake treats. You’ll find links to all their amazing creations at the bottom of this post, so be sure to explore them all for more inspiration.
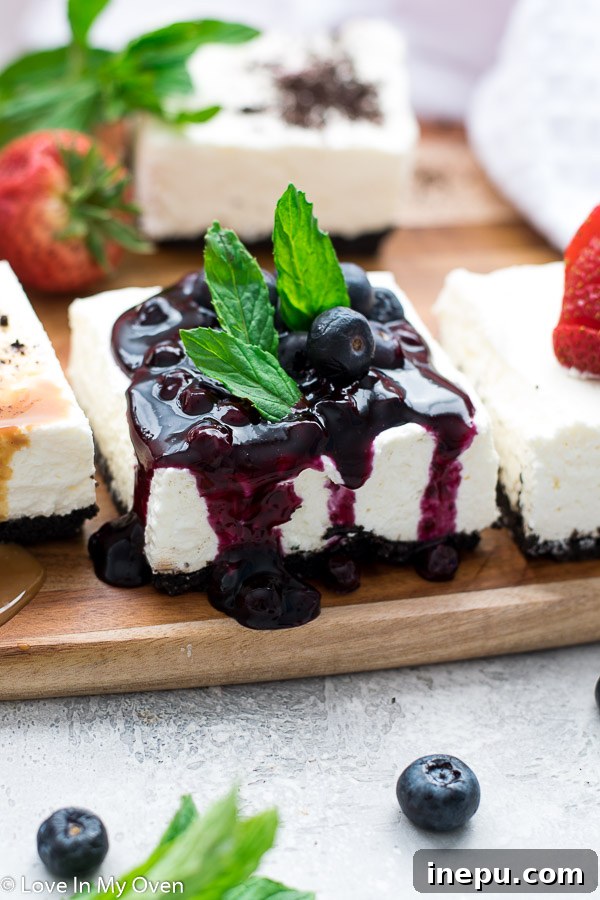
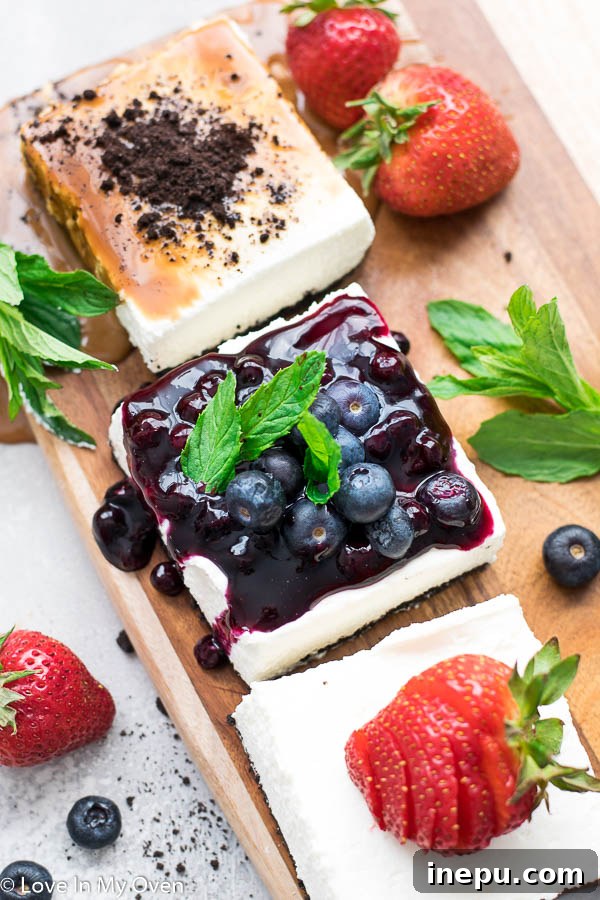
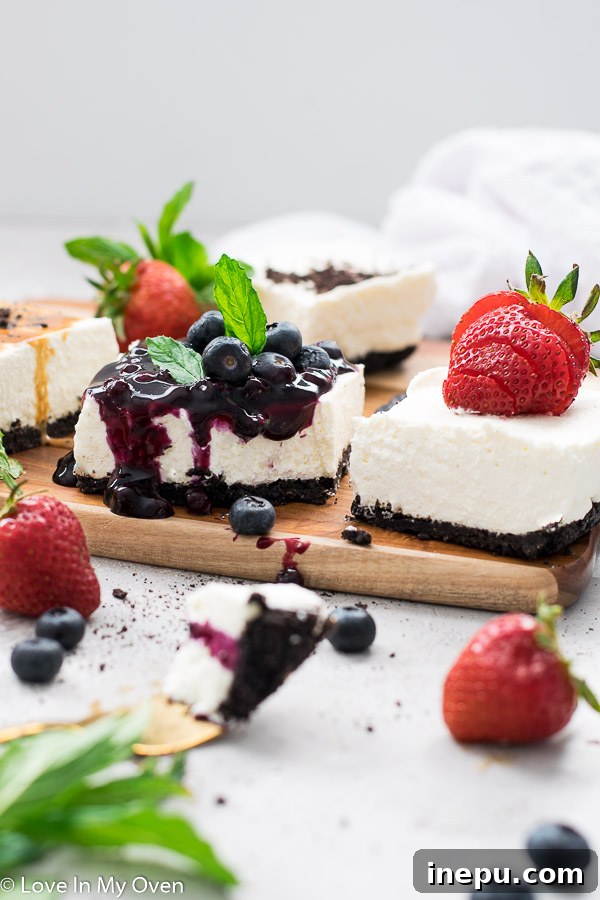
For my contribution, I knew I had to go with no-bake cheesecake bars. This is a recipe I’ve been eager to share on the blog for a long time. My vision was to create a foundational, basic no-bake cheesecake bar that you could enjoy simply as is, or elevate with an array of different sauces and delectable goodies. Imagine them topped with vibrant strawberry or blueberry sauce, rich caramel or chocolate drizzle, or even a zesty lemon curd for a bright finish.
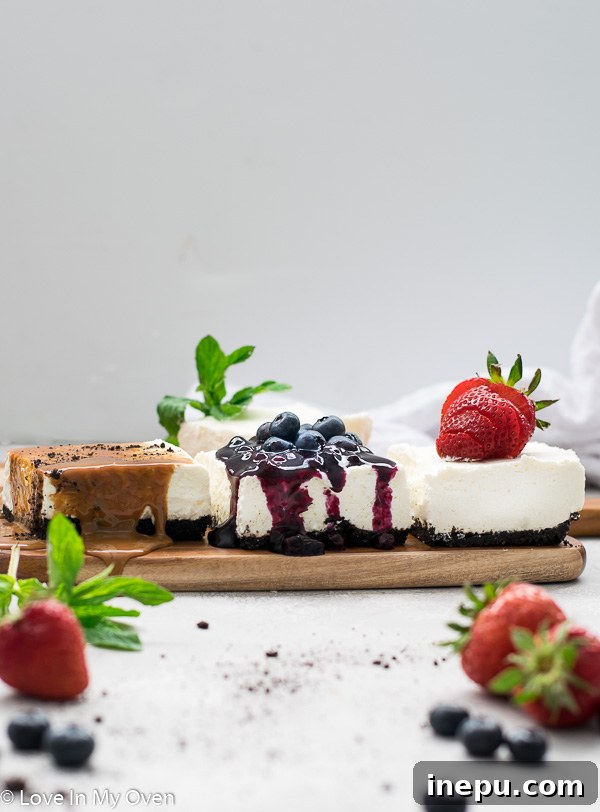
Why Choose No-Bake Cheesecake Bars?
The past few days have been absolutely beautiful, filled with glorious sunshine! This kind of weather makes me want to spend every moment outdoors, perhaps grilling and sipping margaritas on the deck. And when the sun is shining, the last thing anyone wants is to “overheat” the house by turning on the oven. While we might not be deep into the sweltering heat of summer just yet, the principle stands: no-bake desserts offer a fantastic solution!
Beyond keeping your kitchen cool, no-bake recipes are incredibly easy. They involve significantly less fuss and mess than their baked counterparts, making them ideal for busy weeknights, impromptu gatherings, or simply when you’re craving something sweet without the commitment of baking. These cheesecake bars are a testament to that simplicity, delivering maximum flavor with minimal effort.
Crafting Your Perfect No-Bake Cheesecake Bars
These no-bake cheesecake bars are quite possibly the easiest dessert you’ll ever master, yet they taste like they came from a gourmet bakery. Let’s break down the simple steps to create this creamy dream.
The Irresistible Crust: Oreo or Graham Cracker
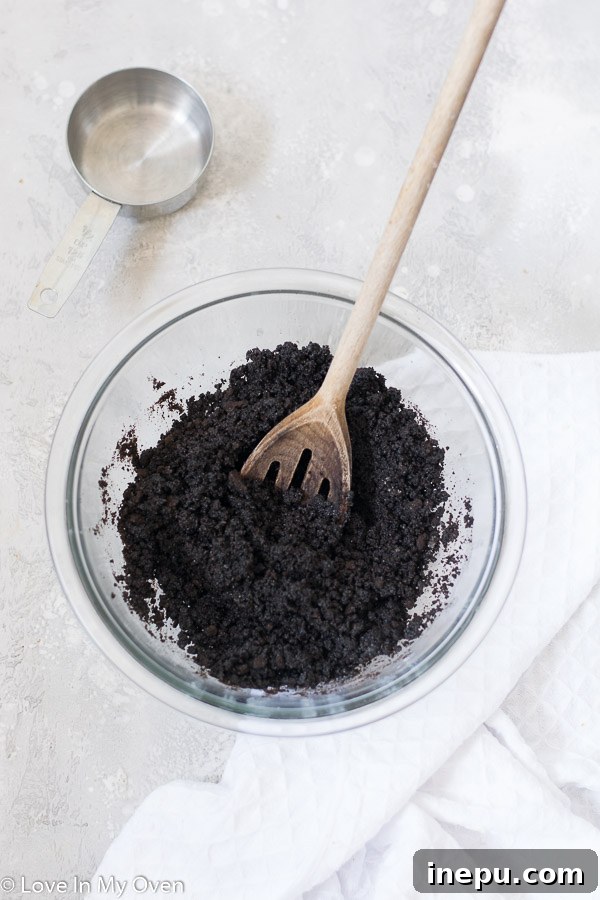
We begin with the foundation: the crust. I’m personally a huge fan of the rich, chocolatey flavor of an Oreo crumb crust for my cheesecake. The deep cocoa notes complement the creamy filling beautifully. However, if you prefer a classic graham cracker crust, it’s an effortless swap! Simply use the same amount of crushed graham cracker crumbs instead of Oreos, keeping the butter and sugar ratios identical. Both options provide a delightful texture that holds up perfectly.
Once your crumbs are mixed with melted butter and a touch of granulated sugar, press the mixture firmly into the bottom of an 8×8 inch pan. Lining the pan with foil or parchment paper, leaving an overhang on the sides, will make for incredibly easy removal and slicing later. Pop this crust into the freezer or fridge while you prepare the filling; this helps it set firmly, preventing a crumbly base.
Creating the Silky-Smooth Cheesecake Filling
The filling for these bars is just as straightforward and yields an unbelievably creamy texture. The key to a smooth filling starts with room temperature cream cheese, which whips up without lumps.
I typically use my stand mixer, fitted with the paddle attachment, to whip the full-fat cream cheese until it’s light and fluffy. Along with the cream cheese, you’ll incorporate powdered sugar, a splash of pure vanilla extract, and plain Greek yogurt or sour cream. The yogurt or sour cream adds a subtle tang that balances the sweetness and richness of the cream cheese.
A note on sweetness: I prefer my cheesecake on the less sweet side, which is why the recipe uses 3/4 cup of powdered sugar. If you have a sweeter tooth, you can easily increase this to 1 cup. If you opt for sour cream instead of Greek yogurt, I recommend starting with 1 cup of powdered sugar to ensure a balanced flavor profile, as sour cream can be tangier.
After this mixture is wonderfully smooth, in a separate clean bowl, whip heavy whipping cream on high speed until it forms stiff peaks. This aerated cream is what gives the cheesecake its light, airy, yet incredibly stable texture. Gently fold the whipped cream into the cream cheese mixture using a spatula. Be careful not to deflate the cream; this gentle folding ensures the filling remains fluffy and light. Pour this luscious filling over your prepared crust and smooth it out evenly with a spatula.
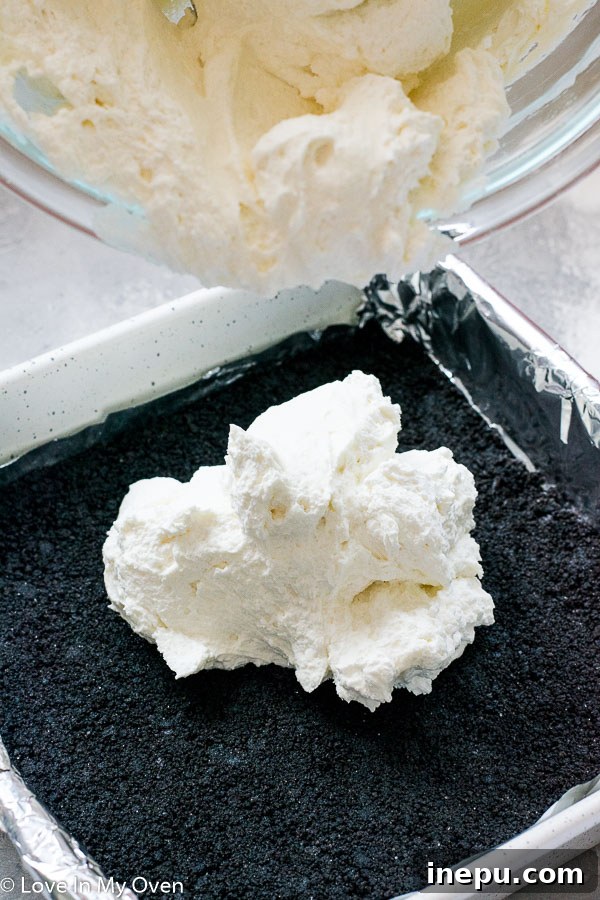
The Crucial Chill Time
Patience is a virtue, especially when it comes to no-bake cheesecakes! The chilling process is absolutely essential for the bars to firm up properly and achieve that perfect sliceable consistency. Place the entire pan in the fridge for a minimum of 4-6 hours, or ideally, overnight. This allows the ingredients to meld and set, transforming the mixture into a dense, creamy cheesecake. Resist the urge to cut into it too early!
Ingredient Spotlight: Full-Fat Cream Cheese and Greek Yogurt
When it comes to no-bake cheesecakes, the quality and type of your dairy ingredients truly make a difference in the final texture and flavor.
Do You Need Full-Fat Cream Cheese?
While you certainly *could* use light cream cheese for these no-bake bars, I strongly recommend using full-fat cream cheese. Full-fat cream cheese contains more stabilizers and fat, which contributes significantly to a much smoother, richer, and creamier dessert. It provides that luxurious mouthfeel that is characteristic of a truly fantastic cheesecake. Light cream cheese might result in a slightly less firm or less decadent bar.
Similarly, I also opt for full-fat plain Greek yogurt. This recipe isn’t aiming to be a “skinny” cheesecake; it’s designed for indulgence! The full-fat yogurt not only adds to the creaminess but also provides that delightful tang without compromising the overall richness. If you’re using sour cream, again, full-fat is recommended for the best results.
Serving and Slicing Your No-Bake Delights
Once your cheesecake has thoroughly chilled and is firm, it’s time for the gratifying moment of serving! Remove the pan from the fridge. The foil or parchment overhang you left earlier will be your best friend here, allowing you to easily lift the entire cheesecake slab out of the pan and onto a cutting board.
For clean, precise cuts, use a very sharp knife. To ensure each slice looks picture-perfect, wipe the knife clean with a warm, damp cloth after each cut. This prevents crumbs and filling from dragging onto subsequent slices. You can cut the bars into 16 smaller servings for a party, or into 9 larger, more generous pieces, which is often my preference!
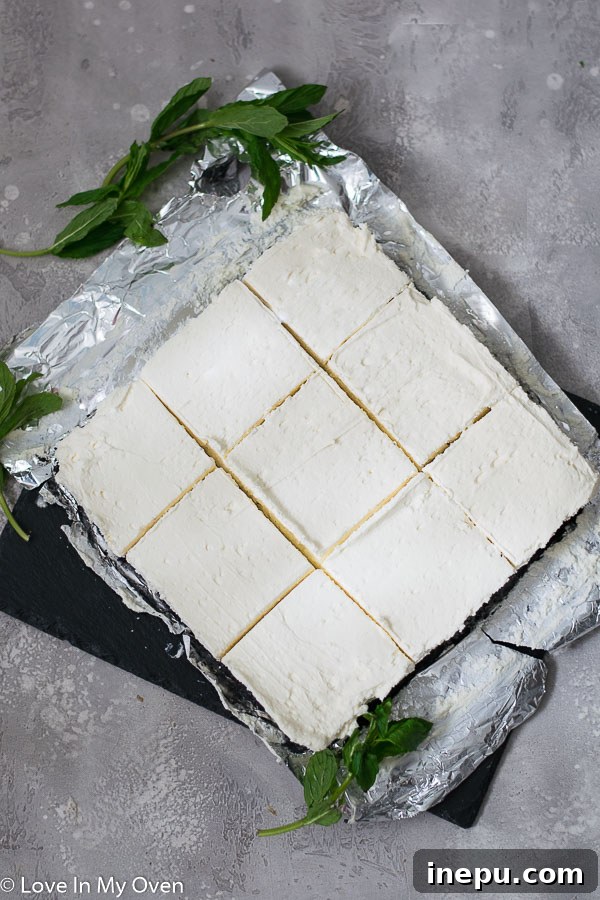
Endless Topping Possibilities for Your Cheesecake Squares
The beauty of these no-bake cheesecake bars lies in their versatility. They are truly perfect on their own, perhaps adorned with just a single fresh strawberry. However, the potential for customization with toppings is vast and exciting!
Here are just a few ideas to inspire you:
- Blueberry Sauce: A vibrant and slightly tart homemade blueberry sauce adds a beautiful contrast.
- Salted Caramel Sauce or Dulce de Leche: For those who love a rich, buttery, and sweet topping with a hint of salt.
- Lemon Curd: Bright, tangy, and incredibly refreshing, especially with the creamy base.
- Chocolate Sauce: A classic pairing, a drizzle of your favorite chocolate sauce is always a crowd-pleaser.
- Strawberry Sauce: Sweet, fruity, and visually stunning, especially with fresh berries.
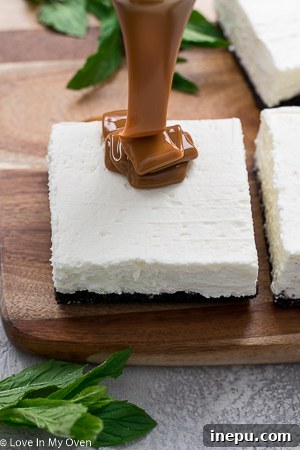
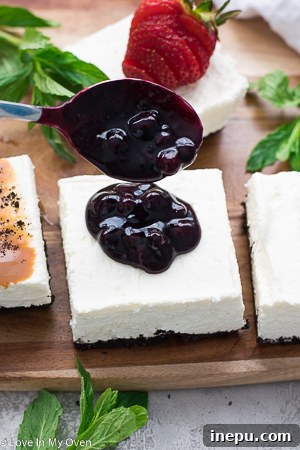
What will you choose to top yours with? No matter your selection, these bars are guaranteed to be delicious and satisfy any sweet craving.
Storage and Make-Ahead Tips
These no-bake cheesecake bars are also fantastic for meal prepping or making ahead for parties. They store beautifully! Keep them in an airtight container in the fridge for 3-4 days. For longer storage, they freeze exceptionally well. Simply place them in an airtight freezer-safe container (preferably before adding any liquid toppings) for up to two months. When you’re ready to enjoy, thaw them overnight in the fridge before serving.
I hope you’re inspired to whip up a batch of these incredibly simple, yet utterly delicious, no-bake cheesecake bars. They truly are the perfect dessert for any occasion, offering rich flavor without any of the baking hassle. Enjoy every creamy, dreamy bite!
Now, please take a moment to check out these other amazing no-bake recipes from my talented blogging buddies:
No Bake Pistachio Pie from Pies and Tacos
No Bake Strawberry Cheesecake from Sugar Salt Magic
Peanut Butter Bars from Katiebird Bakes
Lemon Raspberry Icebox Cake from This Celebrated Life
Butterfinger Pie from The Itsy-Bitsy Kitchen
No Bake Cheesecake Bars
5 Stars 4 Stars 3 Stars 2 Stars 1 Star
5 from 15 reviews
Author: Katherine | Love In My Oven
Total Time: 6 hours
Yield: 9 or 16 bars
Description
Hot weather or not, these no bake cheesecake bars will save you the time (and heat) of turning on an oven to make fantastic, creamy and delicious cheesecake bars with an Oreo crust!
Ingredients
Crust
- 1 1/2 cups crushed Oreo crumbs*
- 5 tbsp unsalted butter, melted
- 1 tbsp granulated sugar
Filling
- 2 (8oz) blocks full-fat cream cheese**
- 3/4 cup powdered sugar***
- 1 tsp pure vanilla extract
- 1/2 cup plain Greek yogurt or sour cream****
- 1 1/4 cup heavy whipping cream
- optional: dulce de leche (canned), blueberry sauce, salted caramel sauce,lemon curd for topping
Instructions
- Line an 8×8 baking pan with aluminum foil or parchment paper, leaving a bit of overhang on the sides to pull out easily for slicing and serving.
- In a large mixing bowl, combine the Oreo crumbs with the melted butter and granulated sugar, stirring to combine. Press the crumbs down firmly into the pan, using the back of a spoon or measuring cup. Place the pan in the fridge or freezer while you prepare the filling.
- In the bowl of a stand mixer fitted with the paddle attachment, or using a handheld electric mixer, whip the cream cheese and powdered sugar together on high until light and fluffy, about 2 minutes. Add the vanilla extract and Greek yogurt, and whip again for another minute or two.
- In another bowl using a handheld electric mixer, or in a clean mixing bowl using your stand mixer fitted with the whisk attachment, whip the heavy cream on high until stiff peaks form. Fold the whipping cream into the cream cheese mixture using a spatula, until combined.
- Remove the pan from the freezer or fridge, and empty the filling into the crust, smoothing it all out with a spatula. Place the entire pan into the fridge for 4-6 hours until firm. Using the overhang of aluminum foil, remove the bars from the pan onto a cutting board, and using a very sharp knife, cut the bars into even squares (9 or 16). Clean the knife before each cut. Top with desired topping, or serve plain.
Leftovers may be kept in an airtight container, for 3-4 days in the fridge, or in the freezer (before topping) for up to 2 months. Thaw overnight in the fridge, before serving.
Notes
*If you’re more of a fan of a traditional graham cracker crust, just replace the Oreo crumbs with the same amount of crushed graham cracker crumbs
**Feel free to use light cream cheese and Greek yogurt, but be sure to use the block cream cheese, not the spreadable kind!
***I prefer my cheesecake on the less sweet side, but if you prefer it sweeter, increase the powdered sugar to 1 cup, or even 1 1/4 cups.
****If using sour cream, increase the powdered sugar in the filling to 1 cup.
*****Recipe can easily be doubled to fit a 9 x 13 pan.
- Prep Time: 20 minutes
- Category: desserts
- Method: no bake
- Cuisine: american