
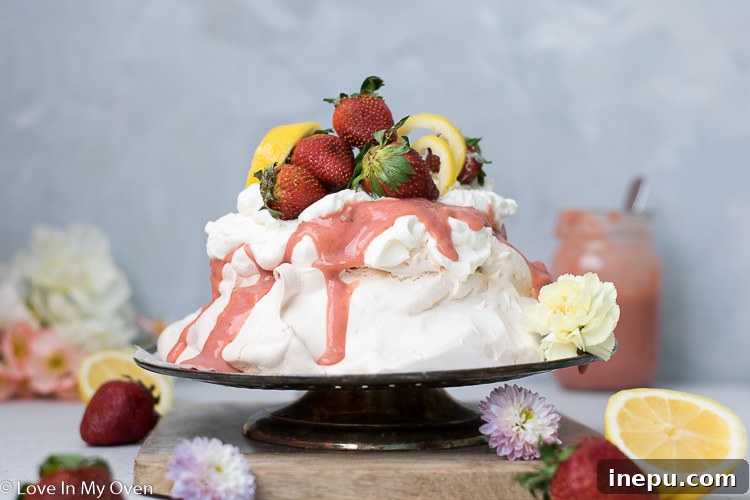
Fluffy and light, this airy strawberry lemon curd pavlova is the easiest dessert you can make! Tasty meringue topped with delicious strawberry lemon curd and a mountain of whipped cream!
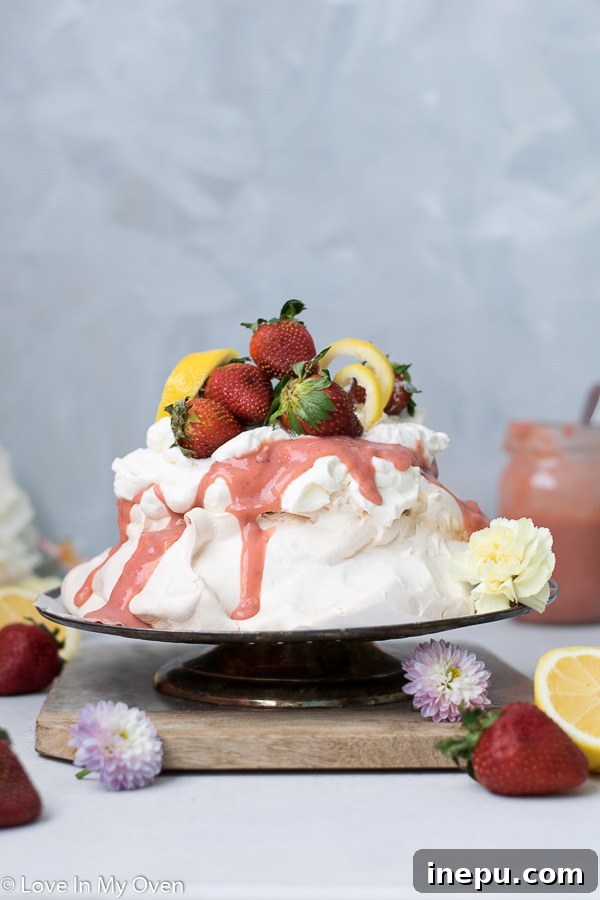
Indulge in the Easiest & Most Irresistible Strawberry Lemon Curd Pavlova
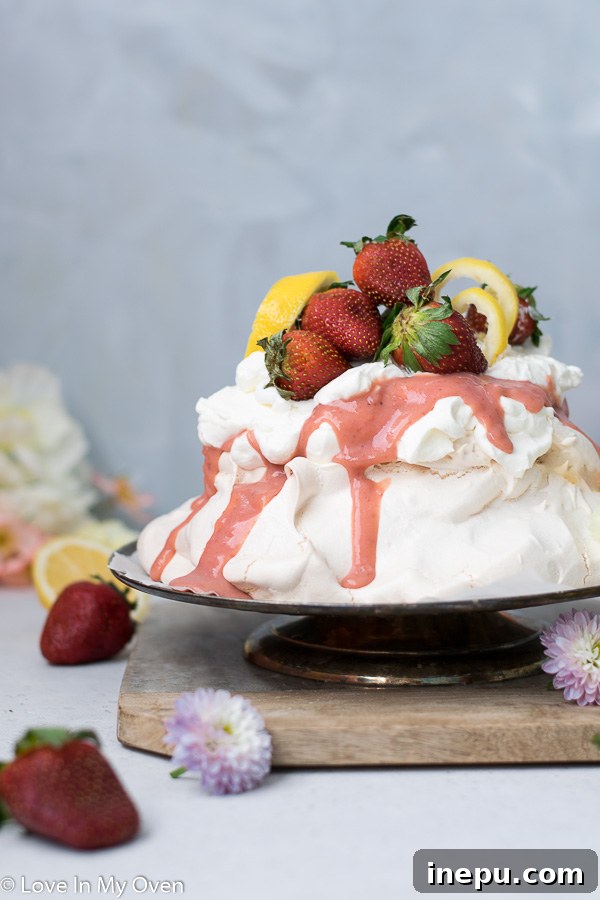
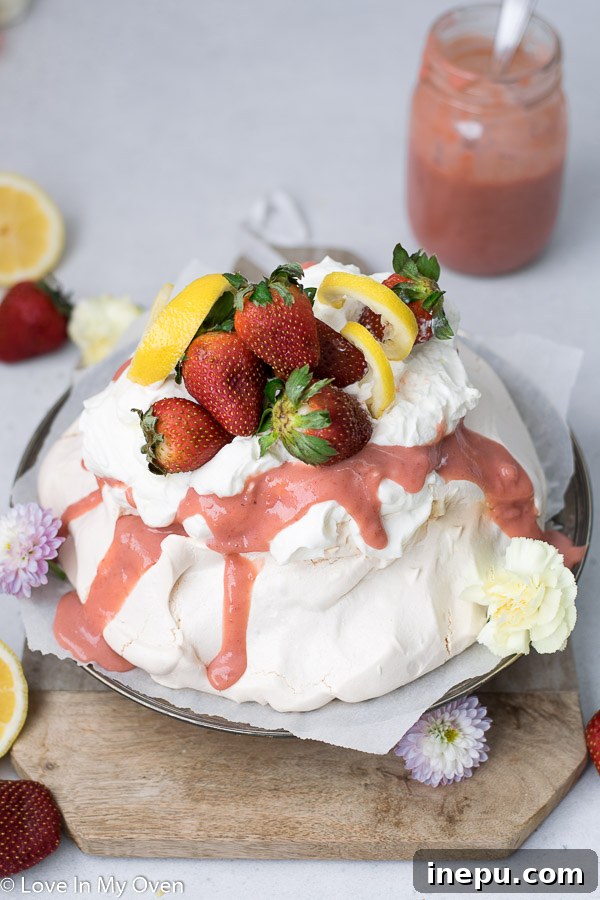
There’s something truly magical about a dessert that looks incredibly impressive yet is surprisingly simple to create. The Strawberry Lemon Curd Pavlova is exactly that – a show-stopping masterpiece that will delight your taste buds and impress your guests without demanding hours of complex kitchen work. Imagine sinking your teeth into a cloud of delicate meringue, its crisp exterior giving way to a soft, marshmallowy interior, all crowned with vibrant strawberry lemon curd and a generous swirl of freshly whipped cream. This isn’t just a dessert; it’s an experience, a symphony of textures and flavors that will leave everyone craving more.
You might have thought I was going to leave you hanging after sharing that incredible strawberry lemon curd recipe yesterday! Absolutely not! The curd was always intended to be a prelude to this spectacular homemade meringue dessert. While I initially considered presenting them as a single post, I realized the curd deserved its own spotlight, especially with exciting plans for more spring and summer recipes featuring its bright, tangy goodness. So, consider this pavlova the grand debut for your freshly made curd!
This dessert is a testament to simple ingredients transforming into something extraordinary. Whether you’re planning for a special occasion like Easter, a delightful summer gathering, or simply craving a light and flavorful treat, this fluffy pavlova recipe fits every bill. It’s incredibly versatile, allows for creative customization, and, best of all, won’t leave you feeling overly full. So, let’s dive into the world of pavlovas and discover how easy it is to whip up this delightful creation that promises to be a favorite.
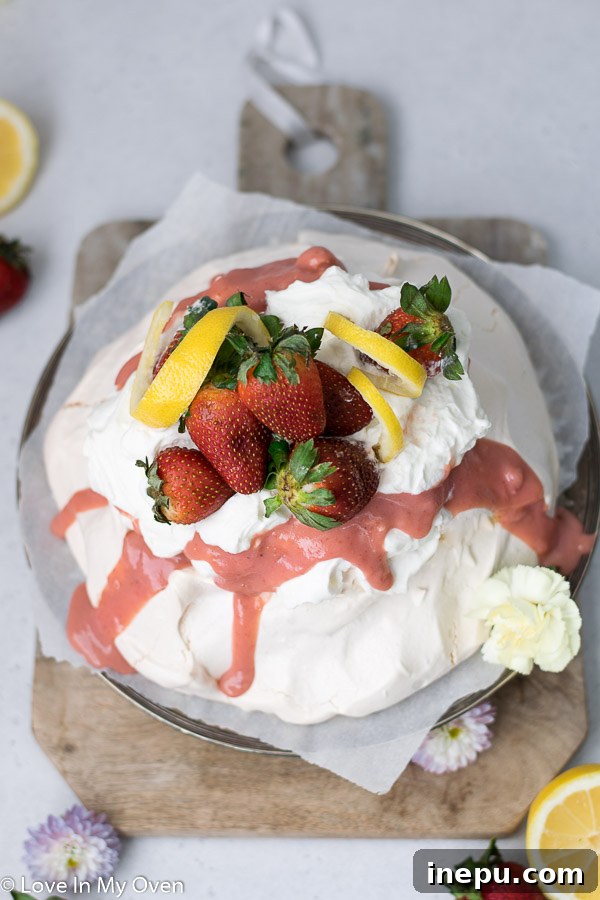
What Exactly is a Pavlova? Unveiling this Light and Airy Dessert
If the term “pavlova” is new to your dessert vocabulary, prepare to be introduced to a true culinary delight. Originating from either Australia or New Zealand (a delightful debate that continues to this day!), this elegant dessert was named after the Russian ballerina Anna Pavlova. It perfectly embodies grace and lightness, much like the dancer herself.
At its heart, a pavlova is essentially a baked meringue. But it’s not just any meringue; it’s a specific type characterized by a wonderfully crisp, almost fragile exterior that encases a soft, chewy, marshmallow-like interior. This beautiful contrast in textures is what makes pavlova so uniquely appealing and utterly addictive. The magic happens with just a few core ingredients, transforming simple pantry staples into an ethereal dessert:
- Egg Whites: The foundation of any meringue, providing structure and incredible volume when whipped. They trap air, which expands during baking to create the pavlova’s airy texture.
- Super-fine Sugar: Essential for dissolving properly into the egg whites, ensuring a smooth, glossy meringue without any grainy residue. It also contributes to the crispness of the outer shell.
- Cornstarch: A secret ingredient that contributes significantly to the signature chewy center, preventing the meringue from becoming completely dry and brittle. It creates that desirable marshmallowy texture within.
- White Wine Vinegar: This acidic addition helps stabilize the egg whites during whipping, making them stronger and less likely to collapse. It also plays a role in creating that desired crisp shell and tender, slightly tangy interior, balancing the sweetness.
While you might encounter slight variations in ingredient ratios or additional flavors across different recipes, this classic combination has proven to consistently deliver the most perfect pavlova. It’s a simple formula that yields incredible results, making it an ideal choice for both seasoned bakers looking for a reliable recipe and curious beginners eager to try their hand at this impressive dessert.
Crafting Your Strawberry Lemon Curd Pavlova: A Step-by-Step Guide to Perfection
Creating this stunning strawberry lemon pavlova is a rewarding process, and it all begins with the incredible flavor boost from the curd. Follow these detailed steps to achieve pavlova perfection:
Step 1: Prepare Your Star – The Strawberry Lemon Curd
The first and most crucial step is to have your vibrant strawberry lemon curd ready. Ideally, you’ll want to prepare this bright and tangy component a day in advance. This allows it ample time to cool completely and thicken to the perfect rich consistency, ensuring it holds beautifully on top of your delicate meringue without seeping into the shell. The vibrant flavor of fresh strawberries combined with the zesty kick of lemon makes for an unparalleled pairing with the sweet meringue and rich, cool cream.
Step 2: Essential Meringue Preparations
For the pavlova itself, a little preparation goes a long way. Start with room temperature egg whites. This is not just a suggestion; it’s a golden rule for successful meringue! Room temperature egg whites whip up with significantly more volume and stability compared to cold ones, resulting in a lighter, fluffier meringue that holds its shape better. While some might try using boxed egg whites, most experienced bakers will tell you they simply don’t yield the same superior structure and texture as fresh egg whites.
Next, ensure your sugar is truly super-fine. Granulated sugar, if too coarse, can sometimes leave a gritty texture in the finished meringue because it doesn’t fully dissolve. My personal trick for achieving ultra-fine sugar is to use castor (berry) sugar and give it a quick pulse in a food processor or blender for about 30 seconds. This extra step guarantees the sugar dissolves smoothly into the egg whites, contributing to that desirable glossy finish and a perfectly smooth, non-gritty texture.
Step 3: Whipping to Perfection – The Meringue Base
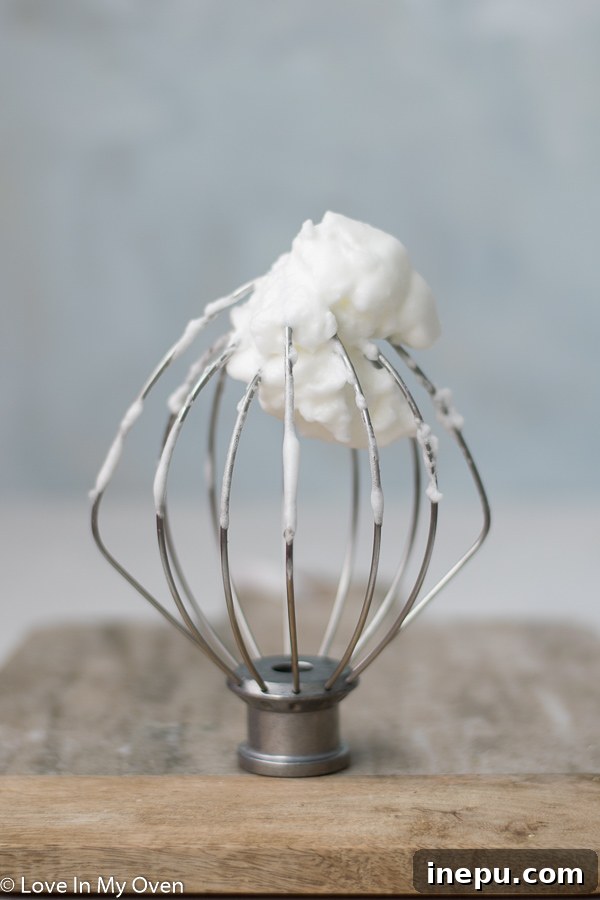
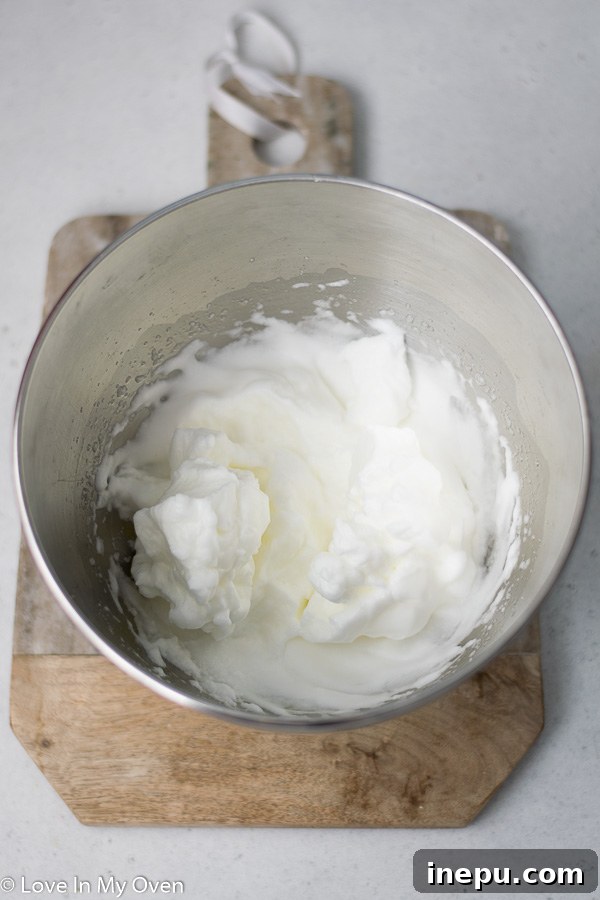
In the impeccably clean bowl of a stand mixer fitted with a whisk attachment (ensure it’s completely grease-free, as even a tiny speck of fat can prevent egg whites from whipping!), begin whipping your room temperature egg whites on high speed. Watch closely as they transform. Initially, they’ll become foamy and bubbly, then gradually thicken. Continue whipping until soft peaks begin to form. At this stage, when you lift the whisk, the peaks will stand but gently fold over at the tips, much like a soft, fluffy cloud. The volume should have visibly tripled.
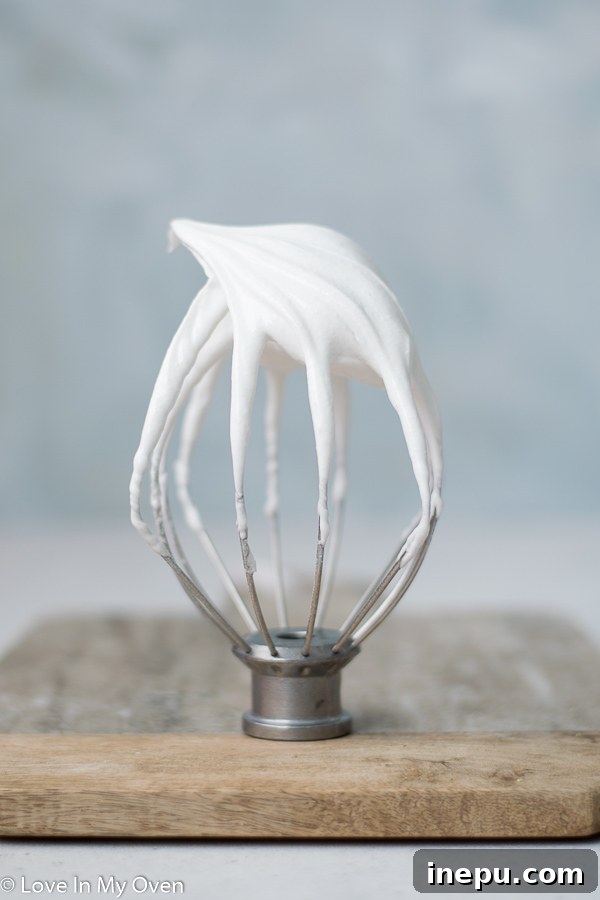
With the mixer still running, but now on a low speed, gradually add the super-fine sugar, a tablespoon at a time. This slow addition is vital! Don’t rush this step, as allowing the sugar to incorporate slowly helps it dissolve completely and build a stable, robust meringue. Once all the sugar is added, increase the mixer speed back to high. Continue whipping until the meringue becomes incredibly smooth, thick, and wonderfully glossy. You’re looking for stiff, firm peaks that hold their shape without drooping when the whisk is lifted. A simple, reliable test: rub a small amount of meringue between your thumb and forefinger – it should feel silky smooth, with no grittiness from undissolved sugar. This is known as the “no grit” test and indicates a perfectly stable meringue.
Step 4: The Finishing Touches for Texture and Stability
Now, gently fold in the cornstarch and white wine vinegar. These additions are crucial for achieving the classic pavlova texture: a perfectly crisp shell and a tender, slightly chewy interior. The cornstarch helps create that desirable soft, marshmallowy center, while the vinegar contributes to the meringue’s stability and a slight tang. Give the mixture just a few turns with a spatula to evenly distribute them without deflating the beautiful volume you’ve meticulously built. Overmixing at this stage can lead to a less airy final product.
Step 5: Shaping Your Pavlova Masterpiece
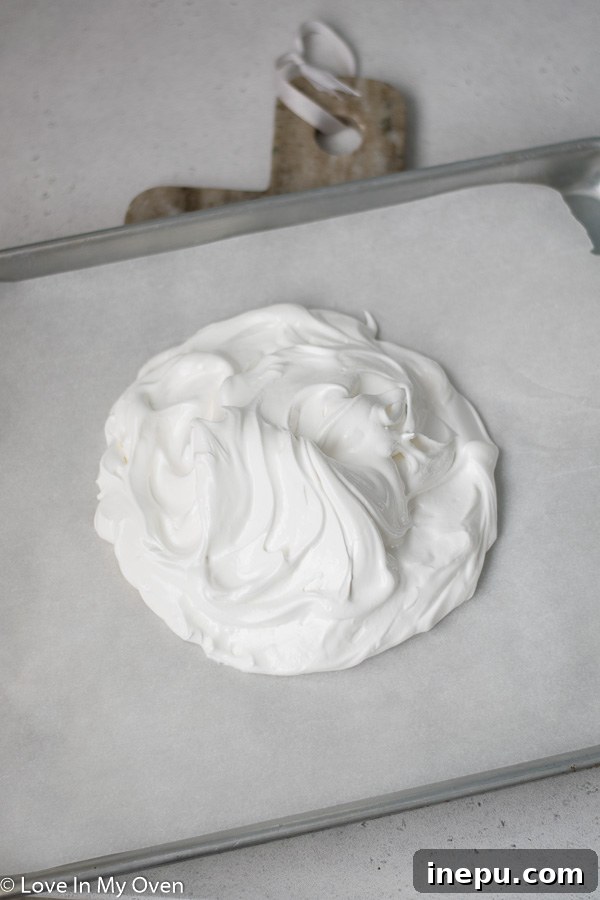
Line a large baking sheet with parchment paper. Carefully spoon the glossy meringue onto the center of the parchment. Using your fingers or a spatula, gently form the meringue into a round shape, aiming for a diameter of about 8-9 inches (20-23 cm). You can create a slight well in the center – like a beautiful bird’s nest – which will beautifully hold your generous toppings later. Smooth out the sides as much as possible for an elegant finish. Remember, the pavlova will puff up in the oven, so account for that when considering its initial height and shape; it will rise, but the general form will be maintained.
Step 6: The Art of Baking and Cooling for a Perfect Crisp
Preheat your oven to 350°F (175°C). Once your pavlova is shaped and ready, place it into the preheated oven. Immediately, and without delay, reduce the oven temperature to 300°F (150°C). This initial blast of high heat helps to quickly form a delicate crust, while the subsequent lower temperature allows the meringue to bake slowly and dry out evenly without browning too quickly or cracking excessively.
Bake for 1 hour and 15 minutes. This next instruction is critically important: Do NOT open the oven door during the entire baking time! Resist the powerful urge to peek! Opening the door, even for a moment, can cause a sudden temperature drop, leading to cracks, a collapsed pavlova, or a chewy texture throughout. For the ultimate crispiness and stability, after the baking time is complete, turn off the oven but leave the pavlova inside the oven for at least 3 hours, or even up to 12 hours. The residual heat will continue to dry and crisp the meringue slowly and gently, preventing cracks and yielding that perfect, delicate texture.
Step 7: Assembling and Serving Your Dream Dessert
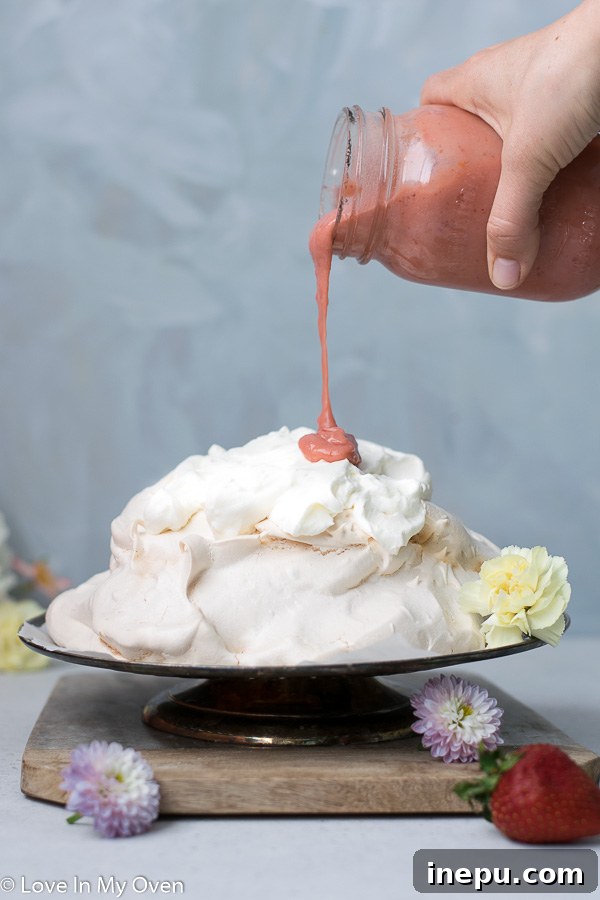
Once your pavlova is completely cooled and carefully removed from the oven, gently transfer it to a beautiful serving plate. Now comes the fun part: topping it! Start with a generous layer of freshly whipped cream. Then, spoon copious amounts of your vibrant strawberry lemon curd over the cream, letting its beautiful color and tang shine. For an extra touch of indulgence and visual appeal, you can add another dollop of whipped cream on top, or even some fresh fruit like sliced strawberries, raspberries, blueberries, or a sprig of fresh mint. The combination of sweet, crisp meringue, tangy fruit curd, and rich, creamy topping is simply divine. This fruit-topped pavlova is best enjoyed immediately to savor the perfect textural contrast!
Can You Prepare a Strawberry Lemon Curd Pavlova Ahead of Time?
One of the many benefits of this delightful dessert is its make-ahead potential, allowing you to minimize stress on the day of serving. However, there’s a crucial caveat when preparing a pavlova in advance to maintain its integrity and irresistible texture:
If you plan to make this easy pavlova recipe ahead of time, I highly recommend baking the meringue shell and storing it undecorated. Once completely cooled from the oven (following the long, slow cooling process), carefully transfer it to a large airtight container. Keep it at room temperature, away from any moisture or humidity, which can quickly turn a crisp meringue soggy. Stored this way, an undecorated pavlova shell will remain crisp and delicious for 2-3 days. In fact, some argue that allowing it to sit for a day or two further dries out the shell, enhancing its crispiness even more!
The key is to not add the strawberry lemon curd or whipped cream (or any other moist toppings like fresh fruit) until just before serving. Ideally, this means no more than an hour or two before you plan to present it. Adding the toppings too soon will cause the meringue to absorb moisture, leading to a soggy, soft texture that completely loses its signature crispness and delicate appeal. Prepare your curd and whip your cream separately, keep them chilled, and assemble your pavlova as the grand finale right before your guests arrive.
This light and airy dessert is an absolutely terrific choice for Easter dessert, Mother’s Day brunch, or really, any special occasion throughout the spring and summer. Its elegant appearance and refreshing nature ensure that even after a hearty meal, everyone will still have room for this delightful treat. My family, especially the boys, absolutely adored this strawberry lemon version, and I have a feeling it will be making frequent appearances on our dessert menu! It’s such a refreshing and elegant dessert that truly hits all the right notes without leaving you feeling heavy.
Happy baking, and enjoy your delicious creation! This pavlova is more than just a dessert; it’s a celebration on a plate.
More Delicious Curd Recipes and Easter Dessert Ideas
If you’ve fallen in love with the bright, tangy flavors of homemade curd, or you’re simply looking for more delightful inspiration for your next sweet creation, check out these other fantastic recipes from our collection:
- Lemon Coconut Cheesecake: A delightful blend of zesty lemon and tropical coconut flavors baked into a creamy, decadent cheesecake, perfect for a special occasion.
- Grain-Free Chocolate Coconut Tart: Rich, intensely chocolatey, and wonderfully satisfying, this tart is perfect for those seeking a gluten-free indulgence without compromising on flavor.
- Meyer Lemon Curd: Discover the unique charm of Meyer lemons, which offer a sweeter, less tart lemon curd with a distinct floral aroma, making it incredibly versatile.
- Cranberry Curd: A festive and tangy curd that’s wonderful for holiday baking, spreading on scones, or adding a vibrant burst of color and flavor to any dessert.
Print Recipe
Strawberry Lemon Curd Pavlova
5 Stars
4 Stars
3 Stars
2 Stars
1 Star
5 from 4 reviews
- Author: Katherine | Love In My Oven
Total Time: 6 hours
Yield: 4–5 servings 1x
Description
Fluffy and light, this airy strawberry lemon curd pavlova is the easiest dessert you can make! Tasty meringue topped with delicious strawberry lemon curd and a mountain of whipped cream!
Ingredients
Scale
- 4 egg whites, room temperature
- 1 cup super-fine sugar*
- 1 1/2 tsp cornstarch
- 1 tsp white wine vinegar
- 1/2 cup strawberry lemon curd
- 1 cup whipped cream, for serving
Instructions
- Preheat the oven to 350 F (175 C) and line a baking sheet with parchment paper. Set aside.
- In the bowl of a stand mixer, whip the egg whites on high until soft peaks begin to form. The egg whites should have tripled in size, look foamy, and form soft peaks that fall over after formed.
- With the mixer running on low, slowly add the super-fine sugar. Turn the mixer up to high and whip until the egg whites are glossy and smooth, and form stiff, firm peaks that do not fall over when formed. Pinch the mixture together with your fingers; if it is still gritty feeling, mix a bit longer until smooth.
- Add the cornstarch and white wine vinegar and give the meringue mixture a few turns with a spatula to combine. Pile the meringue onto the center of the prepared baking sheet, using a spatula or your fingers to form it into a smooth, round mound with a slight well in the center. Keep the top of the pavlova fairly flat, which will ensure the toppings don’t slide off!
- Place the pavlova in the oven, and immediately turn the temperature down to 300 F (150 C). Bake the meringue for 1 hour and 15 minutes. Do not open the oven door while the pavlova is baking. Turn the oven off after the bake time is up, then leave the pavlova inside the oven for at LEAST 3 hours, but ideally up to 12 hours. The longer it stays inside the oven untouched, slowly cooling, the crispier it will be and the less likely to crack!
- Once completely cooled, and just before serving, carefully place the pavlova onto a serving plate. Top with half the whipped cream, followed by the strawberry lemon curd, then the remainder of the whipped cream. For an extra flourish, you can garnish with fresh strawberries or mint leaves. Serve immediately for the best texture.
A cooked pavlova shell that has not been decorated with curd yet can remain at room temperature, covered in an airtight container, for 2-3 days. If you’re making the pavlova ahead of time, do not add the curd and whipped cream until just before serving to maintain its crispness.
Notes
*To ensure my sugar is super-fine and dissolves perfectly, I use castor sugar and grind it up a bit more in a food processor until it is very, very fine. This prevents a gritty meringue.
**If you would prefer your pavlova to be a bit chewier on the inside, bake it for 55 minutes instead of 1 hour 15 minutes. Regardless of bake time, always allow the pavlova to cool down for at least 2-3 hours in the oven (after turning it off) before removing it. This gradual cooling is key to preventing cracks and achieving the desired texture.
- Prep Time: 30 minutes
- Cook Time: 1 hour 15 minutes
- Category: desserts
- Method: oven bake
- Cuisine: Australian