

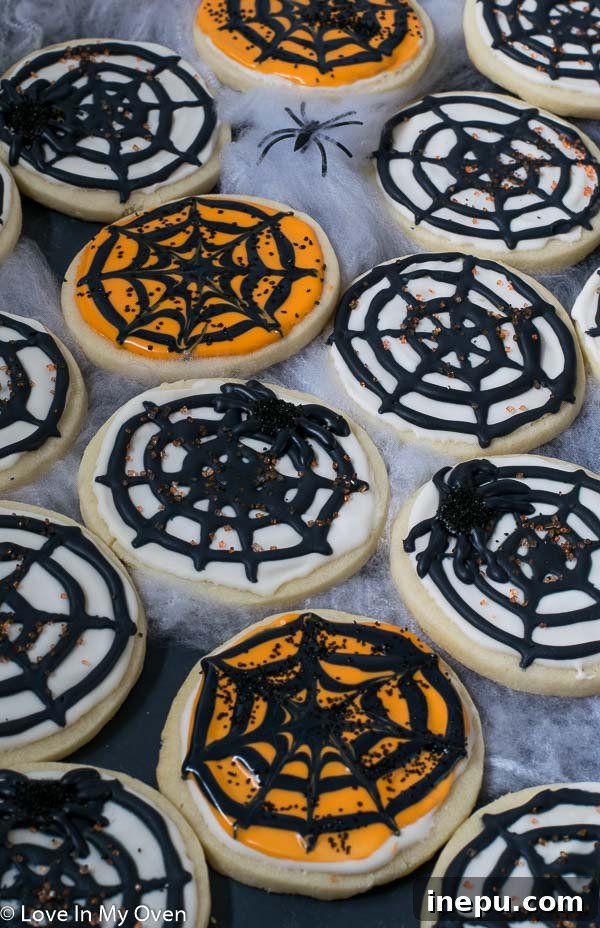
Transform your Halloween baking with these incredibly easy cream cheese cookies, creatively designed as charming spiderwebs! They’re simple Halloween cookies guaranteed to bring a delightful, spooky twist to your celebration.

*Please note* this post contains affiliate links that may earn me a small commission, at no extra cost to you.
As the leaves begin to fall and a crisp chill fills the air, our thoughts turn to all things spooky and sweet. Halloween, with its enchanting blend of costumes, decorations, and treats, is a favorite for many. This year, ditch the store-bought sweets and create something truly memorable with these easy-to-make spiderweb cream cheese cookies. While the holiday sometimes creeps up faster than expected, these delightful cookies are so straightforward that even a last-minute bake session will yield impressive results. Get ready to impress your family and friends with a unique, homemade treat that perfectly captures the spirit of Halloween!
Unlike traditional sugar cookies, which can sometimes be a bit too plain, these cream cheese cookies offer a rich, soft, and slightly tangy flavor profile that’s truly irresistible. The addition of cream cheese transforms an ordinary cookie into an extraordinary one, providing a melt-in-your-mouth texture that will have everyone reaching for more. When paired with a simple royal icing and a clever spiderweb design, these cookies become not just a treat, but a festive work of art. They are the perfect balance of deliciousness and visual appeal, making them an ideal choice for Halloween parties, school events, or simply a fun baking project with the kids.
If you’ve never experienced the magic of a cream cheese cookie, prepare for a delightful surprise. The subtle tang of cream cheese beautifully complements the sweetness of the cookie, creating a balanced flavor that’s hard to resist. Beyond their taste, the cream cheese contributes to an exceptionally tender and moist texture, ensuring that each bite is wonderfully soft and chewy. These aren’t your average crunchy cookies; they offer a delightful softness that lingers, making them a standout addition to any dessert spread.
Crafting Perfect Cream Cheese Cookie Dough
The foundation of these amazing spiderweb cookies is a simple yet flavorful cream cheese dough. The key ingredients are straightforward: butter, cream cheese, sugar, flour, and a few essential extracts to enhance the flavor. For the best results, ensure your butter and cream cheese are at room temperature. This is crucial for achieving a smooth, well-combined mixture, free of lumps, which will contribute to a uniform and tender cookie.
Begin by creaming together the softened butter, cream cheese, and granulated sugar until the mixture becomes light, fluffy, and smooth. This aeration process is vital for the cookie’s texture. Next, incorporate the egg, followed by pure vanilla and almond extracts. These extracts add depth and warmth to the cookie’s flavor, making them even more delectable. Mix these wet ingredients thoroughly until everything is well combined and fragrant.
In a separate bowl, whisk together your dry ingredients: all-purpose flour, baking powder, and a pinch of salt. Gradually add the dry mixture to the wet ingredients, mixing on a low speed until just combined. Overmixing the dough can lead to tough cookies, so stop as soon as no streaks of flour remain. A stand mixer with a paddle attachment works wonderfully for this, but a handheld electric mixer is also perfectly suitable for the task.

Once your dough is prepared, it’s essential to chill it for at least one hour. This chilling period is not just for convenience; it’s a critical step that prevents the cookies from spreading too much during baking and helps them maintain their festive shapes. To make the process even smoother, divide the dough into two disks, wrap them tightly in plastic wrap, and place them in the refrigerator. Alternatively, for same-day baking, roll out the dough to an even 1/4-inch thickness between two sheets of parchment paper before chilling. This ingenious trick allows you to cut your cookies immediately after chilling, saving valuable time and effort. You can stack the rolled sheets of dough in the fridge to conserve space.
Pro tip: Consider investing in an adjustable rolling pin. These clever tools allow you to set the exact thickness for your dough by swapping out rings on the ends, ensuring every cookie is uniformly thick and bakes evenly. It’s a true game-changer for consistent results and perfect cookies every time. You can find the one I use here.
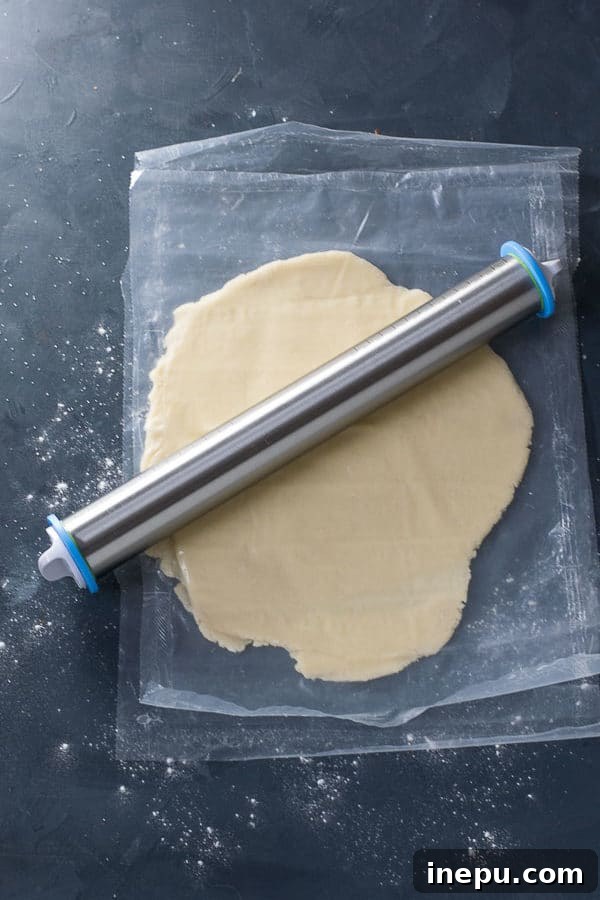
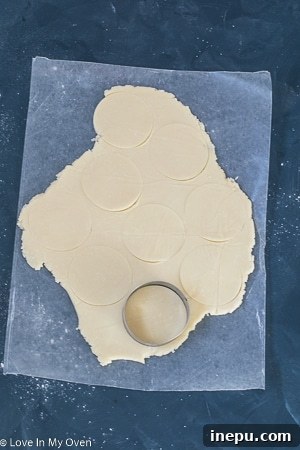
After the dough has been sufficiently chilled (from one hour up to three days for convenience), remove it from the refrigerator. If you pre-rolled your dough, you can immediately begin cutting out your cookie shapes. For our spiderweb design, a simple round cookie cutter is perfect, but feel free to experiment with other Halloween-themed shapes like pumpkins or ghosts. If you’re working with a disk of dough, quickly roll it out to 1/4-inch thickness. Should the dough become too soft or sticky during cutting, simply pop it back into the fridge for 15-20 minutes to firm up. Trust me, a well-chilled dough is the secret to beautifully shaped cookies that hold their form and don’t spread excessively in the oven.
Baking Your Cream Cheese Cookies to Perfection
Baking these cream cheese cookies requires a keen eye and precise timing to ensure they achieve that coveted soft, tender texture. For cookies rolled to 1/4-inch thickness, a baking time of 9-10 minutes is typically ideal. The trick is to remove them from the oven when the edges are just barely beginning to turn golden brown. The centers may still appear slightly under-baked, but this is exactly what you want! The residual heat from the baking sheet will continue to cook them gently for another minute or two, resulting in perfectly soft and chewy cookies. Overbaking, even by a minute, can lead to dry, firm cookies, so it’s always better to err on the side of slightly under-baked for ultimate tenderness.
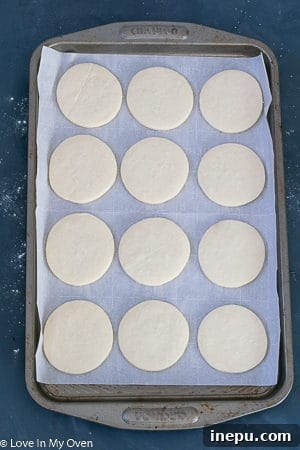
Once the cookies are out of the oven, allow them to cool on the baking sheet for about 5-10 minutes. This allows them to firm up slightly before you transfer them to a wire rack to cool completely. It’s crucial that the cookies are entirely cool before you begin the exciting part of decorating them with royal icing. Warm cookies will cause the icing to melt or run, ruining your beautiful spiderweb designs.
Mastering Royal Icing for Your Spooky Creations
Royal icing is the perfect choice for cookie decorating because it dries to a hard, smooth finish, allowing for intricate designs and easy stacking without smudging. While my recipe calls for raw egg whites, which yield a beautiful sheen and strong structure, you have alternatives if you’re concerned about using raw eggs. You can certainly use your favorite royal icing recipe made with meringue powder or even pasteurized egg whites, which are readily available and eliminate any salmonella concerns. The key is to achieve the right consistency for your decorating needs.
When preparing your royal icing, you’ll want to adjust its thickness. For outlining and detail work, a slightly thicker consistency is ideal, holding its shape well. For flooding the cookies (filling in the outlines), a thinner, more runny consistency is necessary. You can thin the icing by adding tiny amounts of water, stirring well after each addition until you reach your desired flow. Conversely, if your icing is too thin, you can thicken it by adding a bit more powdered sugar. For the spiderweb design, a relatively runny consistency for the white base is best, as it allows the black dots to spread and blend seamlessly.
Once you’ve achieved the desired consistency, divide your icing. Keep about half white for the base, and color the other half black using gel food coloring. I highly recommend using gel food coloring over liquid dyes. Gel colors are highly concentrated, providing vibrant, deep hues without significantly altering the icing’s consistency. This means your black will be a true, rich black, perfect for a spooky spiderweb. These gel colors from Wilton are excellent.
If you’re not planning to ice your cookies immediately, royal icing can be stored in an airtight container in the refrigerator for several days. Before using it again, you may need to stir it well and add a small amount of water to loosen it back to the desired consistency.

Creating the Spooky Spiderweb Design on Your Cookies
The spiderweb design, while looking intricate and professional, is surprisingly simple to achieve and incredibly fun! Even novice decorators can master this technique with ease. Here’s a step-by-step guide to help you create stunning spiderweb cookies:
- **Base Layer:** Begin by flooding the entire surface of a completely cooled cookie with the white royal icing. You can use a piping bag with a small round tip or a squeeze bottle for this. Ensure the white icing is still wet and fresh for the next step.
- **Black Dots & Circles:** Immediately after applying the white base, pipe a single black dot directly in the center of the cookie. Then, working outwards from the center, pipe three concentric black circles around the central dot, leaving approximately a 1/2-inch gap between each circle. Speed is key here, as the wet-on-wet technique is what creates the feathered web effect.
- **Dragging the Web:** Without delay, take a clean toothpick or a scribe tool. Starting from the center black dot, gently drag the toothpick outwards through all the black circles towards the outer edge of the cookie. Repeat this process, dragging the toothpick from the center to the edge at various points around the cookie, creating radial lines that form the classic spiderweb pattern. Aim for 6-8 lines for a balanced web.
- **Optional Sprinkles:** If desired, add festive Halloween sprinkles onto the wet icing immediately after creating the web design. This ensures they adhere properly as the icing dries.
See the visual steps below for a clear demonstration!




Once the icing has completely set and dried (this can take several hours, or even overnight, depending on humidity), your beautiful spiderweb cookies are ready to be stored in an airtight container until you’re ready to serve them. For an extra touch of spooky fun, try adding a small dollop of black icing on a few cookies, covering it with black sprinkles, and then piping thin black lines for legs to create instant edible spiders! These little creepy-crawlies will be the perfect complement to your spiderweb creations.
While these cookies are undeniably perfect for Halloween, the versatility of this cream cheese cookie recipe extends far beyond just one holiday. The rich, soft, and flavorful base cookie is fantastic for any occasion. Imagine them decorated for Christmas with festive colors and sprinkles, or for a birthday party with cheerful designs. The cream cheese truly elevates the cookie, making it a delicious canvas for any creative decorating idea you can dream up.
In fact, these cream cheese cookies are so delicious and adaptable, they recently became a staple for Wally’s preschool Halloween party. After creating the initial batch of spiderweb wonders, I whipped up another batch and transformed them into adorable pumpkin-shaped cookies. Decorating those was incredibly enjoyable – and certainly much tidier than carving an actual pumpkin! They were a hit with all the little ghouls and goblins.
Happy Halloween, and happy baking!


Looking for more Halloween treat inspiration? Don’t miss these spooktacular Halloween cake pops!
And if you’re a cookie enthusiast, here are some other favorite recipes:
- Pumpkin Cake Cookies
- Browned Butter Reese’s Pieces Cookies
- Vanilla Bean Cookie Pops
Print Recipe

Spiderweb Cookies
5 Stars 4 Stars 3 Stars 2 Stars 1 Star
5 from 8 reviews
Author: Katherine | Love In My Oven
Total Time: 1 hour
Yield: 2 dozen cookies
Description
These easy cream cheese cookies are made a little extra fun by turning them into spiderweb cookies! They’re easy Halloween cookies that are sure to delight!
Ingredients
Scale
Cookies
- 1 cup unsalted butter, room temperature
- 2 oz full-fat cream cheese, room temperature
- 1 cup granulated sugar
- 1 egg, room temperature
- 1 tsp pure vanilla extract
- 1/2 tsp almond extract
- 3 cups all-purpose flour
- 1 1/2 tsp baking powder
- 1/2 tsp salt
Royal Icing
- 3 egg whites
- 2 1/2 cups powdered sugar
- 1/2 tsp cream of tartar
Instructions
- Prepare the cookie dough. In the bowl of a stand mixer fitted with the paddle attachment, or using a handheld electric mixer, combine together the butter and cream cheese on high, until smooth, about 2 minutes. Add the sugar and beat for an additional minute. With the mixer running on low, add the egg, followed by the extracts, and beat for an additional minute.
- In a separate mixing bowl, whisk together the flour, baking powder and salt. Add the dry ingredients to the wet, adding half first and mixing on slow, then adding the other half. Mix until just incorporated.
- If you will not be baking the cookies the same day, divide the dough into two and shape into discs, wrapping tightly in plastic wrap and storing in the fridge. Cookie dough can be kept in the fridge for 1 hour to 3 days. If you will be baking the cookie later that day, divide the dough into two and place one half on top of a large sheet of parchment paper. Place another piece of parchment paper on top, and roll out the dough to a 1/4″ thickness. Repeat with the second half of dough, with additional parchment paper. Place the rolled out dough in the fridge to chill, for at least 1 hour but no more than 4 hours.
- Bake the cookies. Preheat the oven to 350 F and line two large baking sheets with parchment paper. Working quickly, remove the dough from the fridge and roll out to 1/4″ thickness, or, if you are using the pre-rolled dough, cut your cookies using a cookie cutter and place the unbaked cookies on the prepared baking sheets, about 1″ apart. Roll the excess dough and repeat.
- Bake the cookies for 9-10 minutes. Remove them from the oven when the outsides are just beginning to brown, but the tops look slightly under-baked. They will continue to bake for an additional minute or two on the hot cookie sheet. Allow the cookies to cool for 10 minutes on the pan before removing them to a wire rack to cool completely.
- Prepare the icing. In the bowl of a stand mixer fitted with the paddle attachment, or using a handheld mixer, beat together the egg whites, powdered sugar and cream of tartar. Add a touch more powdered sugar to thicken up the icing, or a few teaspoons of water to thin it out. Add gel coloring to the mixing bowl, or remove icing to separate bowls and add the color then, using a whisk to incorporate it. If you aren’t using the icing right away, be sure to keep it carefully covered to avoid it hardening!
- Ice the cookies using the spiderweb pattern as shown in the blog post above, or however way you’d like to ice them. Allow the icing to set before storing the cookies.
Cookies will keep in an airtight container, at room temperature, for 4-5 days. You can also store them in the freezer, in an airtight container, for up to 2 months.
Notes
*You can use light cream cheese too, but be sure not to use the spreadable kind from a tub.
**You may have to add more or less powdered sugar, to achieve the desired consistency. You want it to dribble from the spoon fairly easily. Try some on a test cookie before removing all of the icing to your piping bag/squeeze bottle. You can also use a bit of water to thin the consistency.
***If the cookie dough is beginning to soften while you’re rolling and cutting, place the dough back in the fridge for about 20 minutes to firm up again.
- Prep Time: 40 minutes
- Cook Time: 20 minutes