
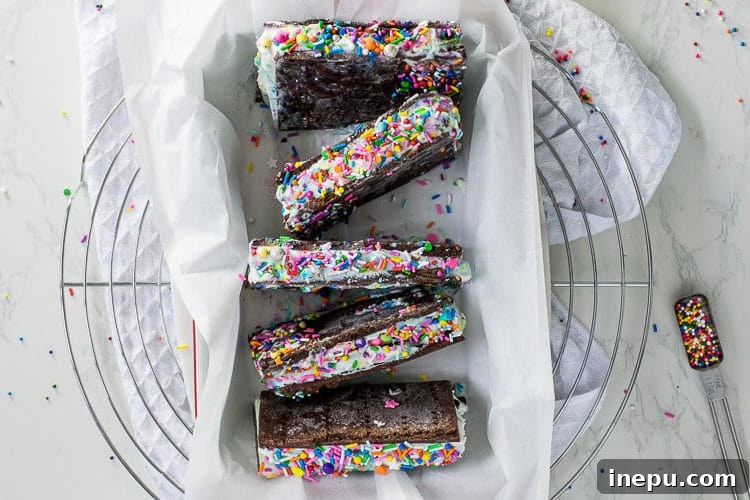
Prepare to impress! These aren’t just ice cream sandwiches; they’re an experience. With every delightful bite, you’ll discover why these are unequivocally the BEST Birthday Cake Ice Cream Sandwiches you’ve ever tasted. Serve them at your next celebration, and you’ll instantly become the coolest host on the block, guaranteed!
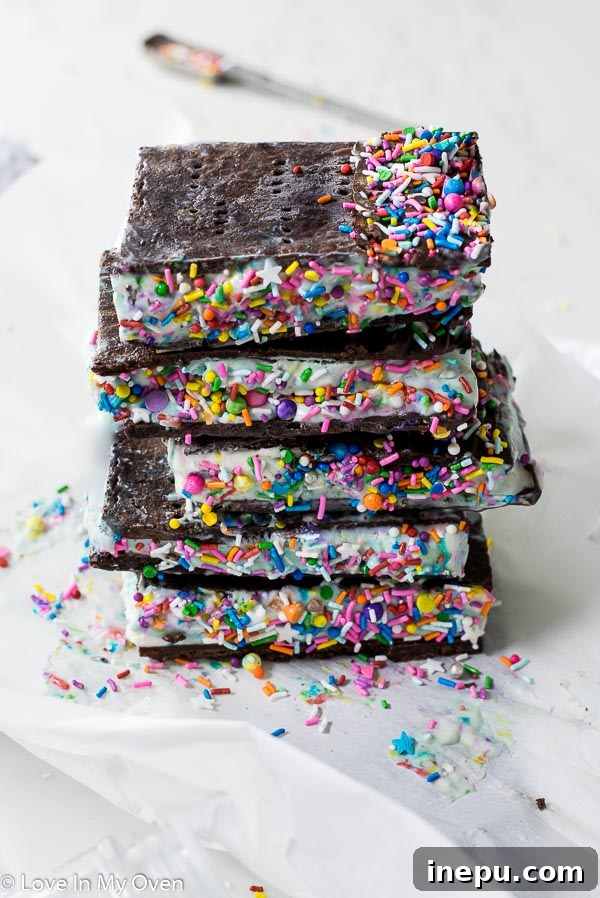
There’s something inherently magical about an ice cream sandwich. It’s a nostalgic treat that takes you back to childhood summers, a simple yet perfect combination of cool, creamy ice cream nestled between two soft, chewy cookies. But what if we told you there’s a way to elevate this classic to an entirely new level of deliciousness? Enter the Birthday Cake Ice Cream Sandwich – a vibrant, fun, and unbelievably tasty twist on a beloved dessert that will captivate your taste buds and leave you wanting more. Seriously, these are truly the best!
Many of us grew up with those iconic ice cream sandwiches from dairy shops, featuring a delightful soft chocolate cookie hugging smooth vanilla ice cream. They were a staple of warm afternoons and a simple pleasure. This recipe pays homage to that beloved classic but injects it with an extra dose of excitement and festivity. Imagine that same irresistible soft chocolate cookie, perfectly rich and slightly messy in the best possible way, but instead of traditional vanilla, it cradles a vibrant, sprinkle-studded, cake-flavored ice cream. It’s a flavor explosion that’s both comforting and exhilarating!
The star of this show, without a doubt, is our homemade no-churn birthday cake ice cream. If you remember that incredible recipe from a few weeks ago, you know exactly what we’re talking about. It’s creamy, sweet, bursting with vanilla cake flavor, and generously speckled with colorful sprinkles – making every bite a celebration. The beauty of a no-churn recipe is its simplicity; you don’t need an expensive ice cream maker to achieve professional-level results. Just a few ingredients and a little patience are all it takes to create a creamy, dreamy base for these sensational sandwiches.
This recipe was initially teased during a fun #summerfunweekcollab dedicated entirely to ice cream, and it quickly became a fan favorite. After indulging in so many sweet creations for the collaboration, my family might be due for a dentist visit, but every single bite of these sandwiches was worth it!
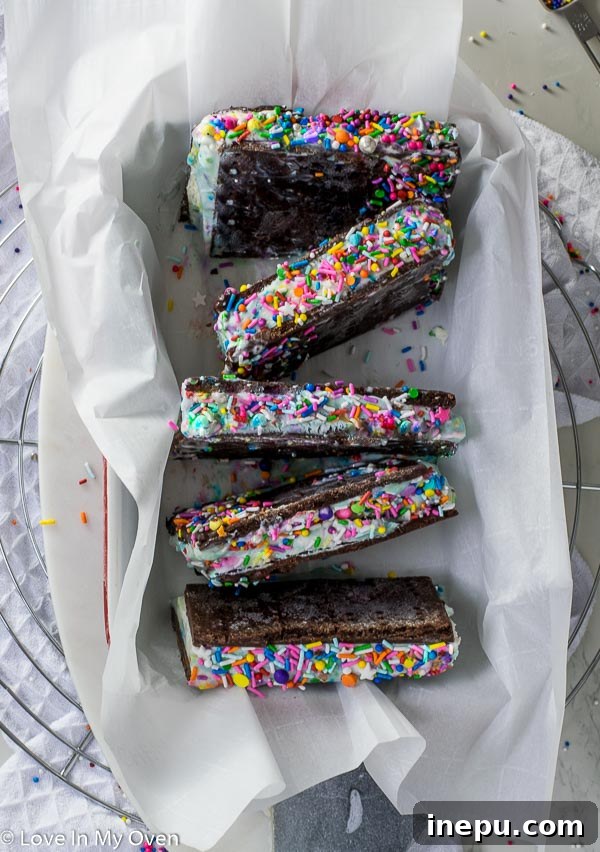
Crafting the Ultimate Birthday Cake Ice Cream Sandwiches: A Step-by-Step Journey
Creating these extraordinary ice cream sandwiches is an enjoyable process, though it does require a bit of planning and patience. Since you need the ice cream to be perfectly frozen before assembly, this endeavor often spans two days. Think of it as a labor of love that yields an incredibly rewarding treat. The recipe itself involves a few distinct freezing phases, ensuring optimal texture and stability for both the ice cream and the final sandwich.
The beauty of this recipe also lies in its versatility. While the birthday cake flavor is undeniably festive and delicious, you can absolutely substitute it with any of our other fantastic no-churn ice cream flavors. We’ve linked several delightful options at the bottom of this post, ranging from fruity to chocolatey. And for those times when you need a shortcut, feel free to use your favorite high-quality store-bought ice cream – just make sure it’s a flavor that complements rich chocolate cookies!
Once your chosen ice cream is prepared and fully frozen, it’s time to shift our focus to the equally important component: the cookies. For these sandwiches, we’re using a specific recipe and method that guarantees a wonderfully soft, chewy, and decadent chocolate cookie. The inspiration for this cookie comes from a recipe I encountered in a magazine by the acclaimed chef Christine Cushing, so you know you’re in for a treat. Her expertise ensures these cookies are not just good, but exceptional, providing the perfect counterpoint to the creamy ice cream filling.
The Cookie Perfection: Crafting the Chocolate Wrappers
The chocolate cookies are more than just a vessel; they are an integral part of the sandwich’s texture and flavor profile. A great ice cream sandwich cookie needs to be soft enough to bite through without the ice cream squishing out, yet sturdy enough to hold its shape. This recipe achieves that ideal balance, delivering a rich, deep chocolate flavor that perfectly complements the sweet and creamy birthday cake ice cream.
To start, you’ll cream together unsalted butter, granulated sugar, and brown sugar until light and fluffy. This step is crucial for incorporating air, which contributes to the cookies’ tender texture. Next, egg yolks and vanilla extract are added, enriching the dough and enhancing its flavor. In a separate bowl, all-purpose flour, cocoa powder, and salt are sifted together. Sifting ensures there are no lumps and helps distribute the ingredients evenly. These dry ingredients are then gradually added to the wet mixture, mixing just until combined to avoid overworking the dough, which can lead to tough cookies.
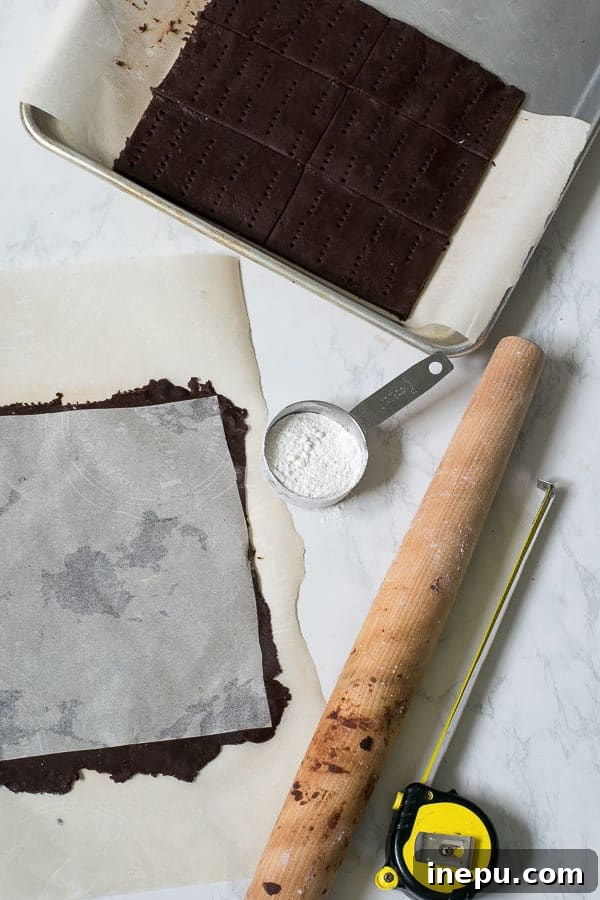
The dough for these cookies is intentionally a bit sticky, ensuring a soft, melt-in-your-mouth texture once baked. This is where a few simple techniques become incredibly helpful. Rolling the dough out directly onto a piece of parchment paper makes handling much easier and prevents sticking. Lightly flouring your rolling pin also helps tremendously. Precision is key when cutting the dough into even rectangles, as this ensures uniform sandwiches. A measuring tape can be surprisingly useful here, helping you achieve perfect dimensions. Once cut, the cookies are baked until just set, maintaining their softness. Crucially, allow them to cool completely before even thinking about adding the ice cream layer. Warm cookies and ice cream are a recipe for a melty, messy disaster!
Essential Tips for Flawless Ice Cream Sandwiches
Achieving ice cream sandwich perfection is all about attention to detail. These tips will guide you to success:
- Dough Handling: As mentioned, roll out the cookie dough directly onto a piece of parchment paper. This sticky dough benefits greatly from a lightly floured rolling pin. Don’t be afraid to add a little extra flour to your pin if needed.
- Precision Cutting: For uniform and professional-looking sandwiches, use a measuring tape or ruler before cutting the dough into even rectangles. This ensures each cookie half is the same size, making assembly much smoother.
- Complete Cooling: Patience is a virtue here. Ensure your cookies are entirely cooled to room temperature before attempting to add the ice cream layer. Any residual warmth will cause the ice cream to melt prematurely.
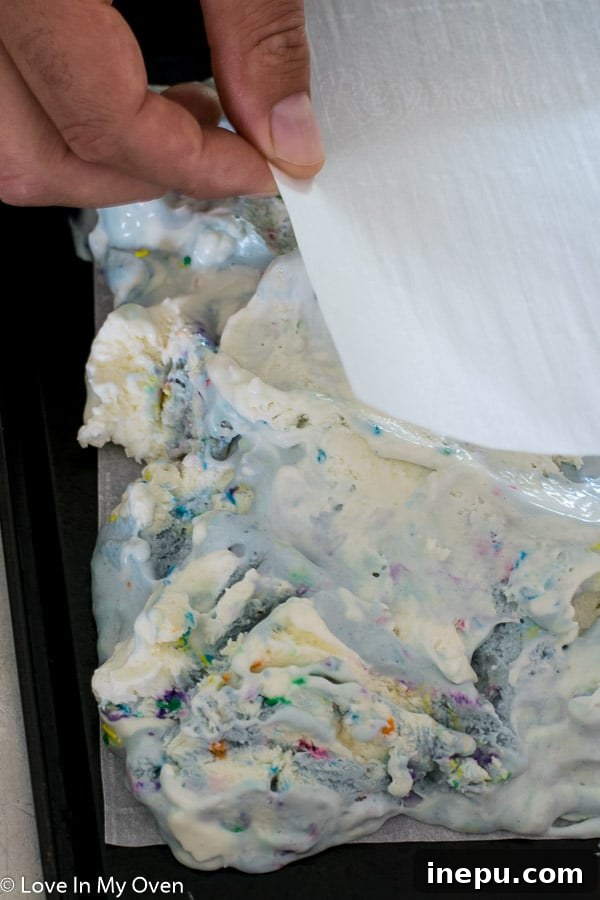
- Ice Cream Layer: This is a critical step. REALLY smooth out your partially thawed ice cream layer between two pieces of parchment paper before freezing it again. This creates an even slab of ice cream that can be easily cut to match your cookie size. The thinner and more uniform the layer, the better your sandwiches will look and hold together. Aim for about 1 inch thickness.
- Ingredient Temperatures: Ensure your butter is at room temperature for the cookies to cream properly. For the ice cream, a slight thaw in the fridge makes it pliable enough to spread, but not so soft that it becomes liquid.
- Don’t Overbake: For soft, chewy cookies, bake them just until the edges are set and the centers are still slightly soft. They will firm up as they cool. Overbaking will result in hard, brittle cookies that are difficult to bite through when frozen.
- Freezing Stages: Respect the freezing times. The initial freeze for the ice cream, the freeze for the ice cream slab, and the final freeze for the assembled sandwiches are all important for structural integrity.
Longevity and Presentation: Storing Your Sweet Creations
One of the many advantages of ice cream sandwiches is their excellent freezer-friendly nature. Properly stored, these delightful treats can last for a considerable amount of time, allowing you to enjoy them whenever a craving strikes or keep a stash ready for impromptu gatherings. While they’ve never lasted particularly long in our household (they’re just too good!), I’m confident that these sandwiches would remain delicious for up to two months when wrapped correctly.
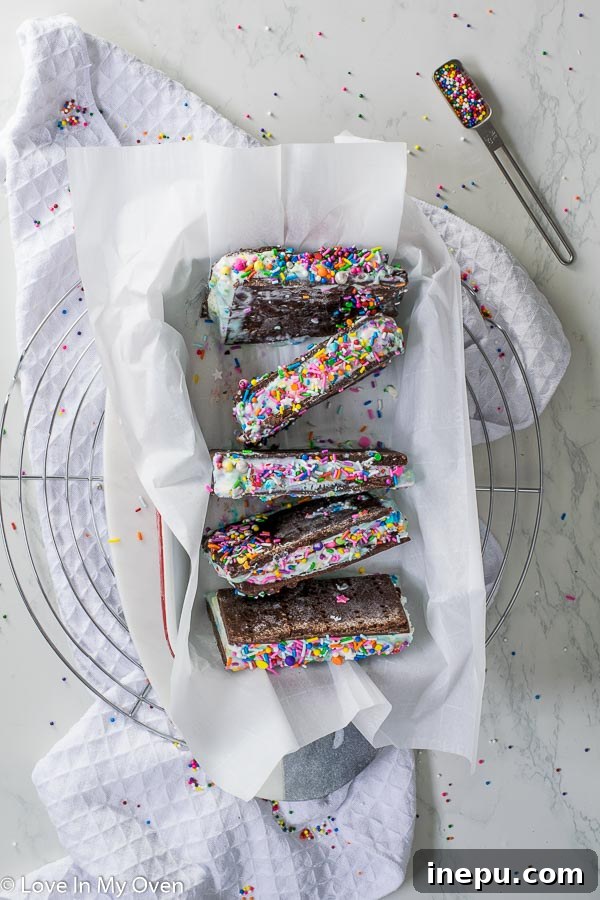
The key to long-term freezer storage is individual wrapping. I highly recommend wrapping each sandwich tightly in parchment paper. This individual wrapping serves multiple purposes: it protects the ice cream from freezer burn, prevents the cookies from drying out, and keeps flavors from mingling. Moreover, there’s something incredibly special and “treat-like” about unwrapping an individually portioned ice cream sandwich – it adds to the overall experience.
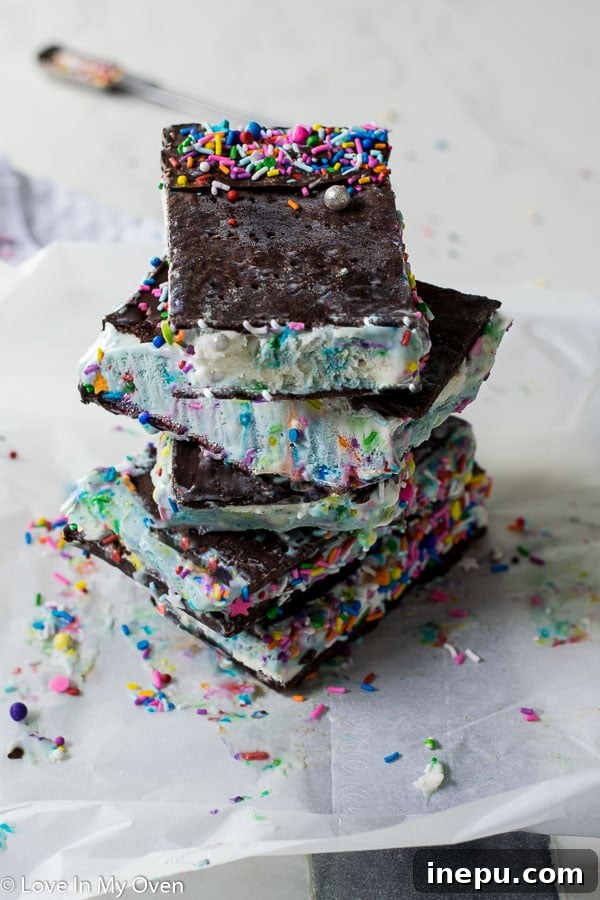
Now, for the fun part: decorating! While you can certainly get creative with your garnishes, if you’re embracing the birthday cake theme, I cannot stress enough how much sprinkles enhance the experience. The explosion of color and slight crunch adds another layer of joy to each bite. The trick is to apply the sprinkles immediately after you sandwich the cookies together. The slight stickiness of the freshly assembled sandwich will help the sprinkles adhere beautifully before the ice cream fully hardens. Other festive options include mini chocolate chips, finely chopped nuts, or even a drizzle of melted white chocolate.
If you decide to make these incredibly fun and delicious treats, be sure to share your creations! Tag me on Instagram @loveinmyoven. I absolutely adore seeing your culinary adventures and would love the chance to feature your magnificent birthday cake ice cream sandwiches!
Endless Possibilities: Customize Your Ice Cream Sandwich Experience
While the Birthday Cake Ice Cream Sandwiches are a showstopper, the fantastic chocolate cookie base in this recipe is incredibly versatile. It provides the perfect foundation for a myriad of other ice cream flavors, allowing you to experiment and create your own signature frozen treats. Think beyond the sprinkles and vanilla – the possibilities are truly endless!
Here are some of our favorite no-churn ice cream flavors that would pair exquisitely with these rich chocolate cookies:
- Rolo No-Churn Ice Cream: Imagine creamy caramel and chocolate chunks nestled between two chewy chocolate cookies. This combination offers a delightful interplay of sweet and salty, with varied textures that will tantalize your palate.
- Matcha No-Churn Ice Cream: For those who appreciate a more sophisticated and unique flavor, matcha ice cream provides an earthy, slightly bitter counterpoint to the sweet chocolate cookie. The vibrant green color also adds a beautiful visual contrast.
- Roasted Strawberry-Rhubarb No-Churn Ice Cream: This option brings a burst of seasonal fruitiness. The sweet and tart notes of roasted strawberry and rhubarb create a refreshing and complex flavor profile that brightens up the rich chocolate.
- Tiger Tail No-Churn Ice Cream: A Canadian classic, this orange and black licorice flavored ice cream offers a bold and distinctive taste. It’s a playful and unexpected pairing with the chocolate cookie, perfect for adventurous palates.
- Real Mint-Chocolate No-Churn Ice Cream: The timeless combination of cool, refreshing mint and rich chocolate is always a winner. This ice cream sandwich offers a classic flavor pairing that is both invigorating and deeply satisfying.
Beyond these suggestions, consider other cookie variations too! Peanut butter cookies for a chocolate-peanut butter ice cream sandwich, vanilla wafers for a lighter contrast, or even red velvet cookies for an extra decadent and colorful treat. The key is to select flavors that you love and enjoy the creative process of making your very own custom ice cream sandwiches. They are perfect for summer gatherings, birthday parties, or simply as a special treat to cool down on a warm day.
Birthday Cake Ice Cream Sandwiches
5 Stars 4 Stars 3 Stars 2 Stars 1 Star
5 from 14 reviews
Author: Katherine | Love In My Oven
Total Time: 8 hours
Yield: 4–6 sandwiches 1x
Description
Indulge in the ultimate frozen dessert! With just one bite, you’ll agree these are the BEST Birthday Cake Ice Cream Sandwiches ever. Perfectly soft chocolate cookies embrace a vibrant, sprinkle-filled birthday cake ice cream, creating a festive treat ideal for any party. Serve these at your next gathering and become the legendary host everyone talks about!
Ingredients
Scale
- 1 recipe no-churn birthday cake ice cream*
- 1/2 cup unsalted butter, room temperature
- 1/4 cup granulated sugar
- 1/4 cup packed brown sugar
- 2 large egg yolks
- 1/2 tsp pure vanilla extract
- 1 cup all-purpose flour
- 1/2 cup unsweetened cocoa powder
- 1/2 tsp salt
- Colorful sprinkles, chopped nuts, or mini chocolate chips for garnish
Instructions
- Prepare the Ice Cream: Begin by making your no-churn birthday cake ice cream (or your chosen flavor). Ensure it freezes for a minimum of 6 hours, or preferably overnight, to achieve a firm, scoopable consistency before proceeding to the cookie preparation.
- Make the Cookies: Preheat your oven to 350°F (175°C). In the bowl of a stand mixer fitted with the paddle attachment (or using a handheld mixer), beat the softened unsalted butter with both granulated sugar and brown sugar on medium speed for approximately 2 minutes, until the mixture is light and fluffy. Add the egg yolks and vanilla extract, then beat for another minute, scraping down the sides of the bowl to ensure everything is well combined.
- In a separate mixing bowl, sift together the all-purpose flour, cocoa powder, and salt. With the mixer running on low speed, gradually add the dry ingredients to the wet ingredients, mixing just until a cohesive dough forms. Do not overmix. Turn the dough out onto a lightly floured piece of parchment paper. Using your hands, gently shape the dough into a log. With a lightly floured rolling pin, roll the dough evenly into a rectangle approximately 3mm (about 1/8 inch) thick. Cut another piece of parchment paper to 7 1/2″ x 8″ and place it precisely over your rolled dough rectangle. Trim any excess dough from around the edges of this top parchment guide. Carefully peel off the top parchment paper. Using a measuring tape or ruler, cut the dough into either 4 large or 6 medium-sized even rectangles, but do not separate them yet. Gather all the dough scraps, gently re-form them into another rectangle of the same thickness, and cut into the same number of rectangles. You should have a total of 8 to 12 cookies. Prick each cookie several times with a fork to prevent excessive puffing during baking.
- Carefully transfer the parchment paper with the cookie rectangles onto a baking sheet. Bake for 10-11 minutes, or until the edges are just set and the centers remain slightly soft. Immediately remove from the oven and allow the cookies to cool completely on the baking sheet before handling.
- Prepare the Ice Cream Slab: Approximately one hour before assembly, transfer your frozen ice cream from the freezer to the refrigerator to allow it to thaw slightly until it’s spreadable but still very cold. Line a rectangular container or a large baking sheet (ensure it’s at least the size of your cookies) with parchment paper, leaving an overhang for easy removal. Scoop the slightly softened ice cream onto the parchment and use a spatula to spread it evenly to a thickness of about 1 inch. Place another piece of parchment paper on top and gently smooth it out completely to create a uniform slab. Freeze for an additional 30 minutes to 1 hour, until firm.
- Assemble the Sandwiches: Remove the firm ice cream slab from the freezer. Lift off the top layer of parchment paper. Carefully invert the ice cream slab onto one half of your cooled cookies. Using a sharp knife, cut through the ice cream to match the shape and size of the cookies underneath. Gently pull the cookie halves apart, placing an ice cream rectangle on one cookie and topping it with another cookie to form a sandwich. Immediately decorate the sides of each sandwich with sprinkles, chopped nuts, or mini chocolate chips while the ice cream is still slightly tacky. Wrap each finished ice cream sandwich individually in parchment paper and freeze for a final 2-3 hours, or until thoroughly firm.
These delightful ice cream sandwiches will keep beautifully in the freezer for at least two months when wrapped properly. While they are still safe to eat beyond this period, the texture of the ice cream may begin to show signs of deterioration.
Notes
*You are absolutely welcome to use a different no-churn ice cream recipe from our collection or a good quality store-bought ice cream. This recipe is designed to use approximately 1 small tub (about 2 lbs or 900g) of ice cream.
Note: The delicious chocolate cookie recipe is thoughtfully adapted from an excellent ice cream sandwich recipe I discovered in a magazine (unfortunately, the specific issue is unclear), credited to the talented Christine Cushing.
- Prep Time: 8 hours
- Cook Time: 10 minutes