
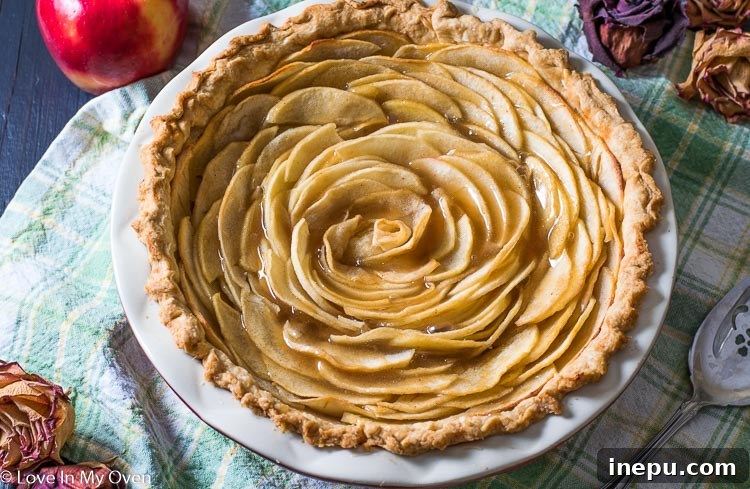
Elevate your dessert game with this truly exquisite Salted Caramel Apple Rose Pie. This visually stunning, open-faced apple pie isn’t just a feast for the eyes; it’s a symphony of flavors that will delight every palate!
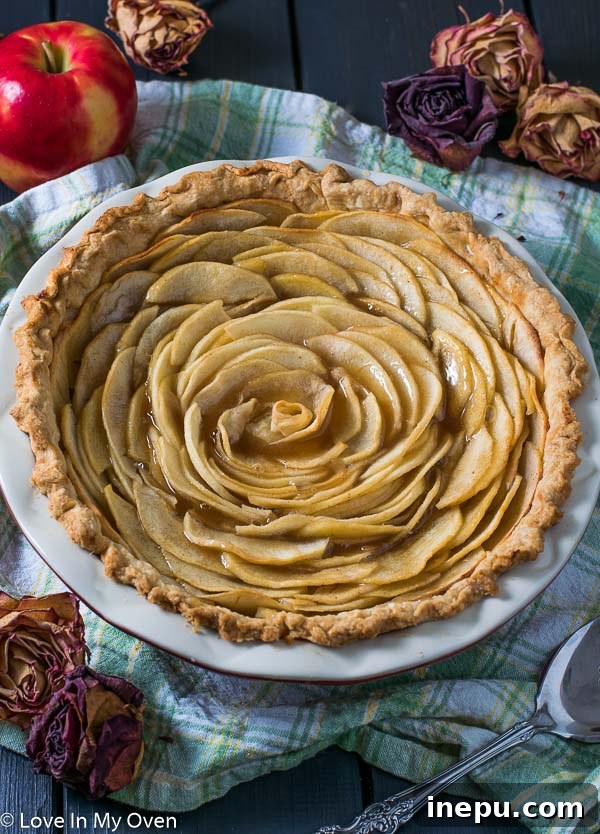
Salted Caramel Apple Rose Pie: The Ultimate Showstopper Dessert
Prepare to amaze your family and friends with a dessert that looks like it came straight from a gourmet bakery, but is surprisingly achievable in your own kitchen. Our Salted Caramel Apple Rose Pie combines the comforting, classic flavors of a homemade apple pie with the luxurious indulgence of rich salted caramel, all presented in a breathtaking floral design. This isn’t just a pie; it’s an edible work of art, perfect for holiday gatherings, special celebrations, or simply to make an ordinary day feel extraordinary.
Forget complicated lattice tops or intricate cut-outs; the beauty of this open-faced apple pie lies in its elegant simplicity. By arranging thinly sliced apples in a circular, overlapping pattern, you create a magnificent rose effect that’s both rustic and refined. Coupled with a tender, flaky crust and a decadent drizzle of warm, homemade salted caramel sauce, this pie promises an unforgettable experience from the first glance to the last delicious bite. It’s the ideal recipe to impress your guests and bring a touch of edible elegance to your dessert table.
Crafting the Perfect Apple Rose Design
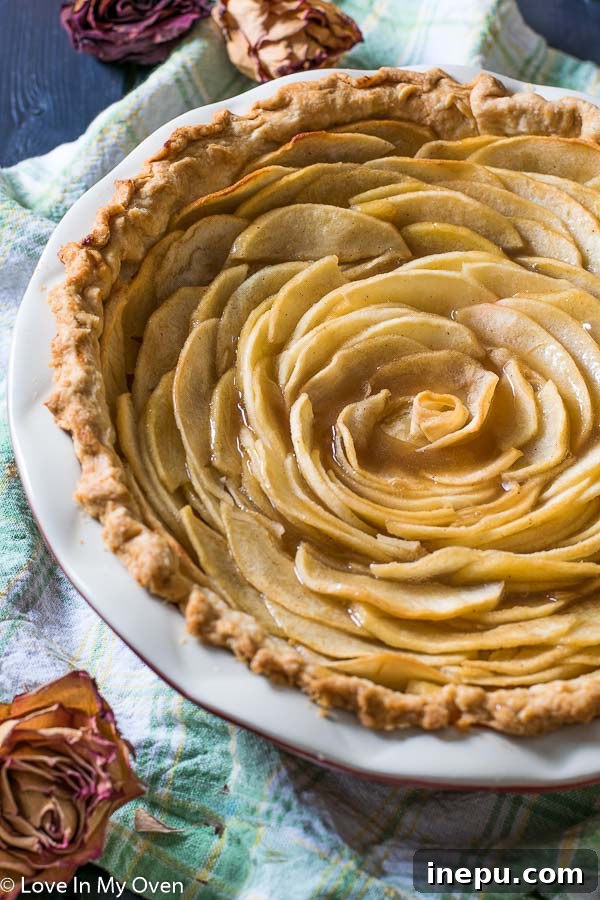
Creating the distinctive rose pattern on your apple pie might seem intimidating at first glance, but it’s a technique that is both enjoyable and rewarding. The key to achieving this stunning visual appeal lies in careful preparation and a bit of patience. Here’s a detailed guide to achieving that magnificent floral effect, ensuring your pie is as beautiful as it is delicious:
Step-by-Step Apple Preparation for Rosettes:
- Choose Your Apples Wisely: The foundation of a beautiful apple rose pie starts with selecting the right apples. Always opt for firm, crisp varieties, as these will hold their delicate shape beautifully during slicing and baking. Soft or mealy apples will unfortunately lose their structure and make the rose design less defined. We’ll delve deeper into apple varieties below, but Honeycrisp or Granny Smith are excellent starting points.
- Prevent Browning: As you peel and slice your apples, their exposed flesh can quickly oxidize and turn an unappetizing brown. To prevent this, immediately place the peeled apples into a large bowl of water mixed with a generous squeeze of fresh lemon juice. The acidity of the lemon acts as a natural antioxidant, keeping your apple slices vibrant and appealing throughout the preparation process.
- Precise Slicing is Key: For the most delicate “petals” and a truly elegant rose, you’ll need to slice your apples thinly and uniformly. Begin by cutting each apple in half and carefully removing the core. Then, place each apple half, cut-side down, on a sturdy cutting board. Using a very sharp knife or, even better, a mandoline slicer, create even 1/8-inch slices. Consistency in thickness is paramount; uneven slices will bake differently and detract from the uniform look of the rose.
- Sweetening and Juicing the Slices: Once all your apples are thinly sliced, gently toss them in a separate large bowl with a mixture of granulated sugar, dark brown sugar, ground cinnamon, and ground nutmeg. This not only infuses them with wonderful warm spice flavors but also helps to draw out their natural juices. Allow the apples to sit in this sugary mixture for at least 30 minutes, or even up to an hour. This step is vital because the released liquid will be reserved and later transformed into your incredible, apple-infused salted caramel sauce.
Arranging the Apple Roses in Your Pie:
- Prepare Your Crust: Ensure your 9-inch pie crust, whether homemade or store-bought, is properly fitted into its pie dish. Prick the bottom of the crust several times with a fork. This prevents air bubbles from forming and keeps the crust flat during baking.
- Drain and Reserve Juices: Carefully drain the seasoned apple slices, making sure to reserve every precious drop of the flavorful juice. Place the drained apple slices in a clean bowl or on a plate, ready for arrangement.
- Begin from the Outside: Start arranging the apple slices from the outer edge of the pie crust, working your way inwards. Place each apple slice overlapping the previous one by about half, creating a continuous, concentric circle. Make sure the curved top edge of each apple slice is facing upwards, forming the “petal” effect.
- Layer and Tighten: Continue adding layers, slightly tucking the base of each new layer under the top edge of the previous one. Ensure the slices are packed in tightly. The tighter you pack them, the more defined and stable your “rose” will be. Don’t be afraid to gently press them down. If you encounter any small gaps, fill them with smaller apple pieces to maintain a full appearance.
- Create the Center Bud: For the very center of your pie, take one or two apple slices and gently roll them up tightly to form a small “bud.” Carefully place this rolled apple in the middle of your concentric circles. This final touch truly completes the beautiful rose illusion.
While the process requires a little attention to detail and a steady hand, the result is undoubtedly worth the effort. You’ll likely find that you get the hang of the arrangement quite quickly, and the visual impact of your finished pie will be simply stunning.
Choosing the Best Apples for Your Pie
The success of any apple pie, especially one where the apples are the visual star, hinges significantly on the type of apples you choose. For this beautiful apple rose pie, selecting the right variety is even more critical, as the apples need to hold their shape and provide the perfect balance of flavor and texture when baked. The golden rule for apple pie is to always opt for crisp, firm apples.
Why Crisp Apples are Essential:
Soft, mealy apples will quickly break down and turn to mush during baking, compromising both the delightful texture of your pie filling and, crucially, the integrity of your carefully arranged rose design. Crisp apples, on the other hand, retain their structure beautifully, offering a pleasant bite in every forkful and ensuring your intricate floral pattern remains intact and vibrant even after an hour in the oven. Beyond texture, crisp apples also tend to have a better balance of sweetness and tartness, which is essential for a well-rounded and exciting flavor profile in a baked dessert.
Our Top Recommendations for Apple Rose Pie:
- Honeycrisp: A truly exceptional choice and often a personal favorite for many bakers. Honeycrisp apples are renowned for their outstanding crispness, juicy texture, and delightful sweet-tart flavor. They hold up beautifully during baking and are perfect for maintaining the delicate rose shape.
- Granny Smith: The quintessential apple pie apple. Granny Smiths offer a wonderfully tart and tangy flavor that provides an excellent contrast to the sweetness of the caramel and sugars. Their firm, vibrant green flesh ensures they maintain their shape, making them an ideal candidate for the rose design. Many bakers prefer to combine Granny Smiths with a sweeter apple to achieve a more complex and balanced taste.
- Golden Delicious: These apples are characterized by their sweet and mellow flavor profile, with a slightly softer texture than Honeycrisp or Granny Smith, but still firm enough to bake well. They contribute a lovely golden hue to the finished pie and add a layer of gentle sweetness.
- Jonagold: A fantastic hybrid, Jonagolds are a cross between Jonathan and Golden Delicious apples. They offer a superb balance of sweet and tart notes, coupled with a wonderfully crisp texture that performs exceptionally well under heat.
- Braeburn: Known for their firm flesh and distinct tangy-sweet flavor, Braeburn apples are another excellent choice that will hold up beautifully during the baking process, ensuring your apple roses stay defined.
- Fuji or Gala: While primarily enjoyed as eating apples, very firm Fuji or Gala varieties can also be used, especially if you prefer a sweeter pie. Just ensure they are exceptionally crisp and fresh to withstand the heat without becoming mushy.
For the absolute best flavor and a captivating texture experience, don’t hesitate to use a combination of two or even three different apple varieties in your pie. For instance, pairing a tart Granny Smith with a sweeter Honeycrisp or Golden Delicious can create a truly complex and harmonious apple filling that will elevate your pie to new, unforgettable heights.
The Magic of Homemade Salted Caramel Sauce
What truly elevates this apple pie from delicious to utterly irresistible is the luscious, homemade salted caramel sauce. And here’s the best part: the sauce isn’t just an afterthought; it’s ingeniously created using the very same flavorful juices released by the apples during their sugar soak. This brilliant method ensures that every drop of caramel is infused with subtle apple notes, perfectly complementing the pie and tying all the flavors together.
Creating Your Decadent Caramel, Step-by-Step:
Once your apple slices have had time to macerate in sugar and spices, you’ll be left with a concentrated, apple-infused sugar liquid. This liquid gold is the foundation of your incredibly flavorful caramel. The process is surprisingly simple and yields results far superior to any store-bought alternative:
- Simmer the Juices: Carefully pour the reserved apple juices into a small saucepan. Add one tablespoon of unsalted butter to the saucepan. Place the saucepan over medium heat, bringing the mixture to a gentle boil.
- Reduce and Thicken: Once boiling, reduce the heat to a steady simmer. Allow the sauce to simmer for approximately 10-15 minutes, stirring occasionally to prevent sticking. During this time, you’ll observe the liquid gradually reducing and thickening into a syrupy consistency. The goal is to allow the natural sugars to caramelize slightly and the excess water to evaporate, which will intensify the flavor significantly.
- Enrich with Cream: Once the sauce has achieved a desirable syrupy thickness, remove the saucepan from the heat. Stir in a quarter cup of heavy cream. This rich cream will transform your apple-infused syrup into a smooth, creamy, and undeniably decadent caramel sauce.
- Season with Salt: The “salted” in salted caramel is not just a descriptor; it’s a crucial flavor component. Add a generous pinch of salt to taste. The salt serves to balance the intense sweetness of the caramel, adding a layer of complexity and making all the other flavors pop. You can adjust the amount of salt to your personal preference – some prefer a subtle hint, while others enjoy a more pronounced salty-sweet contrast.
This homemade salted caramel sauce is incredibly easy to make, and its rich, buttery, and perfectly salty notes are the absolute ideal counterpoint to the sweet, tender, and lightly spiced apples. It truly creates a magnificent dessert experience that will leave a lasting impression.
Serving Suggestions and Storage Tips
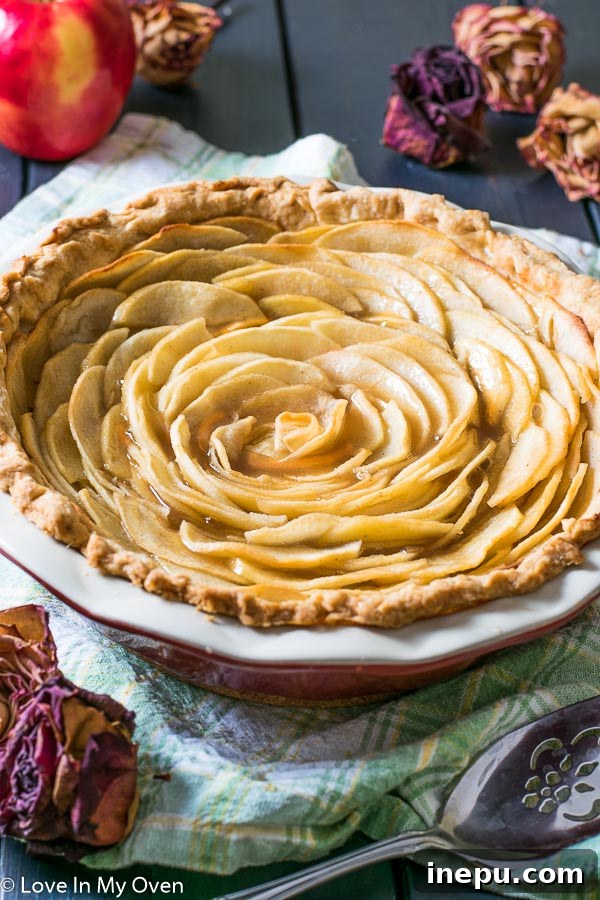
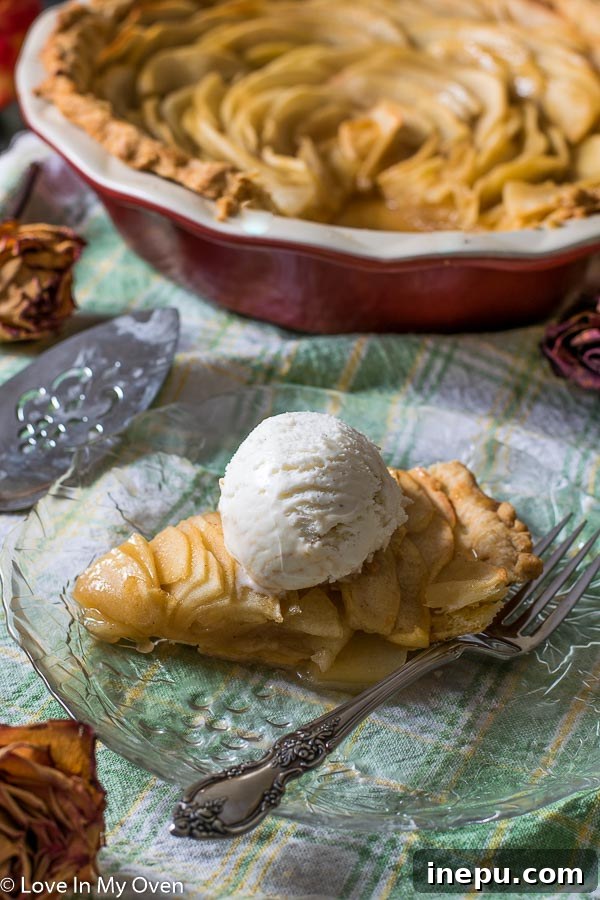
This Salted Caramel Apple Rose Pie is an absolute delight and truly shines when served warm, ideally with the freshly made caramel sauce drizzled generously over each slice. The warmth of the pie and the sauce creates an intoxicatingly aromatic and comforting experience that is perfect for any occasion. For an extra touch of indulgence, consider pairing a slice with a scoop of premium vanilla bean ice cream or a dollop of freshly whipped cream. The luscious contrast of cold creaminess against the warm, sweet-tart apples and rich caramel is simply divine and enhances the overall flavor profile.
If, by some miracle, you find yourself with leftovers (which is often a rare occurrence with such a delicious pie!), store the pie in an airtight container in the refrigerator. It will keep beautifully for 3-4 days. To enjoy it again, you can gently reheat individual slices in the microwave for a short burst or in a warm oven for a few minutes until heated through. Don’t forget to warm up any leftover caramel sauce separately to drizzle over, ensuring that every bite is as luxurious as the first.
If you’re as obsessed with salted caramel as we are, here are a few other delightful treats to explore from our kitchen:
- Salted Caramel Apple Crisp
- The Best Homemade Salted Caramel Sauce
- Salted Caramel Apple Cake
Looking for more delicious pie recipes to add to your baking repertoire? Dive into these other beautiful creations:
- Healthy Blueberry Pie
- Grain-Free Chocolate Chia Pudding Pie

Salted Caramel Apple Rose Pie Recipe
Author: Katherine
Total Time: 2 hours 30 minutes
Yield: 1 pie (serves 8-10)
Description
Wow your guests with this beautiful apple rose pie, that’s as delicious as it is pretty! This open-faced pie features thinly sliced apples arranged in a stunning rosette pattern, baked to perfection, and drizzled with a rich homemade salted caramel sauce.
Ingredients
- 4 large crisp apples (Honeycrisp, Granny Smith, Jonagold, or a mix recommended for best results)
- 1 lemon
- 1/2 cup granulated sugar
- 1/2 cup dark brown sugar
- 1/2 tsp ground cinnamon
- 1/4 tsp ground nutmeg
- 1 (9-inch) pie crust, premade or homemade (chilled)
- 1 tbsp unsalted butter
- 1/4 cup heavy cream
- Pinch of salt, to taste (for caramel sauce)
Instructions
- Prepare Apples: Peel the apples thoroughly. Immediately place the peeled apples in a large bowl filled with cold water, then squeeze the juice from the lemon into the water. This acidic bath prevents the apple slices from oxidizing and turning brown.
- Slice Apples: One at a time, take an apple, cut it in half, and carefully remove the core. Place each apple half, cut-side down, on a cutting board. Using a very sharp knife or a mandoline slicer, cut the apples into uniform 1/8-inch thick slices. Consistency in thickness is crucial for the rose design and even baking. Return slices to lemon water if not using immediately.
- Season Apples: In a separate large bowl, combine the granulated sugar, dark brown sugar, cinnamon, and nutmeg. Drain the apple slices well from the lemon water, then add them to the sugar-spice mixture. Toss gently until all slices are evenly coated. Allow the apple slices to sit for at least 30 minutes in this mixture; this crucial step draws out their natural juices, which will be reserved for your homemade caramel sauce.
- Prepare Pie Crust: Preheat your oven to 375°F (190°C). Carefully line a 9-inch pie dish with your prepared pie crust. Prick the bottom of the crust several times with a fork to prevent it from puffing up during baking.
- Arrange Apple Roses & Bake: Carefully drain the seasoned apple slices, making sure to reserve every drop of the flavorful juice. Starting from the outside edge of the pie crust, begin meticulously placing the apple slices, one at a time. Overlap each slice by about half as you work your way in a large, tight circle towards the center of the dish. Pack the slices in tightly to create a full, beautiful, and defined rose shape. For the very center of your pie, take one or two apple slices and gently roll them up to form a small “bud,” then place this in the middle of your concentric circles. Pour half of the reserved apple juice evenly over the arranged pie. Cover the pie loosely with aluminum foil to prevent the crust edges from over-browning, and bake for 40 minutes. After 40 minutes, remove the foil and continue baking for an additional 15-20 minutes, or until the apple slices are tender and the crust is golden brown. Let the pie cool slightly on a wire rack while you prepare the caramel sauce.
- Make Salted Caramel Sauce: While the pie is cooling, pour the remaining reserved apple juice into a small saucepan over medium heat. Add 1 tablespoon of unsalted butter to the saucepan. Bring the mixture to a boil, then reduce the heat to a simmer. Allow it to cook for 10-15 minutes, stirring occasionally, until it has slightly reduced and thickened into a syrupy consistency. Remove the saucepan from the heat, then stir in the 1/4 cup of heavy cream and a pinch of salt. Taste and adjust the amount of salt if desired, to achieve your perfect salty-sweet balance.
- Serve: Serve the pie immediately while it is still warm for the best flavor and texture. Drizzle the warm, homemade salted caramel sauce generously over the entire pie or individually over each slice just before serving. For an ultimate treat, serve with a scoop of vanilla ice cream or a dollop of whipped cream!
Storage: Leftover pie can be stored in an airtight container in the refrigerator for 3-4 days. For optimal enjoyment, gently reheat individual slices before serving, and warm the caramel sauce separately.
Notes
- Any crisp apple variety will work beautifully for this pie. My personal favorites for their texture and flavor balance are Honeycrisp and Granny Smith, often combined.
Recipe and method inspired by Tasty.
- Prep Time: 1 hour
- Cook Time: 1 hour
- Category: Desserts, Pie, Fall Baking, Holiday
- Method: Oven Bake