
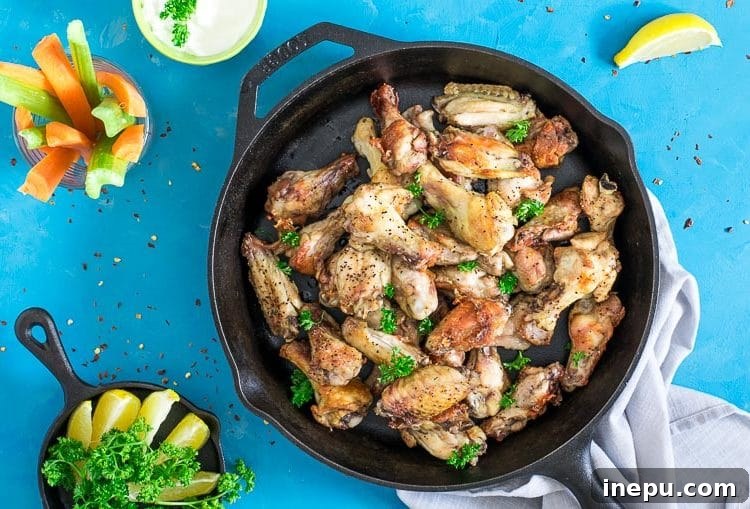
Forget soggy wings and complicated recipes! These EXTRA crispy chicken wings are made without flour, baking powder, or cornstarch. Achieve perfectly golden, crunchy baked chicken wings with just a drizzle of olive oil, a sprinkle of seasoning, and the magic of your oven!
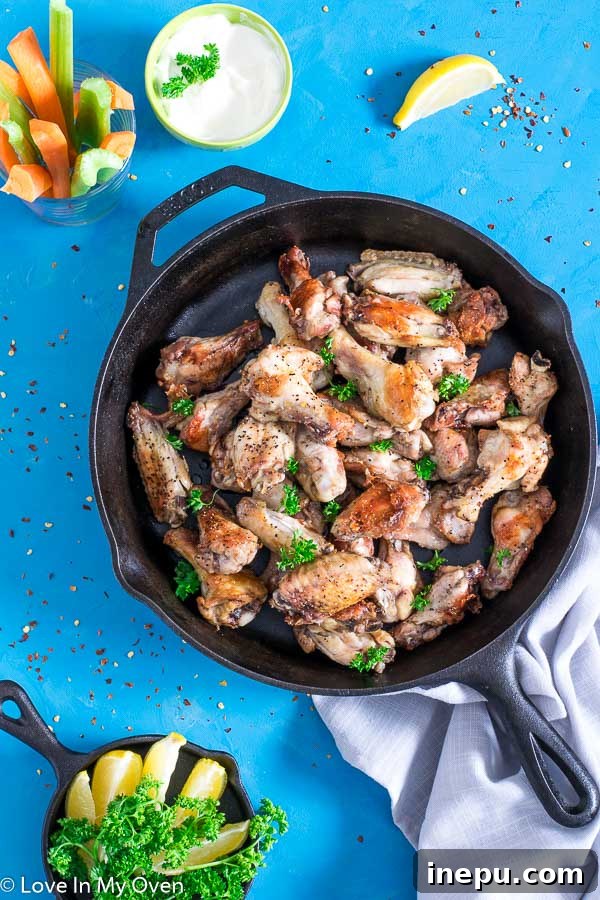
*Please note* this post was originally published in 2019 but has been extensively updated for improved content and SEO. The core recipe, however, remains a timeless favorite!
Welcome to a culinary adventure where simplicity meets irresistible flavor! As a home cook, I’m always on the lookout for recipes that deliver maximum impact with minimal effort, and these crispy baked chicken wings are a testament to that philosophy. You don’t need fancy equipment or a long list of ingredients to achieve restaurant-quality crunch right in your own kitchen.
Gone are the days of shaking wings in questionable powders or deep-frying them to oblivion. We’re embracing a healthier, easier, and undeniably more delicious approach to chicken wings. Whether you’re planning a game day feast, a casual weeknight dinner, or an impressive appetizer spread, these wings are guaranteed to be a showstopper. Let’s dive into the secrets of creating wings so crispy, you’ll hear the crunch across the room!
The Secret to Unbelievably Crispy Baked Chicken Wings: No Flour, No Fuss!
Many recipes for baked chicken wings advocate for the use of baking powder or cornstarch to achieve crispiness. While these can work, they often introduce an unnecessary ingredient and can alter the pure chicken flavor. Our method strips it back to basics, proving that sometimes, less truly is more. The secret lies in two fundamental elements:
- High Heat: A scorching hot oven is crucial. It creates an intensely dry environment that rapidly renders the fat from the chicken skin, allowing it to crisp up beautifully. This high temperature ensures that moisture evaporates quickly from the surface of the wings, leading to that coveted, shatteringly crisp texture.
- Minimal Oil & Proper Seasoning: A light coating of olive oil helps conduct the heat and promotes even browning, while simple, robust seasoning adheres directly to the skin, enhancing flavor without forming a thick, doughy crust. The oil aids in the Maillard reaction, creating a golden exterior that’s as appealing to the eyes as it is to the palate.
By bypassing flour, baking powder, and cornstarch, these wings naturally align with various dietary preferences. They are inherently keto-friendly, paleo-approved, and completely gluten-free. This means everyone at your table can enjoy these succulent, crunchy bites without compromise, making them a fantastic option for entertaining diverse groups or sticking to your health goals. It’s a win-win for flavor and dietary needs!
This recipe isn’t just about what you *don’t* add; it’s about maximizing the natural potential of the chicken wings themselves. We focus on techniques that enhance the inherent qualities of the chicken skin, transforming it into a thin, crispy shell that encases tender, juicy meat. Prepare to be amazed by the simplicity and effectiveness of this approach!
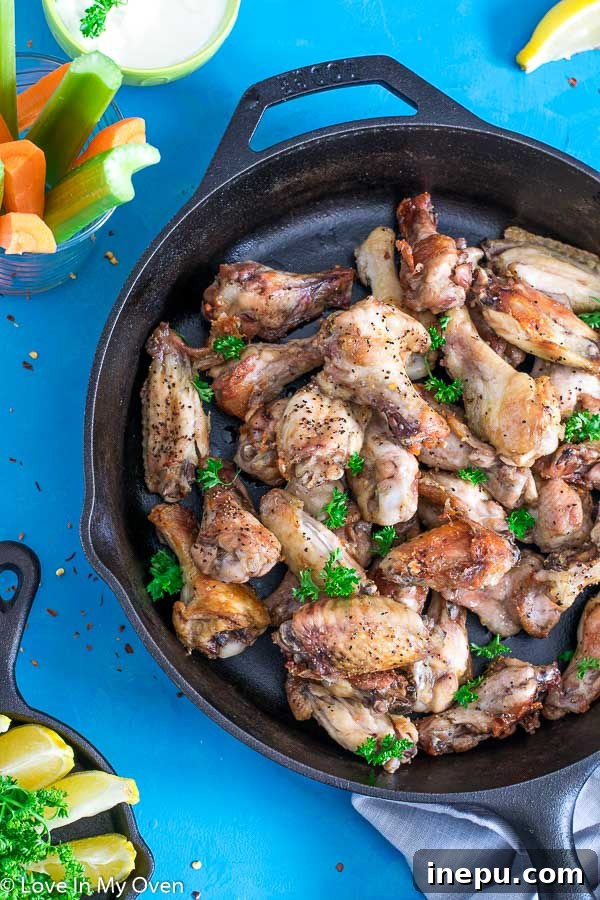
Why This Method Reigns Supreme for Oven-Baked Perfection
You might be wondering, “Is it really that simple?” Yes, it absolutely is! The beauty of this recipe lies in its straightforward nature and the incredible results it yields. Here’s a quick breakdown of the magic steps that contribute to flawless oven-baked wings:
- The Crucial Pat Dry: This step is non-negotiable. Any excess moisture on the chicken skin will steam the wings instead of crisping them. Use several paper towels to thoroughly pat down each wing until it feels completely dry to the touch. This prepares the surface for optimal fat rendering and browning.
- The Light Olive Oil Drizzle: A thin, even coating of olive oil (or another high-smoke-point oil like avocado oil) is all you need. The oil acts as a heat conductor, helping the skin to brown beautifully and ensuring the seasoning adheres properly. Avoid over-oiling, as this can lead to soggy results.
- Generous Seasoning with the “Secret” Blend: Don’t be shy with your chosen spice blend! Our “secret ingredient” truly makes these wings sing, creating a flavorful crust that penetrates the chicken. Ensure every wing is evenly coated for consistent taste and texture.
- The High-Temperature Bake: The oven does most of the heavy lifting. Baking at a high temperature (465°F / 240°C) provides the intense heat necessary to rapidly render the fat from the skin, transforming it into that desirable, shattering crisp texture. This sustained high heat is key to achieving that deep golden-brown color and incredible crunch.
This foolproof method consistently delivers delicious results, making these wings a constant hit with my family and friends. They disappear faster than I can make them, proving that a simple, well-executed recipe can often be the most impressive. Beyond their taste, the ease of preparation means less time in the kitchen and more time enjoying the company of others!
The “Secret” Ingredient: Montreal Steak Spice (and Delicious Alternatives!)
Let’s talk about the star seasoning that elevates these wings from great to extraordinary: Montreal Steak Spice! If you haven’t ventured beyond steak with this incredible blend, you’re in for a treat. Originating from Montreal, Quebec, this bold and savory spice mix is a Canadian classic. It typically features a hearty combination of coarse salt, freshly cracked black pepper, garlic flakes, dried onion, and various other herbs and spices like dill, coriander, and red pepper flakes. Its robust flavor profile perfectly complements chicken, creating a deep, umami-rich crust that is utterly addictive. It provides a fantastic base that can stand alone, offering a truly satisfying savory experience, or serve as a versatile canvas for additional sauces if you wish.
Can’t find Montreal Steak Spice? No problem at all! You can easily create a similar, equally delicious flavor profile with a homemade blend using common pantry staples. A good starting point would be:
- 1 part coarse salt (like kosher salt)
- 1 part freshly cracked black pepper
- 1/2 part garlic powder or garlic flakes
- 1/2 part onion powder or dried onion flakes
- A pinch of cayenne pepper for a subtle warmth (optional)
- A touch of smoked paprika or ground coriander for added depth
Experiment with these ratios to find your perfect blend. The goal is a savory, slightly spicy, and aromatic coating that will develop incredible flavor in the oven. This versatility ensures that you can enjoy these crispy wings no matter where you live or what spices you have on hand.
These perfectly seasoned wings are fantastic on their own, allowing the pure chicken and spice flavors to shine. However, they also serve as an excellent foundation for your favorite sauces, offering endless customization options. We often divide a batch and toss them in different flavors to please every palate. Consider these popular choices:
- Classic Hot Sauce: A generous drizzle of your favorite buffalo sauce, Sriracha, or even a regional specialty like Nandos hot sauce for that fiery kick.
- Sweet & Savory Glaze: A rich teriyaki glaze, brushed on during the last few minutes of baking, creates a sticky, irresistible coating. Honey garlic sauce is another fantastic option.
- Smoky BBQ Bliss: Toss them in your favorite tangy or smoky BBQ sauce for a backyard picnic feel, even if you’re eating indoors.
- Garlic Parmesan Perfection: After baking, toss the hot wings in a mixture of melted butter, finely minced fresh garlic, and grated Parmesan cheese for a decadent, savory twist.
- Lemon Pepper: A simple yet vibrant option, using lemon zest and freshly ground black pepper for a zesty, bright flavor.
The possibilities are truly endless, allowing you to customize your wing experience every single time. Don’t be afraid to get creative and find your new favorite combination!
Optimal Baking Time for Crispy Chicken Wings
Achieving that perfect crispiness requires precision and a little attention, but it’s far from complicated! In a properly preheated oven set to a blistering 465°F (240°C), your chicken wings will typically be ready in about 40-45 minutes. Here are the key steps and indicators for flawless results:
- Preheat Thoroughly: Ensure your oven has reached and maintained the 465°F temperature for at least 15-20 minutes before placing the wings inside. A cold oven will prevent immediate crisping and can lead to uneven cooking.
- Mid-Bake Turn & Drain: Midway through the cooking process (around 20-25 minutes), you’ll need to give the wings a good stir or flip them using tongs. This ensures even browning and crisping on all sides. Crucially, you might notice a significant amount of rendered fat and liquid pooling at the bottom of your baking dish. It is absolutely vital to carefully drain this off before returning the wings to the oven. Leaving this liquid in the pan will cause the wings to steam rather than crisp, resulting in a less desirable, soggy texture.
- The Visual Cues & Sizzle Test: You’ll know the wings are nearing completion when they are beautifully browned to a deep golden hue, appear incredibly crispy, and the entire pan is sizzling actively with rendered fat. The internal temperature of the thickest part of the wing should reach 165°F (74°C) for safe consumption, but visually, the deep color and irresistible crunch will be your most reliable indicators.
- Using a Wire Rack (Highly Recommended): For an even crisper result and significantly easier cleanup, I highly recommend baking your wings on a wire rack placed over a foil-lined baking sheet. This setup allows hot air to circulate completely around each individual wing, promoting maximum crispiness on all sides and preventing them from sitting in their own rendered fat. If using a rack, remember to lightly spray it with cooking spray to prevent sticking.
By following these guidelines, you’ll consistently achieve restaurant-quality crispy wings that are perfectly cooked through and bursting with flavor. The slight effort of turning and draining is a small price to pay for such a rewarding outcome!
Using Frozen Chicken Wings: Tips for Success and Safety
Life happens, and sometimes frozen chicken wings are what you have on hand. While fresh wings are generally preferred for optimal texture and convenience, frozen wings can certainly be used with a little preparation. The absolute key is to ensure they are fully thawed and as dry as possible before they ever hit the oven.
Here’s a detailed guide on how to handle frozen wings for the best crispy results:
- Thaw Completely in the Refrigerator: This is the most important step for both food safety and texture. Transfer frozen chicken wings from the freezer to the refrigerator overnight (at least 8-12 hours, or even up to 24 hours for larger quantities) to thaw completely. Never attempt to bake them from frozen or partially frozen. Baking frozen wings will cause them to release a significant amount of moisture rapidly, leading to a steamed, soggy texture rather than a crispy one, and uneven cooking.
- Drain Any Accumulated Liquid: Once thawed, remove the wings from their packaging and drain any accumulated liquid thoroughly. This liquid is largely water from the thawing process and needs to be removed for crisping.
- The Essential Pat Dry: As with fresh wings, this step cannot be emphasized enough – a dry surface is paramount for crispy skin. Use several layers of paper towels (or a clean kitchen towel) to thoroughly pat down each individual wing until it feels completely dry to the touch. Pay special attention to any crevices or folds in the skin.
- Proceed with the Recipe as Written: Once the wings are fully thawed and meticulously dried, you can proceed with the recipe exactly as written. This includes drizzling with olive oil and coating generously with your chosen seasoning blend before baking at the recommended high heat.
I often stock up on large packs of chicken wings from bulk stores like Costco or larger grocery retailers during my big shopping trips. This allows me to always have them on hand, ready for a quick weeknight meal or an impromptu gathering. Just remember to plan ahead for the thawing process to ensure the best possible crispy outcome!
These crispy little guys are perfect as a game day appetizer, a party snack, or even the main course for a satisfying dinner. Once you’ve tried my simple, no-fuss method, I’m confident you won’t ever go back to other complicated or less effective techniques!
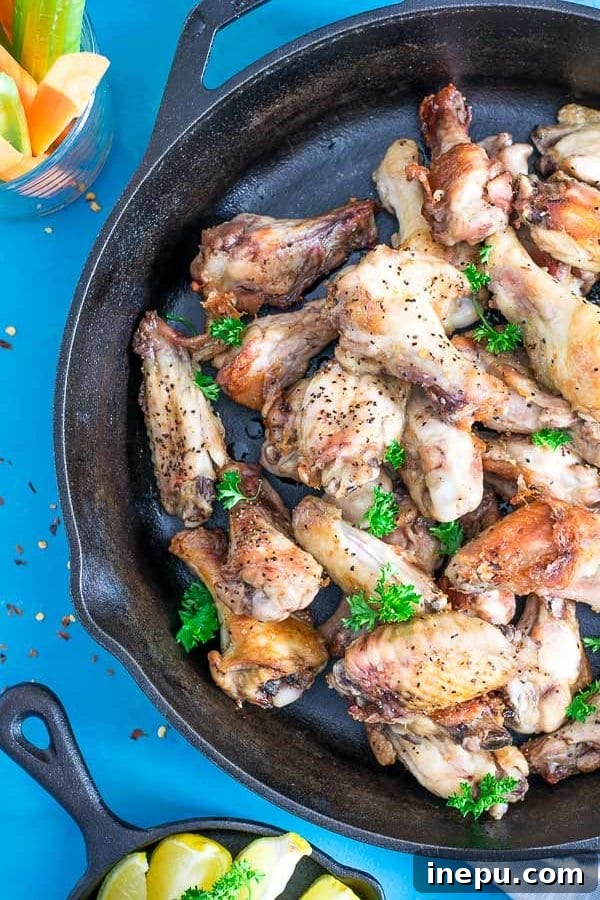
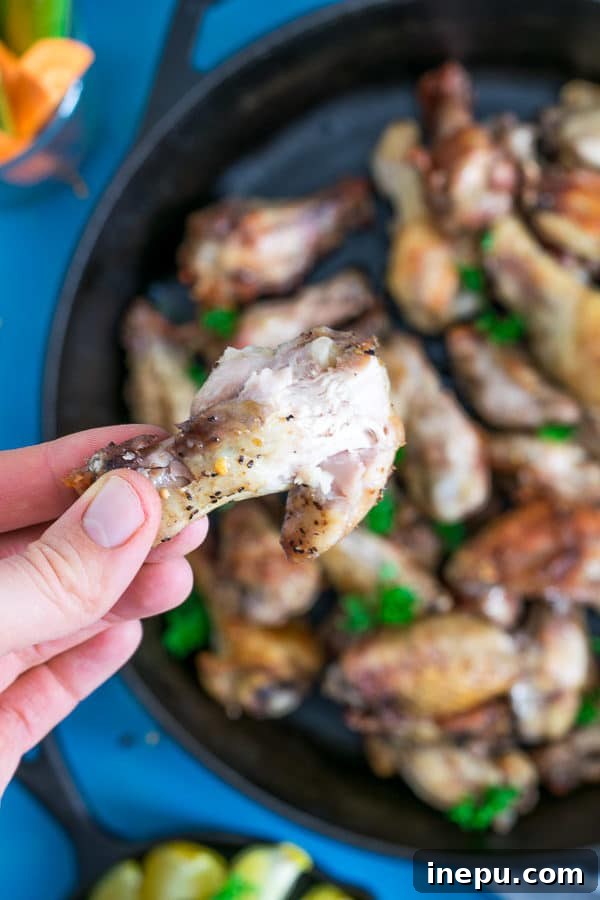
Perfect Pairings and Serving Suggestions for Your Crispy Wings
These exceptionally crispy baked chicken wings are incredibly versatile, making them a fantastic addition to almost any menu. They shine brilliantly as a standalone appetizer, ideal for game days, movie nights, or any casual get-together with friends and family. However, they are also hearty enough to be the star of your dinner plate, especially when paired with a few complementary sides. To complete your meal or elevate your appetizer spread, here are some fantastic side dish and accompaniment ideas:
Classic Companions
- Crisp Green Salad: A light, refreshing green salad with a tangy vinaigrette offers a wonderful contrast to the rich, savory wings. Think mixed greens, cherry tomatoes, cucumber, and a lemon-herb dressing.
- Creamy Coleslaw: This classic side is a go-to for a reason. Its cool, creamy, and slightly sweet crunch provides a perfect counterpoint to the hot, spicy, or savory wings.
- Celery and Carrot Sticks with Blue Cheese or Ranch Dip: The quintessential wing accompaniment! The crisp, cool vegetables offer a refreshing palate cleanser, while a rich, flavorful dip is a must-have for any wing enthusiast.
- Oven Baked Onion Rings: For a delightful crunchy addition, try making homemade Oven Baked Onion Rings. They offer a similar crisp texture and savory flavor that complements the wings beautifully.
Heartier Sides
- Sweet Potato Fries with Dill Dip: The natural sweetness of sweet potato fries pairs wonderfully with savory wings, and the dill dip adds a fresh, herbaceous note.
- Garlic Bread or Cheesy Rolls: To soak up any delicious juices or sauces, warm garlic bread or soft, cheesy rolls are always a welcome addition.
- Roasted Potatoes or Potato Wedges: Simple roasted potatoes, seasoned with herbs and garlic, make for a satisfying and comforting side that stands up to the robust flavor of the wings.
- Macaroni and Cheese: For ultimate comfort food indulgence, a creamy baked macaroni and cheese is an undeniable crowd-pleaser when served alongside crispy wings.
Unique Appetizer Pairings
- Bacon Wrapped Stuffed Dates: For a touch of elegant sweetness, saltiness, and texture, these are an unexpected yet delightful pairing.
- Mini Corn on the Cob: Grilled or boiled mini corn on the cob provides a sweet and slightly smoky flavor that works well with chicken.
No matter how you choose to serve them, these crispy baked chicken wings are sure to be a hit. Once you’ve experienced the simplicity and unparalleled crispiness of this method, I’m confident you won’t go back to any other way of making oven-baked chicken wings! Enjoy the crunch!

Crispy Baked Chicken Wings
★★★★★
5 from 6 reviews
- Author: Katherine
- Total Time: 50 minutes
- Yield: 2 lbs (approx. 12-16 wings)
Description
These EXTRA crispy chicken wings are made without flour, baking powder or cornstarch! Crispy baked chicken wings can be yours with just a bit of olive oil, some seasoning and an oven!
Ingredients
- 2 lbs chicken wings (drumettes and flats)*
- 2 tsp olive oil
- 1 tsp Montreal steak spice* (or homemade blend)
- Optional: flavoured sauce (such as teriyaki or Nandos hot sauce)
Instructions
- Preheat the oven to 465 F (240 C) and lightly grease a 9×13 baking dish. For less grease and easier clean-up and even crispier results, place a wire rack over a foil-lined baking sheet and place the wings on top of the wire rack (lightly spray the wire rack with cooking spray first).
- Use several paper towels to thoroughly pat the chicken wings dry. Drizzle the olive oil over the wings and rub it all over, ensuring each wing is lightly coated. Then, place the wings in the baking dish or on the prepared wire rack. Sprinkle the Montreal steak spice (or your chosen seasoning blend) generously over the wings. Bake for 40-45 minutes.
- Halfway through baking (around 20-25 minutes), carefully turn the wings for even crisping. If baking in a dish, you might notice liquid pooling; be sure to drain this off before putting them back in the oven. The wings are done when they’re beautifully crispy, deeply browned, and sizzling.
- Optional: For sauced wings, once they are done cooking, toss them in your preferred flavoured sauce. Return them to the oven for an additional 5-10 minutes to allow the sauce to heat through and caramelize slightly.
Leftover wings can be stored in an airtight container in the refrigerator for 2-3 days. Reheat in the oven or air fryer for best crispiness.
Notes
- For optimal results, use “drumettes” and “flats” (split-wing chicken wings) rather than whole wings with wingtips attached, as they cook more evenly.
- Montreal steak spice is a fantastic, savory blend. If unavailable, an equally delicious homemade mix includes coarse salt, black pepper, garlic powder, onion powder, a pinch of cayenne pepper, and coriander. Adjust to your taste!
- Prep Time: 5 minutes
- Cook Time: 45 minutes
- Category: Dinner, Appetizer, Snack
- Method: Oven Bake
- Cuisine: American, Canadian