
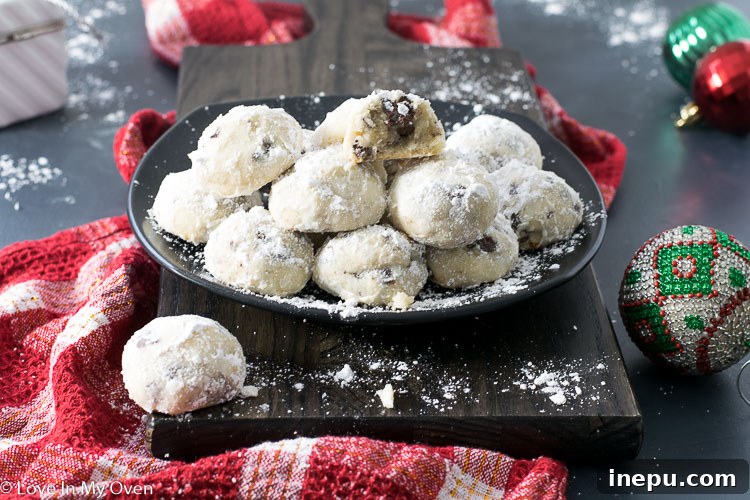
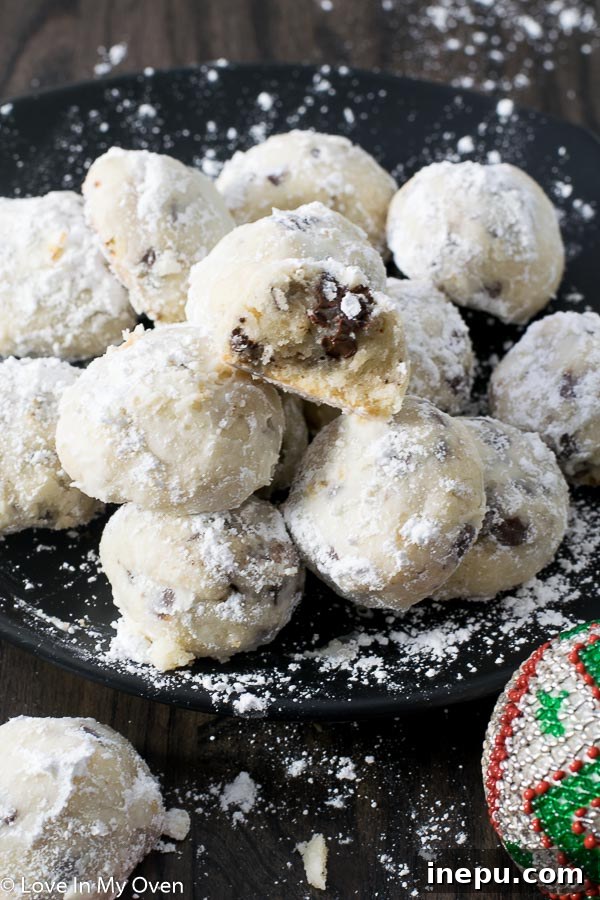
It’s not truly the holiday season without the delightful charm of snowball cookies! These miniature chocolate chip snowball cookies are a timeless classic, perfect for sharing. Crafted without nuts or eggs, they offer a wonderful school-safe treat for everyone to enjoy.
This post may contain affiliate links, which earn me a small commission, at no extra cost to you.
*Please note* this post was originally published in 2019. The text has since been updated and a video added, but the cherished recipe remains exactly the same.
Irresistible Chocolate Chip Snowball Cookies: Your Go-To Holiday Treat
The holiday season is a magical whirlwind of activity, and this past week has been no exception! Returning home from a relaxing trip, we were immediately swept into the festive frenzy of photo shoots, looming work deadlines, joyous cookie exchanges, and lively pre-kindergarten Christmas parties, not to mention a few other commitments that had playfully slipped my mind while basking in the Maui sun. It’s a delightful chaos, isn’t it? While the initial rush can feel a tad overwhelming, once the Christmas tree is up and twinkling, I’m completely immersed in the holiday spirit.
Among the many treats I prepared for our recent cookie exchange were these charming chocolate chip snowball cookies. I had experimented with the recipe once before our departure for Maui, finding it wasn’t quite perfect. So, upon our return, I swiftly dedicated myself to a couple of mini batches to get them just right for Tuesday night’s event! Perhaps you caught a glimpse of my side-by-side test batches on Insta stories. One batch, a victim of too much butter, spread out far more than a perfectly round snowball should. The other, however, maintained its ideal, petite mound. It’s truly fascinating how a small adjustment in butter-to-flour ratios can make an enormous difference in cookie texture and appearance!
Why Chocolate Chip Snowball Cookies Are a Holiday Must
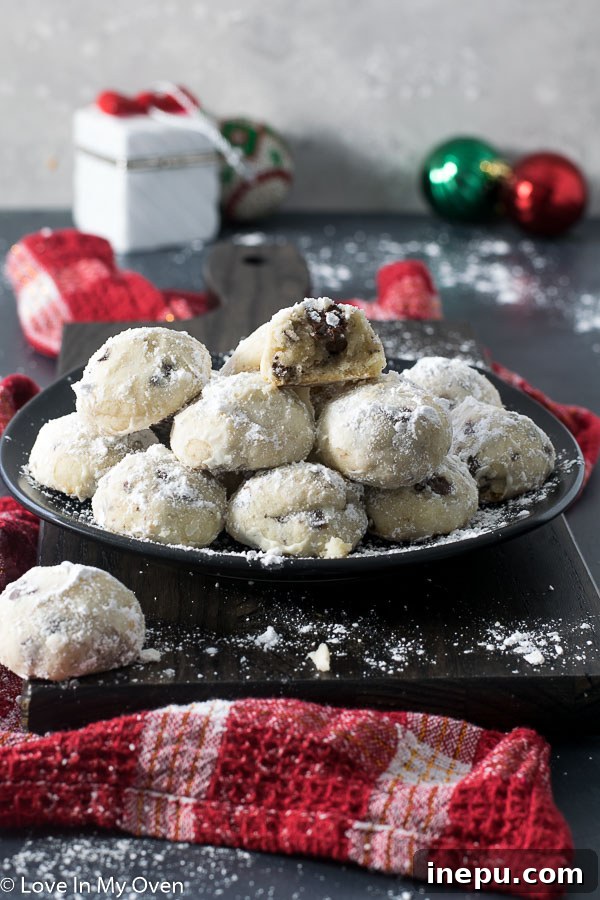
Snowball cookies, also affectionately known as Russian Tea Cakes or Mexican Wedding Cookies, are a beloved fixture in holiday baking for a reason. Their delicate, melt-in-your-mouth texture and festive appearance make them utterly irresistible. What sets this particular recipe apart is its incredible speed and simplicity, especially when you have a stand mixer at hand. But beyond their ease, these chocolate chip snowball cookies bring a delightful twist to the classic, infusing every bite with miniature pockets of rich chocolate. Plus, being free from nuts and eggs, they cater to a wider audience, making them an ideal choice for school parties or gatherings where dietary concerns might be present.
Simple Ingredients for Perfect Snowball Cookies
You’ll be amazed at how few ingredients are required to create such a delightful holiday treat. This recipe relies on basic pantry staples, making it accessible and straightforward. Here’s what you’ll need to gather:
- Unsalted Butter: Room temperature butter is crucial for achieving that light and fluffy base. Using unsalted butter allows you to control the exact amount of salt in your cookies.
- Powdered Sugar: This is key for the tender texture and, of course, the signature “snowball” coating.
- All-Purpose Flour: The foundation of our cookie dough, giving it structure.
- Salt: A pinch of salt enhances the flavor of the butter and chocolate, balancing the sweetness.
- Vanilla Extract: Pure vanilla extract adds warmth and depth to the cookie’s flavor profile.
- Mini Chocolate Chips: While regular chocolate chips can certainly be used, mini chocolate chips distribute more evenly and melt into smaller, more pleasant pockets of chocolate in these bite-sized cookies.
Easy Instructions for Baking Snowball Cookies
Making these chocolate chip snowball cookies is a straightforward process, even for beginner bakers. Follow these simple steps to create your perfect batch of holiday cheer:
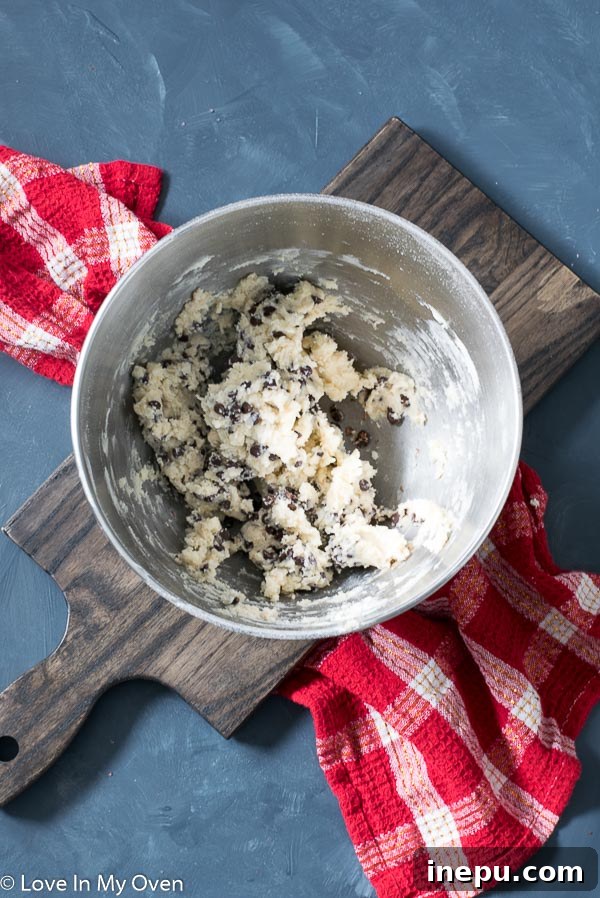
- Prepare the Dough Base: Begin by preheating your oven to 375°F (190°C). Line two baking sheets with parchment paper; this prevents sticking and makes cleanup a breeze. In the bowl of a stand mixer fitted with the paddle attachment (or using an electric hand mixer), cream together the room temperature unsalted butter with ½ cup of the powdered sugar. Beat until the mixture is light, airy, and fluffy – this usually takes about 2-3 minutes. This step incorporates air, contributing to the cookies’ delicate texture.
- Combine Dry and Wet Ingredients: Once the butter and sugar are perfectly light and fluffy, gradually add the all-purpose flour, salt, and pure vanilla extract. Mix on medium speed until the ingredients are just combined. Be careful not to overmix, as this can lead to tough cookies.
- Add Chocolate Chips: Gently fold in the mini chocolate chips. Run the mixer on low speed for just a few seconds, or mix by hand, ensuring the chocolate chips are evenly distributed without overworking the dough.
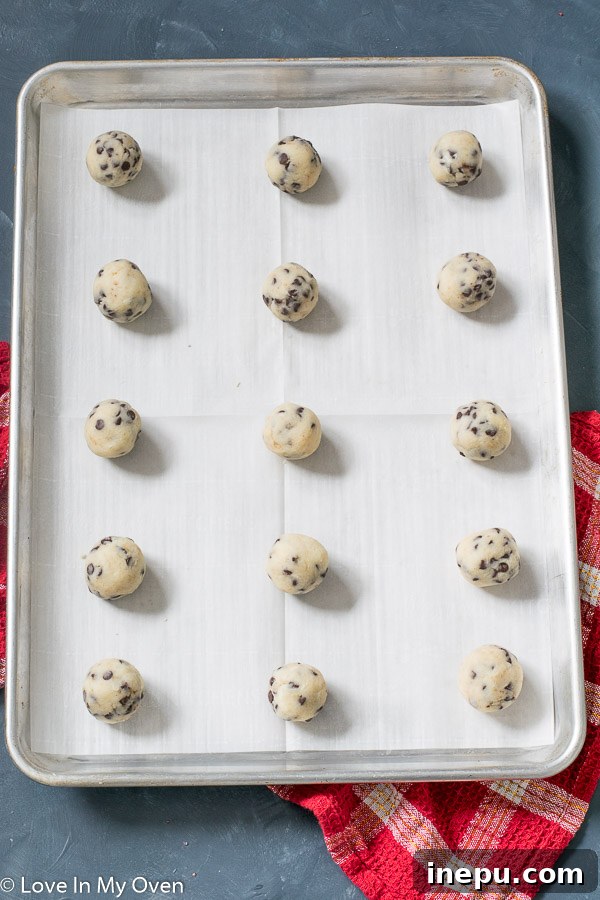
- Form and Chill the Cookies: Scoop out the dough into 1-tablespoon sized balls. A small cookie scoop, like this one, is ideal for uniform sizing. Place the dough balls on your prepared baking sheets, leaving about 2 inches between each to allow for slight spreading. For perfectly tall, mound-shaped cookies that resist spreading, place the entire cookie sheet into the refrigerator for about 5 minutes to chill the dough. This firming-up period is a small but impactful step in achieving the desired snowball shape.
- Bake to Perfection: Transfer the chilled cookie sheets to the preheated oven and bake for 11-12 minutes, or until the edges are lightly browned. The centers may still appear slightly soft, and that’s perfectly fine, as they will continue to set as they cool.
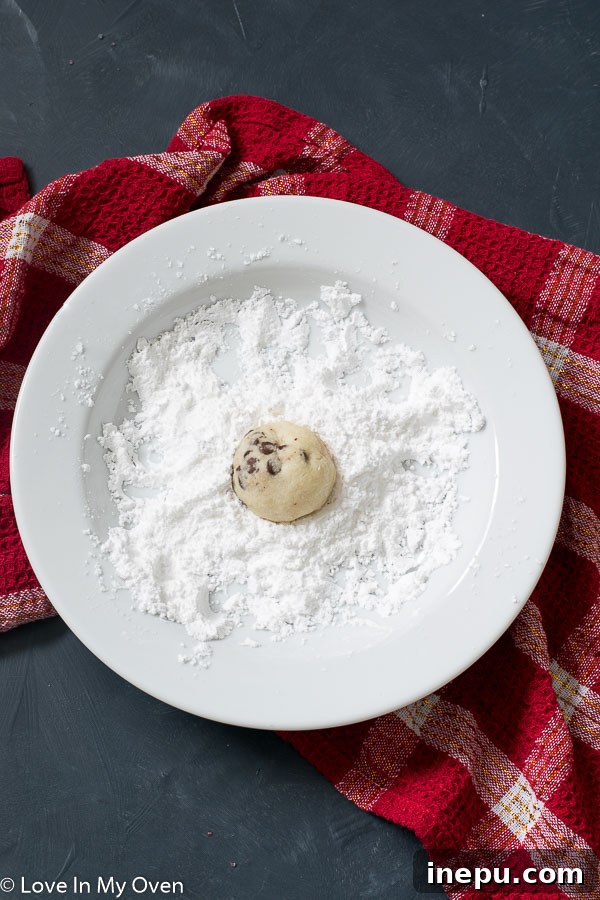
- The Signature “Snowball” Finish: Allow the cookies to cool on the warm baking sheet for 5 minutes before carefully transferring them to a wire rack. While still slightly warm, roll each cookie, one at a time, in the remaining ½ cup of powdered sugar. This initial roll adheres beautifully to the warm cookies, creating that iconic “snowball” effect. Once completely cooled, give them another roll in powdered sugar if desired, for an extra festive touch.
Tips for Perfect Snowball Cookies Every Time
- Room Temperature Butter: This is non-negotiable for a fluffy dough. Cold butter won’t cream properly, and melted butter will make your cookies spread.
- Don’t Overmix: After adding flour, mix just until combined. Overmixing develops gluten, leading to tougher cookies.
- The Chill Factor: Chilling the dough for a few minutes before baking helps the cookies retain their shape and prevents excessive spreading, ensuring those beautiful spherical “snowballs.”
- Rolling in Powdered Sugar: The first roll in powdered sugar should happen while the cookies are still warm (but not hot!) so the sugar adheres well. A second roll once completely cooled adds an extra layer of sweetness and a more pronounced snowy appearance.
- Quality Vanilla: Use pure vanilla extract for the best flavor; it makes a noticeable difference.
Storing Your Chocolate Chip Snowball Cookies
One of the many advantages of snowball cookies is how well they store, making them an excellent candidate for make-ahead holiday baking or gift-giving. Once your delicious chocolate chip snowball cookies have completely cooled, transfer them to an airtight container. If they’re going to be enjoyed within a week, storing them at room temperature is perfectly fine. For longer preservation, these cookies freeze beautifully!
To freeze, arrange the cooled cookies in even layers within a freezer-safe container, separating each layer with a piece of parchment paper to prevent them from sticking together. When you’re ready to serve them, simply thaw the cookies overnight in the refrigerator. For an extra touch of beauty, give them another quick roll in a bit of fresh powdered sugar before serving.
If you’re participating in a festive holiday cookie exchange, these chocolate chip snowballs will be a definite hit. They remain fresh and delicious for up to a week, provided their container is tightly sealed, ensuring they taste as wonderful on day seven as they did on day one.

More Holiday Baking Inspiration
If you’re visiting this page, chances are you’re fully immersed in the joy of the holiday baking season, just like me! Having been away for a couple of weeks, I feel a delightful need to make up for lost time in the kitchen. This upcoming weekend, my oven will certainly be working overtime. Top on my list is creating our DIY gingerbread house with the kids—a cherished tradition. And, of course, sugar cookies are an absolute must; they’re the perfect afternoon craft for Oscar while his siblings nap. What child doesn’t adore decorating cookies, transforming simple dough into edible works of art?
I’d love to hear what festive treats you have lined up for your holiday baking! There’s nothing quite like the aroma of fresh cookies filling the home, making every moment feel a little more special. Whether it’s classic cut-outs, spiced delights, or new family favorites, the spirit of holiday baking is truly heartwarming.
Beyond these delightful chocolate chip snowball cookies, I have a treasure trove of other cookie and sweet recipes on the blog to inspire your holiday creations. I hope your weekend, and indeed your entire holiday season, is filled to the brim with sugar, flour, and endless fun!
Other Irresistible Cookies From the Blog
If you’re looking for more delicious ideas to fill your cookie platters, I’ve got you covered. In addition to a fantastic cookie bar roundup that simplifies holiday baking, here are some other festive treats that are sure to impress:
- Decadent Gingerbread Fudge
- Festive Mint Chocolate Candy Cane Cookies
- Charming Vanilla Bean Cookie Pops
- Classic Chewy Ginger Molasses Cookies
- Bright & Zesty Lemon Cream Cheese Cookies
Print Recipe

Chocolate Chip Snowball Cookies
★
5 Stars
★
4 Stars
★
3 Stars
★
2 Stars
★
1 Star
5 from 11 reviews
- Author: Katherine | Love In My Oven
- Total Time: 30 minutes
- Yield: 34 cookies
Description
It’s not Christmas without snowballs! These mini chocolate chip snowball cookies are a classic. Made without nuts or eggs, they’re a great school-safe treat too!
Ingredients
- 1 cup unsalted butter, room temperature
- 1 cup powdered sugar, divided
- 2 1/2 cups all-purpose flour
- 1/2 tsp salt
- 1 tsp pure vanilla extract
- 1 cup mini chocolate chips
Instructions
- Preheat the oven to 375 F and line two baking sheets with parchment paper. Set aside. In the bowl of a stand mixer fitted with the paddle attachment, or using a handheld electric mixer, beat the butter with 1/2 cup of the powdered sugar until soft and fluffy. Add the flour, salt and vanilla extract, and beat on medium until just combined. Add in the chocolate chips and mix on low for about 15 seconds.
- Scoop out the dough and roll into 1 tablespoon sized balls and place them on a lined cookie sheet, about 2 inches apart. Once all of the balls are lined up on the sheet, place the entire cookie sheet into the fridge for 5 minutes, before removing and placing into the oven to bake, for 11-12 minutes, or until the edges are lightly browned.* Allow the cookies to cool for 5 minutes on the warm baking sheet before rolling them, one at a time, in the remaining 1/2 cup of powdered sugar and placing them on a cooling rack to cool completely.
Cookies should be completely cooled before placing them in an airtight container, in an even layer, to store for 1-2 weeks at room temperature, or up to 2 months in the freezer. Separate layers with a piece of parchment paper.
Notes
*You can also bake the cookies without chilling the pan for 5 minutes, but I like to do this to ensure that the mounds are nice and tall, with no chance of spreading.
- Prep Time: 10 minutes
- Cook Time: 20 minutes
- Category: sweets
- Method: bake
- Cuisine: american