
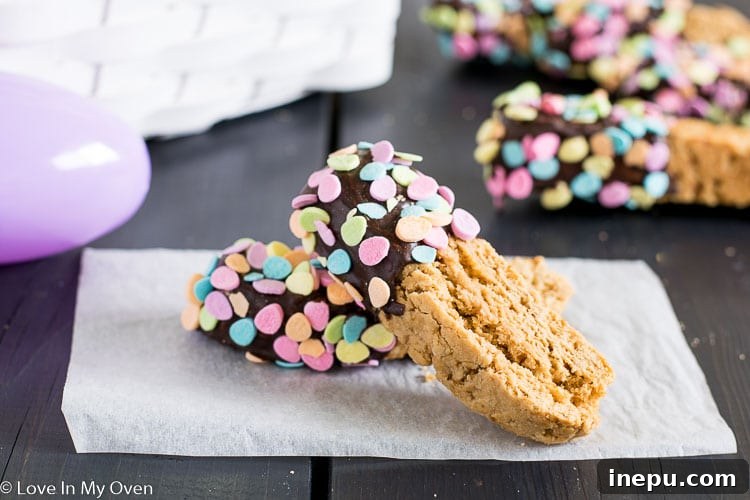
These classic twice-baked chocolate almond biscotti cookies are the perfect treat to serve alongside a cup of coffee or tea. Chocolate dipped biscotti makes a great host gift too!
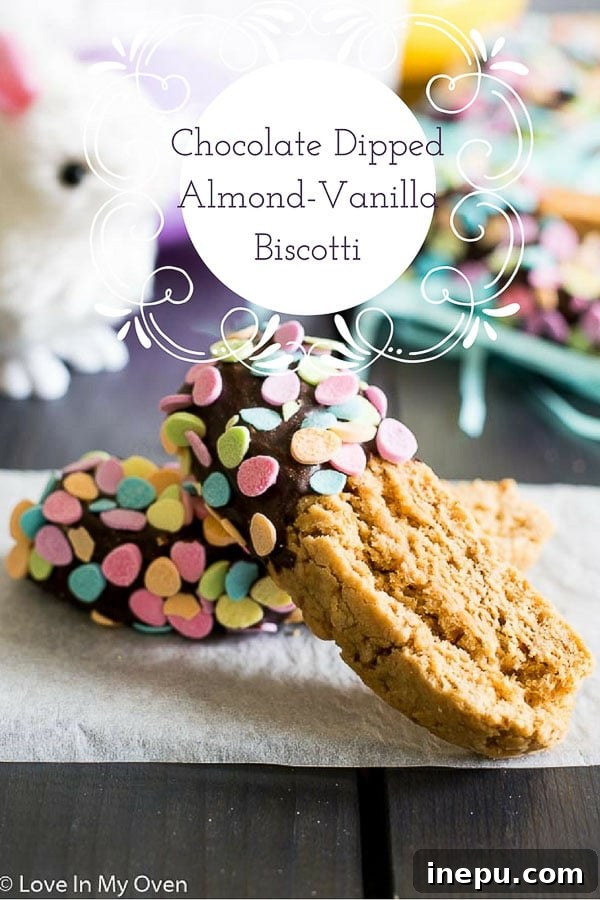
Bake the Perfect Chocolate Almond Biscotti: An Easy Guide to Twice-Baked Delights
Hello, fellow bakers and food enthusiasts! As we navigate the whimsical turns of the seasons, there’s always something comforting to be found in the kitchen. Just recently, I was ready to embrace the warmth of spring, with my rhubarb plant bravely poking through the soil, a sure sign of brighter days ahead. Then, nature had other plans, surprising us with a flurry of snow! It’s moments like these, when the world outside feels a little unpredictable, that I instinctively turn to the warmth and magic of baking. (For my friends across the border, imagine a lovely +20 degrees Celsius turning into a winter wonderland in April!)
And what better way to conjure joy than with the delightful aroma of freshly baked cookies? This past weekend, these easy chocolate dipped biscotti became my beacon of comfort. To add a special touch, I adorned them with the sweetest little Easter egg sprinkles I found a few weeks ago. Suddenly, the kitchen was brighter, the air was sweeter, and the unexpected chill outside faded into insignificance. Baking isn’t just about creating food; it’s about creating moments of warmth, comfort, and simple happiness.
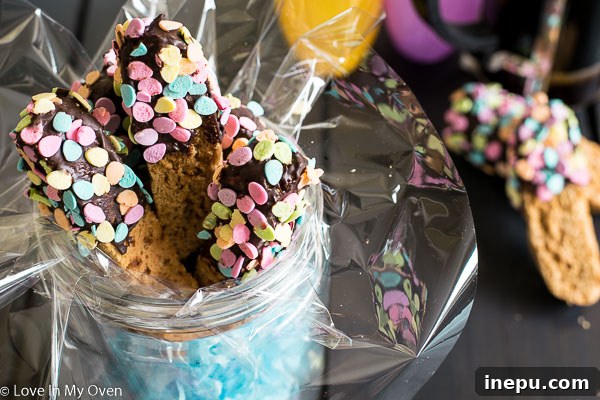
Is Making Homemade Biscotti Really That Easy? Unlocking the Secrets of Twice-Baked Cookies
If you’ve never ventured into the world of homemade biscotti, you are truly missing out on a surprisingly simple and incredibly rewarding baking experience! Many people assume that making biscotti from scratch is an intricate, time-consuming process reserved for professional bakers. However, I’m here to tell you that these classic Italian twice-baked cookies are remarkably easy to master, even for novice bakers. The ingredients are straightforward, the steps are logical, and the result is consistently impressive.
One of the best aspects of having homemade biscotti on hand is their sheer versatility. They are the ideal companion for your morning ritual—whether that’s a robust cup of coffee, a soothing mug of tea, or even a glass of your favorite milk. Their firm texture is designed for dipping, allowing them to absorb just the right amount of liquid to soften slightly and release their full flavor. Moreover, these delightful treats boast an exceptional shelf life. Because they are twice-baked, losing much of their moisture in the process, they keep fresh for a really long time. This makes them perfect for meal prepping your snacks, having a gourmet treat ready for unexpected guests, or simply indulging whenever the craving strikes.
The Art of the “Twice-Baked” Method: Why It’s Essential for Perfect Biscotti
The secret to biscotti’s signature crispness and longevity lies in its name: “biscotti” literally means “twice-cooked” or “twice-baked” in Italian. This unique baking method is what sets them apart from other cookies and contributes to their distinctive texture. The process begins with baking the dough in a log shape, creating a semi-firm, almost cake-like consistency. After this initial bake, the logs are removed from the oven, sliced, and then returned for a second, shorter bake. This crucial second stage is where the magic happens, transforming the soft slices into the hard, dry, and delightfully crunchy biscuits that biscotti are known for.
This dual-baking not only ensures that classic snappy bite but also significantly extends their freshness. By minimizing the moisture content, the risk of spoilage is greatly reduced, allowing biscotti to be stored at room temperature for weeks, or even frozen for months, without compromising their quality. It’s a testament to ancient culinary wisdom, making them an enduring treat that’s both practical and utterly delicious. Embrace the twice-baked journey, and you’ll unlock the full potential of these delightful cookies.
Crafting Your Signature Chocolate Almond Biscotti Dough
The journey to perfect biscotti begins with creating a well-balanced dough. This recipe emphasizes simplicity while delivering rich flavor. You’ll start by creaming together your sugar and butter until the mixture is beautifully smooth and light. For this particular batch, I used coconut palm sugar, which lent a lovely, slightly darker brown hue to my biscotti – a subtle difference that adds visual appeal and a hint of caramel note. The key here is proper aeration; cream them thoroughly to incorporate air, which contributes to a tender, yet firm, texture in the baked cookie.
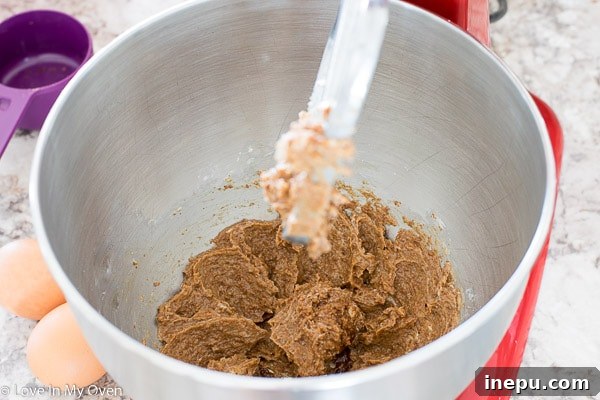
Next, carefully add your extracts. I chose a harmonious blend of almond and vanilla, where the rich, nutty notes of almond meet the warm, sweet aroma of vanilla. Almond extract is quite concentrated, so precise measurement is important to prevent it from overwhelming the delicate vanilla. However, feel free to personalize! If you have a strong preference for either flavor, you can adjust the intensity slightly; even an extra 1/4 teaspoon can make a noticeable difference in the final taste. After the extracts, beat in your eggs one at a time, ensuring each egg is fully incorporated before adding the next. This creates a smooth, well-emulsified base for your dough.
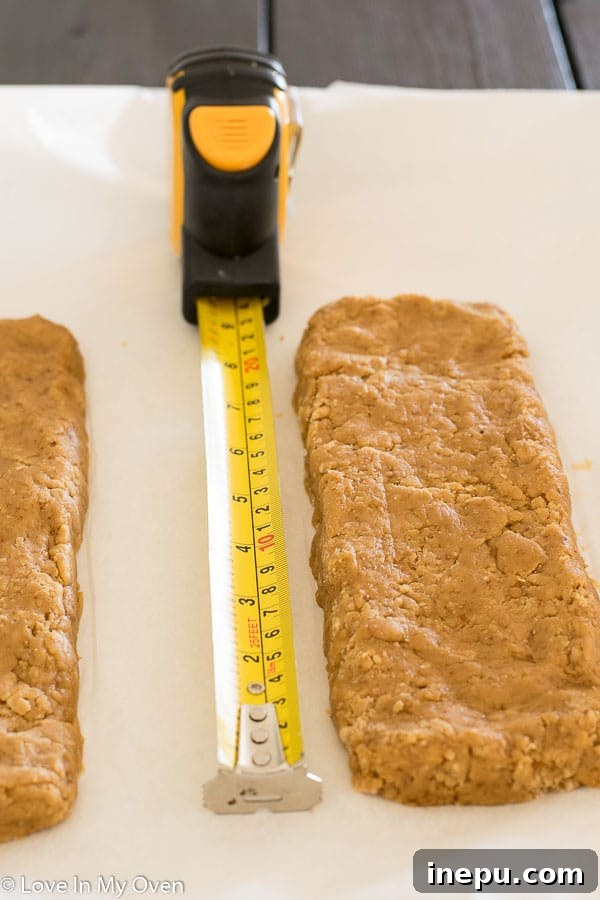
Finally, gradually introduce your dry ingredients. In a separate bowl, whisk together all-purpose flour (sifted for a lighter texture), baking powder, salt, and a pinch of nutmeg. Sifting the flour ensures there are no lumps and helps in even distribution. Slowly add this dry mixture to your wet ingredients, mixing on low speed until the dough just comes together. It’s crucial not to overmix, as this can develop the gluten too much, leading to tough biscotti. The dough will be slightly sticky, which is completely normal. To help with shaping, lightly flour your hands. I often use a measuring tape to ensure my dough logs are precisely the same dimensions; this helps them bake uniformly and gives your finished biscotti a professional appearance.
Achieving Biscotti Perfection: The Baking and Slicing Process
Once your beautifully shaped dough logs are ready, it’s time for their first bake. Gently transfer them to your prepared baking sheet and place them in the preheated oven for approximately 22 minutes. During this stage, the logs will firm up and become lightly golden, setting their initial structure. This step is crucial for building the foundation of your future crisp biscotti.
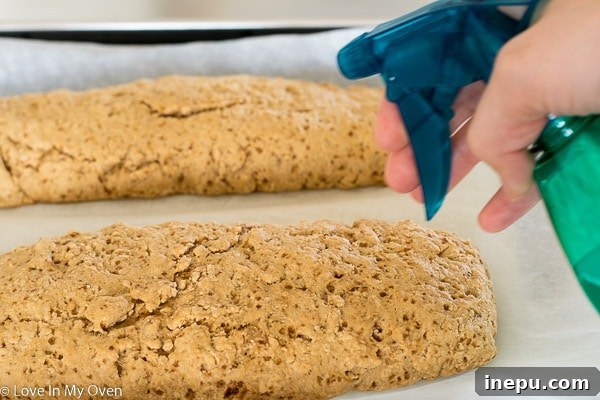
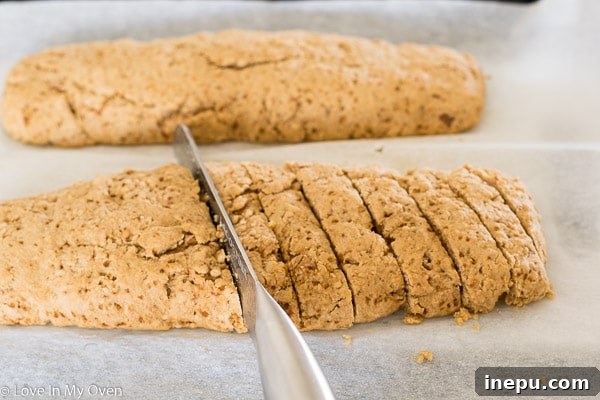
Upon removing the logs from the oven, you’ll encounter a neat trick that simplifies the slicing process and prevents crumbling. Fill a spray bottle with room-temperature water and lightly spritz the entire surface of the warm, baked biscotti logs. Let them sit for about 5 minutes. This light misting miraculously softens the crust just enough to allow you to slice through them cleanly and easily without any breakage. With a large serrated knife, slice the logs diagonally into pieces about 1/2 to 3/4 inches wide. For longer, more elegant biscotti, angle your knife sharper during slicing. This is where you can truly customize the final look of your cookies.
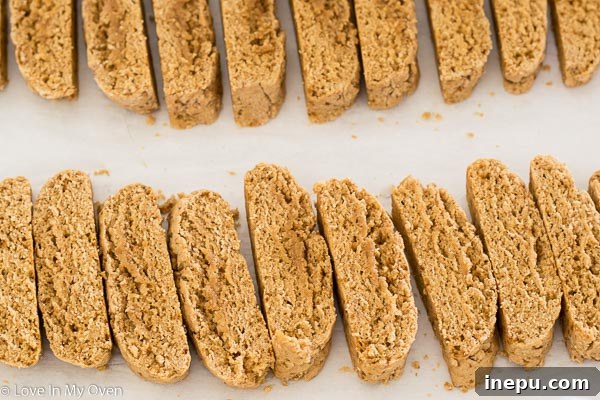
Now, for the second bake, which gives biscotti its characteristic crispness. Arrange your sliced biscotti pieces back onto the baking sheet, laying them on their sides. Reduce the oven temperature, then return them to the oven for an additional 25 minutes. Keep an eye on them towards the end, as ovens can vary. You’re looking for a lovely golden brown color and a truly firm texture. Once baked, remove the biscotti from the oven. After letting them rest on the hot baking sheet for 5 minutes, transfer them to a wire rack to cool completely. This cooling process is crucial and should take at least a few hours, allowing them to fully crisp up and be ready for their chocolate bath.
The Decadent Finish: Dipping in Chocolate and Adding Sprinkles
Once your biscotti are completely cool and firm, it’s time for the final, most delightful step: dipping them in rich, melted chocolate! I find that semi-sweet baking chocolate offers the perfect balance, complementing the almond and vanilla flavors without being overly sweet. Melt your chosen chocolate in a shallow bowl. You can do this gently in a microwave, stirring every 30 seconds until smooth, or using a traditional double boiler method for perfectly glossy results.
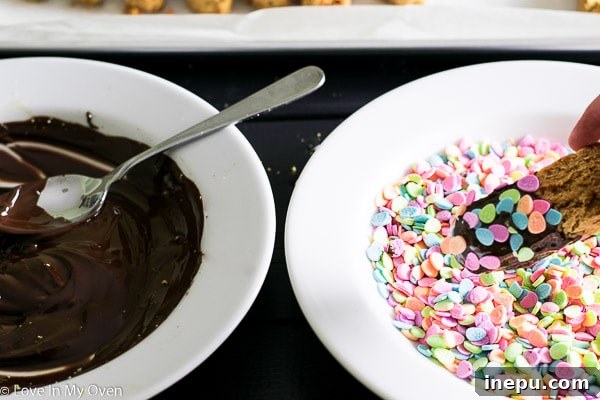
For the sprinkles, I’ve discovered a fool-proof method that avoids a sticky, clumpy mess. Instead of attempting to roll the entire biscotti in a bowl of sprinkles (which often leaves chocolate residue in your precious sprinkle stash!), simply use a spoon or a small spatula to spread a thin, even layer of melted chocolate onto one end of each biscotti. Then, hold the chocolate-dipped end over your bowl of sprinkles and, using your other hand, gently “shower” the sprinkles over the wet chocolate. This ensures even coverage and keeps your remaining sprinkles pristine. Place the newly dipped and sprinkled biscotti back onto the wire rack, allowing the chocolate to set completely before storing them. This may take some time, especially in a warmer environment, but patience here ensures a beautiful, non-sticky finish.
Expert Tips for Baking the Best Chocolate Almond Biscotti
- Measure Accurately: Especially with extracts, precise measurements prevent overpowering flavors. Use a kitchen scale for flour for best accuracy if you have one.
- Room Temperature Ingredients: Ensure butter and eggs are at room temperature for smooth creaming and even incorporation into the dough.
- Don’t Overmix: After adding the dry ingredients, mix just until the dough comes together. Overmixing develops gluten, leading to tougher biscotti.
- Uniform Log Shaping: Evenly sized logs ensure consistent baking. Use a light dusting of flour on your hands to prevent sticking while shaping.
- The Water Spritz is Key: Don’t skip spritzing the logs after the first bake! It’s the secret to neat, crumb-free slices.
- Use a Sharp Serrated Knife: This tool makes slicing the partially baked logs significantly easier and prevents breakage.
- Cool Completely Before Dipping: For best results, biscotti must be completely cooled before dipping in chocolate. Warm biscotti will cause the chocolate to melt or slide off.
- Creative Toppings: Beyond sprinkles, consider chopped toasted nuts (like pecans or walnuts), a dusting of cocoa powder, a drizzle of contrasting white chocolate, or even a sprinkle of sea salt for a gourmet touch.
Serving Suggestions & Storage for Your Delicious Biscotti
Once fully cooled and the chocolate is perfectly set, your homemade chocolate almond biscotti are ready to dazzle! These crispy delights are truly at their best when served alongside a steaming cup of your favorite brew. Whether it’s a rich, dark coffee, a delicate herbal tea, or a robust espresso, their firm texture is designed to be dipped, allowing them to soften slightly and release their full almond-vanilla flavor as they soak up your beverage. They’re also surprisingly good with a scoop of vanilla ice cream or as a crunchy element in a dessert parfait.
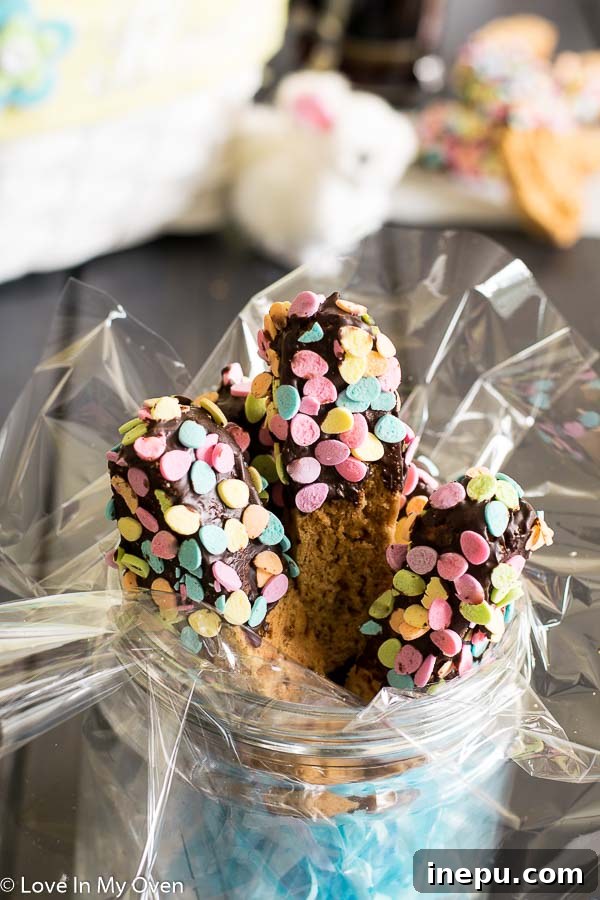
Beyond personal enjoyment, these beautifully crafted biscotti make an incredibly thoughtful and sophisticated host gift. Imagine presenting a small bag or tin of these gourmet treats, customized with sprinkles to fit any occasion – vibrant colors for a birthday, pastels for Easter, or elegant metallics for a holiday gathering. They are a gesture that speaks volumes of care and culinary talent.

Maximizing Freshness: How to Store Your Biscotti
One of the many benefits of biscotti is their fantastic shelf life. To keep your baked and cooled biscotti at their best, store them in an airtight container at room temperature. They will retain their delightful crispness and fresh flavor for a good 3 to 4 weeks, making them a superb make-ahead treat. For even longer preservation, biscotti are excellent candidates for freezing. Simply place them in a freezer-safe airtight container or bag, and they will keep perfectly for up to 6 months. When you’re ready to enjoy them, just let them thaw at room temperature for a little while, and they’ll be as fresh and crisp as the day you baked them.
Craving More Biscotti? Explore These Delicious Variations!
If you’ve been captivated by the simplicity and deliciousness of homemade biscotti, you’ll be thrilled to know there’s a world of flavor combinations waiting to be explored. Once you’ve mastered this chocolate almond version, you might want to try these other delightful recipes from my collection:
- Lemon Poppy Seed Biscotti: A bright and zesty option perfect for spring or a light breakfast.
- Double Chocolate Peppermint Biscotti: A rich and festive choice, especially wonderful during the holiday season.

Chocolate Dipped Almond Vanilla Biscotti
5 Stars
4 Stars
3 Stars
2 Stars
1 Star
5 from 1 review
- Author: Katherine
Total Time: 1 hour 5 minutes
Yield: 25-30 biscotti
Description
These classic twice-baked chocolate almond biscotti cookies are the perfect treat to serve alongside a cup of coffee or tea. Chocolate dipped biscotti makes a great host gift too!
Ingredients
- 6 tbsp unsalted butter, room temperature
- 1/2 cup coconut palm sugar (or granulated sugar)
- 2 tsp vanilla extract
- 1/2 tsp almond extract
- 2 eggs
- 2 cups all-purpose flour, sifted
- 1 1/2 tsp baking powder
- 1/2 tsp salt
- 1/4 tsp nutmeg
- 6 oz baking chocolate, chopped
- Sprinkles, for decorating
Instructions
- Preheat oven to 350°F (175°C) and line a large baking sheet with parchment paper or a silicone baking mat.
- In the bowl of a stand mixer fitted with the paddle attachment (or using a handheld mixer), cream the butter and sugar together until light and smooth. Add the vanilla and almond extracts, then beat in the eggs one by one, mixing until fully combined after each addition.
- In a separate medium bowl, whisk together the sifted all-purpose flour, baking powder, salt, and nutmeg. Gradually add the dry ingredients to the wet ingredients, mixing on low speed until just combined and a soft, slightly sticky dough forms. Be careful not to overmix.
- Lightly flour your hands. Divide the dough into 2 equal sections and shape each into a log approximately 9 inches long and 2 inches wide. Place the logs side by side on the prepared baking sheet. Smooth the tops of the logs with a spatula if desired. Bake for 22 minutes.
- Remove the baking sheet from the oven. Using a spray bottle filled with room temperature water, lightly spritz the surface of both logs. Let them sit for 5 minutes to soften the crust. Then, using a large serrated knife, slice the logs diagonally into 1/2-inch to 3/4-inch thick pieces. Lay the sliced biscotti on their sides back onto the baking sheet. Reduce the oven temperature to 325°F (160°C).
- Return the baking sheet to the oven and bake the biscotti for an additional 25 minutes, or until they are golden brown and crisp.
- Remove the biscotti from the oven. After 5 minutes, transfer the biscotti to a wire rack to cool completely. This cooling process should take at least 2 hours to ensure they are firm and ready for dipping.
- In a shallow, microwave-safe bowl, melt the chopped baking chocolate in 30-second intervals, stirring well after each, until smooth and fully melted. Alternatively, use a double boiler.
- To dip, use a spoon or small spatula to spread a thin layer of melted chocolate onto one end of each cooled biscotti. Hold the chocolate-dipped end over your bowl of sprinkles and gently shower the sprinkles over the wet chocolate using your other hand. Place the decorated biscotti back onto the wire rack to allow the chocolate to set completely.
- Store biscotti in an airtight container at room temperature for 3-4 weeks. For longer storage, freeze for up to 6 months.
- Prep Time: 15 minutes
- Cook Time: 50 minutes
- Category: cookies
- Method: twice baked
- Cuisine: italian