
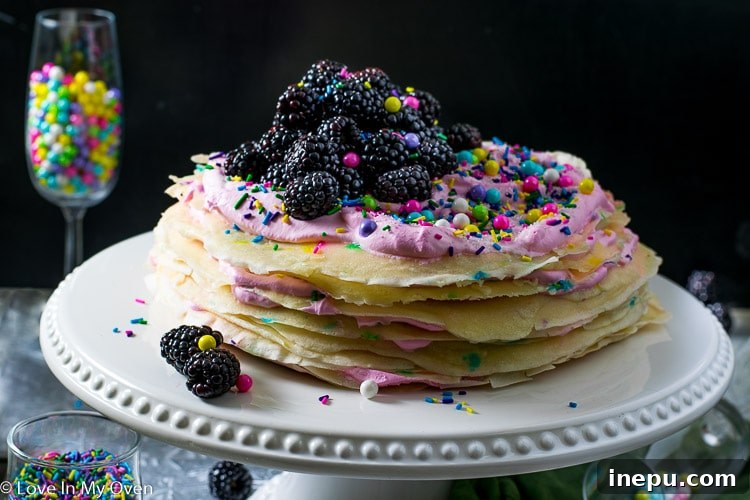
Dazzling Funfetti Crepe Cake: Layers of Sweet Celebration
Discover the magic of a deliciously easy funfetti layer crepe cake, bursting with sprinkles of joy! Enjoy layer upon layer of tender, sweet crepes perfectly paired with a simple yet incredibly scrumptious filling. This dessert is a true showstopper, guaranteed to impress at any gathering.
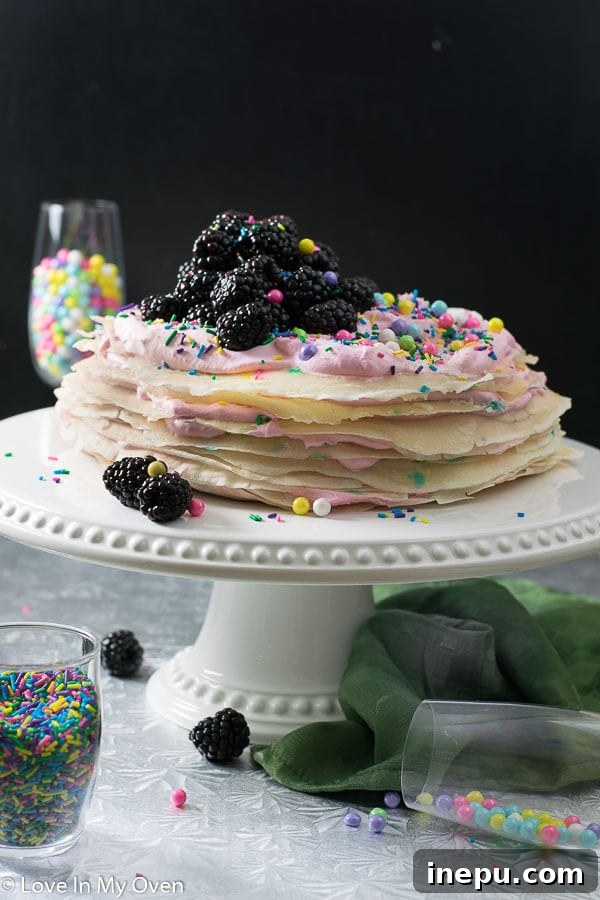
*Please note* this post was originally published in 2019. The text has since been updated and enhanced for clarity and detail, while the beloved recipe remains unchanged.
Two years have flown by since the inception of this blog, and what an incredible journey it has been! It’s hard to believe how quickly time passes when you’re truly passionate about what you do. To commemorate this special milestone, I reached out to you, my amazing readers, for celebratory recipe ideas. Among many fantastic suggestions, a crepe cake and a cheesecake stood out. While I’m absolutely thrilled with how this funfetti crepe cake turned out – a true labor of love and a first for the blog – rest assured, a cheesecake adventure is definitely on the horizon too!
Before we dive into the delightful details of this layered confection, I want to take a moment to express my deepest gratitude. A heartfelt THANK YOU goes out to each and every one of you: my loyal readers, supportive friends and family, and inspiring fellow bloggers. Your unwavering encouragement and constant love are the fuel that keeps this blog thriving. Balancing a busy life with three wonderful children and dedicating time almost every day to creating new content is possible only because I genuinely adore what I do, and your engagement makes it all infinitely more rewarding. Thank you for being part of this journey. ♥
And now, without further delay, allow me to introduce you to this vibrantly sprinkled layer crepe cake – a dessert that truly embodies celebration!
Crafting Your Perfect Crepe Cake: A Step-by-Step Guide
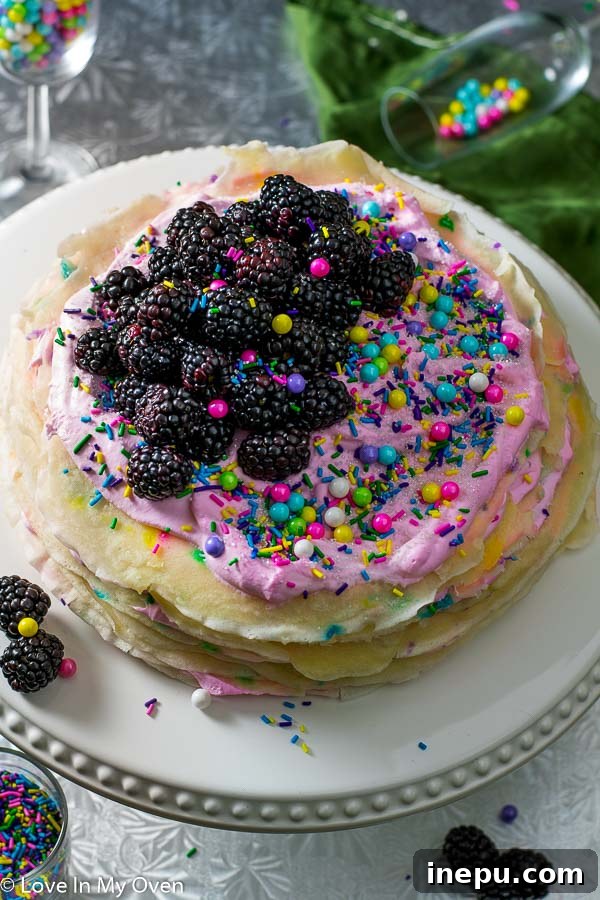
Creating a breathtaking funfetti crepe cake might look intricate, but the process is surprisingly straightforward and incredibly rewarding. This recipe features our go-to sweet crepe base, complemented by a luxuriously simple whipped cream filling. For those interested in a natural pop of color without artificial dyes, a touch of beet juice (which is completely flavorless, I promise!) provides a beautiful hue. If you’re curious about this technique, you can find more details here. Of course, feel free to use your preferred food coloring to match any theme or mood!
Mastering the Art of Crepe Making
If you possess any secret tips or magic tricks for cooking crepes flawlessly in a pan, please share your wisdom! It often takes a few attempts to perfect the technique, but I’ve found a method that works wonderfully. The key is to swiftly remove the pan from the heat source with one hand immediately after pouring the batter. With the other hand, quickly swirl the pan, starting from the center, to evenly distribute the batter across the entire surface. This swift motion creates that signature thin, delicate crepe. Don’t worry if your first few crepes aren’t picture-perfect; a few cracked or imperfect crepes can easily be hidden within the layers of your cake! For those with specialized equipment, a crepe maker can certainly simplify this step.
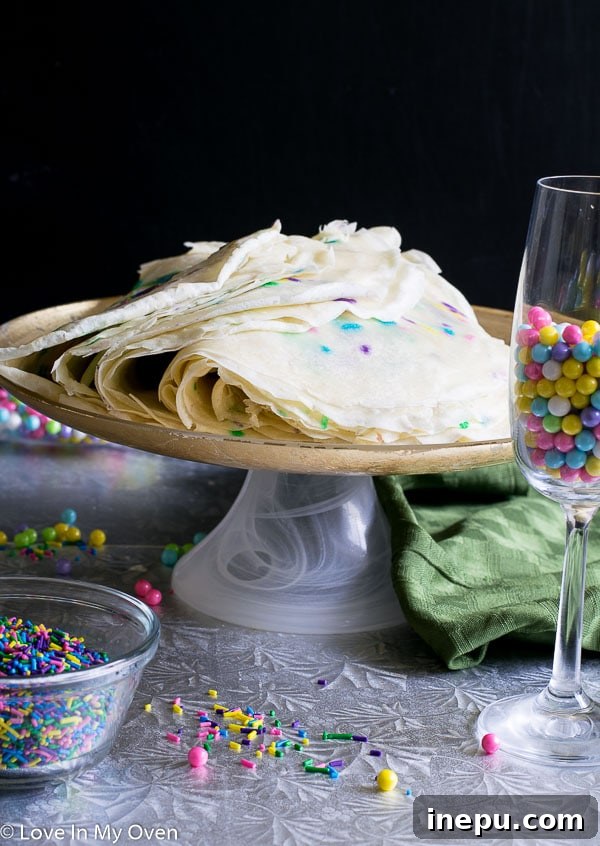
Now, let’s talk about the fun part: sprinkles! The timing for adding sprinkles is crucial to prevent them from bleeding their colors into the crepe batter. Always add your sprinkles immediately after you’ve swirled the batter in the pan, *before* it sets. Incorporating them directly into the batter prior to cooking is generally not advised, as the heat will cause the colors to run, resulting in a less vibrant and potentially muddy appearance.
Another essential tip for a successful crepe cake is patience. Ensure your crepes are completely cooled before you begin stacking and adding the whipped cream filling. Warm crepes will cause your frosting to melt and slide, compromising the stability and aesthetics of your beautiful creation. Allow them to cool fully on a wire rack before proceeding to the next step.
Exploring Delicious Filling Alternatives for Your Crepe Cake
While the light and airy whipped cream filling is an absolute dream for this funfetti crepe cake, you are certainly not limited to it! The beauty of a crepe cake lies in its versatility, allowing for a variety of delightful fillings to suit your taste preferences and dietary needs.
Beyond Whipped Cream: Creative Frosting Ideas
If classic whipped cream isn’t your favorite, or if you’re looking to experiment, consider a soft and fluffy buttercream frosting. The key here is “soft and fluffy.” A buttercream that is too stiff or dense might tear the delicate crepes as you try to spread it. Aim for a consistency that is easily spreadable but still holds its shape. A light vanilla bean buttercream or even a cream cheese buttercream could add a wonderful depth of flavor. Alternatively, a delicate mousse, such as a chocolate mousse or a fruit-flavored mousse, would create an exceptionally elegant and decadent experience. For a dairy-free or vegan option, my coconut whipped cream is an excellent choice, offering a similar light texture with a subtle tropical hint.
One of the most captivating aspects of a crepe cake, besides its surprising ease of preparation, is the stunning visual effect when you slice into it. Those numerous, delicate layers, each with a whisper of filling, create an impression of culinary mastery that belies the simple construction process. It truly makes for a fun and impressive dessert, perfect for entertaining guests and celebrating any special moment.
To elevate this celebratory dessert even further, I often consider serving it alongside a scoop of something extra special. My no-churn mint chocolate ice cream would provide a refreshing contrast, but I’ve also been dreaming up a no-churn funfetti ice cream to complement the cake’s theme. What do you think – a double dose of funfetti joy?
Update: Great news! A funfetti no-churn ice cream recipe is now available on the blog! Find the recipe here to complete your ultimate funfetti dessert experience.
As we celebrate another year of sharing delicious recipes, I look forward to many more years of “Puttin’ Some Love in My Oven” and into your kitchens!
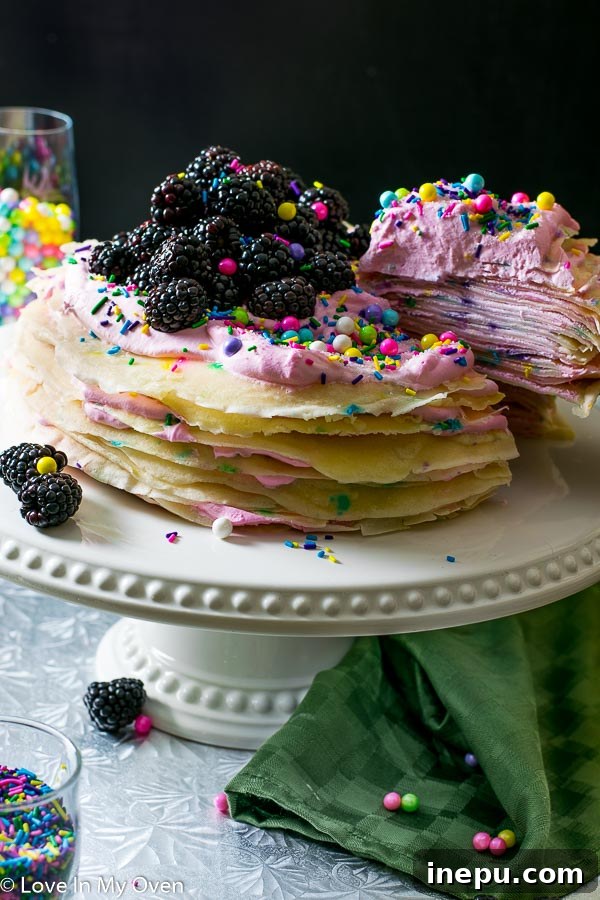
Tips for a Picture-Perfect Crepe Cake Assembly
Achieving those beautiful, even layers in your funfetti crepe cake is easier than you think. Start with your first cooled crepe centered on a cake stand or large serving plate. Apply about 2 tablespoons of your prepared frosting to the middle, spreading it gently and evenly to the edges. Repeat this process, placing another crepe on top and spreading frosting, until all your crepes are stacked. For a smooth, well-shaped cake, pay attention to the edges as you go, ensuring a consistent amount of frosting helps maintain the cake’s cylindrical form. Once all layers are assembled, cover the top with any remaining frosting and let your creativity shine with more sprinkles! Remember, with a funfetti cake, there’s no such thing as too many sprinkles. Store the finished cake in the refrigerator until about an hour before serving to allow the flavors to meld and the cake to firm up slightly.
Storage and Make-Ahead Options
This funfetti crepe cake is not just delicious but also incredibly convenient for make-ahead planning. Leftovers should be stored in an airtight container in the refrigerator, where they will stay fresh and delightful for 2-3 days. For even more convenience, you can prepare the crepes in advance and freeze them. Simply wrap the cooled crepes tightly in plastic wrap, and they will keep well in the freezer for up to 2 months. Thaw them overnight in the refrigerator before assembling your cake. This makes the funfetti crepe cake an ideal option for busy schedules or for preparing components ahead of a special event.
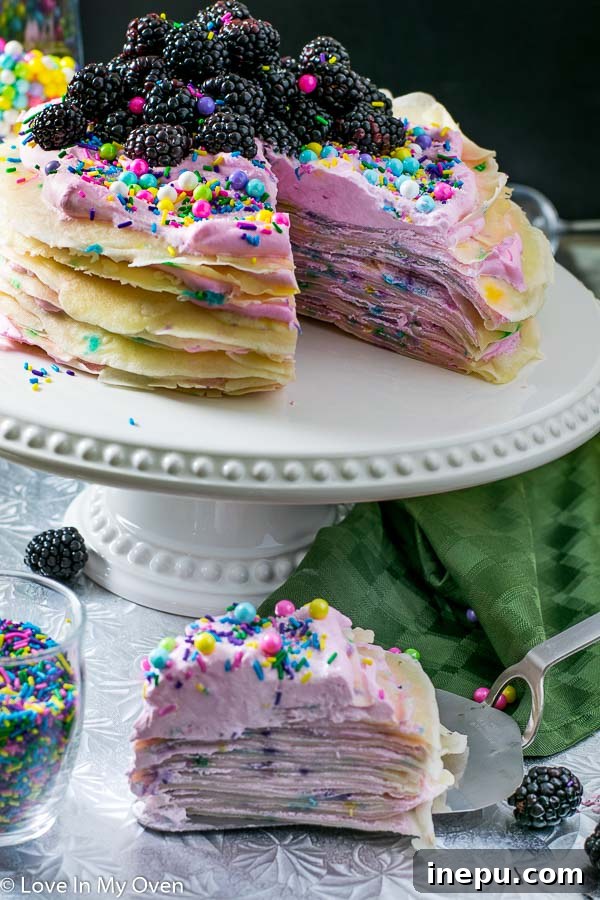
Why This Funfetti Crepe Cake Will Be Your New Favorite
Beyond its undeniably cheerful appearance, the funfetti crepe cake offers a unique dessert experience that sets it apart from traditional cakes. Its delicate, thin layers provide a lighter texture, making it less heavy and often more appealing after a meal. The combination of tender crepes and creamy filling creates a delightful mouthfeel, while the vibrant sprinkles add a playful crunch and burst of color with every bite. It’s a sophisticated yet whimsical dessert that caters to both visual appeal and exquisite taste. Perfect for birthdays, anniversaries, or simply to brighten a regular day, this crepe cake is an expression of joy and a testament to the fact that impressive desserts don’t always require complicated techniques. Its customizable nature also means endless possibilities for flavor combinations, making it a recipe you’ll revisit time and again.
Some other cakes and crepes from the blog you might enjoy:
- healthy birthday cake
- grain-free crepes with strawberry cream cheese filling
- chocolate peanut butter sheet cake

Funfetti Crepe Cake
5 Stars 4 Stars 3 Stars 2 Stars 1 Star
5 from 9 reviews
Author: Katherine
Total Time: 2 hours 60 minutes
Yield: 1 cake 1x
Description
This deliciously easy funfetti crepe cake is a celebration in every slice! Simple to assemble and perfect for any occasion, its vibrant layers will truly captivate your guests.
Ingredients
Scale
Crepes
- 2 1/2 cups milk
- 3/4 cup warm water
- 3 cups all-purpose flour
- 3 eggs, room temperature
- 3 tbsp. granulated sugar
- 4 tbsp. butter, melted and cooled
- 1 tsp pure vanilla extract
- pinch of salt
- 1/4 cup sprinkles (any kind)
Whipped Cream Frosting
- 2 cups heavy whipping cream (36%)
- 1/3 cup powdered sugar
- 2–3 tsp reserved beet juice OR 1-2 drops food coloring*
Instructions
- Place all the crepe ingredients into a blender or food processor, ensuring they are added in the order listed. Blend on high speed just until all ingredients are thoroughly incorporated and the batter is smooth with no visible lumps. Cover the batter and refrigerate it for at least 30 minutes, or even up to one day in advance for optimal results.
- When you are ready to cook the crepes, remove the batter from the refrigerator. Heat a 9″ or 10″ skillet over medium heat. Lightly spray the pan with non-stick spray or melt a small dab of butter, swirling it to evenly coat the pan’s surface. Working quickly, remove the hot pan from the heat with one hand. With the other hand, pour about 3 tablespoons or 1/4 cup of batter into the center of the pan, then immediately swirl the pan to thinly spread the batter across its entire surface. This technique might take a few tries, but it becomes easier with practice! Place the pan back on the heat source, and swiftly scatter approximately 1 teaspoon of sprinkles evenly over the wet crepe batter. Cook the crepe until the edges turn lightly golden, which typically takes about 1 minute. Using a quick flip of the wrist or a thin spatula, carefully flip the crepe over and cook the second side for an additional 30 seconds. Once cooked, transfer the crepe to a wire rack to cool completely before stacking. It’s crucial not to stack warm crepes, as they will stick together and affect the final texture of your cake.
- Once all crepes are cooked and thoroughly cooled (this recipe yields approximately 15-20 crepes), stack them neatly and wrap them tightly in plastic wrap. Store the wrapped crepes in the refrigerator while you prepare the frosting.
- Prepare the frosting: For the best whipped cream results, I highly recommend chilling a metal mixing bowl and your mixer’s whisk attachment in the refrigerator for a few hours before you begin. When you’re ready to make the frosting, pour the heavy whipping cream into the chilled metal bowl. Whip on high speed until the cream starts to thicken, usually around 2 minutes. Gradually add the powdered sugar and any food coloring you choose to use. Continue whipping on high until stiff peaks form, indicating a stable and airy frosting. Store the prepared frosting in the refrigerator until you are ready to assemble the cake.
- Assemble the cake: Begin by placing one cooled crepe in the center of a cake stand or a large, flat serving plate. Spoon about 2 tablespoons of the prepared frosting onto the middle of the crepe and spread it out evenly to the edges. Place another crepe directly on top and repeat the frosting process. Continue layering crepes and frosting until all the crepes have been used. For a beautifully shaped cake, you may find it helpful to add a little extra frosting to the edges as you stack to ensure the cake maintains an even, cylindrical shape. Once all layers are complete, cover the top of the cake with any remaining frosting and decorate generously with more sprinkles! Keep the assembled cake in the refrigerator until about an hour before you plan to serve it. This allows the cake to set, ensuring clean slices.
Leftovers should be kept in the refrigerator, in an airtight container, where they’ll maintain their freshness for 2-3 days. Crepes can also be made well in advance and frozen. To do this, wrap them securely in plastic wrap, and they will keep for up to 2 months. Always remember to thaw frozen crepes in the fridge overnight before assembling your cake.
Notes
- For a natural way to color your frostings using reserved beet juice, refer to the detailed instructions in this recipe. This method provides a beautiful hue without altering the flavor.
- As you stack the crepes and spread the frosting, you might find it beneficial to add a slightly larger amount of frosting towards the outer edges of each layer. This helps the crepe cake to maintain a perfectly round and stable shape as it grows taller.
- Prep Time: 30 minutes
- Cook Time: 30 minutes
- Category: cakes
- Method: stovetop
- Cuisine: american