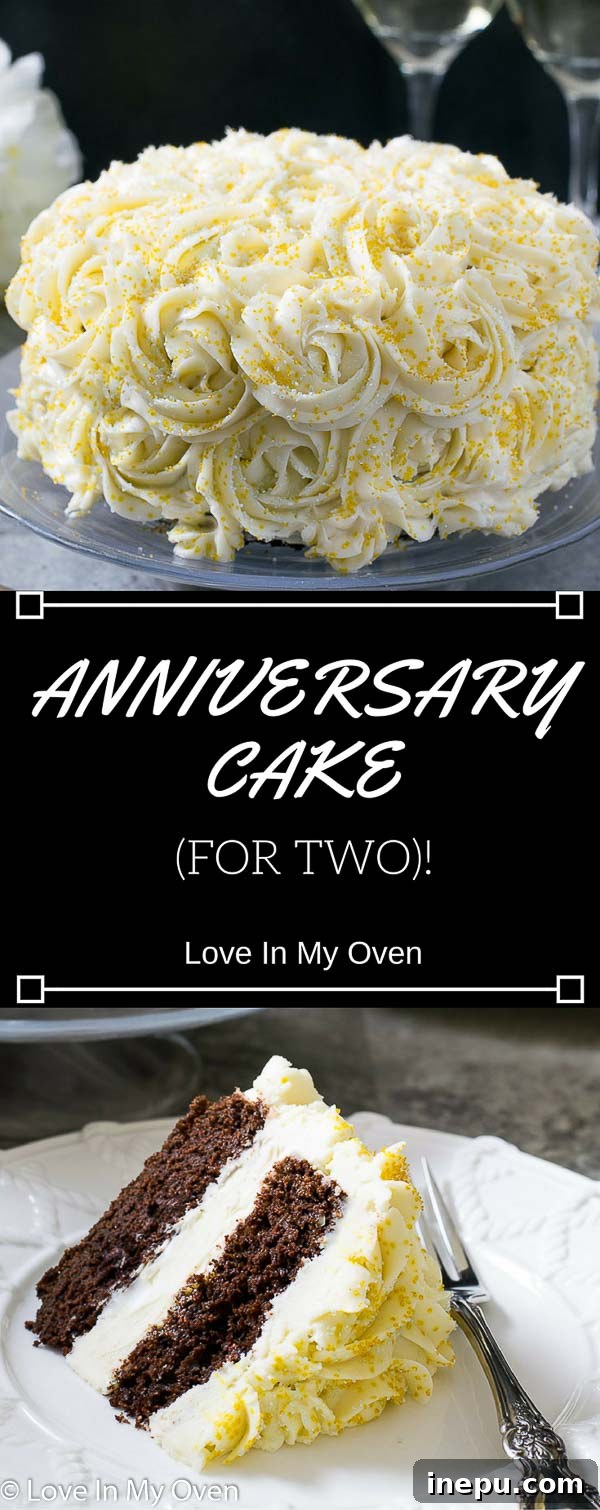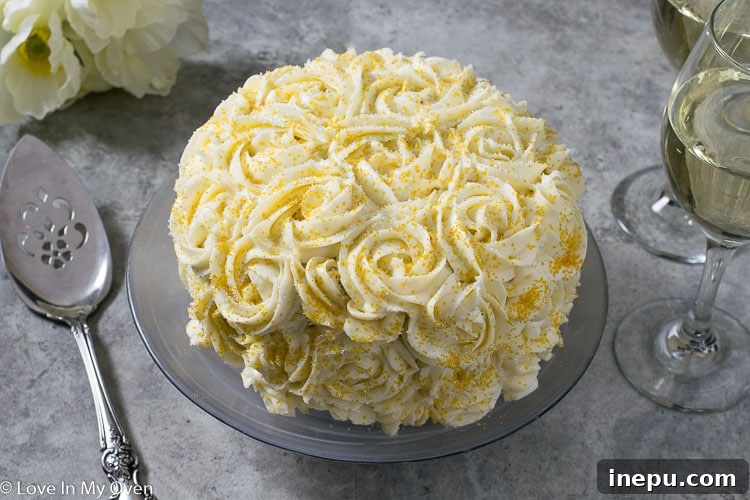
The perfect small chocolate cake recipe to celebrate any special occasion! This mini chocolate cake for two, baked in a 6-inch pan, is the ideal size for an anniversary, a romantic date night, or simply to treat yourself without overindulging.
Today marks a significant milestone – not my wedding anniversary (that’s still months away!), but a very special one for this blog: my one-year blogiversary! It feels like just yesterday I was nervously hitting the “publish” button with a mere handful of recipes. Fast forward a year, and this corner of the internet has blossomed to over 100 recipes, a testament to a year filled with passion, learning, and countless hours perfecting culinary creations and photography.
This journey has been incredibly rewarding. I’ve delved deep into the art of food blogging, from mastering new recipes to understanding the nuances of food styling and photography. While I plan to share a more in-depth reflection on this past year later this week, for now, let’s dive into what truly matters: CAKE!
It’s almost ironic, given my deep affection for cake, that my site, boasting over a hundred recipes, features only a handful of cake creations – three, to be precise, before this glorious addition. Cakes are my absolute favorite indulgence, and my most cherished recipe, the healthy smash cake I crafted for Wally’s first birthday, remains a fan favorite. For this special blogiversary treat, I’m once again reaching for my trusty 6-inch cake pan. It’s truly the perfect size for intimate celebrations, allowing us to enjoy a decadent dessert without committing to a week-long cake feast. After all, we all deserve a little sweetness, but balance is key!
So, whether you’re celebrating a romantic anniversary with your significant other, marking a personal achievement, or simply craving a delicious treat, this mini chocolate cake, adorned with luscious cream cheese icing, is absolutely ideal. It’s designed to bring joy without overwhelming your kitchen or your diet. Let’s make something memorable!
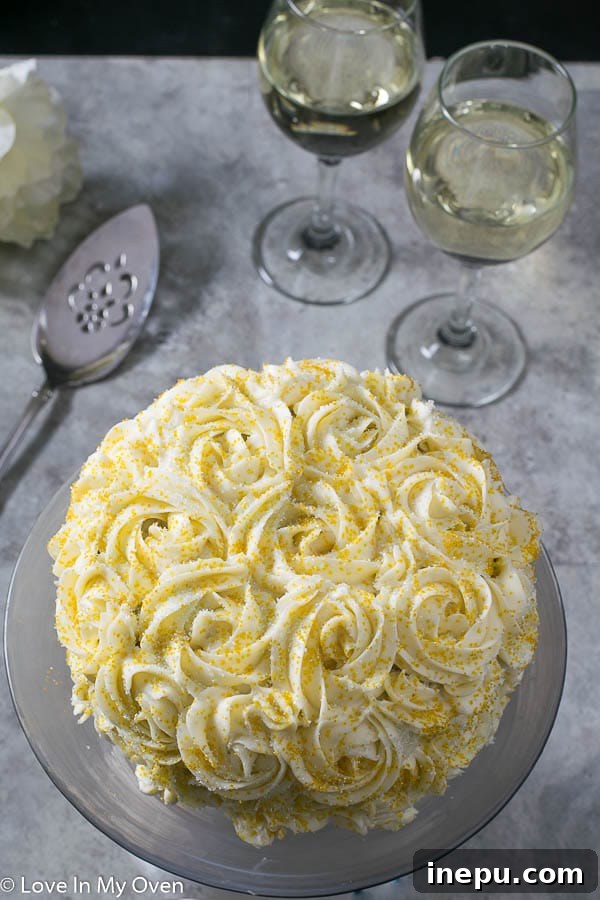
Why Choose a Mini Cake for Your Celebration?
In a world often geared towards grand gestures, there’s a unique charm in small-batch baking, especially when it comes to cakes. A 6-inch cake, perfectly portioned for two (or maybe three, if you’re feeling generous), offers several advantages. Firstly, it minimizes waste, ensuring every slice is fresh and savored. You won’t find yourself with a colossal cake taking up precious fridge space for days on end. Secondly, it’s inherently intimate, making it the perfect dessert for anniversaries, date nights, or any occasion that calls for a special moment between a few people. The effort feels personal, the presentation exquisite, and the joy of sharing a freshly baked treat is unparalleled. It’s also incredibly manageable to bake, making it accessible even for novice bakers who might be intimidated by larger, more complex tiered cakes.
Crafting the Ultimate Moist Chocolate Cake Base
The foundation of this celebratory cake is a simple yet profoundly delicious chocolate cake. Its scaled-down size doesn’t compromise on flavor or texture; in fact, it enhances the experience. The secret to its incredibly moist crumb lies in a few key ingredients. Buttermilk, a staple in many cake recipes, reacts with the baking soda to create a tender texture and a subtle tang that complements the richness of the chocolate. Combined with oil, which provides a level of moistness that butter alone sometimes struggles to achieve, the cake stays incredibly soft for days. To truly amplify the chocolate experience, we incorporate both cocoa powder and melted dark chocolate. Using high-quality cocoa powder and melting real chocolate into the batter deepens the flavor profile, creating a truly decadent taste. For an added layer of richness and to enhance that deep cocoa essence, a touch of instant espresso powder is highly recommended. Don’t worry, your cake won’t taste like coffee; the espresso simply acts as a flavor booster, making the chocolate notes sing even louder.
Mastering Pipeable Cream Cheese Icing
I confess, cream cheese icing holds a special place in my heart – it’s often the only frosting I truly crave. While it’s famously delicious on a fluffy, moist carrot cake (like my personal favorite orange carrot cake), it’s an unexpectedly delightful pairing with rich chocolate cake. The slight tanginess of the cream cheese perfectly cuts through the sweetness and depth of the chocolate, creating a beautifully balanced flavor profile that’s simply irresistible.
However, traditional cream cheese icing, with its softer consistency, isn’t always ideal for intricate piping. To achieve that perfect pipeable texture for stunning decorations, I’ve slightly adjusted the classic ratio. The key is to increase the butter content relative to the cream cheese. Butter provides essential structure and stability, allowing the icing to hold its shape beautifully. Additionally, opting for full-fat cream cheese is crucial. Light cream cheese contains more water, which can make your frosting runny and difficult to work with. By using full-fat and upping the butter, you get an icing that’s stiffer, yet still incredibly smooth, creamy, and bursting with that signature tangy-sweet flavor. Remember to ensure both your butter and cream cheese are at proper room temperature for the best results; this helps them combine seamlessly without lumps, leading to a silky-smooth finish.
Decorating with Beautiful Rosettes: Easier Than You Think!
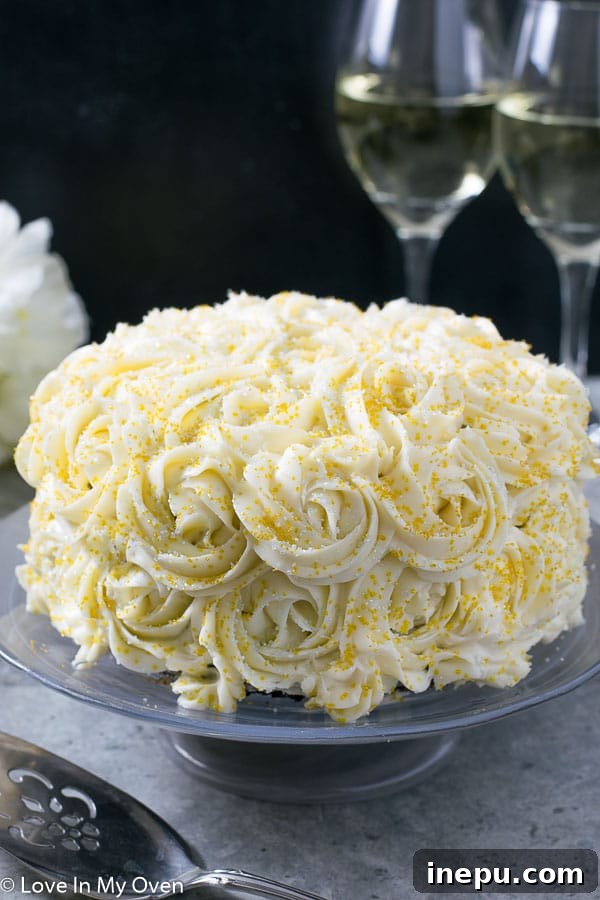
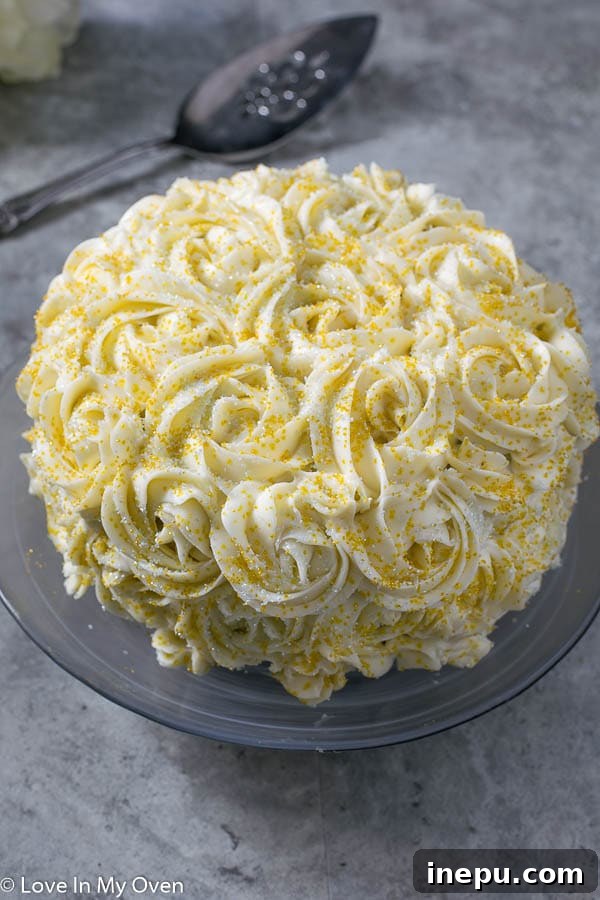
Speaking of piping, this particular cake holds a special memory as my very first “rose cake.” The stunning rosette design, which might look intimidating, is surprisingly simple to achieve thanks to wonderful resources like this awesome tutorial from I Am Baker. I actually decorated this cake amidst the beautiful chaos of family life – my toddler tugging at my pant leg while my three-year-old continuously begged for frosting samples. It’s a true testament to the fact that with a little patience and a good tutorial, even complex-looking decorations are within reach, even for busy parents!
For those eager to try, the rosettes require a star tip (a 1M Wilton tip is a popular choice) and a basic understanding of piping pressure. The tutorial provides excellent visual guidance, but the general idea is to start in the center of where you want your rose, then pipe in a spiral motion outwards, overlapping slightly, to create the petal effect. It’s all about consistent pressure and a steady hand. Don’t worry about perfection; even slightly imperfect rosettes add to the charm of a homemade cake!
Serving Suggestions & Variations
This mini chocolate cake for two is a celebration in itself, but a few thoughtful additions can elevate the experience even further. Consider serving it with a handful of fresh raspberries or strawberries; their tartness provides a lovely contrast to the rich chocolate and sweet cream cheese. A scoop of vanilla bean ice cream or a dollop of freshly whipped cream would also be a delightful accompaniment. For an adult celebration, pair it with a glass of sparkling wine or a rich cup of coffee. If you’re feeling adventurous, you could introduce subtle variations to the cake or frosting. A dash of peppermint extract in the frosting for a holiday twist, or a sprinkle of toasted nuts over the top for added texture, are just a couple of ideas. You could also swap out the dark chocolate for milk chocolate in the cake batter if you prefer a sweeter profile.
Storage and Make-Ahead Tips
Proper storage ensures your delicious mini chocolate cake remains fresh and delightful. If you plan to serve the cake on the same day it’s made, it can be stored at room temperature, ideally covered to prevent it from drying out. For serving within the next day or two, it’s best to keep the cake, covered, in the refrigerator due to the cream cheese icing. Leftover slices will keep well in an airtight container at room temperature for 1-2 days, or in the fridge for 4-5 days. For those who like to plan ahead, the unfrosted cake freezes beautifully. Once completely cooled, wrap it tightly in plastic wrap (and then aluminum foil for extra protection) and store in the freezer for up to two months. Thaw overnight in the refrigerator before frosting and decorating. This makes it a perfect make-ahead option for future spontaneous celebrations!
So, here’s to celebrating small victories, big loves, and the simple pleasure of a perfectly baked cake. Happy anniversary to me, and to you, for being part of this wonderful journey. We all deserve a delicious, perfectly-sized chocolate cake in our lives. May your celebrations be sweet and your cakes always moist!
Here’s to another great year of food and shared moments!
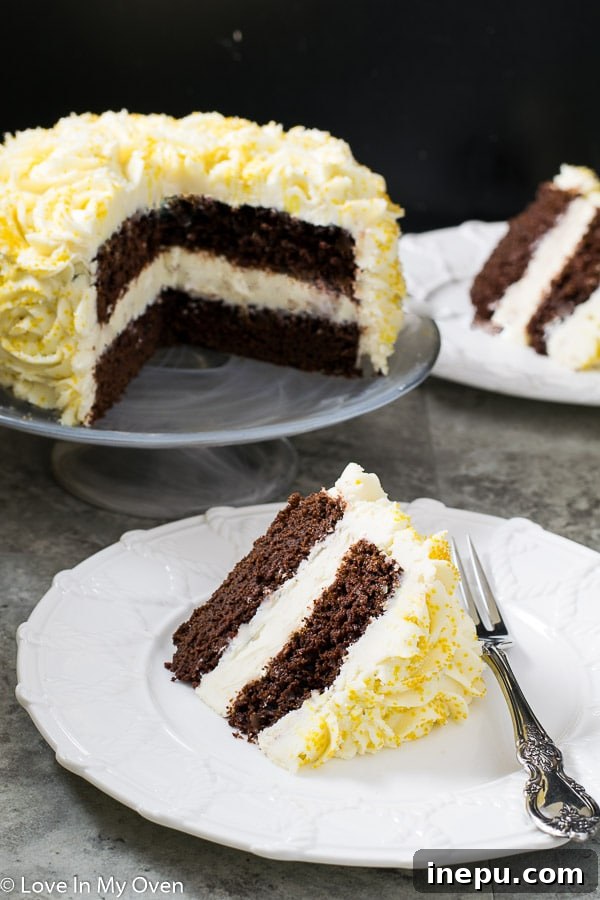
More Delicious Cake Ideas for You to Explore!
- Matcha-Vanilla Cake
- Lovely Lemon Cake
- Orange-Carrot Cake
- Healthy Smash Cake
Mini Chocolate Anniversary Cake for Two
5 Stars 4 Stars 3 Stars 2 Stars 1 Star
5 from 4 reviews
Author: Katherine
Total Time: 3 hours 60 minutes
Yield: 1 6″ cake 1x
Description
Celebrate your special moments with this perfect small chocolate cake! This mini 6-inch chocolate cake with luscious cream cheese icing is ideally sized for two, making it the ultimate romantic anniversary dessert, a sweet treat for a date night, or simply a delightful indulgence for yourself. Easy to bake and beautifully decorated with rosettes, it’s a moist and rich dessert that won’t leave you with excessive leftovers.
Ingredients
Scale
Moist Chocolate Cake
- 1/2 cup all purpose flour
- 1/4 cup unsweetened cocoa powder (not Dutch-processed)
- 1/2 tsp baking soda
- 1/2 tsp baking powder
- 1/4 tsp salt
- 1/3 cup neutral oil (vegetable or grapeseed work well)
- 1/2 cup granulated sugar
- 1 large egg, at room temperature
- 1/2 tsp instant espresso powder* (enhances chocolate flavor)
- 2 oz quality dark chocolate, finely chopped, melted and cooled slightly
- 1/2 cup buttermilk, at room temperature
Stable Cream Cheese Icing*
- 2 (250 gram each) packages of full-fat cream cheese, softened to room temperature
- 2/3 cup unsalted butter, softened to room temperature
- 1 1/2 cups powdered sugar, sifted (to prevent lumps)
- 1 tsp pure vanilla extract
Instructions
- Preheat your oven to 350°F (175°C). Prepare a 6-inch springform cake pan by lining the bottom with parchment paper and lightly spraying the sides with non-stick spray. Dust generously with flour, tapping out any excess. This ensures easy release.
- In a large mixing bowl, thoroughly whisk together the dry ingredients: all-purpose flour, cocoa powder, baking soda, baking powder, and salt. Set aside.
- In a separate medium mixing bowl, whisk together the oil and granulated sugar until well combined and smooth. Incorporate the room temperature egg, instant espresso powder (if using), and the slightly cooled melted chocolate, whisking until fully blended. Pour these wet ingredients into the bowl of dry ingredients. Add half of the buttermilk, stirring gently until just combined. Then, add the remaining buttermilk and continue to stir until the batter is smooth and no lumps remain. Be careful not to overmix. Scrape the batter evenly into your prepared 6-inch pan. Bake for 30-35 minutes, or until a toothpick inserted into the center of the cake comes out clean. An underbaked cake will likely sink in the middle.
- Once baked, remove the cake from the oven and let it cool in the pan on a wire rack for about 10-15 minutes before inverting it onto the rack to cool completely. It is absolutely essential for the cake to be fully cooled before applying icing; otherwise, your frosting will melt.
- Prepare the cream cheese icing. In the bowl of a stand mixer fitted with the paddle attachment (or using an electric hand mixer), beat the softened full-fat cream cheese and room temperature unsalted butter on medium-high speed until they are light, fluffy, and perfectly combined. This should take about 2-3 minutes. Gradually add half of the sifted powdered sugar along with the pure vanilla extract and mix on low speed until incorporated, then increase speed to medium. Add the remaining half of the powdered sugar and continue to beat until the icing is just combined, smooth, and notably stiff. Avoid overbeating, as this can make the cream cheese icing too soft.
- Once the cake is completely cool, it’s time to ice! If you desire a two-layer cake (as pictured), carefully slice the cooled cake in half horizontally using a long serrated knife. Apply a generous layer of icing between the two halves, then frost the top and sides of the cake. Decorate as desired – rosettes are simple and beautiful! If serving the cake the same day, store it covered at room temperature. For serving in the next day or two, keep the cake covered in the refrigerator.
Leftover cake will remain fresh in an airtight container at room temperature for 1-2 days, or in the refrigerator for 4-5 days. For longer storage, the unfrosted cake can be frozen. Wrap the cooled cake tightly in plastic wrap, then an additional layer of aluminum foil, and store for up to two months. Thaw overnight in the fridge before frosting.
Notes
- The instant espresso powder is a secret ingredient that dramatically enhances the deep, rich chocolate flavor without making your cake taste like coffee. It’s optional, but highly recommended for an unparalleled chocolate experience!
- This recipe for cream cheese icing yields enough to create a beautiful middle layer within the cake and provide ample frosting for substantial exterior decorations (like the rosettes). If you prefer a simpler cake with just an exterior frosting and no middle layer, you may consider halving the icing recipe ingredients.
- To achieve the elegant “2-layer” look for your cake, once it has fully cooled, carefully slice it in half horizontally using a sharp serrated knife. This creates two thinner cake rounds ready for a delicious filling.
- Prep Time: 30 minutes
- Cook Time: 30 minutes