
Healthy Chocolate Coconut Nests: Your New Favorite Guilt-Free Treat
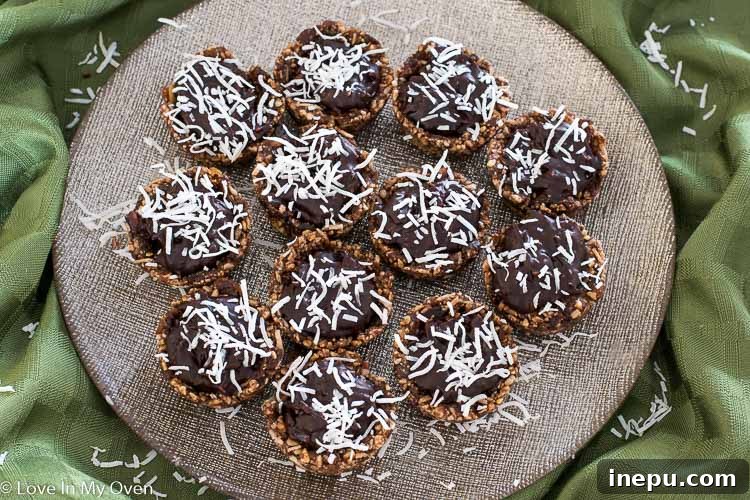
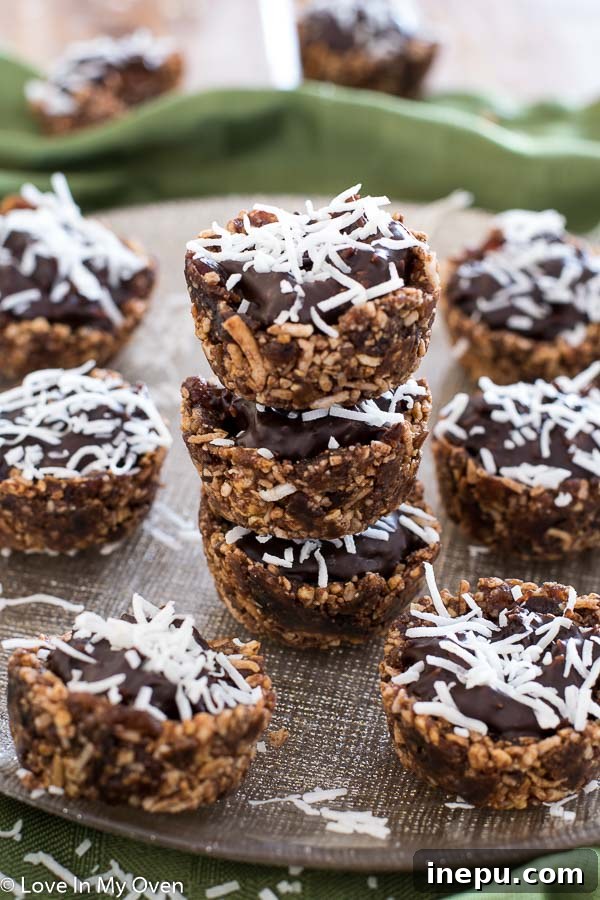
Bite-sized, gluten-free, and bursting with flavor, these healthy chocolate coconut nests offer a perfect blend of rich chocolate and tropical coconut. Each delicate nest is filled with a creamy, dreamy chocolate and coconut ganache, making them an ideal choice for a lighter treat that satisfies your sweet tooth without the guilt.
The Allure of Healthy Treats: A Timeless Recipe Revisited
Yes, you read that right – healthy! While everyone’s definition of “healthy” varies, especially when a decadent chocolate ganache is involved, these delightful nests stand out. Compared to many other sugary confections, these healthy chocolate coconut nests are a clear winner, especially when seeking a more wholesome option for your little ones or yourself. Originally shared in 2017, this beloved recipe has stood the test of time, proving that delicious and nutritious can indeed go hand-in-hand.
Decoding “Healthy”: Why These Nests Are a Smart Choice
What makes these chocolate coconut nests a smart addition to your repertoire of treats? It begins with the ingredients. We ditch refined sugars in favor of natural sweeteners and pack in wholesome nuts and seeds, providing essential nutrients and healthy fats. The carefully crafted recipe ensures a balanced treat that offers flavor and satisfaction, making it a great alternative to ultra-processed snacks. They are designed to be enjoyed without the sugar crash, delivering sustained energy and a truly feel-good experience.
The Magic of Medjool Dates: Nature’s Sweetener and Binder
For several years now, I’ve been captivated by the naturally sweet, caramel-like glory of Medjool dates. These soft, succulent fruits are not only incredibly delicious but also a powerhouse of natural sugars, fiber, and essential minerals. Their sticky texture makes them an exceptional binder for no-bake desserts, eliminating the need for processed syrups or binders. I’ve successfully incorporated them into numerous kid-friendly recipes, including my popular raspberry coconut balls, chewy coconut cream larabars, and convenient peanut butter snack balls. Yes, I admit, there have been a lot of “balls” in my dessert journey. So, for a refreshing change, these beauties are affectionately named “nests”!
Crafting Your Chocolate Coconut Nests: A Step-by-Step Guide
Creating these adorable little baskets is simpler than you might imagine, primarily utilizing the convenience of a food processor. While similar to my other no-bake snacks, these nests involve a few extra steps that are well worth the effort, such as toasting the coconut for enhanced flavor and shaping the dough into perfect little cups before filling.
Gathering Your Wholesome Ingredients
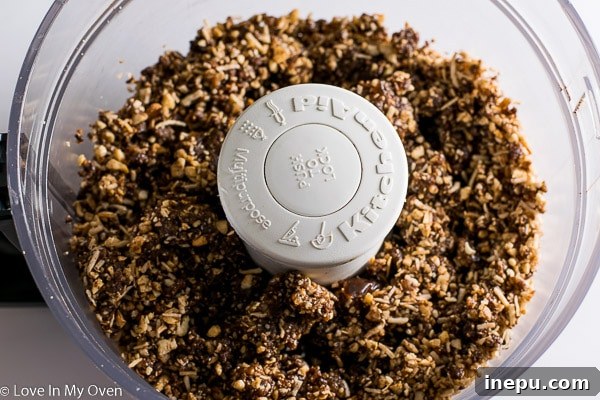
The “dough” for these nests – if we can call it that – is a symphony of healthy goodies. It comprises nutrient-dense Medjool dates, fiber-rich shredded coconut, heart-healthy cashews, antioxidant-packed cocoa powder, and protein-rich pecans. This combination not only tastes incredible but also boasts an impressive nutritional profile for a dessert! Each ingredient contributes to the texture, flavor, and overall health benefits, making these nests a truly guilt-free indulgence.
Preparing the Perfect Nest Base
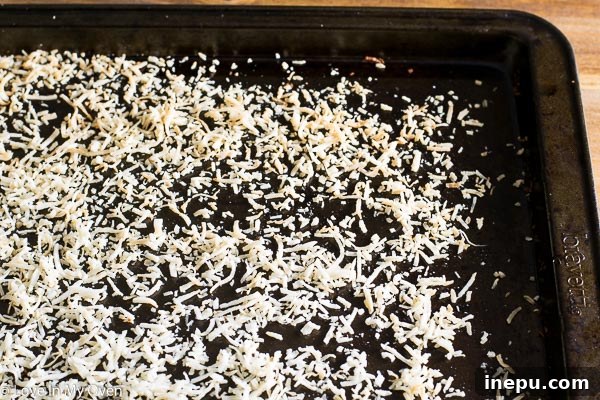
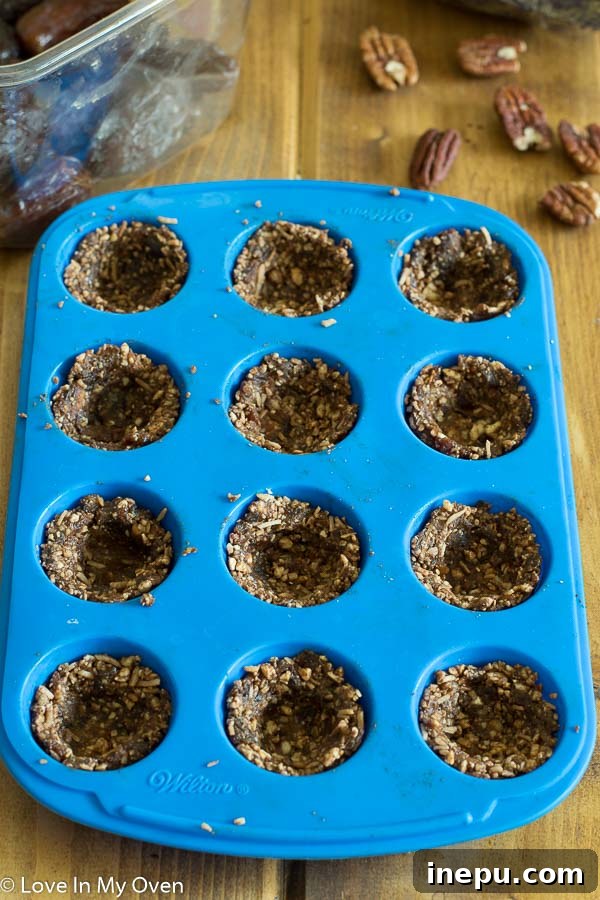
The process begins with a quick toast of the coconut, which deepens its flavor and adds a delightful aroma. Then, the nuts, dates, and other dry ingredients are pulsed in a food processor until they form a soft, sticky dough. This method ensures a consistent texture and integrates all the flavors beautifully. Once the dough is ready, the next step is to shape it into individual nests. I highly recommend using a silicone mini muffin mold for this task, as it makes removal incredibly easy. If you opt for an aluminum mini muffin pan, remember to grease it very, very well to ensure your baskets pop out effortlessly once set.
Tips for Forming Flawless Nests
Each nest is typically formed using about one tablespoon of the dough mixture. Simply drop the dough into each cavity of your muffin mold and use your fingers to gently press it along the sides, creating a small well in the center. This forms the perfect “basket” shape to hold your delicious filling. Once shaped, the nests require about an hour and a half in the freezer to firm up. Before attempting to remove them from the mold, allow them to sit on the counter for about five minutes. This slight warming helps them release cleanly and maintain their beautiful form. If using an aluminum pan, a quick run of a knife around the edges can also aid in easy removal.
The Irresistible Chocolate Coconut Ganache Filling
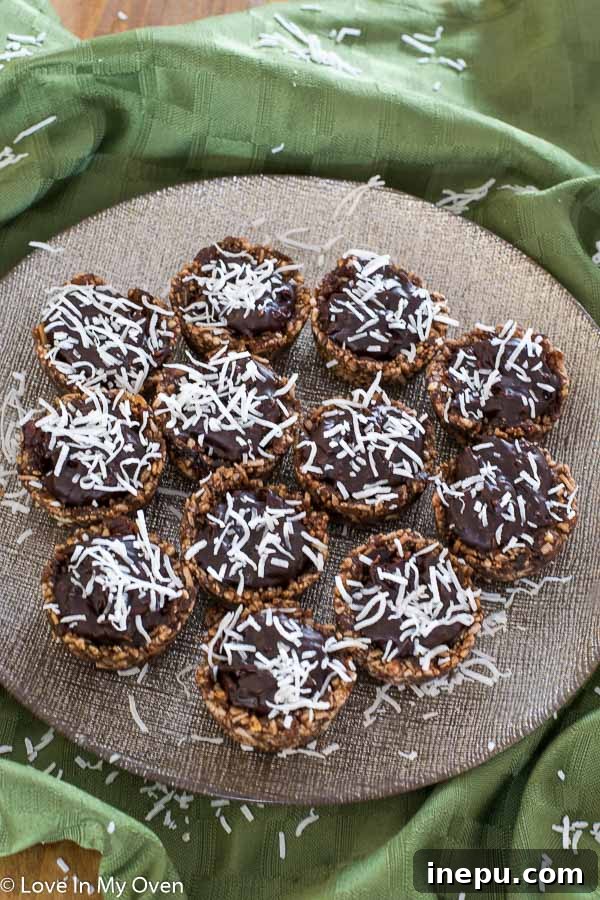
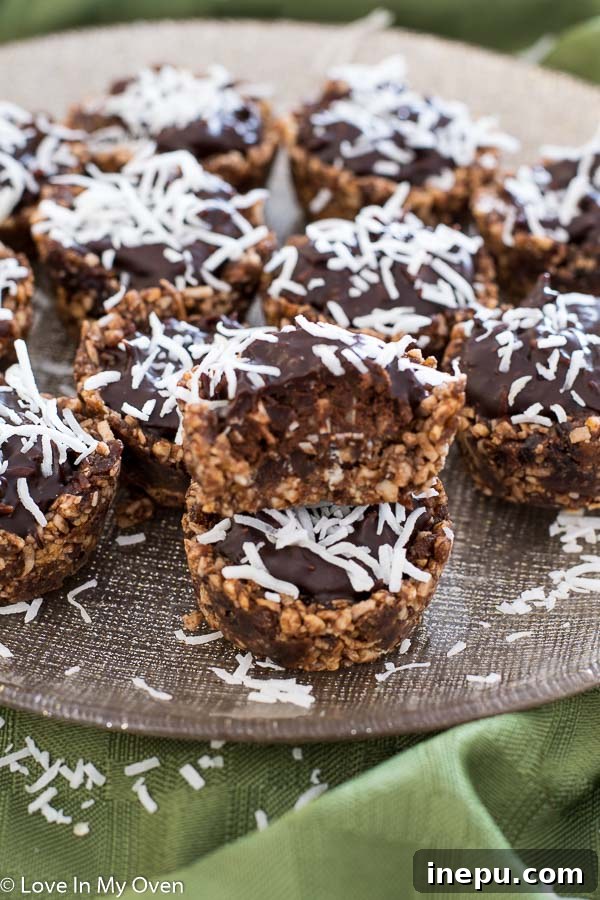
Now, for the truly decadent, yet still wholesome, part – the creamy chocolate coconut ganache! To maintain the delightful coconut theme, I use warm full-fat coconut milk to melt finely chopped dark chocolate. This creates a luxurious, dairy-free ganache that is both rich and silky smooth. A generous toss of extra shredded coconut into the ganache adds an extra layer of flavor and a lovely texture. If you can resist the urge to simply devour this ganache by the spoonful (it’s tempting, I know!), proceed to generously fill your prepared nests. A final sprinkle of shredded coconut on top not only enhances the visual appeal but also provides a delightful crunch with every bite.
Mastering the Ganache: Creamy Perfection
Making the perfect ganache is key to these nests’ success. The quality of your dark chocolate will significantly impact the final taste, so opt for a good quality bar with at least 60-70% cocoa content. Heating the coconut milk until it’s steaming, but not boiling, is crucial before pouring it over the chopped chocolate. Let it sit for a few minutes to allow the chocolate to melt before gently stirring until smooth. Over-stirring can sometimes incorporate too much air, so a slow, patient approach yields the best results. Adding shredded coconut at this stage infuses the ganache with an even deeper coconut essence, making each spoonful a tropical delight.
Creative Filling Variations for Every Palate
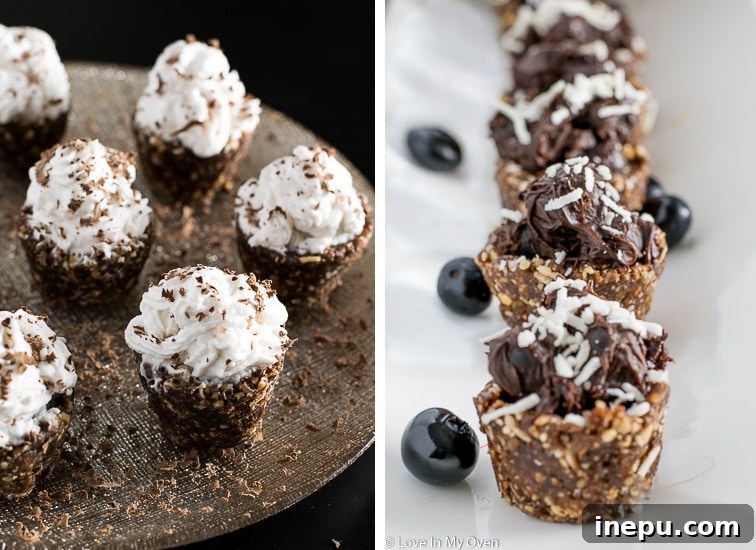
While the chocolate coconut ganache is undeniably divine, the beauty of these nests lies in their versatility. I originally experimented with various fillings before settling on this classic. I’ve successfully used a light and airy coconut whipped cream, which offers a refreshing contrast to the rich base. Chocolate-covered blueberries also made a delicious appearance, adding a burst of fruity sweetness. Since the primary focus of this recipe is the delicious and wholesome nest base, feel free to unleash your creativity! Imagine them filled with a creamy peanut butter swirl, a zesty lemon curd (dairy-free, of course), a vibrant raspberry puree, or even a simple scoop of dairy-free ice cream for an extra indulgent treat. The possibilities are endless, allowing you to customize these nests to suit any craving or dietary preference.
Serving, Storing, and Enjoying Your Nests
These healthy chocolate coconut nests are truly a perfect little treat for any occasion. They strike an ideal balance between being healthy and incredibly satisfying, offering all the taste of a traditional dessert without the heavy guilt. Their gluten-free nature also makes them an excellent option for those with restricted diets, ensuring everyone can enjoy a delicious sweet without compromise.
Perfect for Any Occasion: Dietary Benefits
As we approach seasons of indulgent holiday eating, these lighter nests provide a fantastic alternative. They offer a delightful way to enjoy a sweet treat while keeping things on the healthier side. Furthermore, everyone adores a bite-sized dessert that can be popped into the mouth in one glorious go! Their small size and robust flavor make them perfect for gatherings, potlucks, or simply as a well-deserved personal snack. They are naturally gluten-free and can easily be made vegan and dairy-free by ensuring your chocolate and coconut milk are compliant.
Make-Ahead & Storage Solutions
Planning ahead? These nests are perfect for it! You can prepare the basket bases well in advance and store them in an airtight container in the freezer for up to two months. When you’re ready to serve, simply let them thaw at room temperature for about 15 minutes before filling with your ganache or preferred filling. Once filled, the nests will hold up beautifully at room temperature for a few hours, but for optimal freshness and a firmer texture, it’s best to store them in the refrigerator for up to 4-5 days. This makes them ideal for meal prepping healthy snacks or preparing desserts for an upcoming event.
More Wholesome Sweet Treats from the Blog
If you’re loving these healthy chocolate coconut nests and are on the lookout for more delicious yet wholesome desserts, be sure to check out these other favorites:
- Healthy Sea Salt Caramels
- Gluten-Free Skillet Brownie
- Healthy Popcorn Balls
Print Recipe
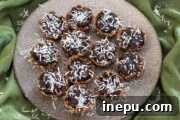
Healthy Chocolate Coconut Nests
5 Stars
4 Stars
3 Stars
2 Stars
1 Star
No reviews
- Author: Katherine
Total Time: 1 hours 60 minutes
Yield: 12 baskets 1x
Description
Bite-sized and gluten-free, these healthy chocolate coconut nests are filled with a creamy chocolate and coconut ganache. A perfect option for a lighter treat!
Ingredients
Scale
- 3/4 cup cashews
- 1/4 cup pecans
- 1 1/4 cup pitted Medjool dates
- 1/2 cup shredded coconut
- 2.5 tbsp. cocoa powder*
- 1 tbsp coconut oil
Chocolate Coconut Ganache
- 1/3 cup full-fat coconut milk
- 4 oz dark chocolate, chopped
- 1/3 cup shredded coconut
Instructions
- Preheat the oven to 375 F and scatter the coconut in a single layer onto a large baking sheet. Toast the coconut for about 5 minutes, or until a light brown colour and fragrant. Remove and cool.
- In the bowl of a food processor, add the cashews and pecans. Pulse the nuts until they’re small and crumbly, about 2 minutes. Add the dates, coconut, cocoa powder and coconut oil and continue to pulse until the dates are blended and a soft, sticky dough begins to form.
- If using an aluminum mini muffin pan, grease the pan thoroughly with non-stick spray or coconut oil. I used a silicone pan, which requires no greasing. Using about a tablespoon of dough, drop the dough into each cavity of the muffin pan and use your fingers to create a well in the middle of the cavity, forming the dough along the sides to create a basket shape.
- Once all cavities are full, place the muffin tray into the freezer for an hour and a half. Remove the pan, and allow it to sit at room temperature for about 5 minutes before popping the baskets out. If using an aluminum pan, it is helpful to run a knife along the edge of the baskets prior to removing. Arrange the baskets on a large baking sheet.
- Place the chopped chocolate in a heat-safe bowl, and pour the coconut milk into a small saucepan and place on the stove over medium heat, stirring occasionally. Once the milk begins to steam, but prior to boiling, pour the coconut milk over the chocolate and allow it to sit and melt the chocolate for a few minutes before stirring into a smooth ganache. Add the shredded coconut.
- Using a spoon, fill the baskets full of ganache, and top with coconut. Place the baskets in the fridge to harden before serving, about 15 minutes.
Make ahead: Make the baskets ahead of time and store them in the freezer, in an airtight container for up to 2 months. Allow them to sit at room temperature for about 15 minutes before filling.
Filled baskets will keep at room temperature for quite a few hours, but are best stored in the fridge, up to 4-5 days.
Notes
- Dutch-processed or regular cocoa powder works fine.
- Experiment with different fillings for the baskets! Try coconut whipped cream, or chocolate-covered fruit.
- Prep Time: 30 minutes
- Cook Time: 5 minutes
- Category: desserts
- Method: food processor
- Cuisine: American