
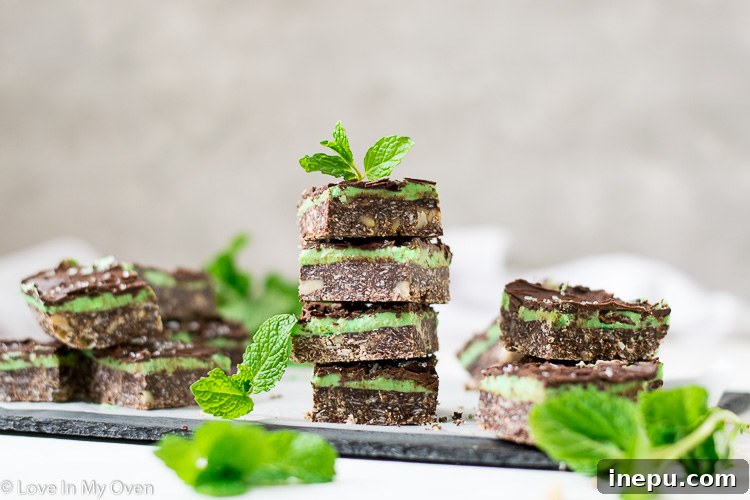
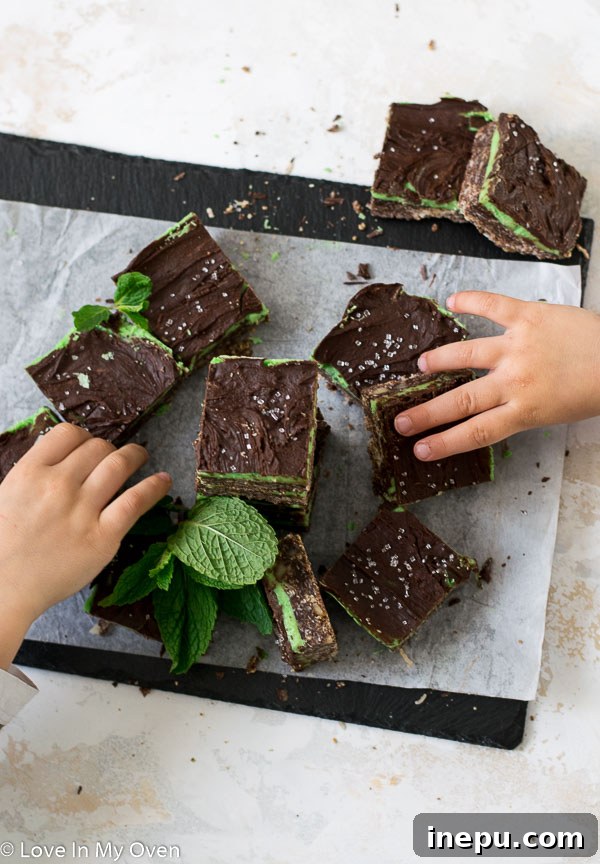
Prepare to fall in love with these Mint Chocolate Nanaimo Bars – the ultimate, easy-to-make, no-bake dessert that will quickly become your new family favorite! This recipe offers a refreshing minty twist on the traditional Canadian classic, perfect for any celebration.
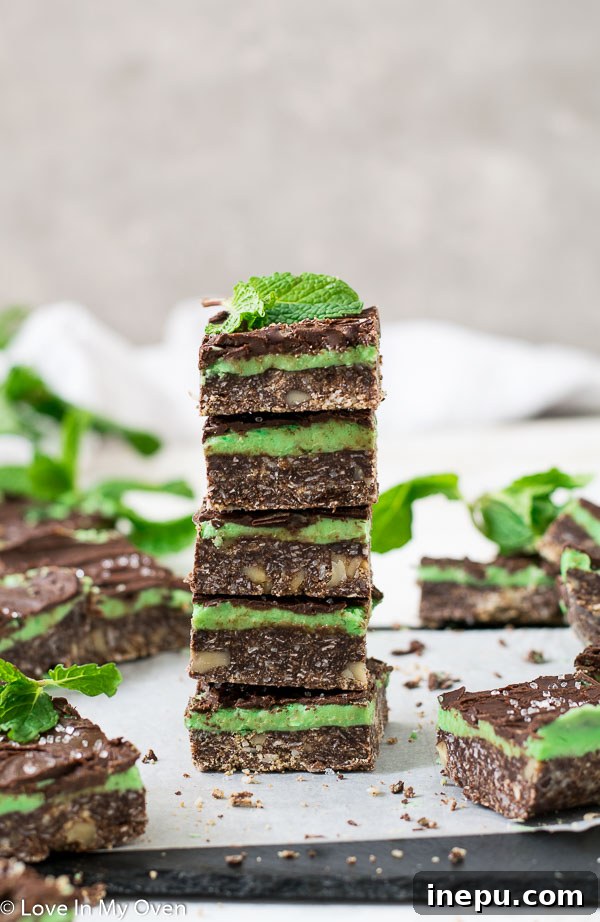
As festive seasons approach or simply when you crave a truly special treat, the thought of a delicious, layered dessert often comes to mind. While there are countless options, few capture the heart quite like the Nanaimo bar. But what if we told you there’s a version that takes this beloved Canadian classic to an exhilarating new level of flavor? Enter the **Mint Chocolate Nanaimo Bar**, a vibrant, refreshing, and utterly irresistible adaptation that promises to be the “BEST Nanaimo bar recipe” you’ve ever tried.
This article dives deep into the world of these fantastic minty squares, exploring their origins, unique characteristics, and a detailed guide to crafting them in your own kitchen. Whether you’re a long-time fan of Nanaimo bars or new to this no-bake wonder, prepare to be charmed by the delightful combination of rich chocolate, cool peppermint, and a satisfying crumbly base.
A Festive Favorite with a Fresh Twist: Mint Nanaimo Bars
While traditional Nanaimo bars hold a special place in Canadian culinary history, this mint chocolate variation introduces a vibrant flavor profile and a striking green hue that makes it perfect for various holidays. Imagine these emerald beauties gracing your St. Patrick’s Day spread, or adding a cool, festive touch to your Christmas cookie platters. The refreshing peppermint cuts through the richness of the chocolate, creating a perfectly balanced bite that’s both indulgent and invigorating. It’s a fun and exciting departure from the original, yet it retains all the comforting elements that make Nanaimo bars so universally adored.
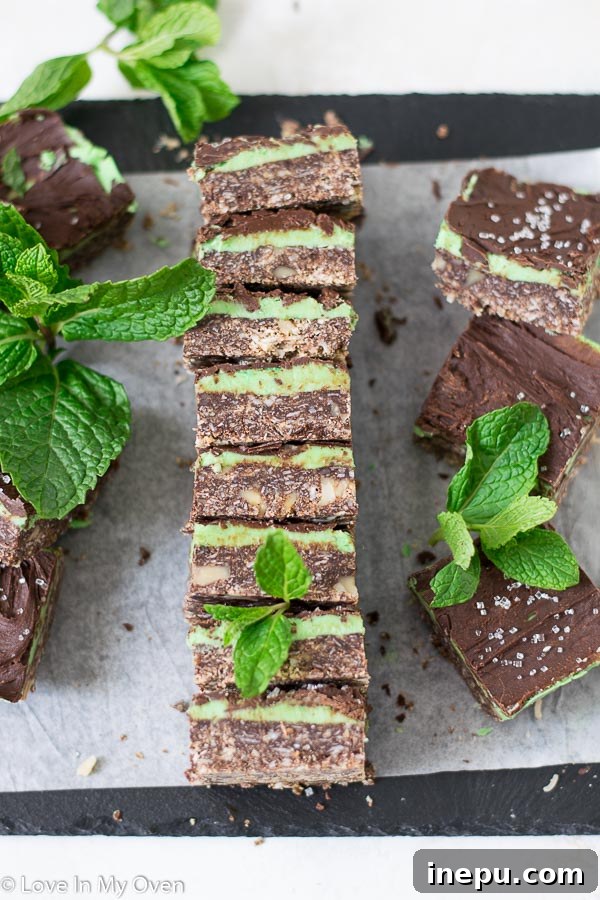
The Enduring Legacy of Nanaimo Bars: A Canadian Treasure
The Nanaimo bar is more than just a dessert; it’s a culinary icon deeply embedded in Canadian culture. This delightful no-bake square, consisting of a crumb base, custard-flavored buttercream, and a chocolate ganache top, hails from Nanaimo, British Columbia. Its exact origins are somewhat debated, but recipes for “chocolate square” variations began appearing in local cookbooks in the mid-20th century. Over time, it gained national recognition, becoming synonymous with Canadian baking.
My own connection to Nanaimo bars deepened during a memorable family trip to Vancouver Island in 2016. Amidst the charming coastal scenery and brisk island air, we found ourselves at the Nanaimo Museum. It was a rainy day, perfect for exploring indoors, and my son, Etienne, with his love for museums, was in his element. While much of my time was spent playfully navigating around a curious toddler and the captivating automatic doors, I distinctly recall a fascinating exhibit dedicated to the very dessert we’re discussing. It was there I learned firsthand about the rich history and local pride associated with the original Nanaimo bar, solidifying its place in my culinary repertoire.
The museum visit, despite the chilly weather and the energetic pursuits of a little one, was a wonderful experience. We even managed to venture out to the breathtaking Tofino beach, capturing a few moments with my cell phone, as seen in these slightly grainy but cherished photos:


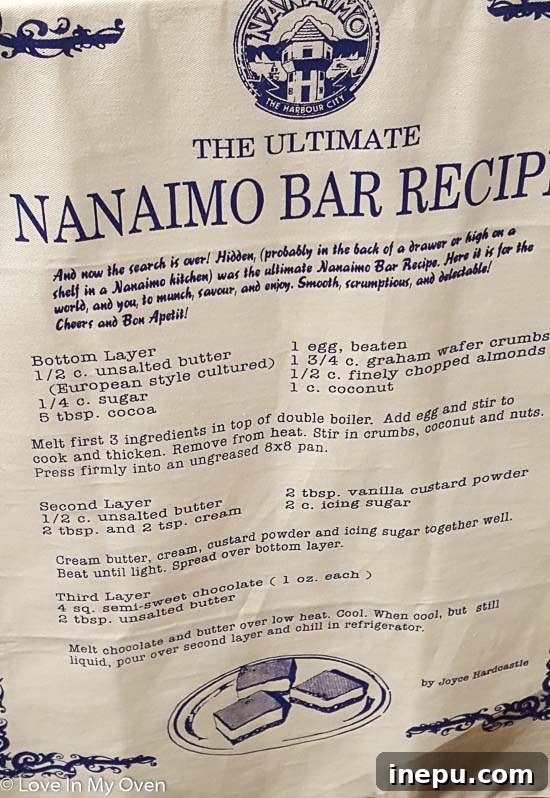
What Makes These Mint Nanaimo Bars So Special?
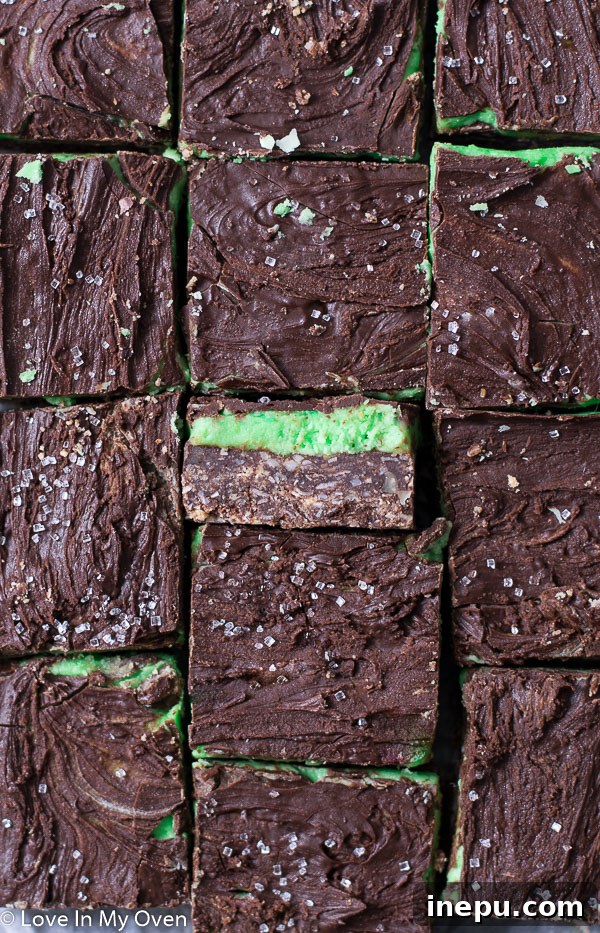
While staying true to the beloved no-bake, three-layered structure of the classic, these mint Nanaimo bars introduce a few key elements that set them apart. The most striking difference, of course, is their vibrant green hue and unmistakable peppermint flavor. This isn’t just a simple color change; it’s a complete flavor transformation that elevates the entire experience.
Instead of the traditional almonds, this recipe utilizes chopped walnuts in the base. Walnuts offer a slightly different texture and a complementary earthy note that pairs beautifully with the mint and chocolate. Beyond these modifications, the essence of the Nanaimo bar remains: a rich, satisfying, and utterly delightful treat.
These bars have long been a treasured tradition in my own family, particularly around Christmas. The sheer novelty of the green icing, combined with the refreshing burst of mint, always made them a standout on any holiday dessert platter. They aren’t just an average Nanaimo bar; they’re an experience, a delightful surprise for anyone expecting the traditional. This unique combination makes them perfect for St. Patrick’s Day celebrations, adding a touch of Irish spirit to a Canadian classic, or as a vibrant addition to your holiday baking during winter months.
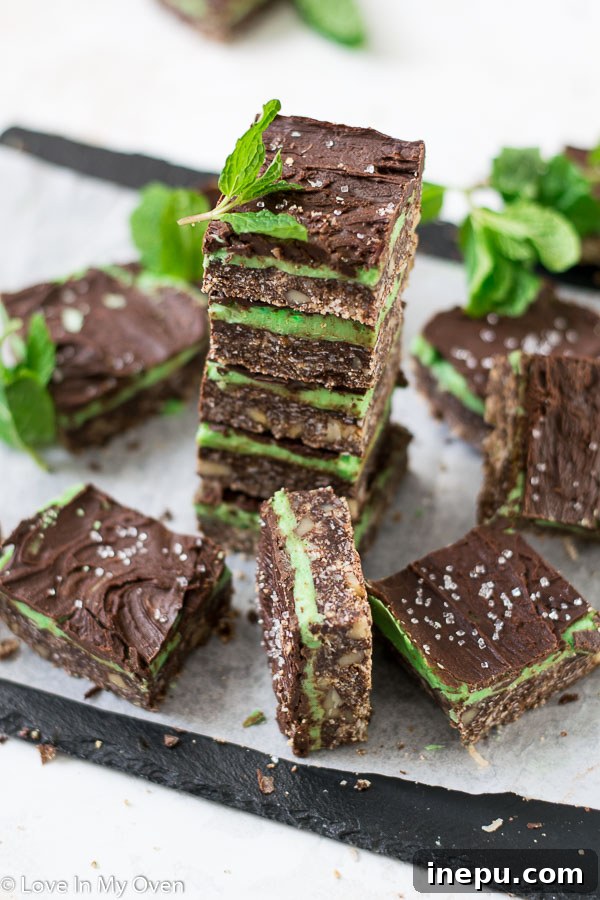
Crafting Perfection: A Step-by-Step Guide to Mint Nanaimo Bars
Making these irresistible mint chocolate Nanaimo bars is a straightforward process, thanks to their no-bake nature. Each layer comes together easily, requiring only a bit of patience for chilling between steps to ensure a clean, beautiful presentation. Here’s a detailed breakdown of how to achieve minty perfection:
The Decadent Bottom Layer
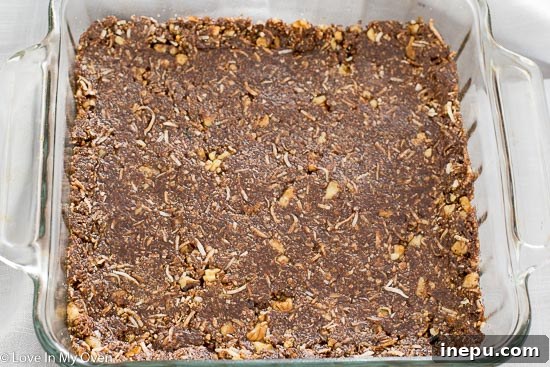
The foundation of any great Nanaimo bar is its robust and flavorful base. For our mint version, we combine finely chopped walnuts, shredded coconut, and crushed graham crackers. These dry ingredients are then mixed with a rich blend of melted unsalted butter, a touch of coconut palm sugar (or regular granulated sugar), cocoa powder, a beaten egg, and a hint of vanilla extract. The egg acts as a binder, ensuring the base holds its shape without baking.
Once thoroughly combined, this mixture is firmly pressed into a well-greased 8×8 inch baking pan. For easy removal and clean cuts, consider lining the pan with parchment paper, leaving an overhang on the sides. After pressing, this layer needs to chill in the refrigerator for at least 30 minutes to firm up properly, creating a sturdy foundation for the layers to come.
The Fluffy Peppermint Filling: A Green Delight
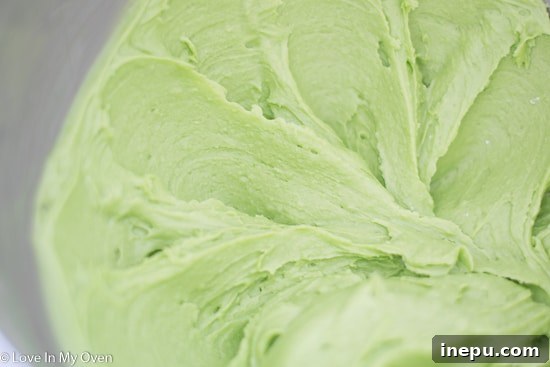
The middle layer is where the mint magic truly happens. This soft, smooth, and utterly delicious peppermint filling is the heart of our mint Nanaimo bar. It starts with softened unsalted butter creamed together with a generous amount of icing sugar and a key ingredient: custard powder. Custard powder, while not a pantry staple for everyone, is crucial for achieving the perfect texture and subtly enhancing the flavor. It works similarly to instant vanilla pudding mix, providing a smooth, stable, and wonderfully creamy consistency.
For that signature green color, we opt for a natural approach: spinach puree. Don’t be alarmed – a small amount of pureed spinach, blended with a little water until completely smooth, provides a vibrant green pigment without imparting any spinach flavor. It’s a fantastic way to avoid artificial food colorings. Simply add the spinach puree in small increments to the creamed mixture until your desired shade of green is achieved. If you prefer, a few drops of green food coloring will also do the trick.
Finally, a teaspoon of pure peppermint extract (adjusted to your taste preference for a subtle or stronger mint flavor) is incorporated, infusing the filling with its refreshing essence. Once smooth and perfectly green, this filling is spread evenly over the chilled bottom layer and returned to the refrigerator for another 30 minutes to firm up.
The Glossy Chocolate Top Layer
The grand finale is a luscious, glossy chocolate topping that perfectly encapsulates the minty filling. This layer is remarkably simple: chopped chocolate (dark or semi-sweet works best to balance the sweetness) is melted with a teaspoon of unsalted butter. Melting the chocolate gently, in 30-second increments in the microwave or over a double boiler, prevents it from seizing, ensuring a smooth, spreadable consistency.
Once melted and smooth, the chocolate mixture is carefully spread over the hardened peppermint filling. The entire pan then goes back into the refrigerator for a final chill of about 30 minutes, or until the chocolate is completely set and firm to the touch. This final chill is essential for clean, crisp cuts.
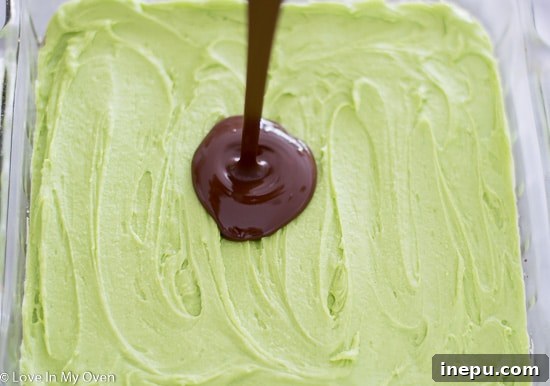
After the chocolate has fully hardened, use a sharp knife (wiped clean between cuts for best results) to slice the Nanaimo bars into squares. They are now ready to be served and enjoyed!
Tips for Perfect Mint Nanaimo Bars Every Time
- **Chill Time is Crucial:** Do not rush the chilling steps. Each layer needs to be firm before the next is added to prevent them from mixing and to ensure clean, distinct layers when cut.
- **Butter Quality:** Use good quality unsalted butter for the best flavor in all layers.
- **Custard Powder is Key:** While it might be tempting to skip, custard powder provides a unique texture and flavor that truly defines a Nanaimo bar’s middle layer. If you absolutely cannot find it, some recipes suggest substituting with instant vanilla pudding mix, though the flavor profile will be slightly different.
- **Natural Green Coloring:** For the spinach puree, ensure it’s blended until absolutely smooth with no visible bits. Start with a small amount and add more gradually to achieve your desired shade of green without affecting the consistency or flavor of the filling.
- **Prevent Chocolate Seizing:** When melting the chocolate for the top layer, do so gently. Overheating chocolate can cause it to seize, becoming grainy and unusable. If using a microwave, heat in short bursts (e.g., 30 seconds), stirring well after each interval until smooth. A double boiler is another excellent method.
- **Clean Cuts:** For beautifully neat squares, use a sharp knife and clean it with a hot, damp cloth between each cut. This prevents the chocolate from cracking and ensures smooth edges.
Storage and Make-Ahead Convenience
One of the many advantages of Nanaimo bars is their excellent shelf life and make-ahead potential, making them ideal for holiday baking or entertaining. These mint chocolate Nanaimo bars will keep wonderfully in the refrigerator in an airtight container for up to one week. For longer storage, they freeze beautifully! Simply place them in a sealed, freezer-safe container, separating layers with parchment paper if stacking, and they will stay fresh for up to two months. When ready to serve from the freezer, allow them to thaw slightly at room temperature or in the refrigerator for a few minutes until they reach your preferred texture. If you’re serving them at an event or as part of a dessert spread, they will remain perfectly fine at room temperature for the day.
Explore More Delicious Bars and Brownies
If you’re a fan of delightful squares and decadent brownies, be sure to check out these other fantastic recipes:
- Chocolate Caramel Shortbread Bars
- Butterscotch Brownies
- Chocolate Caramel Bliss Bars
Print Recipe
Mint Nanaimo Bars
5 Stars 4 Stars 3 Stars 2 Stars 1 Star
5 from 2 reviews
- Author: Katherine
Total Time: 1 hour 30 minutes
Yield: 16 bars 1x
Description
You will agree that these mint Nanaimo bars are the BEST Nanaimo bar recipe once you try them! These mint chocolate Nanaimo bars are a family favorite and a fun twist on a traditional Canadian dessert!
Ingredients
Scale
Bottom Layer
- 1/2 cup chopped walnuts
- 1 cup shredded coconut
- 2 cups graham cracker crumbs
- 1/2 cup unsalted butter
- 1/4 cup coconut palm sugar*
- 3 tbsp cocoa powder
- 1 egg, beaten
- 1 tsp vanilla extract
Middle Layer – Filling
- 1/4 cup unsalted butter, softened
- 2 1/2 cups icing sugar *see notes
- 2 tbsp custard powder
- 2 tbsp milk, room temperature
- 2 tbsp spinach puree* or 2–3 drops green food coloring
- 1 tsp pure peppermint extract
Top Layer
- 4 oz chocolate, chopped
- 1 tsp unsalted butter
Instructions
- Generously grease an 8×8 pan or line with parchment paper. In a medium sized bowl, mix together the walnuts, coconut and graham cracker crumbs. Set aside.
- In a medium sized saucepan, melt the butter, sugar and cocoa powder together. Stir until the mixture is smoothed, and then set aside to cool for 5 minutes before adding the vanilla and beaten egg.
- Mix the liquid ingredients with the walnut and coconut mixture and stir until completely coated. Press the mixture firmly into the bottom of the 8×8 pan and place in the refrigerator to set for 30 minutes.
- Cream together softened butter, icing sugar, custard powder and milk. If using spinach puree, add 1 tbsp at a time or until desired green color is reached. You may need to add more icing sugar to thicken the filling. Add in 1/2 to 1 tsp of peppermint extract.
- Spread the filling evenly over the top of the hardened bottom layer and place into the refrigerator for another 30 minutes. In a microwaveable bowl, melt together the chopped chocolate and butter. Heat in 30 second increments in order to avoid seizing. Spread the melted chocolate evenly over the pan and refrigerate once more, about 30 minutes. Cut into 16 bars and serve.
Bars will keep in the fridge in an airtight container for up to 1 week, and in the freezer for up to 2 months.
Notes
- You may substitute regular granulated sugar for the coconut palm sugar.
- If you are not using the spinach puree to color your filling, you will need less powdered sugar. Start with 2 cups.
- Spinach puree: blend a handful of spinach with 1/4 of water until completely blended and there are no small bits visible. Use sparingly in the filling until the appropriate green color is reached.
- Prep Time: 1 hour
- Cook Time: 30 minutes
- Category: desserts
- Method: no bake
- Cuisine: canadian