

Discover the ultimate guide to creating irresistibly buttery and beautifully decorated chocolate-covered shortbread cookies. Perfect for any occasion!
Please note this post contains affiliate links, which may earn me a small commission, at no extra cost to you.
The air is buzzing with festive excitement, and my kitchen is no exception! As the holidays quickly approach, there’s a special kind of joy that fills the home when baking. I’ve been busy whipping up batch after batch of these delightful chocolate-covered shortbread cookies, and I simply can’t wait to share this incredible recipe with you. These aren’t just any shortbread cookies; they are an experience – a melt-in-your-mouth buttery base elevated by a luscious chocolate coating and endless possibilities for personalization. Whether you’re a seasoned baker or just starting, this recipe promises to bring warmth and deliciousness to your holiday season and beyond.
The Irresistible Allure of Chocolate Covered Shortbread Cookies
There’s something inherently comforting and luxurious about a classic shortbread cookie. Its simplicity is its strength, allowing the rich, buttery flavor to shine through. But when you introduce a layer of decadent chocolate and an array of vibrant toppings, you transform a humble cookie into a show-stopping treat. These chocolate-covered shortbread cookies are not only fantastically delicious but also incredibly fun to make, especially when you involve little helpers in the decorating process. Forget the fuss of intricate icing bottles; these cookies offer a super customizable canvas that’s easy for everyone to enjoy.
Our recipe ensures that classic, melt-in-your-mouth texture and buttery flavor that defines shortbread. The added chocolate coating provides a satisfying crunch and a rich counterpoint to the cookie’s delicate sweetness. They are truly a holiday must-have, but versatile enough to be enjoyed year-round for any special occasion or just a cozy afternoon treat.
What Makes the Perfect Shortbread?
At the heart of any exceptional shortbread cookie lies butter – and a generous amount of it! Butter is the foundational ingredient that gives shortbread its signature rich flavor and tender crumb. My recipe, however, takes it a step further by incorporating both powdered sugar and granulated sugar directly into the dough. The powdered sugar is key to achieving that wonderfully soft and tender texture that lasts longer, ensuring your cookies stay fresh and delightful for days. This combination contributes to a cookie that is both crisp enough to hold its shape and delicate enough to dissolve beautifully on your tongue.
Beyond butter and sugar, classic shortbread cookies typically include all-purpose flour and a touch of salt to balance the sweetness. For an extra layer of sophisticated flavor, I highly recommend adding a hint of pure vanilla extract and a quarter teaspoon of almond extract. The subtle nutty note from the almond extract complements the butter and chocolate beautifully, adding a unique depth that makes these cookies truly unforgettable. These simple, high-quality ingredients are all you need to create a truly spectacular cookie.
Essential Tips for Flawless Shortbread Cookie Dough
The Importance of Chilling Shortbread Cookie Dough
One of the most frequently asked questions about shortbread is whether the dough needs to be chilled. The answer is a resounding yes! On my first attempt with this recipe, I skipped the chilling step, and while the cookies were still edible, they spread out considerably and became a bit too brown. Chilling the dough is a crucial step that helps solidify the butter, preventing the cookies from spreading excessively in the oven and ensuring they maintain their crisp edges and perfect shape. A minimum of one hour of chilling is recommended for optimal results, leading to beautifully shaped cookies every time.
If your schedule allows for longer chilling – up to three days – that’s perfectly fine! Just remember that when you’re ready to bake after an extended chill, you’ll need to remove the dough from the refrigerator and let it sit at room temperature for about 30 minutes. This allows the butter to soften slightly, making the dough pliable enough to roll out without cracking. If, at any point during the rolling, cutting, or baking preparation process, the dough starts to become too soft or sticky, don’t hesitate to pop it back into the fridge for 15-20 minutes. This quick chill will firm up the butter again, making it much easier to work with. If you work efficiently, you might find yourself breezing through this step without interruption.
Rolling Dough Like a Pro
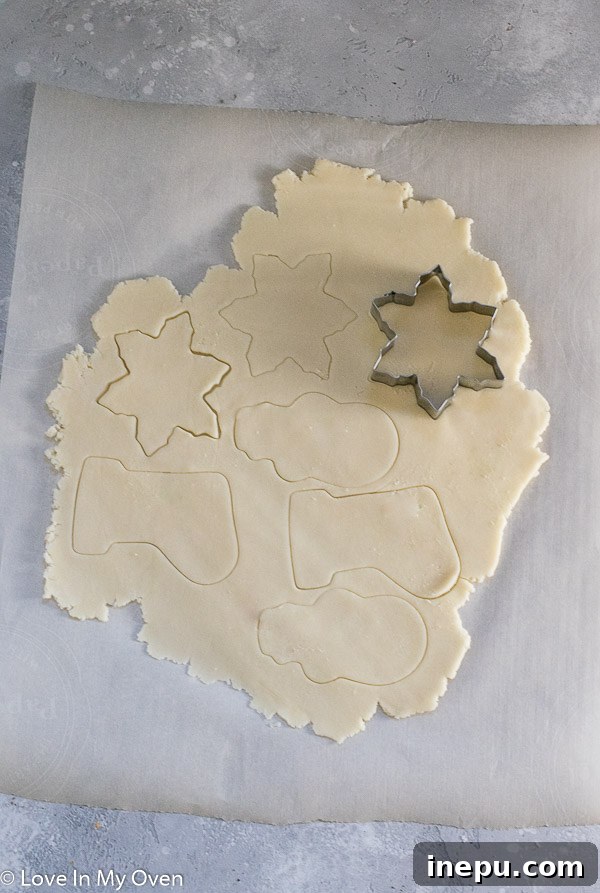
For a truly effortless rolling experience, I swear by rolling the dough between two sheets of parchment paper. This method prevents the dough from sticking to your rolling pin or work surface, eliminating the need for excessive flouring, which can toughen the cookies. It works like a charm, ensuring an even thickness and making cleanup a breeze. Aim for a 1/4-inch thickness for ideal cookie structure and texture – not too thick, not too thin.
Baking to Golden Perfection
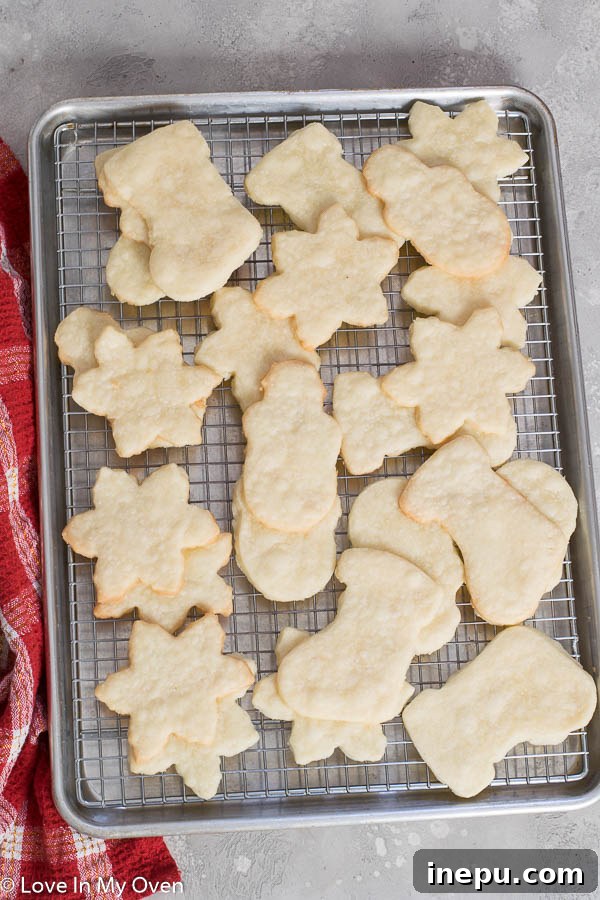
Once your beautifully cut shortbread shapes are arranged on a parchment-lined baking sheet, it’s time for baking. These cookies typically bake in about 9-11 minutes at 350°F (175°C), or until the edges are just barely golden brown. The key is to avoid overbaking, as shortbread is meant to be pale and delicate, not deeply browned. Overbaking can lead to a dry, tough cookie. As soon as they come out of the oven, allow them to cool on the baking sheet for about 5 minutes before carefully transferring them to a wire rack to cool completely. This cooling period is essential before the chocolate dipping and decorating process begins, ensuring your chocolate adheres perfectly.
Mastering the Art of Chocolate Dipping and Decoration
How to Perfectly Dip Your Cookies in Chocolate
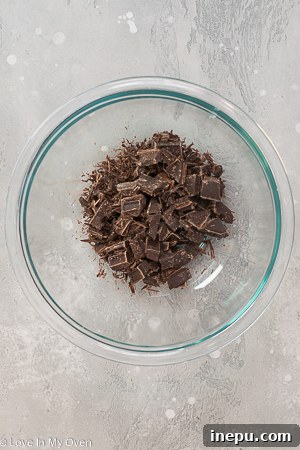
The chocolate coating is where these shortbread cookies truly become a masterpiece. I prefer using chopped semi-sweet chocolate for its balanced flavor, but you can certainly experiment with dark, milk, or even white chocolate to suit your preference. Melting the chocolate in the microwave is quick and convenient: simply heat in 30-second intervals, stirring thoroughly after each, until it’s smooth and perfectly runny. Alternatively, a classic double boiler system works beautifully for a gentler, more controlled melt, preventing scorching.
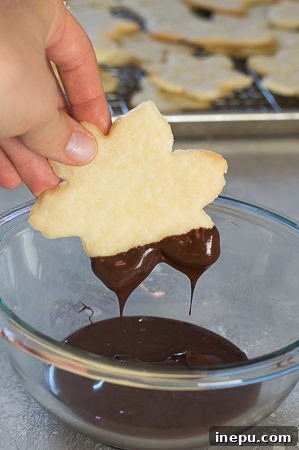
For dipping, choose a fairly small, deep bowl. This allows the melted chocolate to pool at the bottom, making it much easier to achieve a generous and even coating on your cookies without needing excessive amounts of chocolate. Hold a cooled cookie by one end and carefully dunk the other end into the melted chocolate. Use a small spoon or a butter knife to spread the chocolate evenly over the desired portion of the cookie, then gently scrape off any excess from the underside to ensure a clean finish. The goal is a smooth, elegant chocolate layer that complements the shortbread, not overwhelms it.
Unleash Your Creativity with Toppings
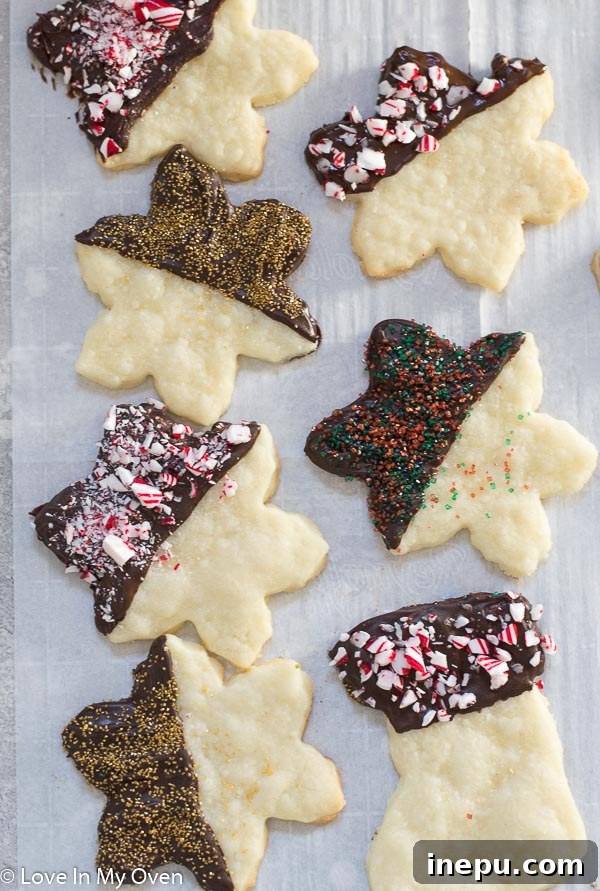
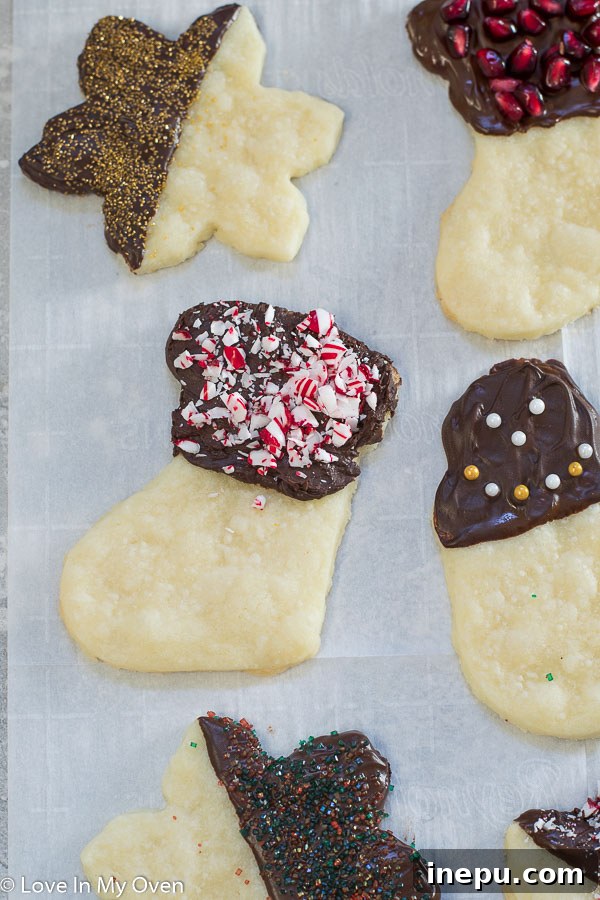
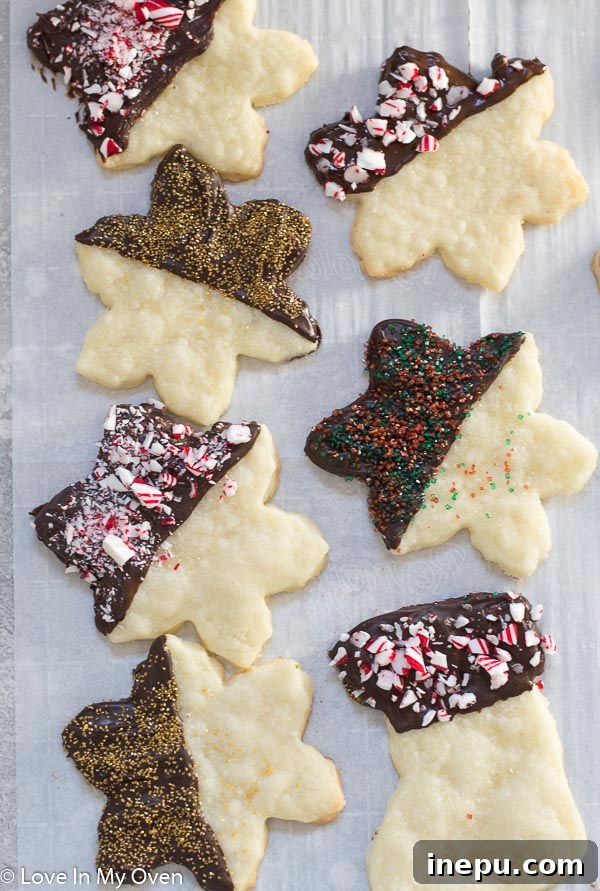
Immediately after dipping, lay your chocolate-covered cookie onto a parchment-lined baking sheet and let your imagination run wild with toppings! This is where the real fun begins, offering endless opportunities for personalization and creativity. Don’t be afraid to think outside the box!
- For the Holidays: Crushed candy canes, festive sprinkles (stars, snowflakes, nonpareils), finely chopped pistachios for a touch of green, or a dusting of edible glitter.
- For Valentine’s Day: Pink and red sprinkles, dried rose petals, or a light drizzle of contrasting white chocolate.
- For Birthdays/Parties: Rainbow sprinkles, crushed Oreos, mini chocolate chips, or colorful sanding sugar.
- Elegant/Gourmet Options: A sprinkle of sea salt flakes (especially with dark chocolate), finely chopped toasted nuts (pecans, walnuts), desiccated coconut, a scattering of pomegranate arils, or a delicate drizzle of caramel.
- Kids’ Favorites: Mini M&Ms, sprinkles, or small candy pieces.
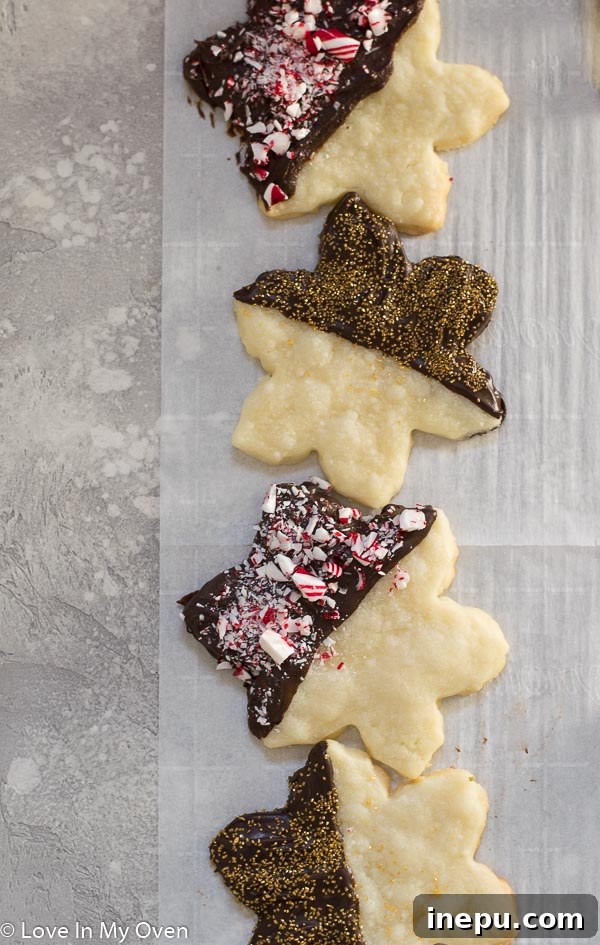
Since it’s the peak of Christmas season, I kept things wonderfully festive with a mix of colorful sprinkles and crushed candy cane. The kids absolutely adore this part, and it’s a fantastic, mess-free way for them to help decorate. Allow the chocolate to set completely before handling or storing the cookies. You can speed up this process by placing the baking sheet in the refrigerator for 10-15 minutes.
Storage and Freezing Chocolate Covered Shortbread Cookies
Can You Freeze Chocolate Covered Shortbread Cookies?
Yes, absolutely! These cookies are wonderfully freezer-friendly, making them perfect for make-ahead holiday baking or simply stashing away a batch for future cravings. The key to successful freezing is to ensure that the chocolate coating is completely hardened and cooled before you stack them. Once firm, carefully layer the cookies in an airtight, freezer-safe container, placing parchment paper between layers to prevent sticking and damage to the decorations. They will keep beautifully in the freezer for up to two months!
When you’re ready to enjoy them, simply thaw the cookies in the refrigerator for a few hours, or at room temperature for a quicker treat. Some even find them delicious straight from the freezer – a delightful frozen chocolatey snack! Having a stash of these on hand means you’re always prepared for unexpected guests or a sudden craving for something sweet.
A Versatile Recipe for All Seasons
Making these cookies was such a joy, from cutting out fun shapes with festive cookie cutters (we used these Christmas cookie cutters!) to sprinkling decorations over the glistening chocolate. The beauty of this shortbread recipe lies in its incredible versatility. While perfect for Christmas, it’s easily adaptable for any special occasion throughout the year. Imagine heart-shaped cookies for Valentine’s Day, star-shaped cookies for a Fourth of July picnic, or even just simple rounds adorned with sprinkles for an everyday pick-me-up. The possibilities are truly endless!
More Delicious Cookie Recipes to Try
With cookie season in full swing (or whenever the craving strikes!), there are always more delectable treats to explore. If you loved these chocolate-covered shortbreads, be sure to check out some of my other favorite cookie recipes:
- Chocolate Chip Snowball Cookies: A classic melt-in-your-mouth cookie, perfect for winter gatherings.
- Raspberry Filled Sugar Cookies: Tender sugar cookies with a delightful fruity center.
- Festive Cookie Pops: Fun and easy to decorate, these are always a hit!
- Coconut Caramel Bliss Bars: Not strictly a cookie, but an equally irresistible sweet treat!
Print Recipe

Chocolate Covered Shortbread Cookies
5 Stars 4 Stars 3 Stars 2 Stars 1 Star
5 from 11 reviews
Author: Katherine | Love In My Oven
Total Time: 1 hour
Yield: 30 cookies
Description
These delightful chocolate-covered shortbread cookies combine the classic, tender, and buttery flavor of traditional shortbread with a rich, smooth chocolate coating and your choice of fun, customizable toppings. They are incredibly easy to make, perfect for holiday baking, special occasions, or simply as an indulgent everyday treat. This recipe is designed for both seasoned bakers and beginners, promising a melt-in-your-mouth experience that everyone will love. The ability to switch up toppings means endless variations, keeping things exciting and tailored to any theme or taste preference.
Ingredients
- 1 cup unsalted butter, softened to room temperature
- 1/2 cup powdered sugar (confectioners’ sugar)
- 1/4 cup granulated sugar
- 1 tsp pure vanilla extract
- 1/4 tsp pure almond extract (optional, but highly recommended for enhanced flavor)
- 2 cups all-purpose flour
- 1/2 tsp salt
- 6 oz chopped semi-sweet chocolate (or your preferred type for melting)
- Sprinkles, crushed candy cane, chopped nuts, sea salt flakes, or other decorations for topping (as desired)
Instructions
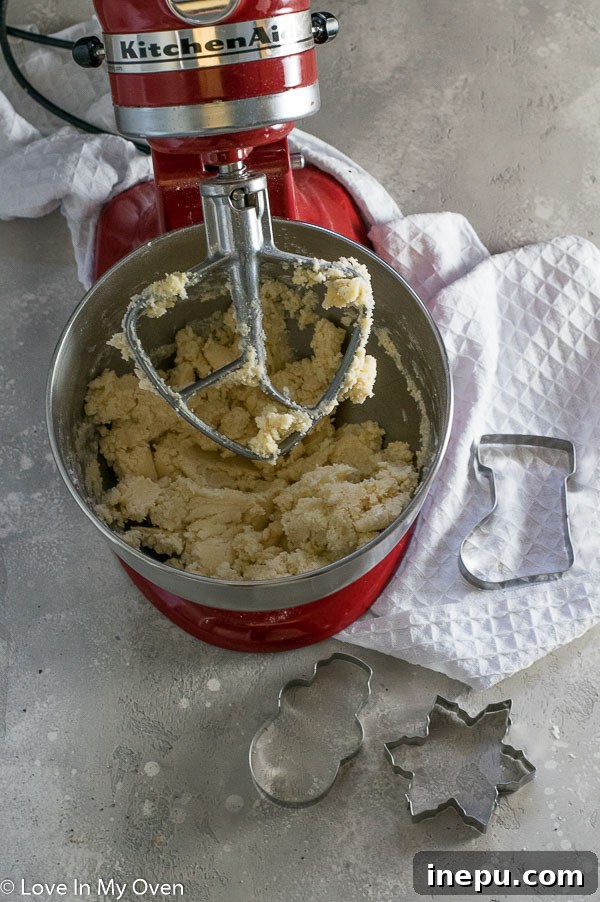
- Prepare the Cookie Dough: In the bowl of a stand mixer fitted with the paddle attachment (or using a handheld electric mixer), beat the softened unsalted butter with both the powdered sugar and granulated sugar for two full minutes on medium-high speed. Continue beating until the mixture is visibly smooth, light, and creamy. Incorporate the pure vanilla extract and almond extract (if using), and beat for another 10-15 seconds until fully combined. In a separate large bowl, whisk together the all-purpose flour and salt. Gradually add the flour mixture to the wet ingredients in the mixer, mixing on low speed continuously until a cohesive dough forms. Continue mixing slowly just until all ingredients are soft and thoroughly combined, being careful not to overmix. Wrap the dough tightly in plastic wrap and chill in the refrigerator for at least 1 hour, or up to 3 days, to prevent spreading during baking.*
- Bake the Cookies: Preheat your oven to 350°F (175°C). Line two large baking sheets with parchment paper. Remove half of the chilled cookie dough from the mixing bowl and gently form it into a disc with your hands. Place this disc between two sheets of parchment paper (or on a lightly floured surface) and roll it out evenly to a thickness of approximately 1/4 inch. Use your favorite cookie cutters to cut out various shapes from the dough. Carefully transfer the cut-out cookies to the prepared baking sheets, ensuring they are spaced about 1 inch apart. Gather any leftover dough scraps, gently re-roll, and cut out more cookies until all dough is used.** Bake the cookies for 9-11 minutes, or until the edges are just barely browned and the centers are set. Immediately remove the baking sheets from the oven and allow the cookies to cool on the sheets for 5 minutes before carefully transferring them to a wire rack to cool completely.
- Dip and Decorate the Cookies: Once the cookies are completely cooled, prepare your chocolate. Place the chopped semi-sweet chocolate in a microwave-safe bowl. Heat on high power in 30-second increments, stirring thoroughly after each interval, until the chocolate is smooth, glossy, and perfectly runny. Alternatively, melt the chocolate using a double boiler method for a gentler process. Select a small, deep bowl for dipping to ensure the chocolate pools, making it easier to coat the cookies. Holding one cookie at a time, dunk one end (or the entire cookie, if preferred) into the melted chocolate. Use a butter knife or the back of a small spoon to gently spread the chocolate evenly over the desired portion of the cookie, then carefully scrape off any excess from the underside for a clean finish. Immediately place the dipped cookie onto a fresh baking sheet lined with parchment paper. While the chocolate is still wet, liberally decorate with your chosen toppings – sprinkles, crushed candy cane, chopped nuts, or sea salt flakes. Repeat this process with all remaining cookies. Allow the chocolate to completely harden at room temperature (or chill in the refrigerator for 10-15 minutes to speed up setting) before storing, stacking, or serving.
Storage: Once the chocolate is completely hardened and the cookies are cooled, they can be stacked in an airtight container. Store at room temperature for up to 2 weeks, or in the freezer for up to 2 months.
Notes
*Chilling the Dough: If you chill the cookie dough for longer than 1 hour (e.g., overnight or for several days), it will be quite firm. To make it pliable enough for rolling, let the dough rest at room temperature for approximately 30 minutes before you attempt to roll it out. This ensures easier handling and prevents cracking.
**Working with Dough: Cookie dough, especially shortbread, can become soft and sticky if handled too much or if your kitchen is warm. If you notice the dough becoming difficult to work with while rolling or cutting, simply pop it back into the refrigerator for 15-20 minutes. This will firm up the butter again, making the dough much easier to manage.
Topping Ideas: Beyond traditional holiday sprinkles and candy canes, consider adding finely chopped pistachios, toasted shredded coconut, mini chocolate chips, a drizzle of contrasting white chocolate, or even a dash of chili powder for a unique kick with dark chocolate!
Chocolate Choice: While semi-sweet is recommended, feel free to use milk chocolate for a sweeter profile or dark chocolate for a richer, more intense flavor. White chocolate can also be used, plain or tinted with food coloring for special occasions.
- Prep Time: 30 minutes
- Cook Time: 30 minutes
- Category: cookies
- Method: bake