
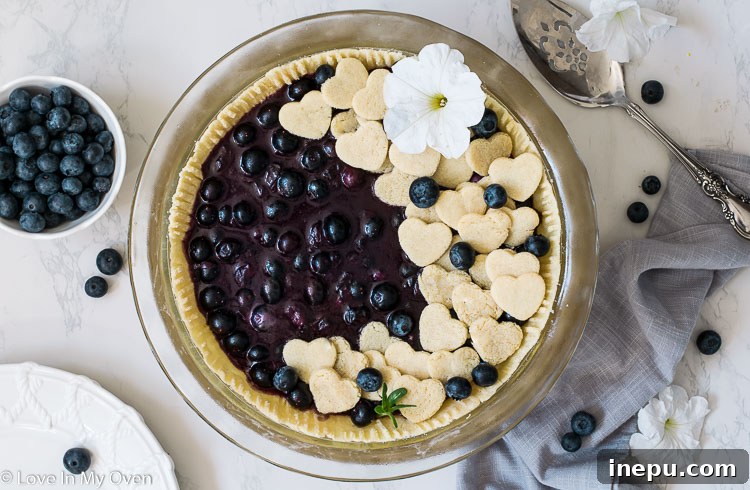
Dreaming of a delicious, guilt-free dessert? This healthy blueberry pie with an almond flour crust proves that a sugar-free, low-carb treat can be incredibly flavorful! Perfect for any occasion, whether you use fresh or frozen blueberries.
Indulge Guilt-Free: The Ultimate Sugar-Free Blueberry Pie with Almond Flour Crust
Many people wonder if a pie can truly be "healthy." It’s a fair question, as traditional pies are often loaded with sugar and refined carbs. However, this isn't just any pie. We’ve transformed the classic blueberry pie into a dessert that's not only incredibly delicious but also aligns with a healthier lifestyle. Forget the days when enjoying a slice of pie meant feeling a little guilty; this recipe is designed for pure, unadulterated enjoyment!
This journey to a healthier blueberry pie began on a whim, as many great recipes do. I found myself with an abundance of fresh blueberries – a truly delightful problem to have during peak season! While a traditional blueberry pie initially crossed my mind, I was also conscious of wanting a lighter option. We all have those days when our favorite jeans feel a bit snug, right? That’s when inspiration struck: why not create a pie that satisfies the sweet craving without the sugar crash or carb overload?
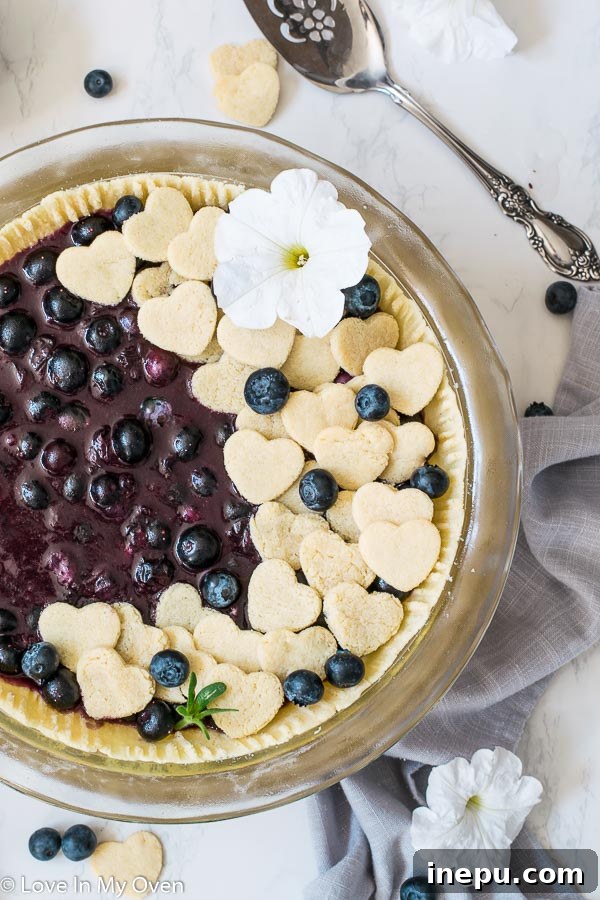
I remembered having some leftover Swerve, a popular erythritol-based sweetener, from my husband's keto diet days. It was the perfect substitute for granulated sugar, allowing us to achieve that desired sweetness without the added calories or impact on blood sugar. For the crust, I already had a winning grain-free recipe from my beloved chocolate chia pudding pie. This almond flour crust is robust yet tender, providing the perfect foundation for our vibrant blueberry filling. I even made a little extra dough to cut out adorable heart shapes for a charming top layer – because healthy doesn't mean sacrificing a touch of whimsy!
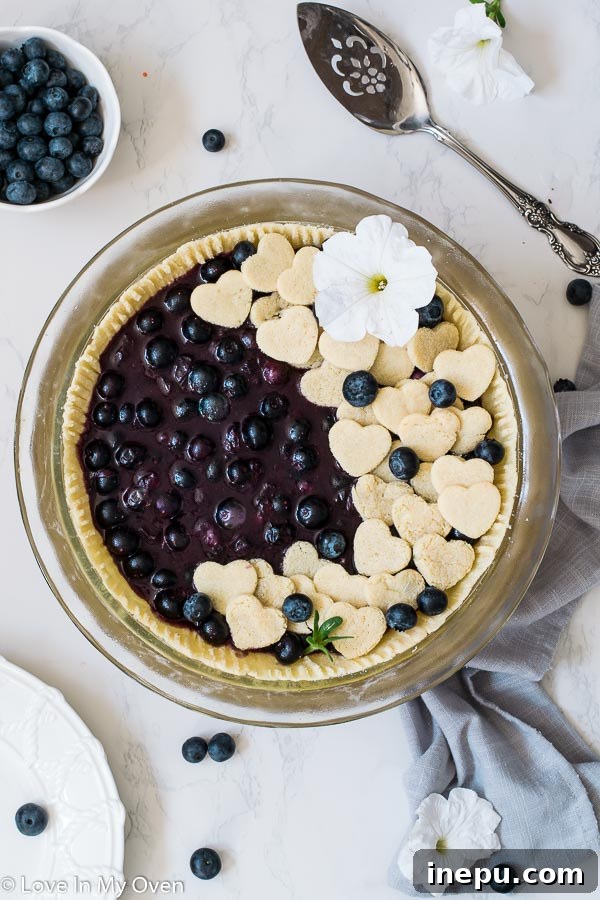
Crafting the Perfect Sugar-Free Blueberry Pie Filling
The term "healthy" can be quite subjective, especially when it comes to dessert. It's important to clarify that while I am passionate about creating nutritious recipes, I am not a trained nutritional expert. For this recipe, the "healthy" aspect primarily comes from the exclusion of added sugar in the filling, relying instead on alternative sweeteners. If you're accustomed to or prefer traditional sugar, you might not view this pie through the same lens. However, if you're open to or already incorporate alternative sweeteners into your diet, then you'll appreciate the significant reduction in sugar content!
The magic of this pie filling lies in its simplicity and the vibrant burst of natural blueberry flavor. Here are the essential ingredients:
- Fresh Blueberries: The star of the show! Whether you use fresh, in-season berries or convenient frozen ones, they provide natural sweetness and a wealth of antioxidants.
- Granulated Sweetener: A sugar alternative like Swerve, erythritol, or a monk fruit blend keeps this pie sugar-free and low-carb. These sweeteners bake beautifully and provide excellent flavor without the guilt.
- Cold Water: Essential for dissolving the cornstarch and creating a smooth base for thickening.
- Cornstarch: Our chosen thickener. It helps achieve that perfectly luscious, spoonable pie filling consistency that isn’t too runny or overly gelatinous.
- Pinch Sea Salt: A tiny bit of salt enhances all the flavors, balancing the sweetness and brightening the fruit.
- Unsalted Butter: Adds a touch of richness and silky mouthfeel to the finished filling, contributing to that satisfying pie experience.
- Fresh Lemon Juice: A splash of lemon juice is crucial. It brightens the blueberries, cutting through the sweetness and adding a delightful zesty note that elevates the entire pie.
Making the filling is a straightforward process:
- In a medium saucepan, combine 3 cups of your blueberries (reserving the rest for later), the granulated sweetener, cold water, cornstarch, and a pinch of sea salt. Place the saucepan over medium-high heat and bring the mixture to a gentle boil, stirring frequently to prevent sticking.
- Once boiling, reduce the heat to a simmer and continue cooking for 10-12 minutes. During this time, the filling will begin to thicken beautifully. While it simmers, use the back of a fork or a potato masher to gently smash some of the blueberries. This releases more of their juicy flavor and creates a varied texture within the filling – some whole berries, some burst, all delicious.
- After the filling has thickened to your desired consistency, remove it from the heat. Stir in the unsalted butter and fresh lemon juice, ensuring they are fully incorporated. Finally, fold in the remaining fresh blueberries. This adds pockets of fresh, untamed berry flavor and texture to the cooked filling.
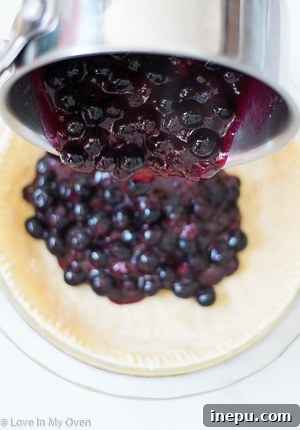
- Carefully pour the warm filling into your pre-baked and cooled almond flour pie crust. For the best results and to allow the filling to set properly, place the pie in the fridge for at least an hour before serving. This cooling time is essential for achieving that perfect, sliceable pie.
Creating a Flawless Almond Flour Pie Crust
This almond flour crust is a true game-changer in the world of healthy desserts, and it’s a staple in my kitchen! It's an ideal alternative when you're looking for a grain-free, low-carb option that still delivers on taste and texture. Unlike a traditional flour crust or even my popular 3-ingredient pie crust, this one utilizes the unique properties of almond flour to create a delightful base. Remarkably, it requires only a few simple ingredients (technically just three if you don't count the pinch of salt!).
You'll need:
- Almond Flour: The foundation of our grain-free crust. Fine almond flour provides a tender texture and a subtly nutty flavor that complements the blueberries beautifully.
- Coconut Oil (or Butter): Acts as the fat component, binding the dough and ensuring a rich flavor. Melted coconut oil keeps it dairy-free, while cold butter (or vegan butter) works equally well.
- Egg: The egg is crucial for binding the almond flour dough, giving it structure and helping it hold together since there's no gluten.
- Sea Salt: A pinch of sea salt enhances the overall flavor of the crust, much like in the filling, adding depth and balance.
Preparing this crust is wonderfully simple:
- Preheat your oven to 350°F (175°C) and lightly grease a 9-inch pie plate. In a food processor, combine the almond flour and sea salt. Pulse lightly to combine. Then, add the melted coconut oil (or cold, cubed butter) and the large egg (plus an extra egg yolk for richness, if using). Continue to pulse the mixture until a cohesive dough "ball" forms. The dough will be softer and more pliable than traditional wheat flour dough.
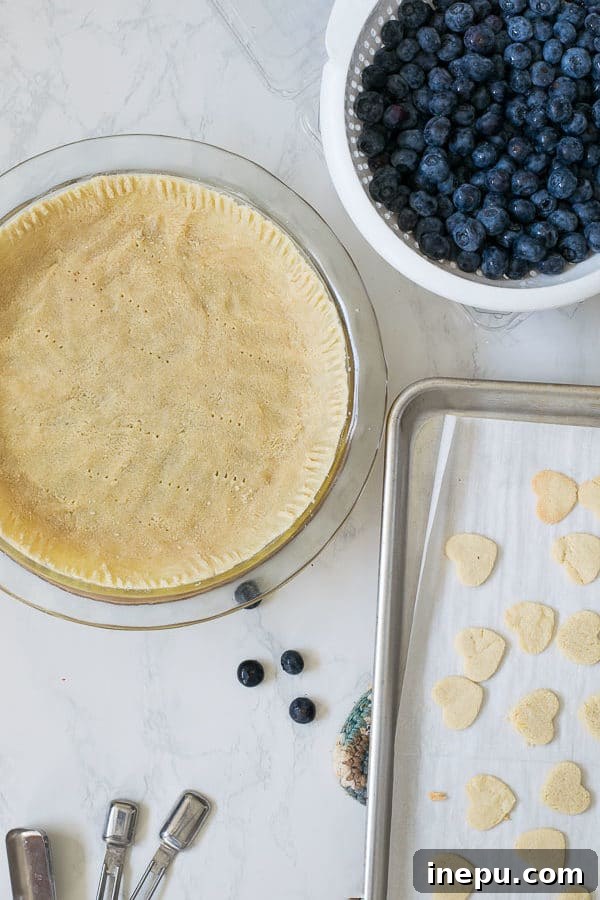
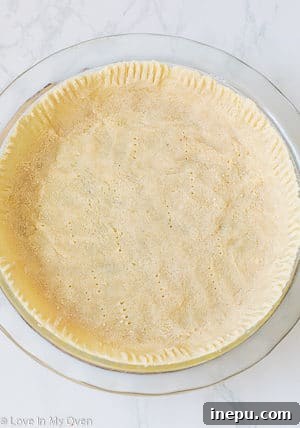
- Remove about one-third of the dough and set it aside; this will be for your decorative pie crust hearts. Empty the remaining dough into your greased pie dish. Due to the lack of gluten, this dough won't be rolled out like a conventional pie crust. Instead, use the back of a measuring spoon, your fingers, or a flat-bottomed glass to press the dough out evenly into the bottom and up the sides of the pie plate. For a beautiful finish, you can use a fork to gently prick the edges, creating a charming decorative pattern.
- Bake the crust for approximately 10 minutes, or until the edges are lightly golden brown. Keep a close eye on it, as almond flour can brown quickly. Once baked, remove the crust from the oven and allow it to cool completely while you prepare the filling. Don't turn off your oven just yet!
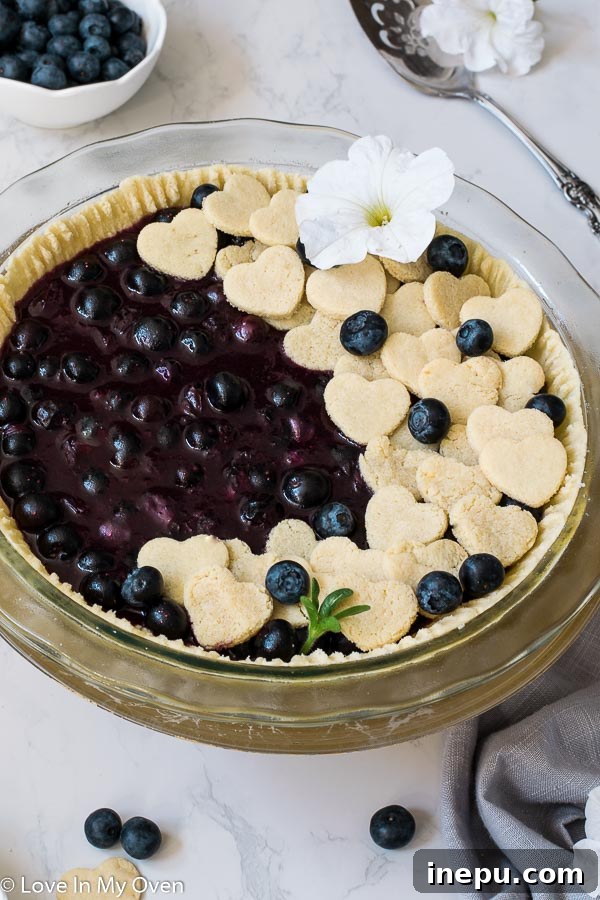
- While your main pie crust is baking and cooling, you can prepare the delightful pie crust hearts. Take the reserved dough and place it between two pieces of parchment paper. Using a rolling pin, roll the dough out to about ¼ inch thick. Carefully remove the top layer of parchment paper. Now, use a small heart-shaped cookie cutter to cut out as many hearts as you can from the rolled dough. Carefully slide the parchment paper, with the hearts still on it, onto a baking sheet. Bake these small hearts for about 10 minutes, until lightly golden. Once baked, remove them and let them cool completely. These decorative elements add an extra touch of love to your healthy pie!
Note on Texture: It's important to remember that because this crust is gluten-free, it will not have the same light, flaky texture or be as easy to handle as a regular wheat flour crust. This is precisely why we press the dough into the dish rather than attempting to roll it out traditionally. The result is a wonderfully tender, slightly crumbly crust that perfectly complements the rich blueberry filling.
Customizing Your Healthy Blueberry Pie: Alternatives and Substitutions
One of the beauties of home baking is the flexibility to adapt recipes to your preferences or dietary needs. This healthy blueberry pie is no exception, offering several alternatives and substitutions to ensure it's perfect for you and your loved ones.
Sweetener Options:
If you're not strictly avoiding sugar or prefer the traditional taste, you can certainly substitute the granulated sweetener with regular granulated sugar in the filling. However, keep in mind that doing so will transform this from a sugar-free and low-carb pie into a more conventional one. For those committed to the sugar-free aspect, popular alternatives to Swerve include erythritol, monk fruit blends, or stevia blends. Experiment to find the one that best suits your palate, as some can have a slight aftertaste for certain individuals.
Thickener Alternatives:
While cornstarch works wonderfully to thicken the pie filling, if you're particularly concerned about keeping the net carbs as low as possible, you have other options. Guar gum or xanthan gum are excellent low-carb thickeners that can be used in smaller quantities compared to cornstarch. Arrowroot powder is another gluten-free alternative, although it's not as low-carb as the gums. Whichever thickener you choose, the key is to allow the filling to simmer gently until it reaches a rich, thick consistency. Placing the pie in the fridge for at least an hour before serving will also greatly assist in setting the filling, regardless of your chosen thickener.
Fruit Variations:
While blueberries are the star here, don't hesitate to experiment with other berries or fruit combinations! A mixed berry pie (strawberries, raspberries, blackberries) would be equally delightful. You could also try a blueberry-peach or blueberry-rhubarb combination for a seasonal twist. Just ensure the fruit has similar moisture content, or adjust the thickener slightly if using very watery fruits.
Dairy-Free and Vegan Options:
For those following a dairy-free or vegan diet, this recipe is easily adaptable. Simply ensure you use a plant-based butter alternative (like vegan butter sticks) instead of unsalted butter in both the crust and the filling. The coconut oil in the crust recipe already makes it dairy-free. For the egg in the crust, a "flax egg" (1 tablespoon ground flaxseed mixed with 3 tablespoons water, let sit for 5 minutes to thicken) can sometimes work as a binder, though the texture might vary slightly.
Serving Suggestions and Storage
When it comes to serving pie, there's always the classic debate: warm or cold? While I usually lean towards warm pies straight from the oven, I was pleasantly surprised by how absolutely delicious this healthy blueberry pie is when served chilled. The cold temperature allows the filling to firm up perfectly, making for clean slices and a refreshing dessert, especially on a warm day.
If you prefer your pie warm, don't worry – it's easy to reheat! Simply cover the top of the pie loosely with aluminum foil to prevent excessive browning. Place it in an oven preheated to 300°F (150°C) for about 25-30 minutes, or until warmed through. The foil helps to keep the crust from becoming too crisp while the filling gently warms.
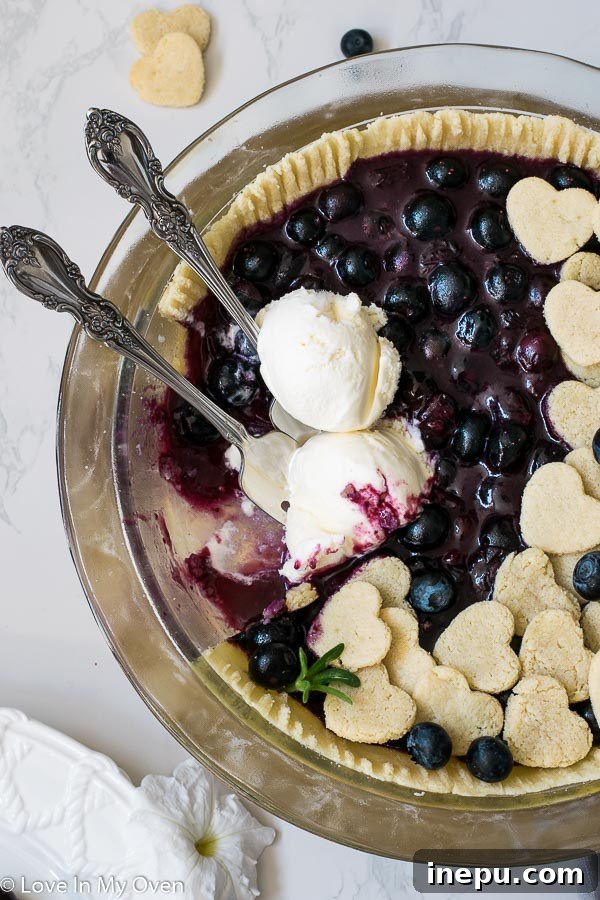
Regardless of whether you enjoy it warm or cold, there's one non-negotiable accompaniment: a scoop of creamy vanilla ice cream! The contrast of the cool, melting ice cream with the tangy-sweet blueberry filling is simply heavenly. For a truly low-carb experience, opt for a sugar-free or keto-friendly vanilla ice cream. Alternatively, try it with my indulgent no-churn roasted strawberry-rhubarb ice cream for an extra fruity explosion!
Beyond ice cream, consider a dollop of fresh, sugar-free whipped cream or a sprinkle of toasted slivered almonds for added texture and flavor. And let's be honest, when a pie is this healthy and delicious, two slices are practically the minimum requirement!
Storage:
Any leftover healthy blueberry pie should be stored in the refrigerator. Cover it tightly with plastic wrap or aluminum foil to keep it fresh. It will remain delicious for 3-4 days. While you can freeze individual slices for longer storage, the crust might lose a bit of its original texture upon thawing. If freezing, wrap slices tightly in plastic wrap and then in foil for best results, and thaw in the refrigerator before gently reheating if desired.
So, go ahead and bake this incredible healthy blueberry pie. It’s a testament to the fact that you can have your pie and eat it too, without compromise. All hail healthy blueberry pie!
Psst – If you're looking for more delicious grain-free treats, be sure to explore these other fantastic recipes:
- Grain-Free Chocolate Chia Pudding Pie
- Sunny Citrus Tart
- Chocolate Nice Cream Pie
- Keto Coconut-Lemon Cheesecake
- Grain-Free Chocolate Coconut Tart
Print Recipe
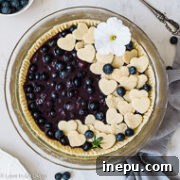
Healthy Blueberry Pie
5 from 7 reviews
- Author: Katherine | Love In My Oven
- Total Time: 1 hour
- Yield: 1 pie
- Diet: Gluten Free
Description
Think a sugar-free blueberry pie is too good to be true? Think again! This healthy blueberry pie with an almond flour crust is sugar-free, low-carb, and VERY delicious! Use fresh or frozen blueberries for an easy holiday pie!
Ingredients
Almond Flour Pie Crust
- 3 cups almond flour
- 1/2 tsp sea salt
- 3 tablespoons coconut oil, melted, or salted butter, cold
- 1 large egg + 1 egg yolk
Blueberry Filling
- 4 cups fresh blueberries, divided
- 1/2 cup granulated sweetener (sub regular sugar)*
- 2 tbsp cold water
- 1 tsp cornstarch**
- pinch sea salt
- 1 tbsp unsalted butter
- 1 tbsp fresh lemon juice
Instructions
- Preheat the oven to 350 F (175 C) and lightly butter or grease a 9″ pie plate. Add the flour and salt to a food processor and pulse lightly. Add the coconut oil (or butter) and egg and continue to lightly pulse until a “ball” of dough is formed. Remove about 1/3 of the dough and set aside for decorations. Spread the remaining dough out, using your hands, into the pie plate. Use a fork to prick the edges for a prettier crust. Bake the pie crust for about 10 minutes, or until the edges are lightly browned. Allow the crust to cool while you prepare the filling. Keep the oven on!
- While the pie crust is baking, prepare the pie crust hearts. Place the remaining dough between two pieces of parchment paper. Roll it out to about 1/4″ thick and remove the top layer of paper. Use a small heart-shaped cookie cutter to cut out as many hearts as you can fit on the rolled out pie dough. Slide the parchment paper onto a baking sheet and then bake for 10 minutes. Remove and let cool.
- In a medium saucepan over medium-high heat, combine together 3 cups of blueberries, the sweetener, cold water, cornstarch and pinch of salt. Bring the mixture to a gentle boil, then reduce the heat and simmer for 10-12 minutes, until thickened. Use a fork to smash some of the blueberries while the mixture is simmering. Remove from heat, add the butter and lemon juice, and remaining blueberries. Stir to combine. Pour the mixture into the cooled pie crust and strategically place the baked hearts onto the pie.
- Place the pie in the fridge for at least 1 hour to let it fully thicken before serving (with ice cream)! If you want to serve the pie warm, cover it with aluminum foil and place it in the oven for 25-30 minutes, preheated to 300F (150 C).
Leftover pie can be stored in the fridge, covered, for 3-4 days.
Notes
*I used Swerve sweetener, but you can use your favorite granulated sweetener.
**You can use guar gum or xanthan gum if you would like to lower the net carbs of this pie even further.
- Prep Time: 30 minutes
- Cook Time: 30 minutes
- Category: pies
- Method: stovetop
- Cuisine: american