
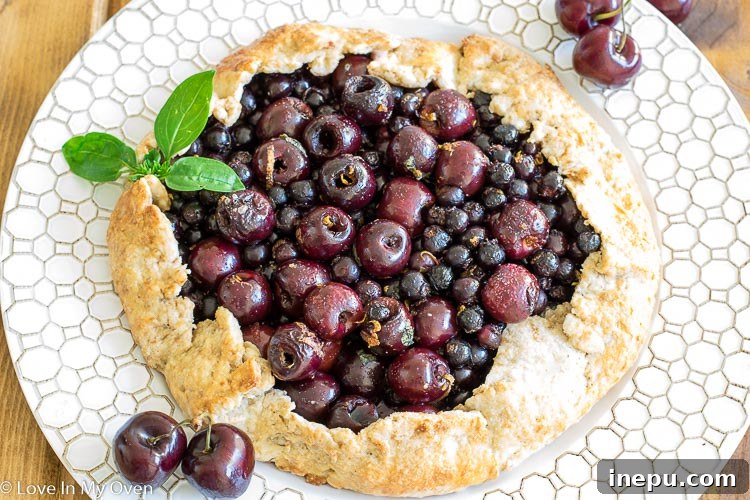
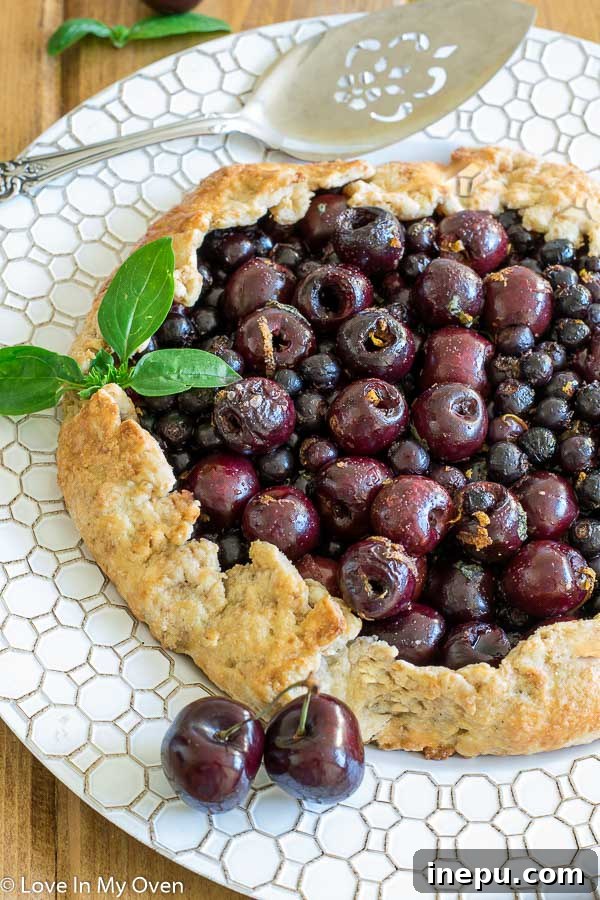
This delightful Lazy Cherry Saskatoon Galette is a delicious shortcut to traditional pie! Featuring fresh, seasonal berries and aromatic basil combined with bright lemon zest, it’s a super summer dessert that truly shines with rustic charm and incredible flavor.
*Important Note*
This post was originally published in 2017. While the cherished recipe remains exactly the same, I’ve since updated and refreshed the text to bring you even more helpful tips, detailed explanations, and insights into making this fantastic dessert!
The Easiest Summer Dessert: Lazy Cherry Saskatoon Galette Recipe
Meet my newest culinary obsession and your new best friend in the kitchen: the galette. While it might not be a novel concept for seasoned bakers, it’s a revelation for those of us who appreciate delicious results with minimal fuss. A galette is, quite simply, a pie without all the demanding work – no intricate crimping, no perfect lattice, just rustic charm and incredible flavor. Plus, doesn’t it look incredibly impressive? Imagine serving this at your next dinner party, casually remarking, “Oh, this? Just a little pie I whipped up.” It’s the ultimate lazy pie, elegantly disguised. Think of it as a free-form, open-faced tart that’s much less intimidating than its traditional pie cousin. Got it? Good!
The beauty of the galette lies in its wonderfully forgiving nature. Unlike a traditional pie that often requires precise shaping, careful crimping, and can leave bakers feeling intimidated by the quest for perfection, a galette embraces imperfections. Its free-form style means you simply roll out the dough, spoon in your fruit filling, and then fold the edges haphazardly over the fruit. This creates a beautifully rustic, homemade look that suggests effortless elegance. It’s proof that homemade doesn’t have to mean hours of painstaking effort. This dessert is perfect for those who want to impress without the stress, embodying a laid-back approach to baking that consistently yields stunning results. It’s a truly delightful way to showcase fresh, seasonal fruits with a buttery, flaky crust.
For me, the galette truly resonates with my baking philosophy. My husband playfully (and sometimes all too accurately) calls me “good enough Katie,” a moniker I probably lean into more than I’d like to admit. I wouldn’t exactly call it laziness, but I’m certainly not a perfectionist by any stretch of the imagination. I’m so far from Type A; I’m probably closer to Type Z! If my mom is reading this, she’s likely recalling those days when my dish-washing duties often required a re-wash – “Not good enough, Katie!” she might have thought. But with this galette, ‘good enough’ is absolutely perfect, resulting in a beautiful dessert that tastes like you’ve spent hours in the kitchen, when in reality, it comes together with surprising ease.
Unveiling the Saskatoon Berry: A Taste of the Prairies
Okay, for those of you south of the Canadian border or in areas where these gems aren’t common, you might be thinking, “What on earth is a saskatoon?” Well, before you dive into geographical confusion, yes, Saskatoon is indeed a vibrant city in Saskatchewan, Canada. And yes, I’m proudly putting its namesake berry in my pie! HAH! But seriously, it’s a city *and* the namesake of these incredible tiny berries that often grow in somewhat obscure places, sparking great excitement among those lucky enough to find them. They are a true regional treasure.
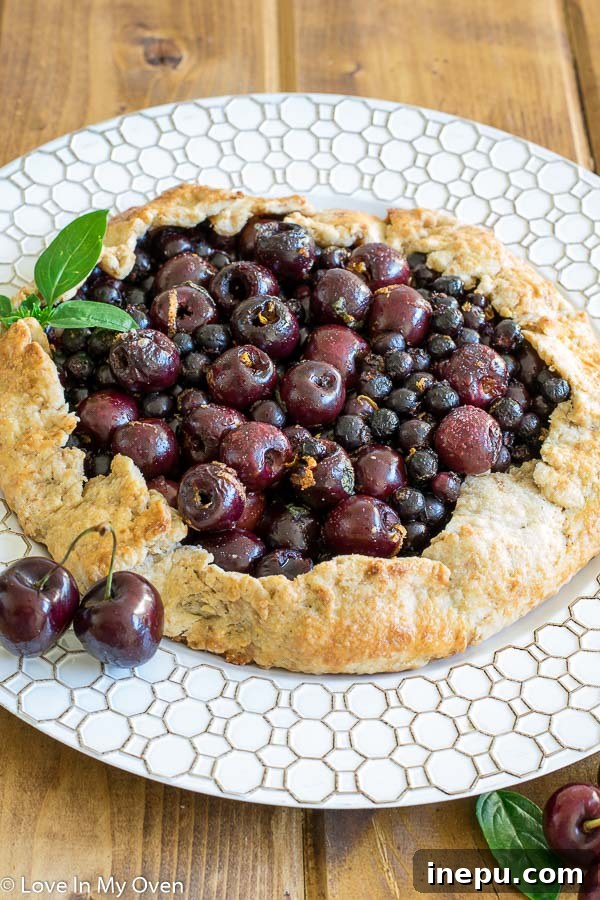
Saskatoon berries, also known as Juneberries or Serviceberries in some parts of North America, are truly unique in their flavor profile. They boast a taste distinct from blueberries, often described as sweet with a delicate hint of almond or marzipan, a touch of earthiness, and a slightly woodsy undertone. Imagine a harmonious blend of a blueberry, a subtle apple flavor, and a hint of nuttiness – that’s a saskatoon! They possess a slightly firmer texture than blueberries, which holds up beautifully during baking, offering a delightful pop of flavor in every bite. These berries are often a treasured find, especially across the Canadian prairies and parts of the northern U.S., where picking them is a beloved summer tradition, marking the peak of the berry season.
However, if you’re not up for scouting the banks of your nearest river for a wild saskatoon bush, or if they’re simply not available in your region, don’t fret! This recipe is incredibly adaptable. You can easily swap saskatoon berries for an equal amount of blueberries, or even a mix of your favorite summer berries like raspberries, blackberries, or even huckleberries if you’re lucky enough to find them. While the specific flavor nuances will differ slightly, the galette will still be incredibly delicious, celebrating the essence of fresh, seasonal fruit wrapped in a tender, flaky crust. The goal is to create a delightful summer dessert, so feel free to experiment with what’s available and fresh in your local market.
Crafting Your Perfect Lazy Cherry Saskatoon Galette
The beauty of this galette extends beyond its rustic appearance; both the crust and the filling are wonderfully straightforward to prepare, making it a truly approachable baking project. My philosophy for this dessert is deliciousness without complexity, and every step reflects that. You’ll be amazed at how quickly you can bring together something that looks and tastes so impressive.
The Secret to a Flaky, Flavorful Crust
This isn’t just an easy crust; it’s an exceptionally flaky and flavorful one, the kind that forms the perfect foundation for our vibrant berry filling. My little secret ingredient? Nutmeg! Just a mere 1/4 teaspoon is enough to impart a subtle warmth and a “right-from-the-bakery” depth of flavor that truly elevates the entire galette. It’s an unexpected addition that beautifully complements the berries, adding an aromatic complexity without ever overpowering their natural sweetness.
To start, in a large mixing bowl, whisk together the all-purpose flour, coconut palm sugar (or regular granulated sugar), salt, and that crucial pinch of nutmeg. Ensuring these dry ingredients are well combined is the first step to a uniform and delicious crust. Next, comes the star of any good pastry: cold butter. It’s absolutely essential that your butter is *very* cold – ideally straight from the refrigerator, or even popped into the freezer for 10-15 minutes before you begin. Cut the cold butter into small, uniform cubes, then use a fork or a pastry cutter to quickly cut it into the flour mixture. Work efficiently, aiming for a texture that resembles coarse meal with some distinct pea-sized butter pieces still visible. The key here is to keep the butter as cold as possible; these tiny pieces of cold butter will melt in the oven, releasing steam and creating those coveted, delicate flaky layers.
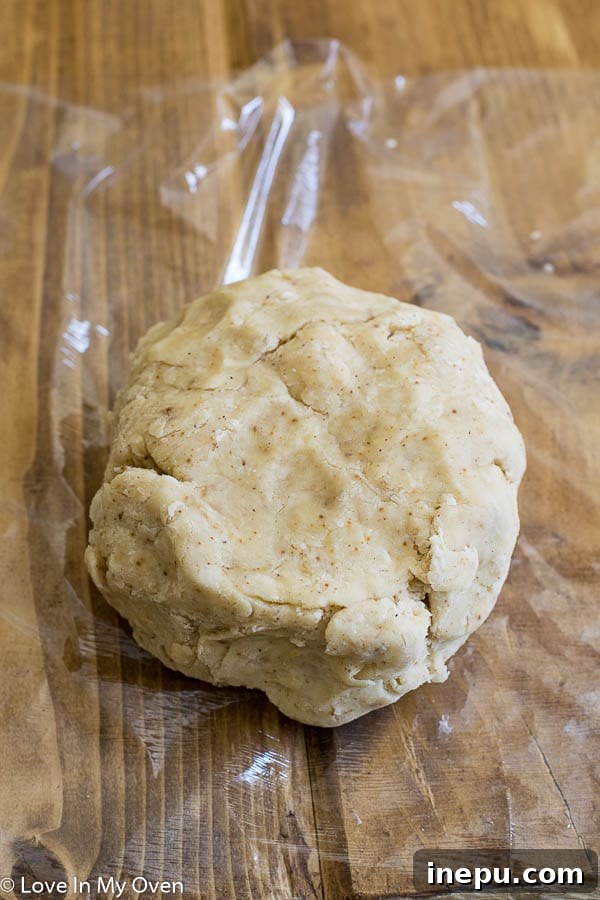
Once your butter is incorporated, slowly pour in the equally cold milk (any type will do, but whole milk often yields a richer crust). Again, the cold temperature is paramount. Cold milk helps prevent the butter from melting prematurely, further ensuring a beautifully flaky crust. Stir just until the dough begins to come together in a shaggy ball. Overmixing is the enemy of a tender crust, as it develops the gluten in the flour, which can lead to a tough, chewy texture. So, handle the dough gently and minimally. Lightly knead the dough with your hands for just a minute or two until it forms a cohesive ball. Wrap the dough tightly in plastic wrap and place it in the fridge to chill for at least an hour. This chilling period is non-negotiable; it allows the gluten to relax, making the dough much easier to roll out, and firms up the butter, contributing significantly to the final flaky texture.
Tip for Success: Always remember that cold is your best friend when making pie crusts! Cold butter, cold milk, and thoroughly chilled dough are the trinity for a perfectly flaky and tender galette. Resist the urge to rush the chilling process!
A Burst of Summer: The Berry Filling
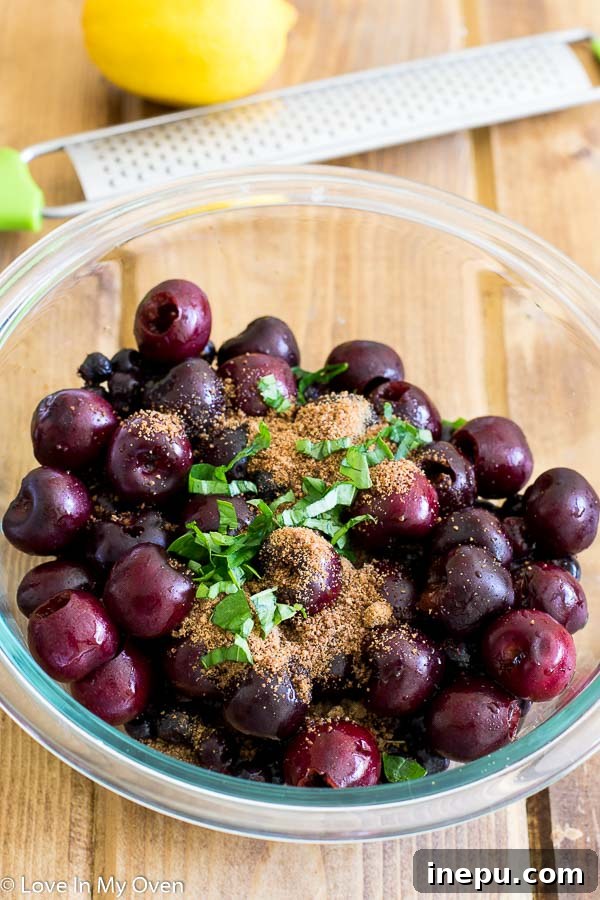
While the dough chills to perfection, you can prepare your vibrant and aromatic filling. This is where the magic of summer berries truly shines, amplified by fresh, complementary flavors! I tossed together a generous amount of fresh saskatoons and sweet, pitted cherries, creating a delightful balance of tastes and textures. The cherries add a burst of juicy sweetness and a beautiful crimson hue that contrasts wonderfully with the deeper, more complex tones of the saskatoons. But the real game-changers in this simple filling are the bright lemon zest and fresh basil from my garden. Yes, basil!
It might sound unconventional to add an herb to a fruit pie, but the subtle, aromatic freshness of basil beautifully complements the sweetness of the berries, adding an unexpected layer of sophisticated flavor that will leave your taste buds intrigued and delighted. It’s a secret ingredient that elevates the galette from simply delicious to truly unforgettable. The lemon zest further brightens everything, cutting through the sweetness with a lovely, zesty tang, enhancing the overall fruitiness. Combine your saskatoons, cherries, coconut palm sugar (or regular granulated sugar), a tablespoon of all-purpose flour (to help absorb excess moisture and thicken the juices released during baking), the finely chopped fresh basil, and the zest of half a lemon in a medium bowl. Toss everything gently until the fruit is evenly coated. This simple mixture is all you need for a truly sensational filling. Allow it to sit briefly while your dough finishes chilling; this gives the flavors a moment to meld and the sugar to start drawing out some of the fruit’s natural juices, creating a delicious syrupy consistency.
Assembling and Baking Your Rustic Masterpiece
Once your dough is perfectly chilled and firm, it’s time for the fun part: assembly! Preheat your oven to a robust 425°F (220°C). Prepare a large baking sheet by lining it with a piece of parchment paper. This vital step will prevent sticking, make transferring the galette much easier, and ensure a breeze of a cleanup.
On a lightly floured surface, unwrap your chilled dough and roll it out into a rough 12-inch circle. Don’t stress about achieving a geometrically perfect circle; remember, the rustic, free-form nature is part of the galette’s inherent charm! Once rolled to the desired thickness (about 1/8 to 1/4 inch), carefully transfer the dough to your prepared parchment-lined baking sheet. Now, spoon the glorious berry filling evenly into the center of the dough, making sure to leave about a 2-inch border all around the edge. This border will form the crust of your galette.
To create the signature galette look, gently lift the edges of the dough up and over the fruit filling, folding them in overlapping sections towards the center. You can truly do this as haphazardly or artfully as you wish – the ultimate goal is simply to have all the dough lifted up, enclosing the fruit while leaving a generous portion of the fruit in the center exposed. Press lightly to seal any seams you create, ensuring the juices stay contained during baking. This free-form approach is what makes the galette so appealing and achievable for any baker, regardless of their pie-making experience.
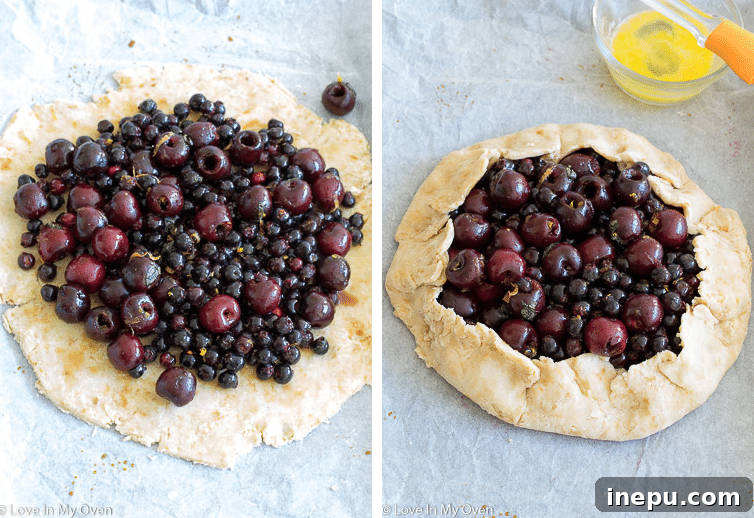
For a beautiful golden-brown and slightly glossy crust, whisk one egg in a small bowl to create an egg wash. Then, using a pastry brush, liberally brush the beaten egg over the exposed dough edges. If you appreciate a little extra sparkle and a hint of sweetness, sprinkle some coarse sugar over the egg wash. This adds a lovely crunch and enhances the visual appeal of the finished galette. Now, carefully transfer your baking sheet with the assembled galette into the preheated oven. Bake for approximately 25-30 minutes, or until the crust is beautifully golden brown to your liking and the filling is visibly bubbly and fragrant. Keep a close eye on it during the last 10 minutes to prevent over-browning.
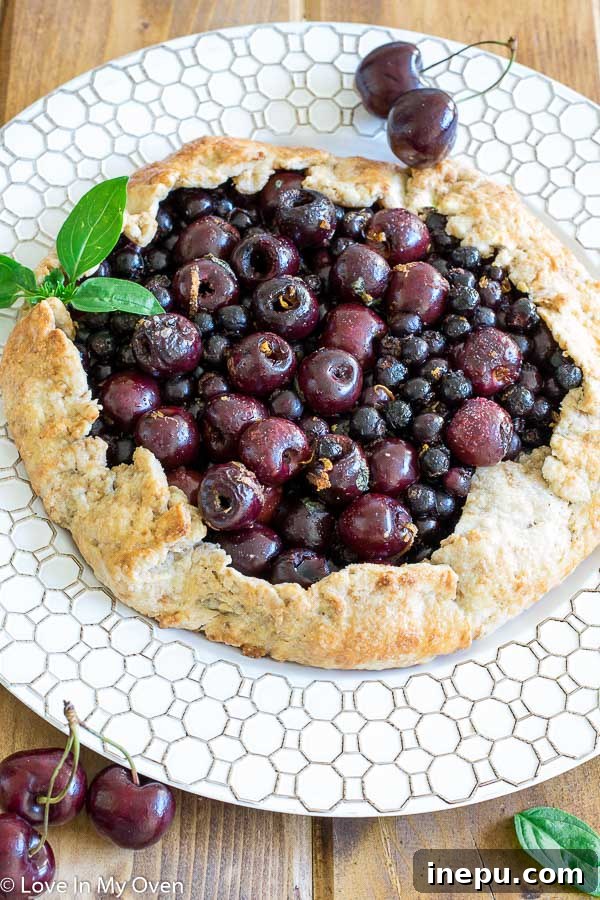
Once baked, remove the galette from the oven and let it cool slightly on the baking sheet for at least 15-20 minutes before attempting to slice it. While it’s tempting to dive in immediately, allowing it to cool for this short period lets the fruit filling set properly, which makes for much cleaner slices and prevents a runny mess. After cooling, carefully transfer it to a wire rack or serving platter. Slice, and serve! It’s truly a magnificent summer treat, a testament to simple ingredients yielding extraordinary results.
Serving Suggestions: The Perfect Accompaniments
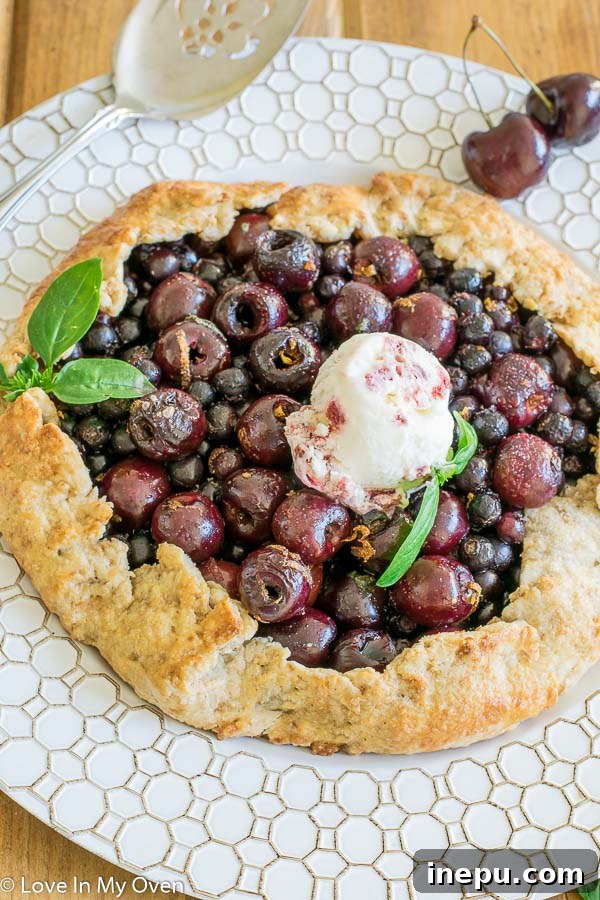
While this Lazy Cherry Saskatoon Galette is absolutely divine on its own, adding a little something extra can elevate it to pure dessert bliss. My personal favorite pairing for this rustic pie is a generous scoop of my no-churn roasted strawberry rhubarb ice cream. The creamy, tart sweetness of the ice cream provides a perfect contrast to the warm, fruity galette – it’s an unbelievably good combination that screams summer with every bite!
But the possibilities don’t end there! For a lighter, airy touch, you could opt for classic whipped cream or even a dairy-free alternative like my coconut whipped cream. Both add a delightful cloud-like texture that melts beautifully into the warm fruit, providing a wonderful counterpoint to the flaky crust. If you’re a fan of homemade ice creams, explore my other no-churn ice cream recipes – a simple vanilla bean, a spiced ginger, or even a lemon curd ice cream would be phenomenal alongside this galette. For those who prefer ultimate simplicity, a delicate dusting of powdered sugar adds an elegant finish without overwhelming the natural, nuanced flavors of the berries and basil.
This galette is versatile enough to be served warm as a show-stopping dessert after dinner, or even at room temperature for a leisurely brunch, a casual picnic, or an afternoon tea. Its blend of sweet, tart, and aromatic notes makes it suitable for almost any occasion where a touch of homemade goodness is desired. It’s truly a dessert that brings joy and comfort with its rustic charm and exquisite taste.
I genuinely hope you get a chance to try my “SCARY” (Saskatoon-Cherry) galette! It’s a recipe that embodies ease, incredible flavor, and the pure joy of summer baking, designed for those who appreciate deliciousness without all the fuss.
Frequently Asked Questions About Saskatoon Galettes
- Can I use frozen saskatoon berries or cherries for this recipe?
- Yes, absolutely! If using frozen berries or cherries, there’s no need to thaw them beforehand. Simply toss them directly into your filling mixture. You might consider adding an extra tablespoon of all-purpose flour or a teaspoon of cornstarch to the fruit filling to help absorb any additional moisture released during baking, which will help prevent a soggy bottom and ensure a perfectly set filling.
- How long does this galette last, and what’s the best way to store leftovers?
- Leftover galette will keep wonderfully. Once cooled to room temperature, cover it loosely with plastic wrap or foil and store it in the refrigerator for 3-4 days. For best results, it’s advisable to store it in an airtight container to maintain freshness and prevent it from drying out.
- What’s the best way to reheat a slice of galette?
- To reheat, you can pop individual slices back into a preheated oven (around 350°F or 175°C) for about 10-15 minutes, or until warmed through and the crust crisps up again. This method helps restore its freshly baked texture. While a microwave will warm it, the crust won’t be as crisp, so the oven is highly recommended.
- Can I make the galette dough ahead of time?
- Absolutely! The dough is perfect for making in advance. After preparing, wrap it tightly in plastic wrap and store it in the refrigerator for up to 2-3 days. You can even freeze the dough for up to a month; just be sure to thaw it in the fridge overnight before you plan to roll it out for assembly. This makes weeknight baking a breeze!
- What if I can’t find saskatoon berries locally? What are good substitutes?
- No problem at all! While saskatoons offer a unique flavor, blueberries are an excellent and readily available substitute that works beautifully in this recipe. You could also use mixed berries (such as raspberries, blackberries, or a combination), or even other stone fruits like thinly sliced peaches or plums. Just adjust the sugar levels as needed based on the sweetness of your chosen fruit.
- Can this galette recipe be adapted for savory fillings?
- Definitely! The basic galette crust recipe is incredibly versatile. For a savory version, simply omit the sugar from the crust ingredients and consider adding a pinch of dried herbs like thyme or rosemary for an earthy flavor. For the filling, think roasted vegetables (such as mushrooms, onions, zucchini, or cherry tomatoes) with a sprinkle of cheese (like goat cheese, feta, or Gruyere), or even caramelized onions and spinach. The assembly process remains the same, offering a delightful rustic savory tart perfect for lunch or a light dinner.
More Delicious Pie and Galette Inspiration
If you’ve enjoyed making this easy and utterly delicious galette, be sure to check out some of my other favorite pies and galettes from the blog for more sweet baking adventures:
- Grain-Free Chocolate Chia Pudding Pie
- Strawberry Apple Pie
- Healthy Blueberry Pie
Lazy Cherry Saskatoon Galette
Author: Katherine
Prep Time: 30 minutes
Cook Time: 30 minutes
Total Time: 1 hour
Yield: 1 galette (serves 6-8)
Category: Pies, Desserts, Fruit Desserts
Method: Oven Bake
Cuisine: American
Description: This delicious Lazy Cherry Saskatoon Galette is a delightful shortcut to traditional pie! Fresh saskatoon berries, sweet cherries, vibrant lemon zest, and a hint of fresh basil combine in an easy, rustic crust for a perfect summer dessert.
Ingredients
For the Crust:
- 1 1/2 cups all-purpose flour
- 1 tbsp coconut palm sugar (or regular granulated sugar)
- 1/2 tsp salt
- 1/4 tsp ground nutmeg
- 1/2 cup (1 stick or 113g) very cold unsalted butter, cut into small cubes
- 1/4 cup very cold milk (any milk is fine)
- 1 egg, beaten (for egg wash)
- Optional: 1 tbsp coarse sugar, for sprinkling on the crust
For the Filling:
- 1 1/2 cups fresh saskatoons (or blueberries)
- 1/2 cup fresh, pitted cherries (halved if large)
- 2 tbsp coconut palm sugar (or regular granulated sugar)
- 1 tbsp all-purpose flour (or 1 tsp cornstarch if using frozen fruit)
- 1 tbsp chopped fresh basil
- Zest of 1/2 a lemon
Instructions
- Prepare the Dough: In a large mixing bowl, whisk together the flour, 1 tbsp sugar, salt, and nutmeg until well combined. Add the very cold, cubed butter and quickly cut it into the flour mixture using a pastry cutter or your fingertips until the mixture resembles coarse meal with some pea-sized butter pieces remaining.
- Slowly pour in the cold milk, stirring with a fork until the flour is moistened and a shaggy dough begins to form. Gently knead the dough with your hands for about 1-2 minutes until it comes together into a cohesive ball. Be careful not to overwork it. Wrap the dough ball tightly in plastic wrap and refrigerate for at least 1 hour (or up to 2-3 days).
- Prepare the Filling: While the dough chills, combine the saskatoons, cherries, 2 tbsp sugar, 1 tbsp flour, chopped fresh basil, and lemon zest in a medium bowl. Toss gently until all the fruit is evenly coated. Set aside at room temperature.
- Preheat Oven and Roll Dough: Preheat your oven to 425°F (220°C). Line a large baking sheet with parchment paper. On a lightly floured surface, roll out the chilled dough into a rough 12-inch circle, about 1/8 to 1/4 inch thick. Carefully transfer the rolled dough to the prepared parchment-lined baking sheet.
- Assemble the Galette: Spoon the prepared fruit filling into the center of the dough, leaving a generous 2-inch border around the edge. Gently lift the edges of the dough and fold them over the fruit filling in overlapping sections, pressing lightly to seal any seams. The center of the fruit will remain exposed, showcasing the vibrant colors.
- Bake: In a small bowl, whisk the egg for the egg wash. Brush the beaten egg liberally over the exposed dough crust. If desired, sprinkle the crust evenly with coarse sugar for added sparkle and crunch.
- Carefully transfer the baking sheet with the galette into the preheated oven. Bake for 25-30 minutes, or until the crust is beautifully golden brown and the filling is bubbly and fragrant. Keep an eye on it during the last few minutes to prevent over-browning.
- Cool and Serve: Remove the galette from the oven and let it cool on the baking sheet for at least 15-20 minutes before attempting to slice. This crucial step allows the fruit filling to set properly, ensuring cleaner slices. Carefully transfer the galette to a wire rack or serving platter. Serve warm or at room temperature, ideally with a scoop of vanilla ice cream, roasted strawberry rhubarb ice cream, or a dollop of fresh whipped cream.
Notes:
- Storage: Leftover galette can be stored, covered loosely (or in an airtight container for longer freshness), in the refrigerator for 3-4 days.
- Reheating: For the best texture, reheat individual slices in a 350°F (175°C) oven for 10-15 minutes until warmed through and the crust is crisp again.
- Frozen Berries: If using frozen berries, do not thaw. Add them directly to the filling mixture and consider adding an extra tablespoon of flour or a teaspoon of cornstarch to absorb any excess moisture.
Shop today’s essential baking tools!
Amazon Basics 3-Piece Baking Sheet Set
Shop on Amazon
Spring Chef Dough Blender, Professional Pastry Cutter
Shop on Amazon
Erayco Premium Stainless Steel Zester Grater
Shop on Amazon
M KITCHEN WORLD Silicone Pastry Brush
Shop on Amazon
GoodCook Everyday Rolling Pin
Shop on Amazon