
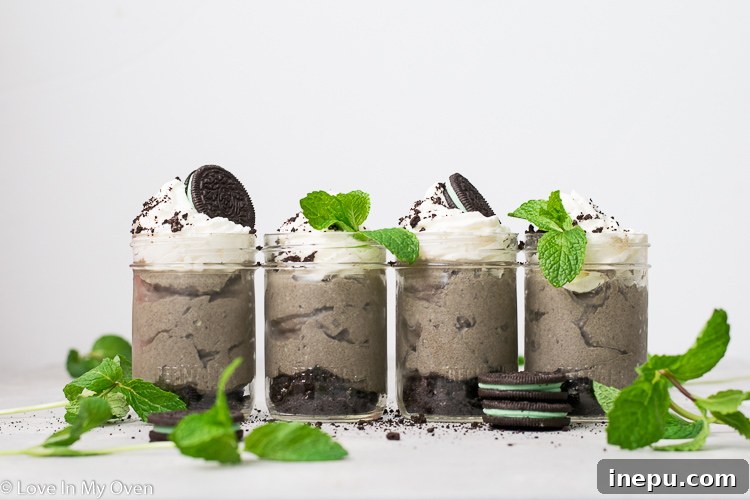
Indulge in pure bliss with this incredibly easy 3-ingredient Mint Oreo Mousse! This luscious, creamy, and vibrantly refreshing dessert is so simple to make, it’s destined to become a staple in your recipe repertoire. Get ready to fall in love with a sweet treat that delivers maximum flavor with minimal effort!

Life can be wonderfully chaotic, can’t it? Just this past weekend, my husband Etienne and I embarked on the ambitious task of giving our long-haired dog, Baker, a much-needed haircut. Having only ever owned short-haired pups before him, we quickly learned that grooming a fluffy companion is an art form in itself – emphasis on “tried” to give him one! We managed his face and legs, leaving him looking rather comically bundled in a ridiculously warm, puffy coat everywhere else. Sorry, Baker, the rest of your luxurious locks will have to wait!
Amidst the delightful chaos of everyday life, there’s nothing quite as satisfying as a simple pleasure that feels utterly luxurious. And that’s precisely what this mint chocolate Oreo mousse is all about! I’ve been eagerly waiting to share this recipe with you, and trust me, it’s worth the wait. If you’re a fan of the classic mint Oreo cookie – and who isn’t? – then prepare for your taste buds to sing. This mousse is strikingly similar to the beloved Mint Oreo Blizzard from Dairy Queen, but with the added satisfaction of being homemade. It’s an absolute dream come true for mint chocolate lovers.
The cool, invigorating burst of mint paired with the rich, chocolatey crunch of Oreos makes this mousse the ultimate refreshing dessert. It’s perfect for those warm days when you crave something sweet but light, or simply as a delightful treat to have chilling in the fridge. Picture yourself unwinding after a long day, spooning into this velvety, cool confection. Pure bliss, right? This recipe is a testament to how simple ingredients can come together to create something truly extraordinary. It’s quick, it’s easy, and it’s unbelievably delicious. So, let’s dive into how you can whip up this delightful minty magic!

Unveiling the Simplicity: How to Make This Irresistible Mint Oreo Mousse
The secret to this incredibly easy mousse method was a delightful discovery I made through my talented friend, Marie, over at Sugar Salt Magic. She expertly crafted a magical mousse using classic Oreo cookies, and immediately, I knew I had to adapt her brilliant technique for my all-time favorite flavor: Mint Oreo. The result? A dessert that’s both effortless and utterly divine, perfect for satisfying those spontaneous sweet cravings.
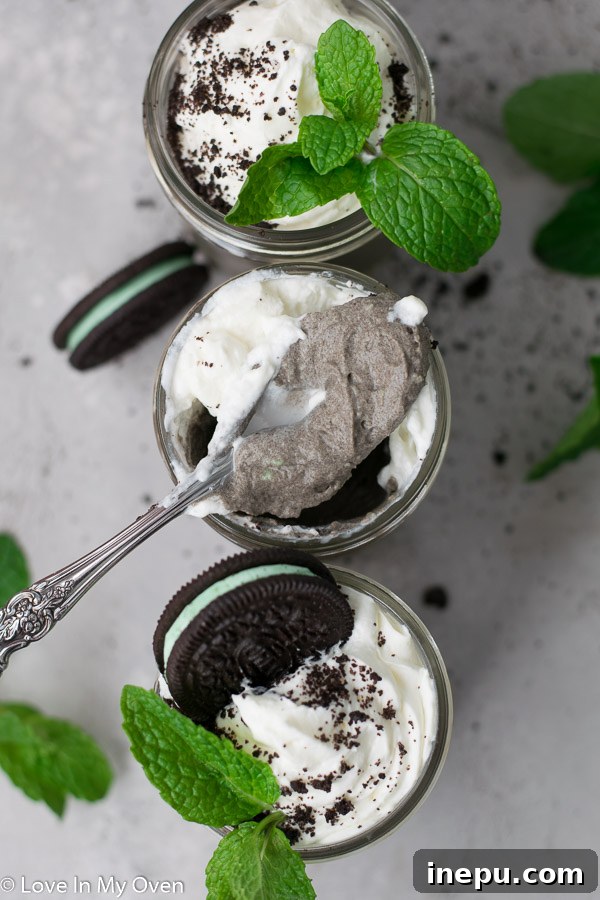
This recipe truly redefines easy baking (or rather, no-baking!). With just three primary ingredients, you’re on your way to a light, airy, and intensely flavorful mousse that tastes like it came from a gourmet dessert shop. The process is surprisingly straightforward, relying on the magic of time and a little bit of whipping to transform humble ingredients into a spectacular treat. The key to its creamy texture and rich flavor lies in allowing the Oreos to properly soften in the heavy cream, infusing the cream with their distinctive mint chocolate goodness before whipping it all into a dreamy cloud of deliciousness.
Beyond its simplicity, this mint Oreo mousse offers a refreshing escape, particularly on warmer days. Its vibrant mint notes awaken the palate, while the creamy texture provides a luxurious mouthfeel that’s both satisfying and light. It’s the kind of dessert that feels special, yet requires minimal fuss, making it ideal for impromptu gatherings, a weeknight indulgence, or even as a thoughtful make-ahead treat. Prepare to impress yourself and anyone lucky enough to try a spoonful of this minty marvel.
The Magical Trio: Just Three Main Ingredients You Need
The beauty of this recipe truly lies in its elegant simplicity, requiring only three core ingredients to achieve a dessert that tastes far more complex than it is. Each component plays a crucial role in creating the signature texture and flavor profile of this decadent mint Oreo mousse. Let’s break down what you’ll need and why each element is essential:
1. Mint Oreo Cookies: The Flavor Powerhouse
You’ll need approximately 21 mint Oreo cookies, divided for two uses. These cookies are the star of the show, providing not only the distinct mint chocolate flavor but also contributing to the mousse’s unique texture. The cream filling of the Oreos, combined with the chocolatey wafers, infuses the heavy cream with an irresistible taste as they soak. When choosing your Oreos, ensure they are fresh for the best flavor and a smooth soaking process.
2. Heavy Cream: The Foundation of Creaminess
Two cups of cold heavy cream (also known as whipping cream) form the luscious base of this mousse. The high-fat content of heavy cream is essential for creating that light, airy, and stable whipped consistency. As the Oreos soak in it, the cream absorbs their flavor, becoming a mint-infused canvas ready for whipping. Always start with very cold cream for optimal whipping results.
3. Powdered Sugar: Sweetness and Structure
Just two tablespoons of powdered sugar (also known as confectioners’ sugar) are added to sweeten the mousse and help stabilize the whipped cream. Powdered sugar dissolves easily, ensuring a smooth texture without any grittiness. Its fine particles also assist in creating a firmer, more stable mousse that holds its shape beautifully.
Optional: Mint Extract for an Extra Kick
While the mint Oreos provide a fantastic flavor base, a quarter teaspoon of mint extract is highly recommended if you want that minty zing to really “pop.” It intensifies the refreshing mint notes, elevating the dessert to another level. If you prefer a more subtle mint flavor, you can certainly omit it. However, for a true mint lover, this optional addition is a game-changer.
That’s it! Just these few items are all you need to create a dessert that will delight and impress. The clever combination of these ingredients yields a dessert that is both familiar and exciting, a true testament to the power of simple cooking.
Step-by-Step Guide to Whipping Up Perfection
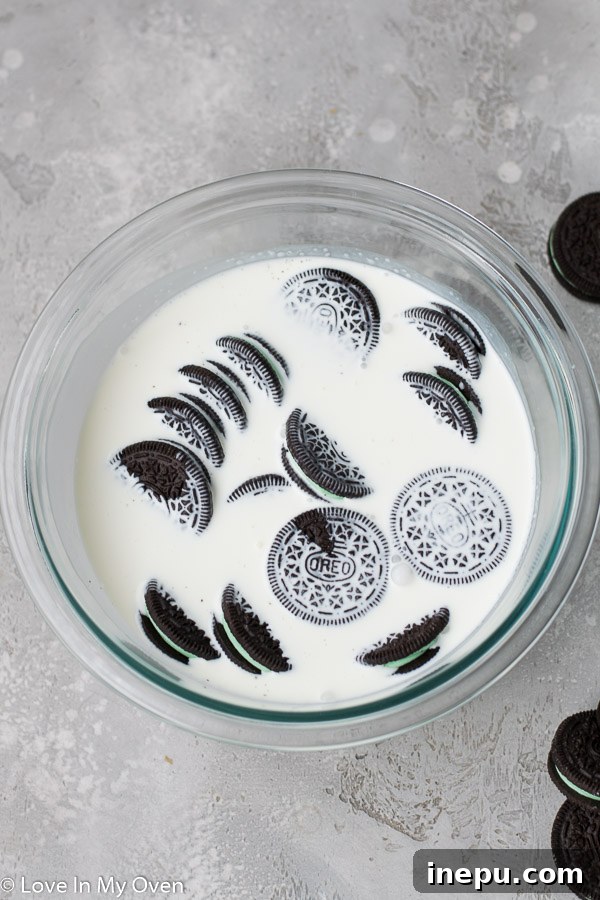
- The Overnight Soak: Begin your mousse-making journey the night before you plan to serve. Take 14 of your mint Oreo cookies and place them gently into a large mixing bowl. Pour the two cups of heavy cream over the cookies, ensuring they are fully submerged. This crucial step allows the cookies to soften completely and infuse their delightful mint chocolate flavor into the cream, creating a rich, flavorful base for your mousse. Cover the bowl tightly with plastic wrap and refrigerate it overnight, or for at least 8-12 hours.
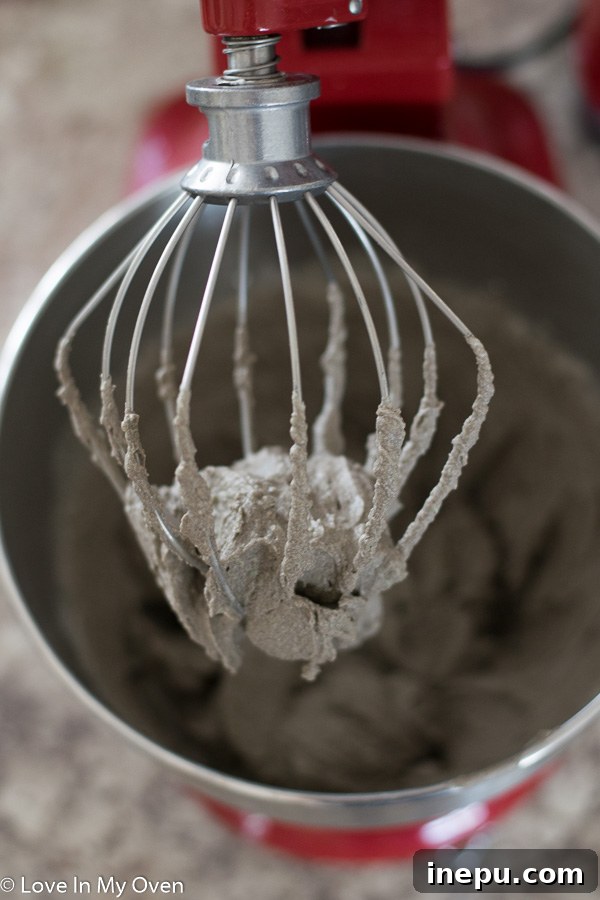
- Whip It Up: The next day, retrieve your cream-soaked Oreos from the fridge. Transfer the entire contents of the bowl into the mixing bowl of a stand mixer fitted with the whisk attachment. Alternatively, if you don’t have a stand mixer, a handheld electric mixer with whisk attachments will work perfectly. Add the powdered sugar and, if you’re using it, the mint extract. Begin whipping the mixture on high speed. Watch as the magic happens! In about 3-4 minutes, the mixture will transform from a liquidy consistency into a light, airy, and fluffy mousse. The Oreos will break down and blend seamlessly, creating a wonderfully integrated texture. Be careful not to over-whip, as this can cause the mixture to become grainy. Stop once it’s light and holds soft peaks.
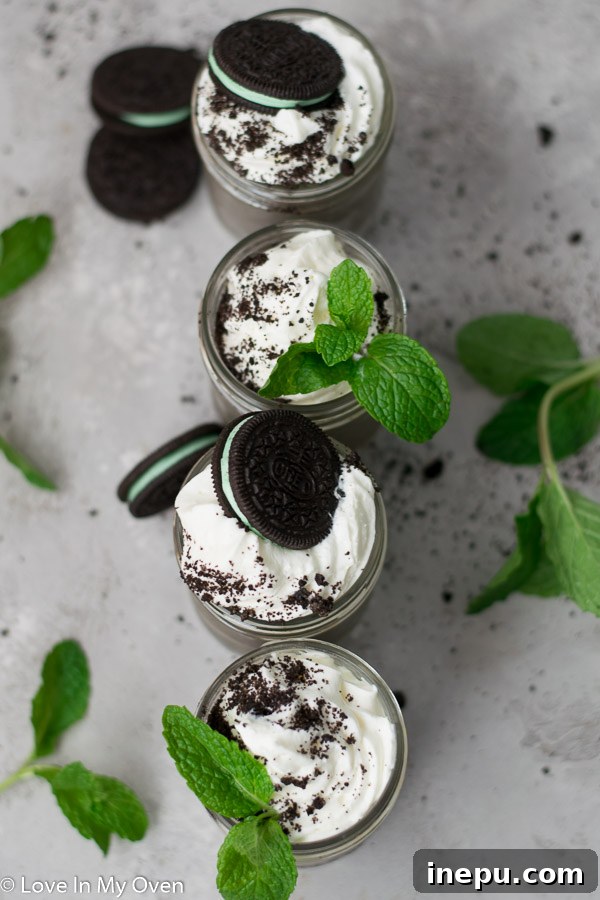
- Assemble and Chill: Now for the finishing touches! Crush the remaining 7 mint Oreos. You can do this by placing them in a Ziploc bag and crushing them with a rolling pin for a rustic texture, or pulsing them briefly in a food processor for finer crumbs. Divide these crushed cookie crumbs evenly among four individual serving dishes, such as mini mason jars, small dessert bowls, or elegant ramekins. Spoon the freshly whipped mousse over the crushed Oreos, dividing it equally among your chosen dishes.
- Serve or Chill: This mousse can be served immediately for a wonderfully soft and fresh experience. However, for the best possible texture and to allow the flavors to meld even further, I highly recommend placing a lid on your dishes (or covering them with plastic wrap) and refrigerating the mousse for at least a few hours. This chilling time allows the mousse to firm up slightly and become even more luscious.
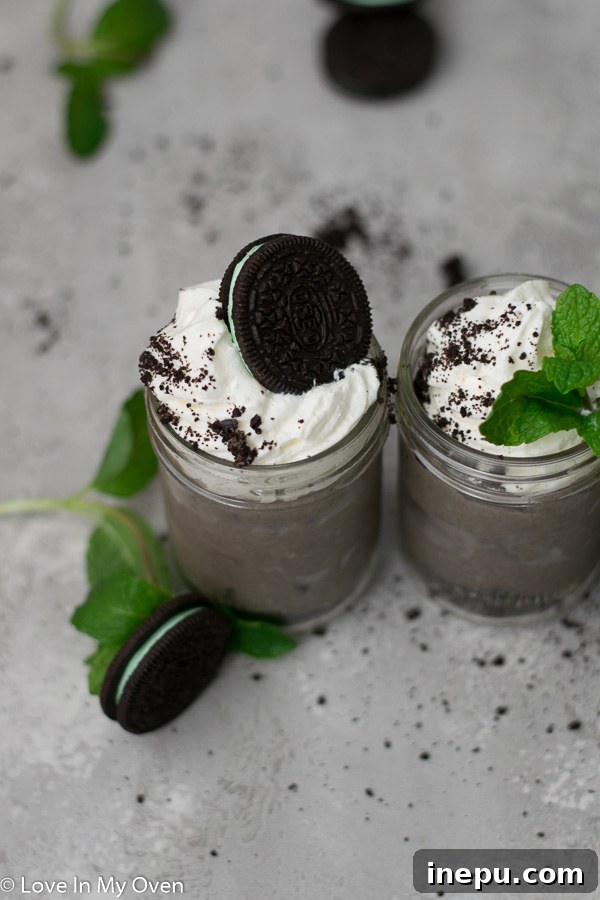
- Garnish and Enjoy: Before serving, elevate your mint Oreo mousse with a dollop of extra whipped cream on top. Sprinkle with additional crushed mint Oreos for extra crunch and visual appeal. For an extra touch of decadence, a drizzle of melted chocolate or a few fresh mint leaves can make it truly gourmet.
This mousse will stay fresh and delicious in the fridge, covered, for 3-4 days, making it an excellent make-ahead dessert option!

Creative Toppings and Serving Suggestions for Your Mousse
While this mint Oreo mousse is absolutely divine on its own, adding a few creative toppings can transform it into an even more spectacular dessert. Think of it as a blank canvas waiting for your artistic touch!
- Classic Whipped Cream & Crushed Oreos: The simplest and most popular choice! A generous dollop of freshly whipped cream adds another layer of lightness, while a sprinkle of extra crushed mint Oreos provides a satisfying textural contrast and reinforces the core flavors.
- Decadent Chocolate Drizzle: For the ultimate chocolate lover, a drizzle of melted dark, milk, or even white chocolate can elevate this mousse to new heights. The chocolate hardens slightly upon contact with the cold mousse, creating a delightful shell-like texture.
- Fresh Mint Leaves: A sprig of fresh mint not only adds an elegant touch of green color but also enhances the refreshing aroma of the dessert. It’s a subtle yet sophisticated garnish.
- Mini Chocolate Chips or Shavings: Sprinkle a handful of mini chocolate chips or delicate chocolate shavings over the top for extra bursts of chocolatey goodness and a refined finish.
- Chocolate Syrup: A simple swirl of chocolate syrup can add a diner-style charm and extra sweetness.
The beauty of serving this mousse in individual portions, especially in cute mini mason jars, is its versatility and portability. These jars are perfect for picnics, potlucks, or simply keeping individual treats perfectly sealed in the fridge. They also make for an attractive presentation that’s sure to impress your guests!
Master Your Mousse: Expert Tips for Success
While this recipe is incredibly simple, a few expert tips can ensure your mint Oreo mousse turns out perfect every single time:
- Start with Cold Ingredients: Ensure both your heavy cream and your mixing bowl (and whisk attachment) are very cold. This helps the cream whip up faster and achieve a firmer, more stable consistency. You can chill your bowl and whisk in the freezer for 10-15 minutes before starting.
- Don’t Rush the Soak: The overnight soaking is crucial. It allows the Oreos to fully soften and deeply infuse their flavor into the cream. Don’t try to shorten this step, as it directly impacts the mousse’s texture and taste.
- Avoid Over-Whipping: Once you start whipping, keep a close eye on the mixture. You want it to be light and fluffy, holding soft peaks. Over-whipping can cause the mousse to become grainy or separate, losing its smooth, velvety texture. Stop as soon as it reaches the desired consistency.
- Adjust Mint Extract to Taste: The amount of mint extract is optional and adjustable. If you prefer a stronger mint flavor, you can add a tiny bit more, but start with the recommended amount and taste before adding more, as extracts can be potent.
- Chill for Best Results: While you can serve the mousse immediately, chilling it for at least a few hours allows it to firm up beautifully and enhances the overall flavor and texture. This makes it an ideal make-ahead dessert.
Endless Variations: Beyond Mint Oreo
The ingenious 3-ingredient method behind this mousse is remarkably versatile, opening up a world of possibilities beyond just mint Oreos! This basic technique can be adapted to almost any flavor of sandwich cookie, allowing you to create customized desserts for any occasion or craving. Don’t be afraid to experiment and unleash your inner dessert chef!
- Classic Oreo Mousse: If mint isn’t your thing, simply use classic, original Oreos for a timeless chocolate and cream flavor. It’s an absolute crowd-pleaser.
- Birthday Cake Fun: Imagine a mousse made with Birthday Cake Oreos! The sprinkles and cake batter flavor would create a festive and whimsical dessert, perfect for celebrations.
- Seasonal Specialties: Keep an eye out for seasonal Oreo flavors! Pumpkin Spice Oreos could make a delightful fall mousse, while Red Velvet Oreos would be perfect for Valentine’s Day.
- Other Sandwich Cookies: Don’t limit yourself to just Oreos! This method would be fantastic with other chocolate or vanilla sandwich cookies. I’m already planning to try it with a rich chocolate fudge cookie soon – imagine the double chocolate decadence!
- Different Extracts: Beyond mint, consider adding other extracts to complement your chosen cookie. Vanilla extract would enhance classic Oreos, almond extract could pair beautifully with a shortbread-like cookie, or even a touch of orange extract for a chocolate-orange twist.
- Add-ins: For extra texture and flavor, consider folding in mini chocolate chips, chopped nuts, or even a swirl of caramel or fudge sauce once the mousse is whipped.
The possibilities are truly endless, making this 3-ingredient mousse a fantastic base for all your creative dessert adventures. If you’re a fan of mint, you absolutely must try this mint Oreo mousse first, but remember, there’s a whole world of mousse variations waiting to be discovered!
Storage and Make-Ahead Tips
One of the many great things about this mint Oreo mousse is how well it stores, making it an excellent candidate for meal prepping your desserts or making it ahead for special occasions. Proper storage ensures that your mousse remains fresh, creamy, and delightful for days.
- Refrigeration: The mousse will keep beautifully in the refrigerator, covered, for 3-4 days. This makes it a fantastic make-ahead option for parties or busy weeks when you want a delicious treat ready to go. Simply prepare it, portion it into serving dishes, and chill until needed.
- Airtight Containers are Key: When storing, always use airtight containers or ensure your individual serving dishes (like mason jars) have tightly fitting lids. This prevents the mousse from absorbing odors from the fridge and helps maintain its creamy texture, preventing it from drying out.
- Individual Jars for Portability: Using mini mason jars for this dessert is not just aesthetically pleasing but also incredibly practical. They are super portable, making them ideal for packing in lunchboxes, taking to a picnic, or serving at a potluck. The lids ensure they stay perfectly sealed and fresh.
- Freezing (Optional, but Possible): While mousse is best enjoyed fresh from the fridge, you can freeze it if you wish. Transfer the mousse into freezer-safe, airtight containers. It can be frozen for up to 1 month. Thaw in the refrigerator for several hours before serving. Note that the texture might be slightly different after freezing and thawing, potentially a little less airy, but still delicious.
Having a batch of this mint Oreo mousse ready in the fridge means you’re always just a moment away from a refreshing, decadent treat. It’s perfect for satisfying those spontaneous sweet cravings or offering an easy, elegant dessert to unexpected guests.
Frequently Asked Questions (FAQs)
- Can I use regular Oreos instead of Mint Oreos?
- Absolutely! This recipe is incredibly versatile. Simply swap out the mint Oreos for classic original Oreos, or any other flavor you prefer, to create a delicious variation.
- Do I really need to soak the Oreos overnight?
- Yes, the overnight soak is crucial for this recipe. It allows the cookies to fully soften and infuse their flavor into the heavy cream, which is essential for achieving the smooth, creamy texture of the mousse without any gritty bits of cookie.
- Is this dessert gluten-free?
- This recipe is not inherently gluten-free, as traditional Oreos contain gluten. However, you can make it gluten-free by using gluten-free mint Oreo cookies (if available) or other gluten-free sandwich cookies.
- Can I make this recipe vegan?
- Yes, it’s possible! You would need to use a plant-based heavy cream substitute (like full-fat coconut cream, chilled overnight with the solid cream scooped off the top) and vegan-friendly mint Oreos or other vegan sandwich cookies. Ensure all ingredients are dairy-free.
- What if my mousse isn’t thickening?
- Ensure your heavy cream was very cold when you started whipping. Also, make sure you’re using heavy cream (not half-and-half or light cream). Continue whipping on high speed; sometimes it just needs a little more time. If your kitchen is very warm, this can also affect thickening, so try to keep ingredients cold.
- Can I add other mix-ins to the mousse?
- Definitely! Once the mousse is whipped, you can gently fold in mini chocolate chips, chopped nuts, or even a swirl of chocolate fudge or caramel sauce for extra flavor and texture. Be careful not to overmix.
More Sweet Treats You’ll Love from the Blog:
If you’re a fan of easy and delicious desserts, be sure to check out some of my other favorites:
- Easy Chocolate Raspberry Mousse
- Peppermint White Chocolate Mousse
- 3-Ingredient Oreo Truffles
Print Recipe
Mint Oreo Mousse
5 from 9 reviews
- Author: Katherine | Love In My Oven
Description
You only need 3 ingredients to make this mint Oreo mousse! This luscious, creamy mint mousse is one that you’ll be making again and again!
Ingredients
- 21 mint Oreo cookies, divided
- 2 cups heavy cream
- 2 tbsp powdered sugar
- optional: 1/4 tsp mint extract
Instructions
- The night before you make this mousse, place 14 mint Oreos in a large mixing bowl and cover them with the heavy cream. Cover the bowl with plastic wrap and place the bowl in the fridge.
- In the bowl of a stand mixer fitted with the whisk attachment, or using a handheld mixer, whip the contents of the mixing bowl on high, along with the powdered sugar and mint extract (if using), until the mixture is light and fluffy.
- Crush the remaining 7 Oreos in a bag, using a rolling pin, or in your food processor. Divide the crushed crumbs among 4 different serving dishes then add the whipped mousse on top of the dish, dividing it up equally. Serve immediately, or place a lid on the dish (or using plastic wrap) and refrigerate the mousse for a few hours. Top with whipped cream and additional mint Oreos, if desired!
Mousse will keep in the fridge, covered, for 3-4 days.
Notes
*This recipe was adapted from Sugar Salt Magic.