
Discover the ultimate guide to creating perfectly crispy baked sweet potato fries, paired with an irresistibly creamy, tangy homemade dill dip. Forget soggy fries and enjoy a healthier, restaurant-quality side dish right in your own kitchen! This detailed recipe will become a new family favorite.
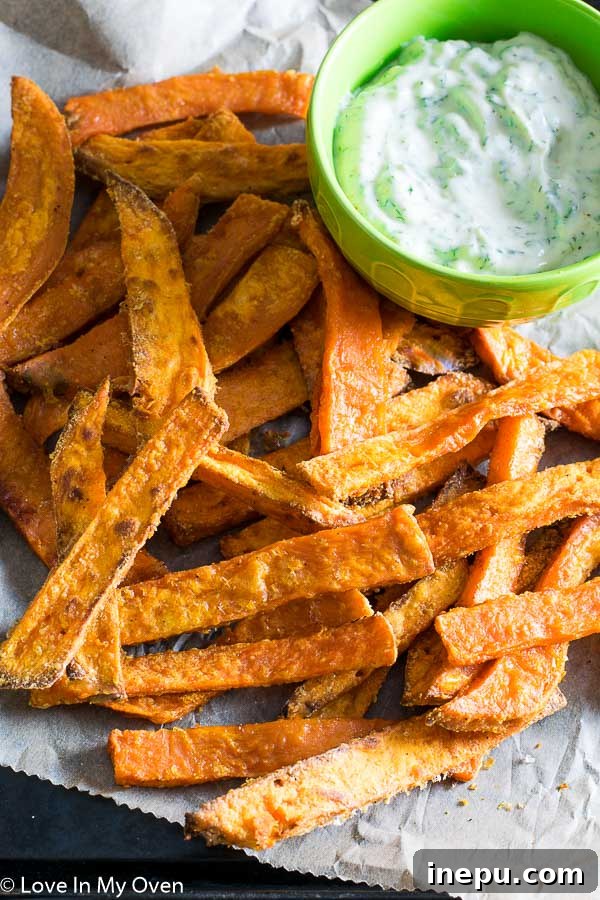
*Please note* this post was originally published in 2017. It has since been re-written to enhance clarity, improve SEO, and provide more detailed tips, but the beloved recipe remains unchanged.
The Ultimate Guide to Crispy Baked Sweet Potato Fries with Homemade Dill Dip
Sweet potato fries have a way of capturing hearts and taste buds. Their natural sweetness, vibrant color, and versatility make them a beloved side dish, snack, or even a light meal. However, achieving that coveted crispy texture at home, without resorting to deep-frying, can often feel like a culinary quest. Many home cooks have experienced the disappointment of limp, soggy, or even burnt sweet potato fries that fall far short of their restaurant counterparts.
I understand the struggle. For years, my attempts at baking sweet potato fries at home resulted in anything but perfection. They would emerge from the oven either too soft and pliable or, in a frustrating twist of fate, charred on the outside while still slightly undercooked within. It became a running joke with my old roommate – a testament to my persistent, yet often flawed, endeavors!
Restaurant sweet potato fries often owe their glorious crispiness to the magic of the deep fryer. While undeniably delicious, deep-frying isn’t always the healthiest or most convenient option for a regular family dinner. Plus, who truly enjoys the messy cleanup that inevitably follows deep-frying? It’s a task many of us would rather avoid.
But fear not, fellow sweet potato enthusiasts! After much experimentation and countless batches, I’m thrilled to share the game-changing secrets to consistently achieve crispy, golden-baked sweet potato fries that rival any deep-fried version. This method is so effective, you might just find yourself addicted. Alongside these perfect fries, we’ll also craft an incredibly flavorful homemade dill dip – a rich, creamy, and slightly tangy accompaniment that takes this dish to an entirely new level. Get ready to impress your family and friends with this healthier, utterly delicious twist on a classic!
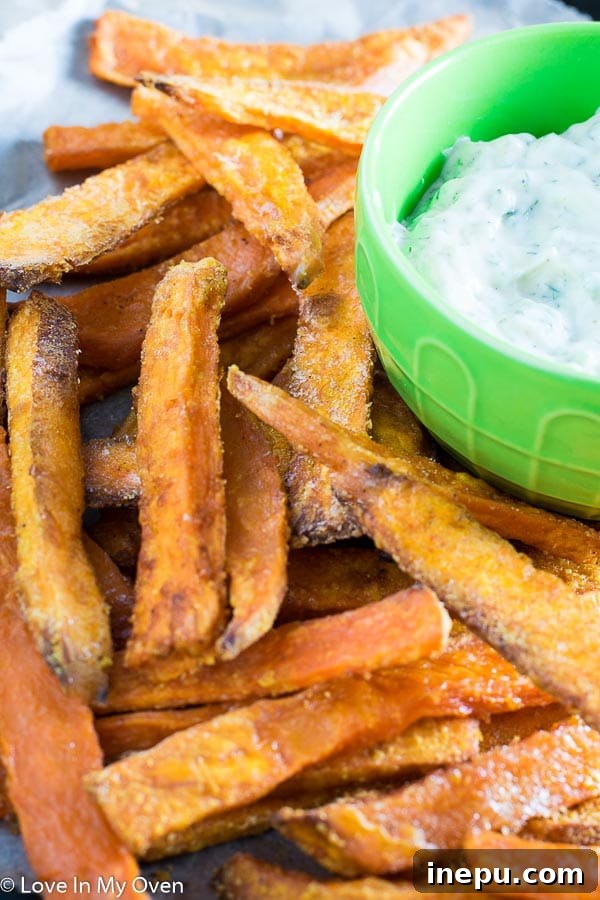
The Secrets to Perfectly Crispy Baked Sweet Potato Fries
Achieving truly crispy baked sweet potato fries isn’t just about throwing them in the oven. It’s a combination of a few crucial techniques that work together to draw out moisture and create that irresistible crunch. Here’s a detailed look at the fundamental steps:
- Uniform Cuts Are Key: This is arguably the most important step for even cooking. Sweet potatoes, when cut into varying sizes, will cook inconsistently. Thinner pieces will burn while thicker ones remain undercooked and soft. Aim for fries that are as close to identical in size and shape as possible, ideally around 1/4 to 1/3 inch thick. A mandoline slicer can achieve professional-level uniformity, but a sharp knife and a steady hand work just as well with a bit of practice.
- Single Layer Spread: Resist the urge to overcrowd your baking sheets! This is a common mistake that leads to soggy fries. When fries are piled on top of each other, they steam rather than roast. Steam traps moisture, preventing the fries from browning and crisping up. Always arrange your sweet potato fries in a single layer with a little space between each piece, allowing air to circulate freely around them. You’ll likely need two large baking sheets for a standard batch.
- The Power of Cornstarch: This may seem like an unusual addition, but a light coating of cornstarch is a game-changer for crispiness. Cornstarch creates a thin, almost invisible barrier on the surface of the fries. As the fries bake, this barrier helps to absorb excess moisture and promotes a beautifully golden, crunchy exterior. It’s the secret weapon against limpness!
- Utilize the Roast Setting: If your oven features a “roast” setting in addition to “bake,” use it! The roast setting typically uses higher, more direct heat from the top element, which is perfect for browning and crisping. If your oven only has a bake setting, ensure you use a high temperature (around 400°F or 200°C) and be mindful of rotating the trays to ensure even cooking. The intense heat helps to caramelize the sugars in the sweet potatoes and create a delightful crunch.
- The Post-Bake Crisp: For an extra layer of crispiness, once your fries are cooked to a golden brown and are tender on the inside, turn off your oven. Leave the baking sheets inside for another 10-15 minutes. The residual heat will continue to dry out the fries slightly, enhancing their crispness without burning them. This technique is often overlooked but yields fantastic results!
Crafting the Irresistible Homemade Dill Dip
Now, let’s talk about the dill dip. If you’ve ever had the pleasure of dining at an Original Joe’s restaurant in Canada, you’ll know exactly what I’m talking about. Their sweet potato fries with dill dip are legendary – a perfectly balanced combination of savory, sweet, and tangy flavors. While their fries are undoubtedly deep-fried, I’ve worked to recreate that incredible dip experience at home, to complement our healthier, baked fries.
This dill dip is more than just a condiment; it’s a creamy, tangy, and incredibly addictive creation that you’ll want to put on everything. The best part? You likely already have most of the ingredients in your pantry and fridge. It’s a simple recipe that comes together in minutes, proving that the best flavors don’t always require complex preparations.
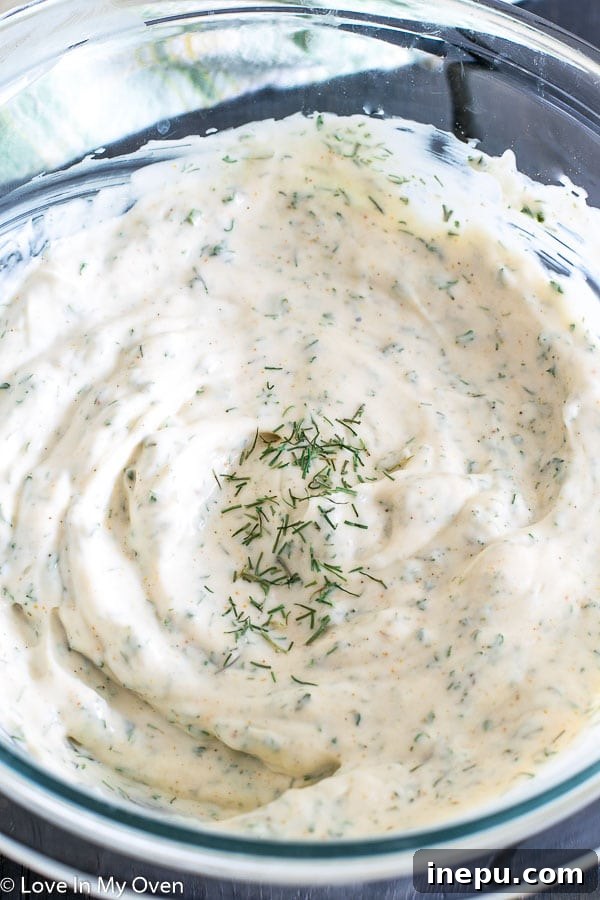
The foundation of this luscious dip is a harmonious blend of mayonnaise and sour cream, providing a rich and creamy base with just the right amount of tang. What truly sets it apart are the generous amounts of seasonings, with dried dill taking center stage. The dill imparts a fresh, aromatic, and slightly sweet herbaceous note that perfectly balances the richness of the dairy. Seasoning salt adds depth, dried parsley provides additional fresh flavor and color, and a touch of Worcestershire sauce introduces a subtle umami complexity that makes the dip truly irresistible.
This dip doesn’t just compliment the crispy sweet potato fries; it elevates them, creating a pairing that feels indulgent yet surprisingly balanced. Prepare for this dip to disappear quickly!
Step-by-Step: Making Your Crispy Sweet Potato Fries
Let’s walk through the process of preparing these golden beauties. Precision and attention to detail at each stage will ensure the best results.
- Preheat and Prepare: Start by preheating your oven to 400°F (200°C). If your oven has a “roast” setting, use it for optimal crisping. Line two large baking sheets with parchment paper. Parchment paper is highly recommended as it prevents sticking and helps with browning. Avoid aluminum foil, as fries tend to stick to it, and an ungreased sheet can also cause sticking. A silicone baking mat is another excellent alternative.
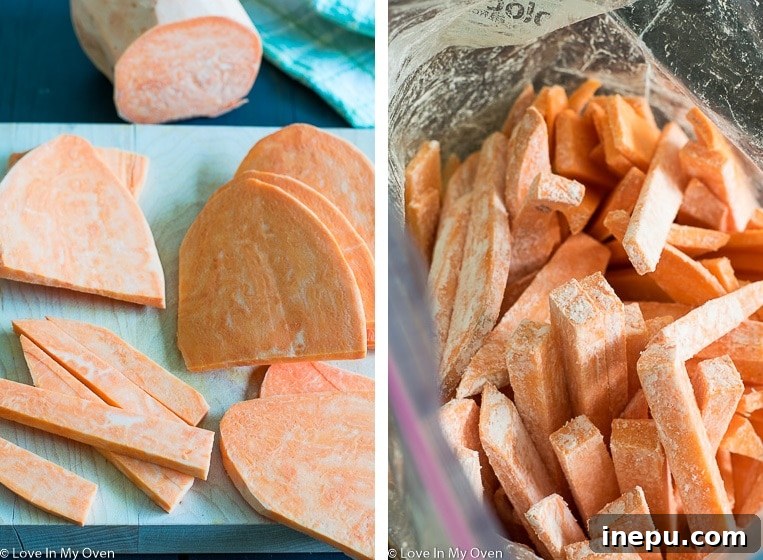
- Peel and Cut with Care: Peel your sweet potatoes thoroughly. Using a sharp chef’s knife or a mandoline (with caution!), cut the sweet potatoes into fry shapes, aiming for approximately 1/4 to 1/3 inch thick. Remember, uniformity is paramount for even cooking. If some pieces are significantly thicker or thinner, they won’t cook at the same rate.
- The Cornstarch Shake: Place your freshly cut sweet potatoes into a large Ziploc bag. Add 3 tablespoons of cornstarch. Seal the bag, ensuring there’s still some air inside, and shake vigorously for 1-2 minutes. The goal is to coat every single fry with a thin, even layer of cornstarch. You should see a fine white powder clinging to each piece.
- Oil and Season: Open the bag and add 2-3 tablespoons of your preferred oil (canola, grapeseed, or olive oil work well). Add your chosen seasonings. I love the classic combination of 1 teaspoon garlic powder, 1 teaspoon paprika, and 1 teaspoon sea salt for a savory and slightly smoky flavor. If you enjoy a bit of heat and the kids aren’t sharing, a pinch of chili powder adds a wonderful kick. Re-seal the bag and shake again, even more vigorously this time, until the oil and seasonings are evenly distributed and the fries are beautifully coated.
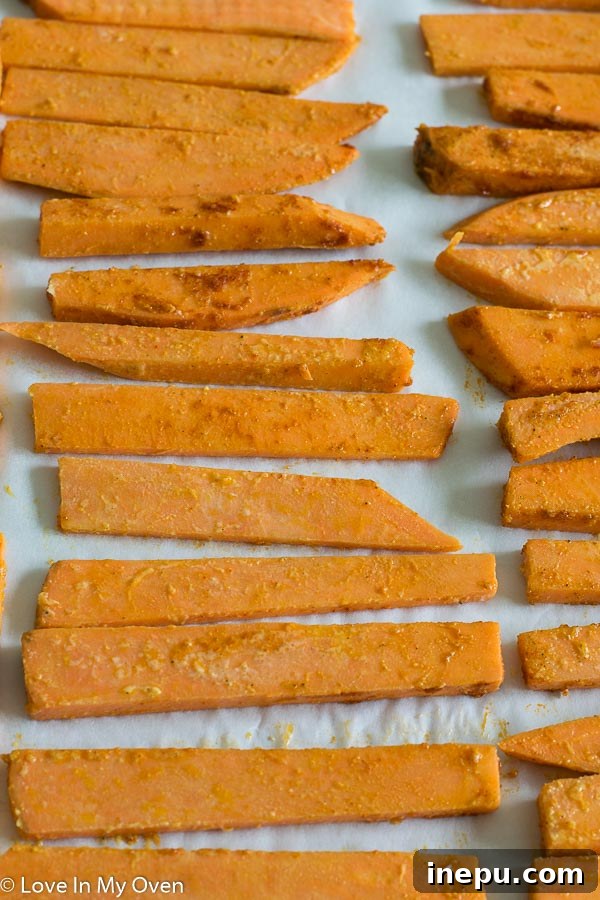
- Single Layer Baking: Carefully arrange the seasoned fries in a single layer across your prepared baking sheets. Crucially, ensure there’s a little space between each fry. If they are touching or overlapping, they will steam instead of crisp. Depending on the amount of sweet potatoes, you will almost certainly need both baking sheets.
- Initial Bake: Place the baking sheets in the preheated oven. Bake for 15 minutes.
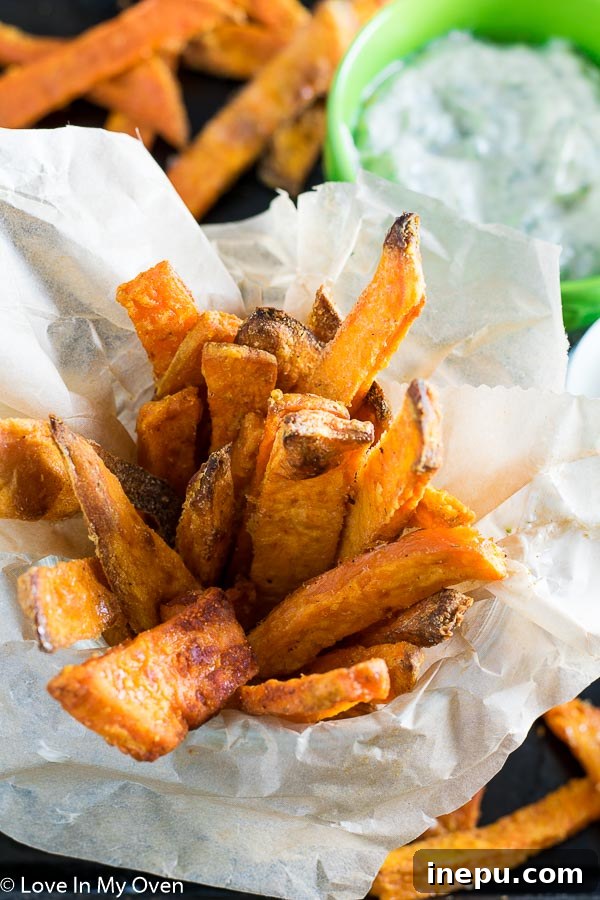
- Flip and Finish: After 15 minutes, remove the pans from the oven. Using a metal spatula (it’s sturdy and slides easily under the fries), carefully flip the fries in sections. Don’t worry about flipping each individual fry; just get them to turn over so the other side can brown. Return the pans to the oven for another 10-15 minutes, or until the fries are golden brown, slightly pillowy in appearance, and firm to the touch. They should not be floppy when picked up. If you’re using the “roast” setting, keep a close eye on them to prevent over-browning.
- Optional Crisping Boost: For that extra crisp, once the fries are cooked to your liking, turn off the oven and leave the fries inside for an additional 10-15 minutes. The residual heat will continue to dry them out, making them even crispier.
Whipping Up the Creamy Dill Dip
While your sweet potato fries are baking to crispy perfection, you can easily prepare the dill dip. This takes mere minutes!
- Combine Ingredients: In a small mixing bowl, combine all the dill dip ingredients: mayonnaise, sour cream, dried dill, seasoning salt, dried parsley, salt, and Worcestershire sauce.
- Mix Thoroughly: Stir all ingredients together until well combined and smooth.
- Taste and Adjust: This is a crucial step! Taste the dip and adjust the seasonings to your preference. Do you like more dill flavor? Add a little extra. Prefer a bit more tang? A tiny squeeze of lemon juice or a dash more Worcestershire can work wonders.
- Chill: Cover the bowl and store the dip in the refrigerator until your crispy sweet potato fries are ready. Chilling allows the flavors to meld beautifully.
Serving Suggestions and Variations
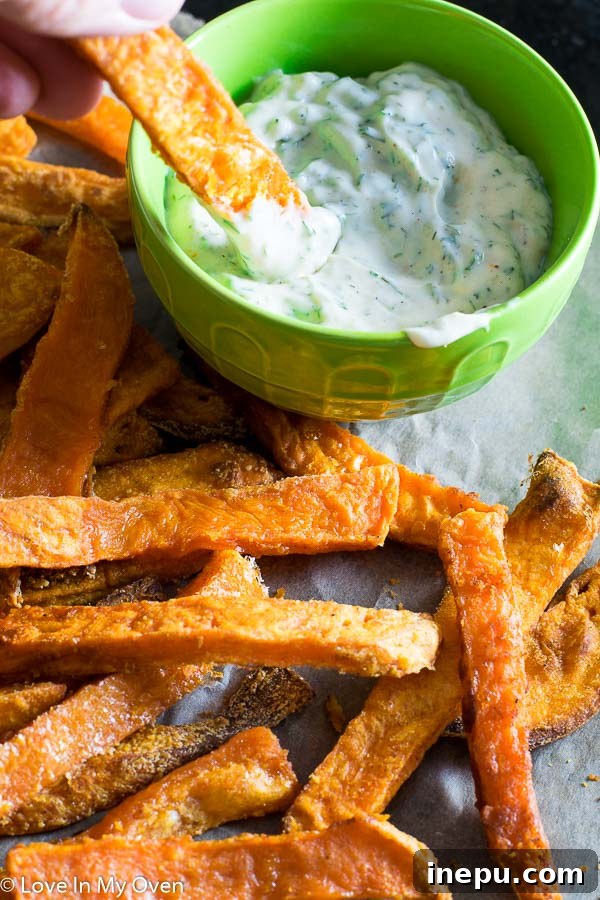
Once your sweet potato fries are hot and crispy, and your dill dip is perfectly chilled, it’s time to enjoy! Serve the fries immediately alongside a small bowl of the creamy dill dip for dipping. The contrast between the warm, sweet fries and the cool, tangy dip is simply divine.
This recipe makes a generous amount of dill dip, often more than enough for one batch of fries. Don’t let the extra go to waste! This versatile dip is fantastic with:
- Burgers and Sandwiches: Use it as a spread on burger buns or a flavorful addition to your favorite deli sandwiches.
- Fresh Veggie Platter: It makes an excellent dip for carrots, celery, bell peppers, cucumbers, and cherry tomatoes.
- Grilled Chicken or Fish: A dollop of dill dip can brighten up grilled meats.
- Potato Chips or Crackers: A simple, yet satisfying snack.
If dill isn’t your favorite herb, or if you’re looking for other flavor profiles, these crispy sweet potato fries are also delicious with:
- A creamy chipotle sauce for a smoky, spicy kick.
- Classic ketchup for a timeless pairing.
- Honey mustard for a sweet and tangy combination.
- A simple squeeze of fresh lime juice and a sprinkle of cilantro for a zesty twist.
These sweet potato fries are seriously delicious and incredibly satisfying. For so long, I craved the deep-fried indulgence of Original Joe’s fries. But after perfecting this baked method, I can happily say that craving has been more than satisfied, and my waistline is thanking me too! This healthier alternative doesn’t compromise on flavor or texture.
Health Benefits of Sweet Potatoes
Beyond their delicious taste and satisfying texture, sweet potatoes are nutritional powerhouses. They are rich in:
- Beta-Carotene: This antioxidant is responsible for their vibrant orange color and is converted to Vitamin A in the body, essential for vision, immune function, and skin health.
- Vitamin C: Another powerful antioxidant that supports the immune system.
- Potassium: Important for blood pressure regulation and fluid balance.
- Fiber: Promotes digestive health, helps regulate blood sugar levels, and contributes to a feeling of fullness.
By baking instead of deep-frying, we maximize these benefits, making this dish a truly wholesome addition to your diet.
As winter settles in with wicked amounts of snow right now, it looks like it’s going to be a weekend of playing in the white stuff, drinking hot cocoa, and, of course, indulging in these incredible fries. They are the perfect cozy comfort food!
Enjoy your weekend, everyone, and treat yourself to this delightful culinary experience!
My entire family absolutely loves sweet potatoes. If yours does too, be sure to try some of my other dishes featuring this versatile orange gem:
- Mini Sweet Potato Muffins
- Sheet Pan Chicken with Sweets and Beets
- Golden Lentil Curry
And don’t forget to explore a few of my other fantastic side dish recipes!
Print Recipe

Sweet Potato Fries with Dill Dip
1 from 1 review
Author: Katherine
Total Time: 45 minutes
Yield: 4 servings 1x
Description
The BEST dill dip recipe is the perfect pairing to these extra crispy sweet potato fries. One of my favorite recipes, these sweet potato fries with dill dip will be a new go-to side for your family dinners!
Ingredients
Scale
- 1–2 large sweet potatoes
- 3 tbsp cornstarch
- 2–3 tbsp oil (canola, grapeseed or olive)
- 1 tsp garlic powder
- 1 tsp paprika
- 1 tsp sea salt
Dill Dip
- 1/2 cup mayonnaise
- 1/2 cup sourcream
- 1 tsp dried dill
- 1 tsp seasoning salt
- 1 tbsp dried parsley
- 1/2 tsp salt
- 1/2 tsp Worcestershire sauce
Instructions
- Preheat the oven to 400 F and line two large baking sheets with parchment paper, or spray with non-stick spray.* Use the roast setting on the oven if available.
- Peel the sweet potatoes, and cut them into fry shapes, about 1/4″ thick each. Place the potatoes into a large Ziploc bag, add the cornstarch and shake the bag well until all of the fries have a thin coating of cornstarch.
- Add the oil, garlic powder, paprika and sea salt to the bag, and shake vigorously. Place the fries in a single layer on the baking sheets and place in the oven for 15 minutes. Remove the pans, and using a metal spatula, flip the fries in sections. Place back in the oven for another 10-15 minutes. You’ll know the fries are done when they’re slightly pillowy looking and firm.* No floppy fries!
- While the fries are baking, prepare the dill dip by combining all of the dip ingredients in a small bowl, and mixing together. Store in the fridge until the fries are ready.
- Serve the fries alongside a small bowl of dip. Enjoy immediately!
Leftover fries can be stored in the fridge, and heated up in the oven at 275 for 10-15 minutes.
Notes
- Do not use foil or an ungreased sheet. Parchment paper works best, but I’ve also had success with a silicone baking mat.
- One tip to crisp up the fries: Once they’re cooked, shut off the oven and leave the fries inside for 10-15 minutes. The low heat in the oven will crisp them up nicely.
- Prep Time: 20 minutes
- Cook Time: 25 minutes