
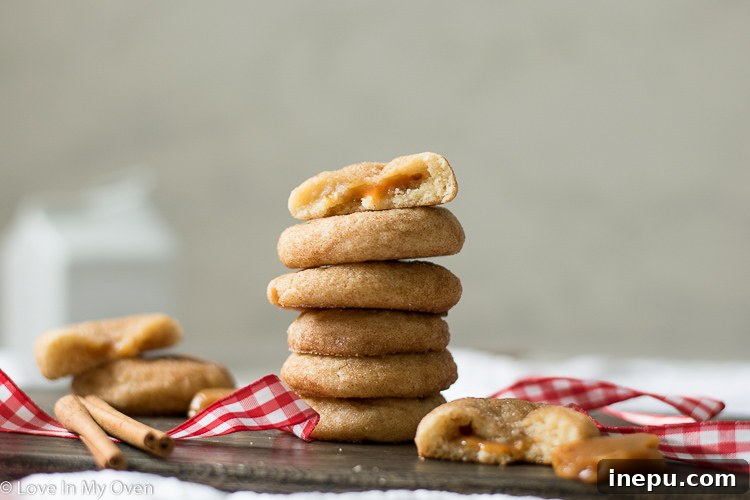
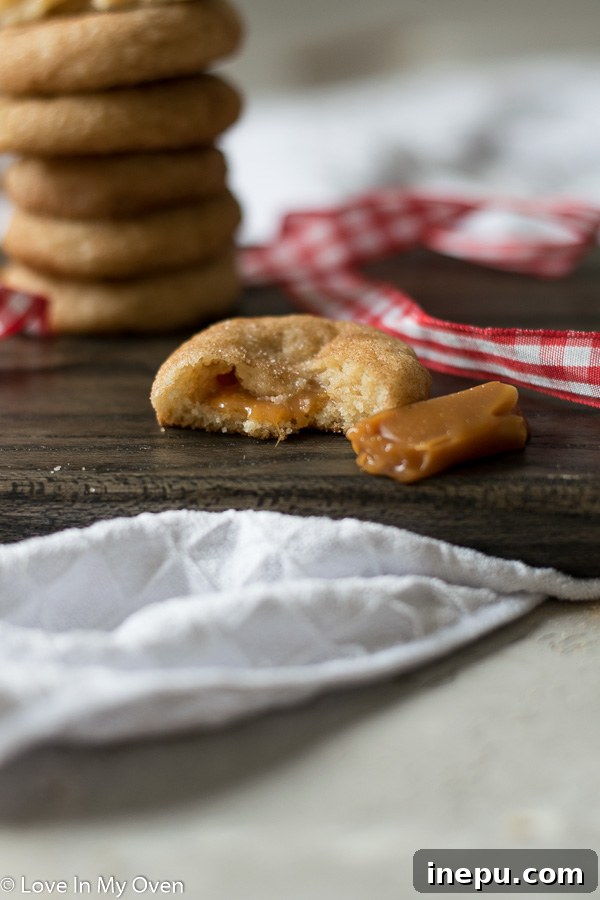
What’s better than a classic, soft, and chewy snickerdoodle? Imagine that same beloved cookie, but with a decadent, gooey caramel center! These Caramel Snickerdoodles are not just a treat for the taste buds; they’re an experience. This easy-to-follow, stuffed snickerdoodle recipe promises an impressive, deeply delicious cookie that will have everyone asking for more.
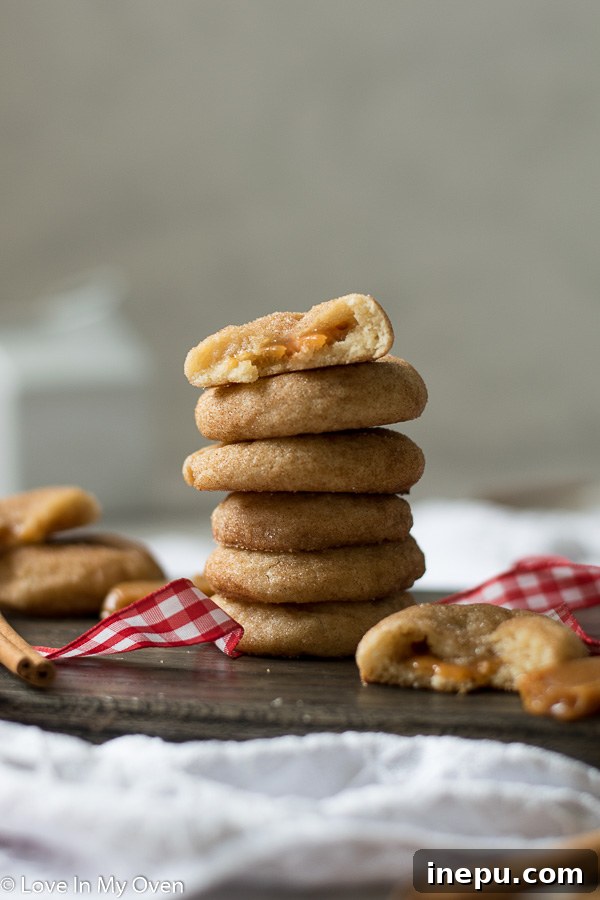
The journey to perfecting these caramel-filled delights was one filled with both delightful aromas and a few moments of cookie-related frustration! While the concept of a caramel snickerdoodle seemed simple enough, achieving that ideal balance – a perfectly puffy, wonderfully chewy cookie with a molten caramel core that doesn’t burst out during baking – took considerable dedication. There were indeed many rounds of testing, leading to what I affectionately called “pancaked caramel snickerdoodles” in my freezer. Each batch still tasted amazing, don’t get me wrong, but they lacked the beautiful, plump texture that truly defines a superior snickerdoodle. Finally, after much trial and error, I cracked the code! And the result, as you can see, is a triumph: a cookie that is as gorgeous as it is delicious.
This recipe isn’t just about mixing ingredients; it’s about understanding the nuances of cookie baking, especially when you introduce a luscious, sticky filling. From the precise chilling times to the expert handling of the dough, every step plays a crucial role in ensuring that each bite delivers that magical combination of warm cinnamon-sugar and rich, flowing caramel. If you’re ready to elevate your cookie game and impress friends and family with a truly unforgettable treat, you’ve come to the right place. Let’s dive into the secrets of making the best caramel snickerdoodles you’ll ever taste.

Mastering the Art of Caramel Snickerdoodles: A Step-by-Step Guide
Crafting these delectable caramel snickerdoodles involves a method similar to my beloved caramel-stuffed oatmeal chocolate chip cookies, but with a few critical adjustments and secret tips to ensure your snickerdoodles achieve that signature puffy, irresistibly chewy texture, all while keeping the caramel perfectly contained. Let’s break down the essential steps and insights to guarantee your success.
The Foundation: Soft Caramels are Key
The very first and most crucial piece of advice for this recipe revolves around your choice of caramel. You absolutely NEED to acquire genuinely soft caramels. My top recommendation is the extra-soft Werther’s Original Caramels. A common pitfall in my initial recipe tests was using caramels that were too firm. These harder caramels stubbornly retained their ball shape during baking, leading to an odd-looking, uneven cookie rather than a beautifully molten center. So, I cannot stress this enough: ensure your caramels are soft and pliable for that perfect ooey-gooey texture!
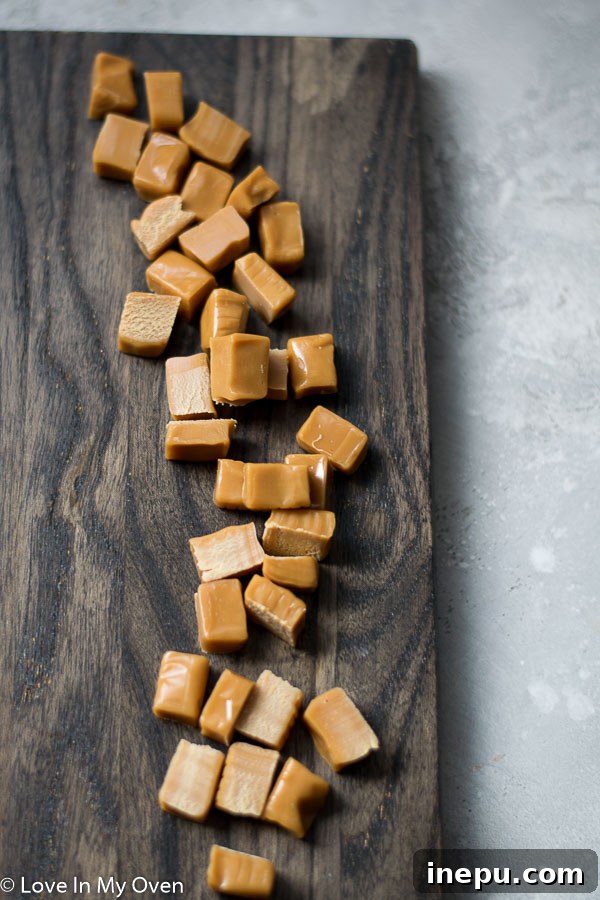
Once you have your soft caramels, you’ll be cutting them in half. This ensures they fit perfectly inside the cookie dough balls, allowing for an even distribution of the caramel and preventing over-stuffing, which can lead to bursting during baking.
Preparing the Snickerdoodle Dough
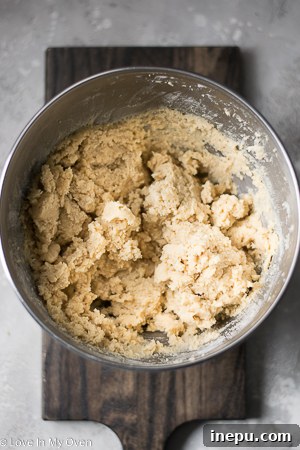
The dough itself follows a classic snickerdoodle preparation. Begin by whisking together all your dry ingredients – flour, baking soda, cream of tartar, ground cinnamon, and salt – in a large mixing bowl. Cream of tartar is vital here, as it’s what gives snickerdoodles their distinctive tangy flavor and contributes to their characteristic chewy texture. In a separate bowl, or the bowl of a stand mixer, beat together softened unsalted butter with both granulated sugar and brown sugar until the mixture is light and fluffy. The combination of sugars adds depth and moisture. Incorporate the egg and egg yolk, along with pure vanilla extract, mixing until just combined and scraping down the sides of the bowl as needed. Gradually add the dry ingredients to the wet mixture, mixing on low speed until a soft, cohesive cookie dough forms. Be careful not to overmix, as this can result in tough cookies.
The Magic of Chilling: Why It’s Non-Negotiable
Essential Tip 1: Chill the Dough! This is not an optional step; it’s a game-changer for snickerdoodle perfection. After preparing your dough, cover it tightly and refrigerate it for at least one hour. Chilling allows the butter to firm up, preventing the cookies from spreading too much in the oven. It also gives the flour time to hydrate, leading to a more tender and flavorful cookie. Furthermore, chilled dough is significantly easier to handle, making the stuffing process much smoother.
Stuffing Your Snickerdoodles with Caramel
Once your dough is adequately chilled, remove it from the fridge. Using a medium-sized cookie scoop (approximately 1 tablespoon), portion out a spoonful of dough. Gently press your thumb or finger into the center of the dough to create a small indentation. Into this well, carefully place one of your halved soft caramels.
Essential Tip 2: Centralize the Caramel! This step is critical to prevent caramel explosions. Carefully push the dough up and over the caramel, completely encasing it. Then, gently roll the dough in your hands to form a smooth, uniform ball. Make every effort to keep the caramel nestled squarely in the center of the dough ball. If the caramel is too close to the edge, it may melt and ooze out of the cookie during baking, leading to messy pans and less-than-perfect cookies.
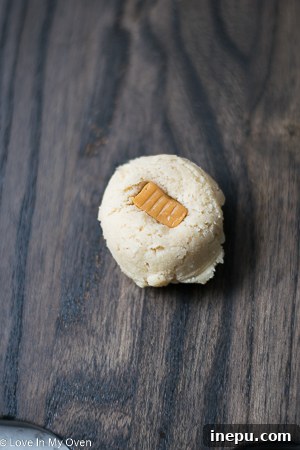
The Signature Cinnamon-Sugar Coating
After forming your caramel-stuffed dough balls, it’s time for the iconic snickerdoodle coating. In a shallow dish, combine granulated sugar and ground cinnamon. Roll each dough ball thoroughly in this mixture. For that truly authentic, super cinnamony snickerdoodle experience, roll them not just once, but twice! This ensures a generous coating that crisps up beautifully in the oven and delivers that classic flavor in every bite.
Essential Tip 3: Another Chill for Perfection! I know, I know – more waiting! But trust me, this second chilling step is paramount for achieving that coveted puffy, chewy cookie texture. After coating your dough balls, arrange them on a parchment-lined cookie tray, ensuring they are spaced about 2 inches apart. Place the entire tray back into the refrigerator for an additional 30 minutes. This final chill before baking helps the cookies hold their shape, prevents excessive spreading, and locks in moisture, resulting in a perfectly tender interior and slightly crisp exterior.
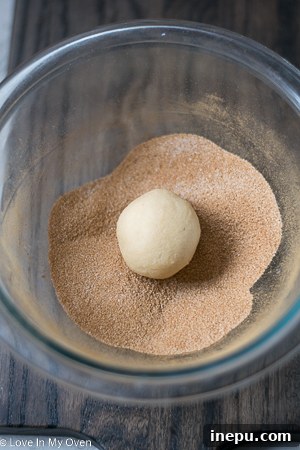
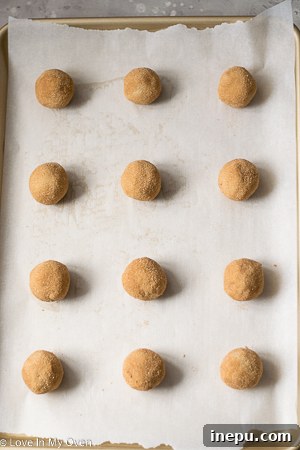
Baking Your Caramel Snickerdoodles to Golden Perfection
While your cookie dough balls are enjoying their final chill, preheat your oven to 350°F (175°C). Once the 30 minutes of chilling are complete, transfer the baking sheet directly from the fridge into the preheated oven. Bake the cookies for approximately 10 to 11 minutes. It’s important to keep a close eye on them; they will appear slightly under-baked in the center when you first remove them from the oven, and this is exactly what you want! The edges should be lightly set, but the middle should still look soft and perhaps a bit puffy. This slight under-baking ensures a wonderfully soft and chewy interior once they’ve cooled. Allow the cookies to cool on the baking tray for 5 minutes; during this time, they will continue to firm up and set. After 5 minutes, carefully transfer them to a wire rack to cool completely.
Finishing Touch Tip: For an extra boost of cinnamon-sugar flavor and a beautiful presentation, sprinkle a little extra cinnamon and granulated sugar over the warm cookies immediately after they come out of the oven. The residual heat will help the mixture adhere and melt slightly into the cookie as it cools, adding another layer of aromatic sweetness.
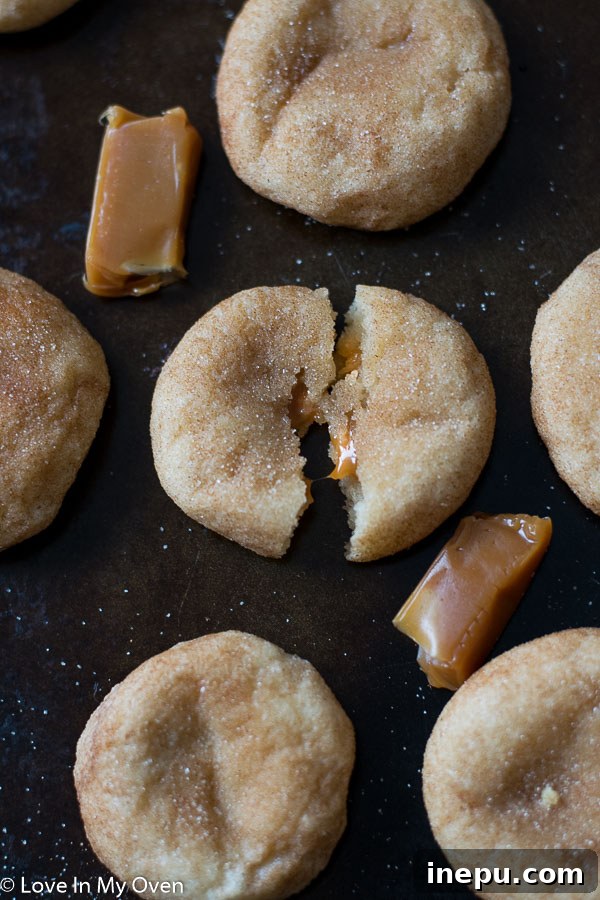
Storage and Longevity of Caramel Snickerdoodles
These caramel snickerdoodles are truly divine when enjoyed warm, with the caramel still wonderfully molten and gooey. However, they are equally exquisite and retain their delightful chewiness at room temperature. To keep them fresh and soft, store your baked cookies in an airtight container at room temperature. They will maintain their quality for approximately one week before gradually beginning to firm up. For longer storage, these cookies freeze exceptionally well. Place them in a freezer-safe, airtight container or bag, and they will stay fresh for up to two months. When you’re ready to enjoy a frozen cookie, simply let it thaw at room temperature, or warm it gently in the microwave for a few seconds to bring back that irresistible gooey caramel center.
By following these detailed tips and techniques, you are well on your way to baking the absolute best caramel snickerdoodles. Expect soft, perfectly puffy, and wonderfully chewy cookies, each hiding a delightful caramel surprise at its heart. These impressive and utterly delicious cookies are truly perfect for any occasion, whether you’re treating yourself, sharing with loved ones, or looking for a memorable holiday gift. Happy baking!

Craving more delicious treats? Explore some other fantastic cookie recipes from the blog that I know you’ll adore:
- Salted Chewy Brownie Cookies: A rich, fudgy dream with a hint of sea salt.
- Chewy Ginger Molasses Cookies: Warm spices and irresistible chewiness for a comforting treat.
- Raspberry Filled Sugar Cookies: Sweet, buttery cookies with a burst of fruity jam.

Caramel Snickerdoodles
5 Stars
4 Stars
3 Stars
2 Stars
1 Star
5 from 7 reviews
Author: Katherine | Love In My Oven
Total Time: 2 hours
Yield: 24 cookies 1x
Description
What’s better than a soft and chewy snickerdoodle? Caramel snickerdoodles!! This stuffed snickerdoodle recipe is easy and impressive, and very delicious!
Ingredients
Scale
- 2 3/4 cup all-purpose flour
- 1 tsp baking soda
- 2 tsp cream of tartar
- 1/2 tsp ground cinnamon
- 1/2 tsp salt
- 1 cup unsalted butter, softened to room temperature
- 1 cup granulated sugar
- 1/3 cup brown sugar
- 1 egg + 1 egg yolk
- 1 tsp pure vanilla extract
- 12 SOFT caramels, cut in half*
- 1/4 cup granulated sugar + 1 tbsp ground cinnamon, for rolling
Instructions
- In a large mixing bowl, whisk together the flour, baking soda, cream of tartar, cinnamon and salt. In the bowl of a stand mixer fitted with the paddle attachment, beat together the butter and both sugars on medium-high for 2 minutes, or until soft and fluffy. Add the egg and egg yolk and beat to combine, using a spatula to scrape down the sides as needed. Add the vanilla extract and combine.
- With the mixer running on low, slowly add the dry ingredients until a soft cookie dough forms. Cover and refrigerate the dough for at least 1 hour**. Remove the dough from the fridge, and using a medium cookie scoop (about 1 tablespoon), scoop the dough out and using your finger, create an indent. Place one caramel half in the middle, then push the dough up and over the caramel to cover it. Roll the dough in your hands to form a ball, then roll the ball in the cinnamon sugar mixture, rolling twice to ensure the dough is completely covered. Place the balls of dough on a baking sheet prepared with parchment paper, about 2 inches apart. Place the entire tray in the fridge for 30 minutes to chill.
- Preheat the oven to 350 F. After chilling for 30 minutes, remove the dough from the fridge and place it directly into the oven to bake for 10-11 minutes. Cookies are done when the outsides are firm but the middle looks slightly under-baked. Remove the cookies and let them cool for 5 minutes on the tray. Sprinkle extra cinnamon sugar on top. Use a spatula to remove the cookies to a wire rack to cool completely.
Cookies can be stored at room temperature in an airtight container for up to 1 week, or in the freezer for up to 2 months.
Notes
*I like to use Werther’s extra soft caramels but the Kraft caramels will also work, as long as they’re SOFT!
**Cookie dough can be refrigerated for up to 3 days. If refrigerating longer than a few hours, leave the dough out on the counter at room temperature to soften up before scooping the dough.
- Prep Time: 25 minutes
- Cook Time: 25 minutes
- Category: cookies
- Method: oven bake
- Cuisine: american