

Indulge in the ultimate comfort food with these incredibly easy and utterly delicious homemade cheese rolls. Soft, fluffy, and bursting with savory cheese flavor, this recipe will quickly become a cherished favorite in your kitchen!
As a busy parent, packing creative and appealing lunches for the kids often feels like a daily challenge. While variety is key, there’s one item my children never tire of: the delectable cheese buns from our beloved local bakery. I’ll readily admit, their rolls are a delightful treat. However, the cost quickly adds up, and making a special trip to the bakery isn’t always feasible with our busy schedule. This prompted a quest to create an equally irresistible, yet more affordable and accessible, homemade cheese roll recipe right in my own kitchen.
After a few rounds of experimentation – the first batch needed more cheese, the second lacked sufficient seasoning – I finally perfected these easy cheese rolls. And let me tell you, the third time was indeed the charm! This recipe delivers rolls that are not just good, but truly outstanding. They’re incredibly soft, wonderfully cheesy, and seasoned to perfection. Best of all, they’re entirely homemade, offering a significant saving compared to their bakery counterparts, without compromising on taste or texture. Prepare yourself to make this cheese rolls recipe time and time again; it’s that good!

Crafting the Perfect Cheese Roll: Essential Ingredients
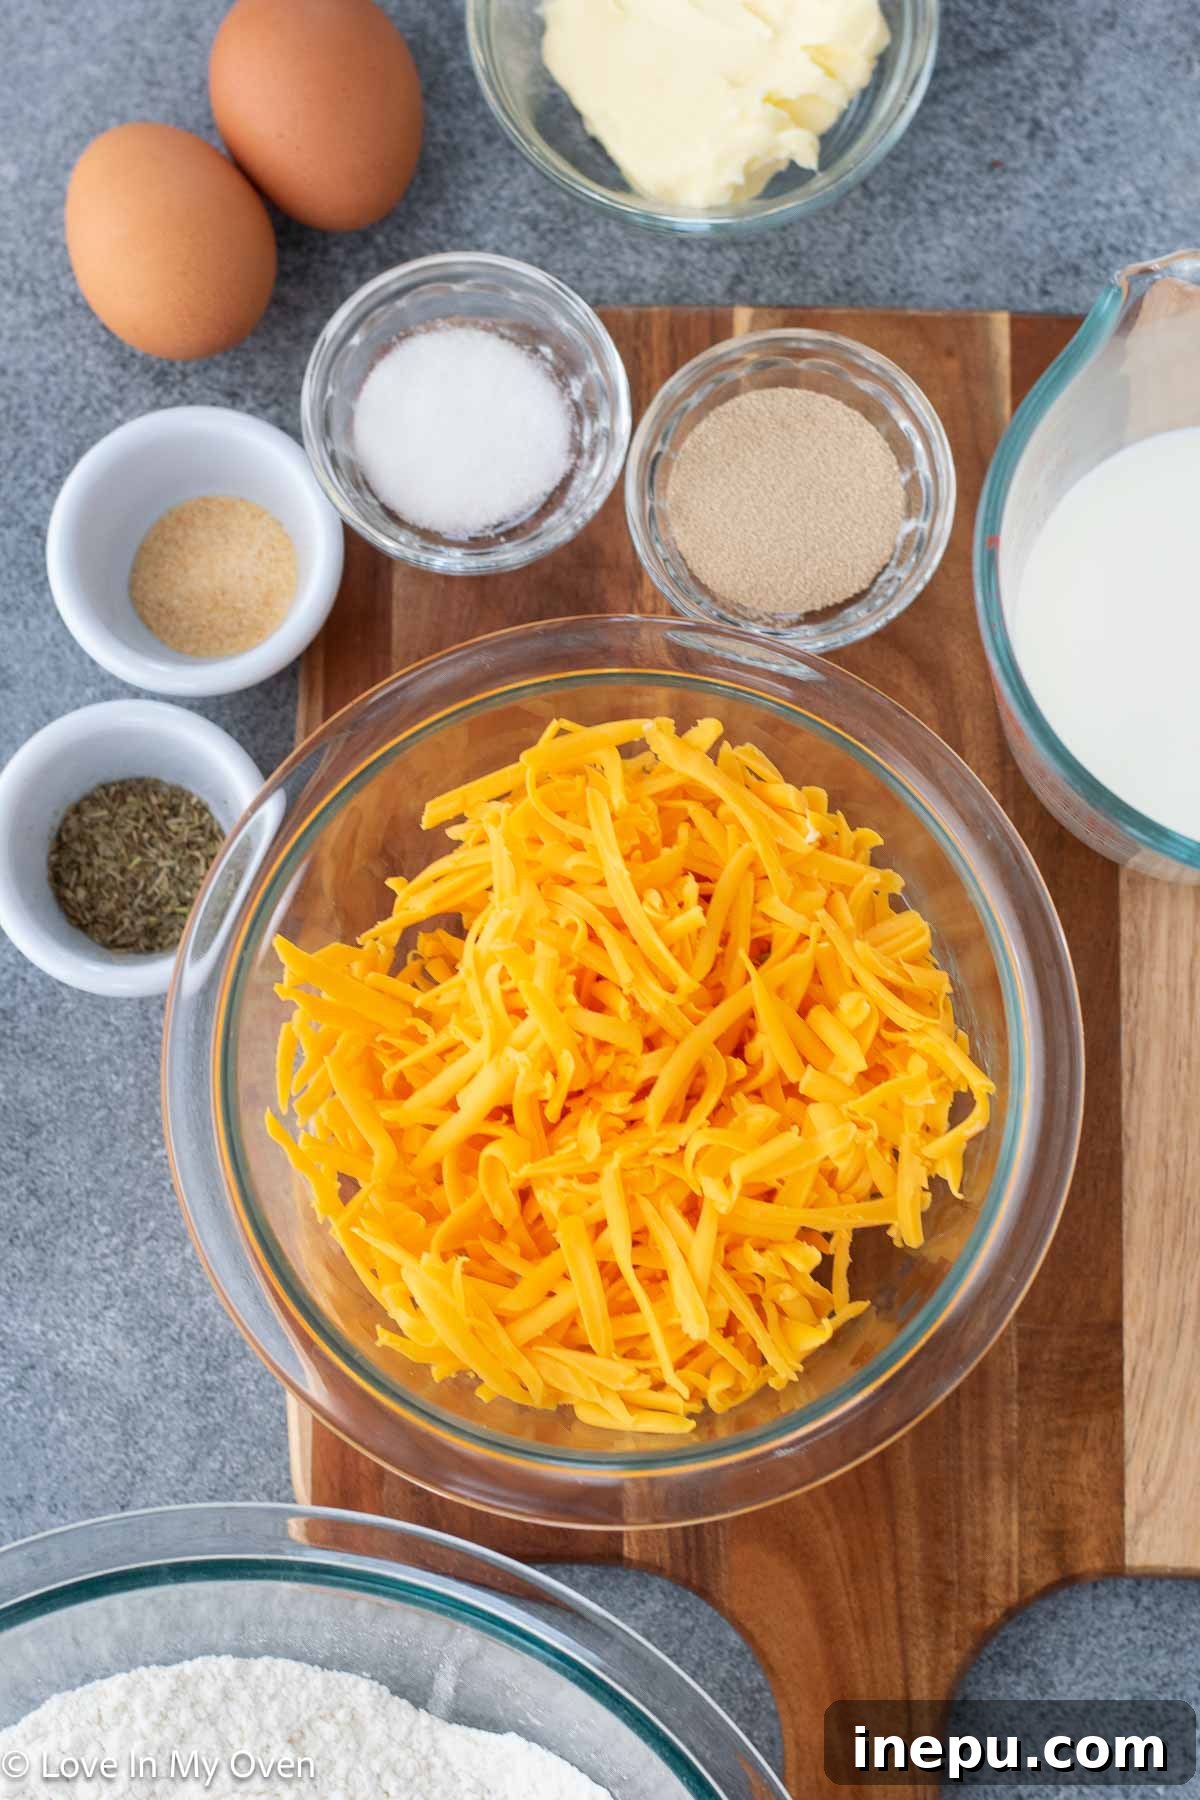
The beauty of these homemade cheese rolls lies in their simplicity, utilizing common pantry staples to create something extraordinary. While the star of the show is undeniably cheddar cheese, the supporting cast of ingredients ensures a perfect rise, tender crumb, and incredible flavor profile. Here’s what you’ll need to gather:
- Active Dry Yeast: The leavening agent that gives these rolls their irresistible fluffiness. Ensure it’s active for the best rise.
- Granulated Sugar: A touch of sweetness not only enhances flavor but also feeds the yeast, helping it activate properly.
- Whole Milk: Provides richness and moisture to the dough, contributing to its soft texture. Warm milk is crucial for activating the yeast.
- Eggs: Add structure, richness, and a beautiful golden hue to the rolls. Room temperature eggs blend more easily.
- Unsalted Butter: Divided for both dough enrichment and a flavorful filling layer. Using unsalted butter allows you to control the overall saltiness.
- All-Purpose Flour: The foundation of our dough. Have a little extra on hand for dusting and adjusting consistency during kneading.
- Salt: Essential for balancing flavors and strengthening the dough’s gluten structure.
- Shredded Cheddar Cheese: The star! Opt for good quality sharp or medium cheddar for the best flavor. Freshly shredded cheese melts better than pre-shredded.
- Dried Italian Seasoning (or Oregano): Adds a wonderful aromatic depth and savory note to complement the cheese.
- Garlic Powder: A must-have for that classic savory, cheesy bread flavor.
- Onion Powder: Enhances the overall savory profile, creating a more complex and appealing taste.
- Flaky Sea Salt: A finishing touch that adds a delightful crunch and burst of salty flavor to the baked rolls.
Don’t be daunted by the list; each ingredient plays a vital role in achieving the perfect balance of flavor and texture. Once you gather everything, you’ll see how straightforward it is to combine them into a truly magical dough.
Mastering the Art of Homemade Cheese Rolls: A Step-by-Step Guide
If you’ve ever ventured into the world of scratch-made rolls, especially if you’ve tried my Nutella cinnamon rolls, you’ll find the process for these cheese rolls remarkably similar. Even if you’re a novice baker or find working with yeast intimidating, fret not! This recipe is designed to be incredibly simple and rewarding. Follow these detailed steps, and you’ll be baking perfect, pillowy cheese rolls in no time.
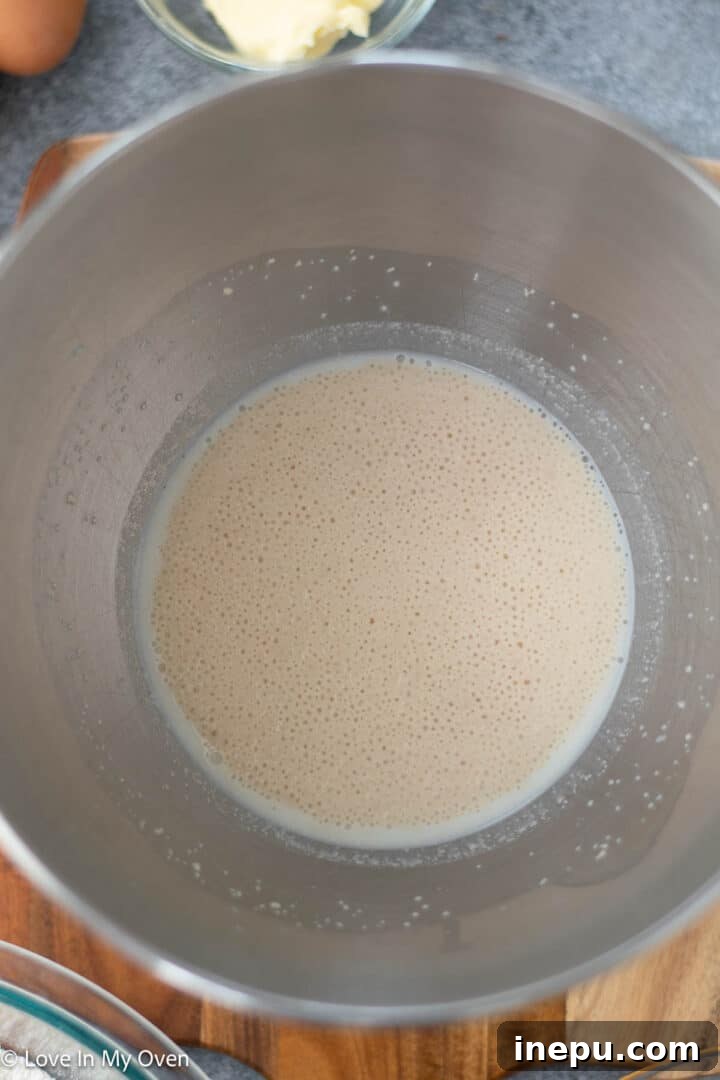
- Activate the Yeast: Begin by gently warming your whole milk. You can do this in a saucepan over low-medium heat until it’s comfortably warm to the touch, or simply microwave it in a glass measuring cup for about 45-60 seconds. The ideal temperature is between 105-110°F (40-43°C). Be cautious not to overheat, as excessively hot milk will kill the yeast and prevent your dough from rising. In the bowl of a stand mixer fitted with the paddle attachment, combine the warm milk, active dry yeast, and granulated sugar. Give it a quick whisk to ensure everything is well-mixed, then cover the bowl with a clean kitchen towel. Allow this mixture to rest for about 5-10 minutes. During this time, the yeast should “bloom,” becoming foamy and puffed up, indicating it’s active and ready to work its magic. If you don’t see this activity, your yeast might be old or the milk temperature was off, and it’s best to start again.
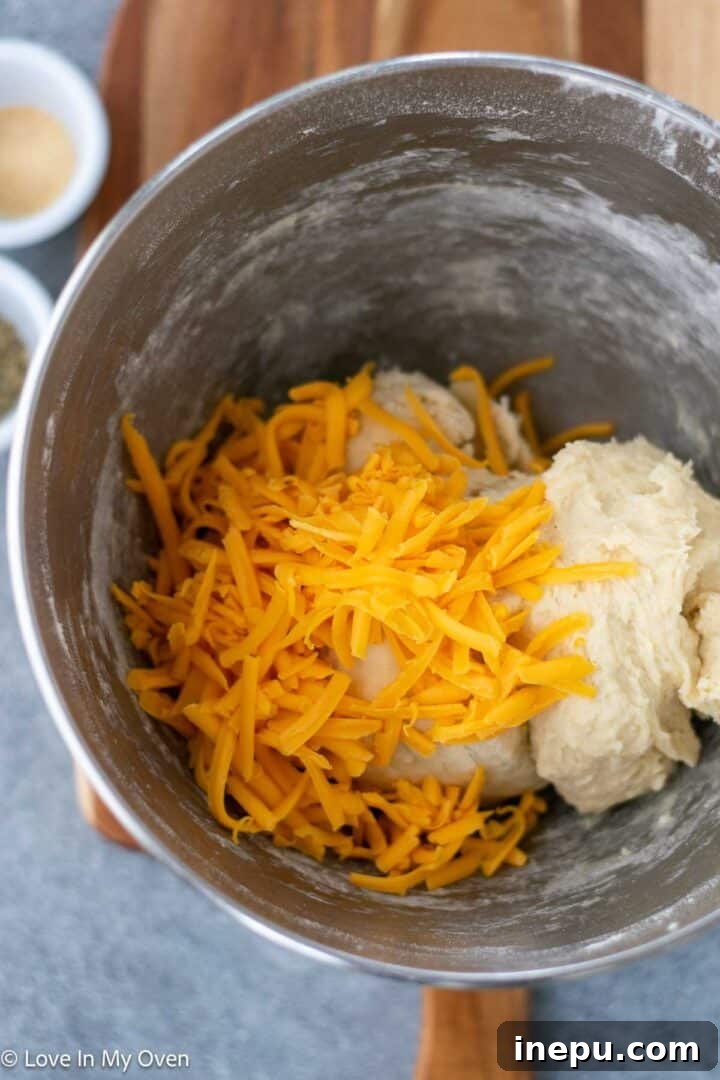
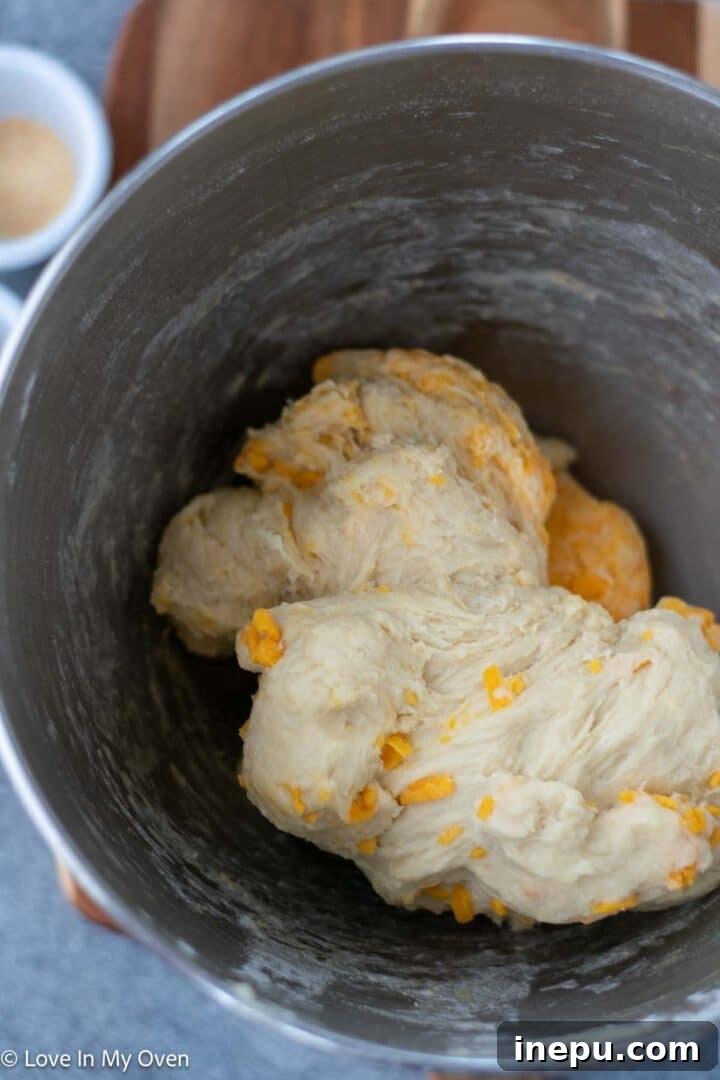
- Form the Dough: Once the yeast is active, reduce the mixer speed to low. Add the eggs, one at a time, allowing each to incorporate fully before adding the next. Follow this with 1/4 cup of the softened unsalted butter, broken into a few pieces. Don’t worry if the mixture isn’t perfectly smooth at this stage; it will come together. Incorporate one cup of all-purpose flour along with 1/4 teaspoon of salt, mixing just until combined. Now, switch from the paddle attachment to the dough hook. Gradually add the remaining 2 1/2 cups of flour, one cup at a time. Increase the mixer speed to medium and knead the dough for approximately 4-5 minutes. The dough should become smooth, elastic, and pull away from the sides of the bowl. If it feels too sticky, add flour a tablespoon at a time until it reaches the desired consistency. Finally, incorporate 1 cup of shredded cheddar cheese, mixing for just another minute until it’s evenly distributed throughout the dough.
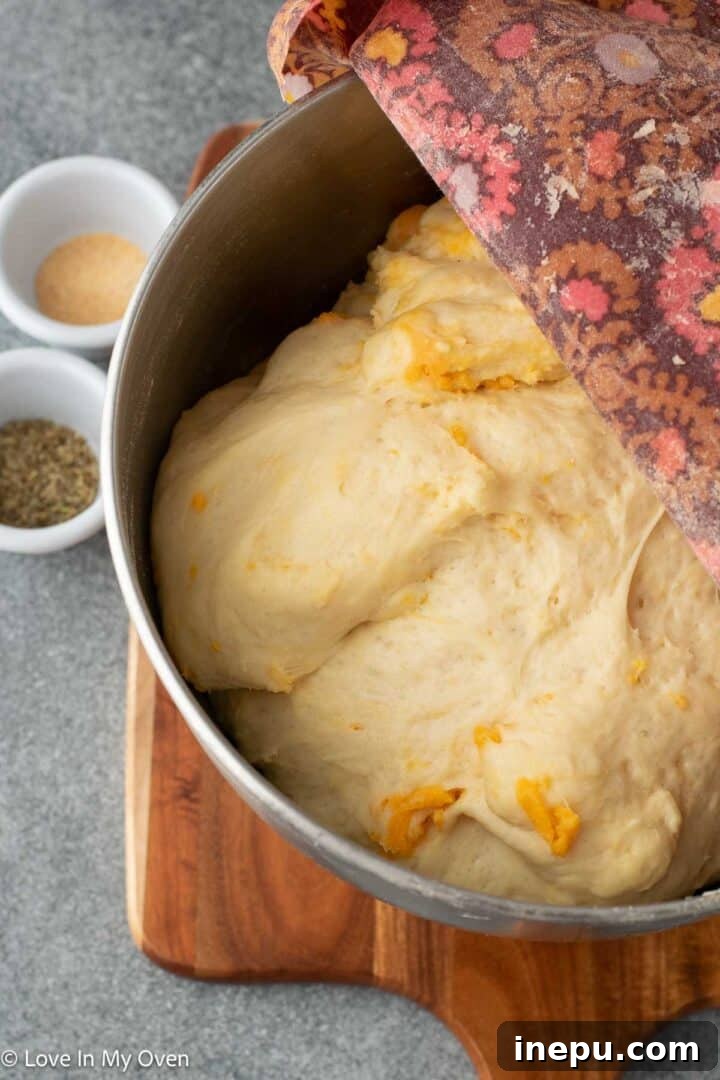
- First Rise (Bulk Fermentation): Remove the dough from the mixer bowl. Lightly spray the bowl with nonstick cooking spray, then return the dough to the bowl, turning it once to coat lightly. This prevents it from sticking. Cover the bowl tightly with plastic wrap or a damp kitchen towel. Place the dough in a warm, draft-free spot and let it rise for 1 to 2 hours, or until it has visibly doubled in size. This first rise is crucial for developing flavor and texture.
- Shape the Rolls: Once the dough has doubled, gently punch it down to release the air. Transfer the dough to a lightly floured surface. Using a rolling pin, roll the dough out into a rectangle, roughly 12 inches by 16 inches. Precision isn’t paramount here, but aim for a relatively even thickness. Evenly spread the remaining 1/2 cup of softened unsalted butter across the entire surface of the dough rectangle. Next, generously sprinkle the remaining shredded cheddar cheese over the butter layer, ensuring a good distribution for maximum cheesy goodness. Finish by scattering the Italian seasoning, garlic powder, onion powder, and the remaining 1/4 teaspoon of salt over the cheese.
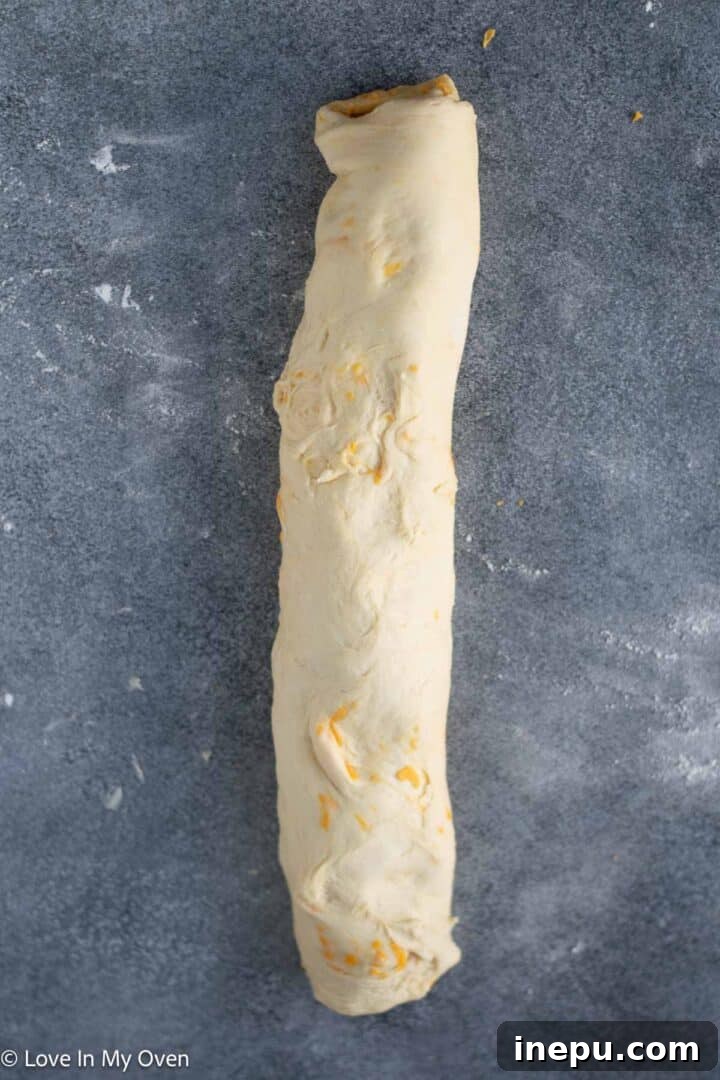
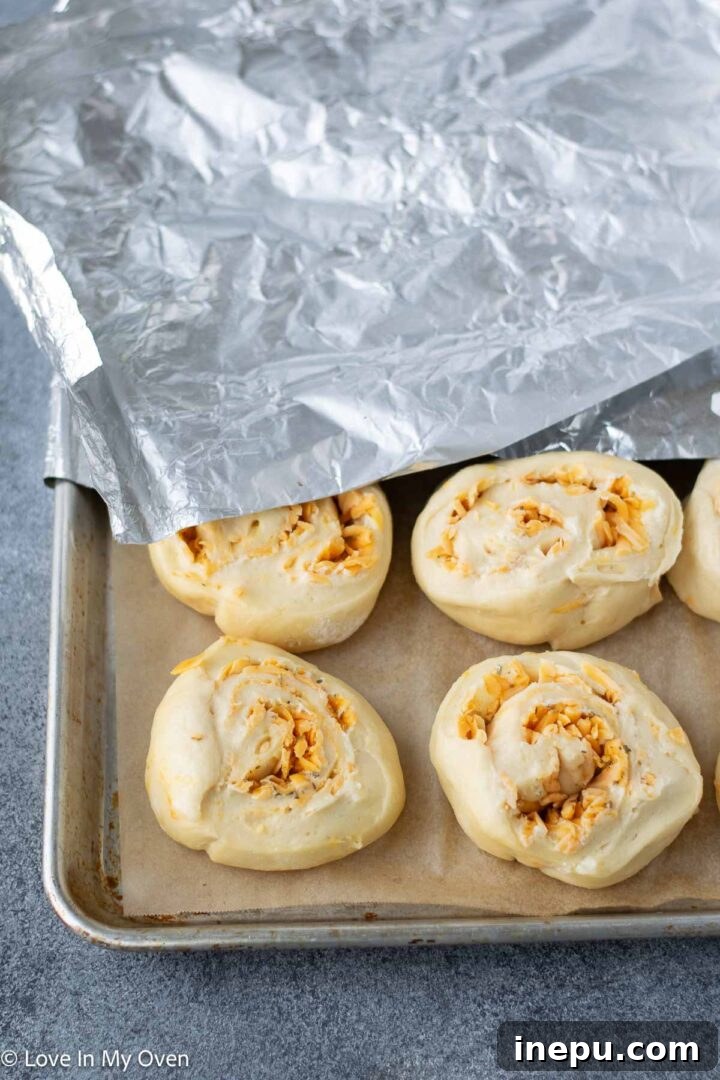
- Slice and Second Rise: Starting from one of the long edges, carefully roll the dough into a tight cylinder. Once you have a log, use a sharp knife or bench scraper to cut it into 12 equal pieces. A simple trick for even rolls is to first cut the log in half, then cut each half in half again, and finally divide each quarter into three equal pieces. Arrange the cut rolls, spiral side up, evenly spaced apart on a baking sheet (or a 9×13-inch pan) lined with parchment paper. This spacing allows them room to expand. Cover the rolls tightly with plastic wrap or aluminum foil that has been lightly sprayed with nonstick spray (ensure the sprayed side faces down onto the dough). Let them rise again in a warm place for another 1 to 2 hours, or until they look puffy and nearly doubled in size. This second rise contributes to an incredibly light and airy texture.
- Bake to Golden Perfection: While the rolls are completing their second rise, preheat your oven to 350°F (175°C). Once the oven is ready and the rolls have adequately risen, place the baking sheet in the preheated oven. Bake for 20-25 minutes, or until the center of the middle roll no longer appears “doughy” and the edges are beautifully golden brown. To ensure the rolls remain soft and don’t over-brown too quickly, I recommend covering the rolls loosely with aluminum foil for the first 15 minutes of baking, then removing it for the final 5-10 minutes. This creates a steamy environment that keeps them tender while still allowing for a lovely golden finish.
Once baked, remove the rolls from the oven and immediately sprinkle the tops with a pinch of flaky sea salt for an extra touch of flavor and texture. Allow them to cool on the baking sheet for about 10 minutes before serving. This brief cooling period helps them set and makes them easier to handle, though resisting the urge to devour them hot is the hardest part!


Storage and Freezing: Enjoying Your Cheese Rolls Longer
While these cheese rolls are undeniably at their peak perfection when served warm, fresh out of the oven, their deliciousness doesn’t diminish quickly. They also boast excellent keeping qualities, making them ideal for meal prep or enjoying throughout the week. Once completely cooled to room temperature, you can store any leftover rolls in an airtight Ziplock bag or a sealed container. I personally love using my Zwilling vacuum seal system for optimal freshness. Stored properly on the counter at room temperature, they will remain wonderfully soft and fresh for 2-3 days.
Freezing Homemade Cheese Rolls for Later
For even longer enjoyment, these rolls freeze beautifully! I often bake a full batch of 12 and then freeze half of them for future meals. To freeze, ensure the rolls are completely cooled. Place them in an airtight freezer-safe bag or container, removing as much air as possible. They will keep well in the freezer for up to 2 months.
When you’re ready to enjoy them, simply thaw the frozen rolls overnight in the refrigerator. Once thawed, you can eat them cold, or for that fresh-baked experience, gently reheat them. Cover the thawed rolls loosely with aluminum foil and warm them in an oven preheated to 250°F (120°C) for about 10 minutes, or until heated through and fragrant. They’ll emerge soft and ready to savor!
Perfect for Lunchboxes!
These savory cheese rolls are an absolute game-changer for lunchboxes! They offer a delightful alternative to traditional sandwiches, providing a filling and flavorful option that kids and adults alike will love. Pack them alongside some fruit, veggies, and a dip for a complete and satisfying meal on the go.
The Overnight Method: Making Cheese Rolls Work for Your Schedule
One of the fantastic aspects of this cheese rolls recipe is its flexibility, particularly with an overnight preparation option. Given that the rolls require two distinct rise times, each lasting 1-2 hours, the full process can take a few hours. While undoubtedly worth the wait, fitting it all into a single busy day isn’t always practical. That’s why I frequently opt for the overnight method, allowing me to split the baking process across two days.
To implement the overnight method, simply follow the recipe instructions up to the point where the rolls are sliced and placed on the baking sheet for their second rise (Step 5 in the detailed instructions above). Instead of letting them rise at room temperature, tightly cover the baking sheet with plastic wrap or foil (sprayed with nonstick spray to prevent sticking) and place them in the refrigerator. They can chill there for up to 12 hours, though I wouldn’t recommend longer than 16 hours.
On the day you plan to bake, remove the rolls from the refrigerator about 2 hours before you want to put them in the oven. Keep them tightly covered and let them sit at room temperature during this time. They will slowly come to temperature and complete their final rise, becoming visibly puffy. Once they have risen adequately, proceed directly to Step 6 of the baking instructions and enjoy your freshly baked, perfectly risen cheese rolls without the rush!

Serving Suggestions: What Pairs Perfectly with Cheesy Rolls?
These wonderfully versatile cheesy rolls are fantastic all on their own as a satisfying snack, or tucked into a lunchbox as a delightful sandwich alternative. But their savory, comforting flavor also makes them an excellent accompaniment to a variety of dishes, elevating any meal they join. Think beyond just bread; these rolls can be a star! Here are some of my favorite ways to serve them:
- Alongside Hearty Soups: There’s nothing quite like dipping a soft, cheesy roll into a warm bowl of soup. Their savory profile perfectly complements brothy or creamy soups. Consider serving them with:
- Creamy tortellini soup
- Hearty ham bone and bean soup
- Smooth and simple butternut squash soup
- With Chili: The robust flavors of a warm and hearty chili find a perfect match in these cheesy rolls. They’re excellent for soaking up every last bit of that delicious sauce.
- On a Meat and Cheese Board: Elevate your entertaining with these rolls as a key component of a gourmet charcuterie or cheese board. Their homemade touch adds a rustic charm.
- As a Dinner Roll Alternative: During holiday dinners or special occasions, swap out traditional plain dinner rolls for these flavorful cheese rolls. They add an extra layer of indulgence and excitement to the meal.
- Brunch Spreads: Serve them with scrambled eggs, bacon, and fresh fruit for a delightful savory brunch option.
No matter how you choose to serve them, these cheese rolls are sure to be a crowd-pleaser, adding a touch of homemade comfort to any occasion.
Explore More Delicious Bread Recipes
Who doesn’t adore the comforting aroma and taste of freshly baked bread? If you’ve enjoyed making these cheese rolls, you’re in for a treat with some of my other favorite, tried-and-true bread and dinner roll recipes from the blog. From incredibly quick options to more intricate, yet equally rewarding, bakes, there’s something here for every bread enthusiast:
- 3-Ingredient Bread: An absolute revelation for anyone seeking simplicity and speed without sacrificing flavor. Perfect for beginners!
- Overnight Beer Bread: Rustic, flavorful, and incredibly easy to prepare, this no-knead bread is ideal for a savory side with minimal effort.
- Cheesy Cornmeal Drop Biscuits: For those who love a quick bake, these cheesy, tender biscuits are a fantastic alternative to traditional rolls, ready in a flash.
- 30-Minute Dinner Rolls: When time is of the essence but homemade is a must, these quick and fluffy dinner rolls are your go-to solution.
Happy baking, and enjoy expanding your repertoire of homemade bread wonders!



Delicious Homemade Cheese Rolls
5 Stars 4 Stars 3 Stars 2 Stars 1 Star
No reviews
Author: Katherine | Love In My Oven
Total Time: 3 hours 30 minutes
Yield: 12 rolls
Description
These easy cheese rolls are delicious! They’re soft and cheesy and super simple. You’ll make this cheese rolls recipe again and again!
Ingredients
Scale
- 1 cup whole milk
- 2 tsp active dry yeast
- 2 tsp granulated sugar
- 2 large eggs, room temperature
- 3/4 cup unsalted butter, room temperature, divided
- 3 1/2 cups all-purpose flour, plus more as needed
- 1/2 tsp salt, divided
- 3 1/2 cups shredded cheddar cheese, divided
- 1/2 tsp Italian seasoning
- 1 tsp garlic powder
- 1/2 tsp onion powder
- 1/2 tsp flaky sea salt
Instructions
- Warm the milk. Using a saucepan over medium heat, or in the microwave in a glass measuring cup, warm the milk to around 105-110 F. This is about 45 seconds on high in the microwave.
- In the bowl of a stand mixer fitted with the paddle attachment, add the yeast, sugar and warm milk. Whisk to combine and then cover the top of the bowl with a clean towel for 5 minutes, or until the mixture foams up. If this doesn’t happen, start again with new yeast.
- Turn the mixer to low and add the eggs, one at a time, followed by 1/4 cup of the softened butter, broken into pieces. The butter and eggs might not be completely integrated, which is ok. Mix on low for 1 minute, before adding in one cup of flour and 1/4 tsp salt, mixing just until combined. Switch the attachment to the dough hook, then add the remaining 2 1/2 cups of flour. Turn the mixer up to medium and knead the dough with the mixer for 4-5 minutes. If the dough is sticking to the sides of the bowl, add a bit more flour, just a tablespoon at a time. Once the dough is pulling away easily from the bowl, add in 1 cup of cheddar cheese and mix for another minute.
- Remove the dough from the bowl, then spray the bowl with nonstick spray and place the dough back inside. Cover the bowl tightly with plastic wrap and allow the bowl to rest for 1-2 hours or until doubled in size. Once the dough has doubled in size, remove it to a lightly floured surface and roll it out to a rectangle approximately 12″ x 16″. Spread the remaining 1/2 cup of the softened butter over the dough, smearing it evenly. Next, sprinkle the remaining cheddar cheese, followed by the Italian seasoning, garlic powder, onion powder and remaining 1/4 tsp salt.
- Starting from the long edge, roll the dough into a tight roll until you have a log. Cut the log into 12 equal pieces. Place the rolls evenly spaced apart on a cookie sheet or 9 x 13′ pan lined with parchment paper. Cover the rolls tightly with plastic wrap or aluminum foil sprayed with nonstick spray! Let the rolls rise for another 1-2 hours.*
- Preheat the oven to 350 F. Place the rolls in the oven for 20-25 minutes** or until the middle roll no longer looks doughy and the edges of the rolls are lightly browned. Remove the rolls from the oven and sprinkle the tops with flaky sea salt. Cool the rolls for 10 minutes and then enjoy!
Notes
*Overnight Method: Prepare the recipe up to step 5. Once the rolls are sliced and placed on the cookie sheet, you can tightly cover them and place them in the fridge for up to 12 hours (but no longer than 16 hours).
About 2 hours before you want to bake the rolls, remove them from the fridge and let them sit at room temperature, still tightly covered or until they have risen. Continue with step 6 to bake the rolls.
**Keep the rolls covered with foil for the first 15 minutes of baking, then remove it for the last 10. This ensures they don’t get too brown before they’re fully cooked and the cheese rolls stay soft!
Freezing the rolls: Freeze the rolls for up to 2 months in an airtight bag or container. Thaw them overnight in the fridge, and either eat them cold or you can heat them up before serving. Cover the rolls with foil (once thawed) and heat them in an oven heated to 250 F for about 10 minutes.
- Prep Time: 3 hours
- Cook Time: 30 minutes
- Category: appetizers
- Method: oven bake
- Cuisine: american