

Discover the magic of holiday baking with these enchanting Vanilla Bean Christmas Cookie Pops! Simple to make, incredibly fun to decorate, and even more delightful to eat, these cookie lollipops are the perfect festive treat.

Delightful Vanilla Bean Christmas Cookie Pops: Your Ultimate Holiday Treat Guide
There’s an undeniable charm and whimsy to food served on a stick. Picture the classic carnival corn dog, the nostalgic lollipop, or even the ever-popular cake pop. The concept of a treat on a stick simplifies enjoyment and adds an element of playful elegance to any gathering. While cake pops have certainly carved out their niche in the world of celebratory desserts, it’s time for their equally charming cousin to step into the spotlight: the cookie pop! Especially during the festive season, these delightful creations, like our Vanilla Bean Christmas Cookie Pops, transform a simple cookie into an extraordinary, handheld indulgence.
Embracing the “food on a stick” philosophy for cookies might seem like an added layer of complexity to your baking routine, but we promise it’s a worthwhile endeavor. With a few expert tips and a sprinkle of patience, you can easily elevate your holiday baking from traditional cookies to these whimsical cookie lollipops. Imagine the joy on faces as guests pick up a perfectly frosted cookie, complete with its own stick, ready to be devoured without a crumbly mess. It’s a game-changer for holiday parties, school events, or even just a cozy evening by the fire.
Our Vanilla Bean Christmas Cookie Pops are more than just a novelty; they’re a celebration of flavor and fun. The rich, aromatic vanilla bean paste infuses the sturdy sugar cookie base with an unparalleled depth of flavor, marked by those beautiful, tiny vanilla flecks that hint at premium quality. Adorned with vibrant royal icing, these cookie pops become edible works of art, ready to impress and delight everyone who takes a bite. Get ready to embark on a baking adventure that promises both delicious results and unforgettable memories!
Crafting the Perfect Cookie Pop: Essential Tips & Tricks for Success
Transforming a delicious cookie into a perfectly portable cookie pop requires a little foresight and a few key techniques. Over years of holiday baking and experimenting, we’ve gathered the ultimate guide to ensure your Christmas cookie pops are not only beautiful but structurally sound and utterly irresistible. Here’s what you need to know:
1. Choosing Your Cookie Dough Base for Optimal Sturdiness
The foundation of a great cookie pop is a robust cookie dough. You need a dough that can withstand the insertion of a stick without crumbling or cracking, and one that bakes up firm enough to hold its shape. A classic sugar cookie dough is an excellent choice, known for its reliable structure and smooth texture, making it ideal for cutting out various festive shapes. Similarly, a gingerbread cookie dough works wonderfully, offering both stability and a delightful spicy aroma that perfectly complements the holiday season. Avoid excessively soft doughs, as they are prone to breaking apart when a stick is introduced. The goal is a dough that is pliable enough to roll and cut, yet firm enough to hold a stick securely once baked and cooled. This ensures your cookie pops remain intact from first glance to last bite.
2. Achieving Optimal Dough Thickness: The 1/2 Inch Golden Rule
Precision in dough thickness is paramount for successful cookie pops. We recommend rolling your cookie dough out to approximately 1/2 inch (about 1.25 cm). This specific thickness provides enough depth for the stick to be inserted into the center of the cookie without protruding through the top or bottom, which can lead to breakage. If your dough is too thin, the stick will likely burst through the cookie, ruining its appearance and structural integrity. Conversely, if it’s too thick, the cookie might be difficult to eat and the stick may not reach far enough into the center to provide adequate support. For consistent results, a dough guide or rolling pin with adjustable rings can be incredibly helpful, ensuring every cookie pop has the perfect thickness for stability and a pleasant eating experience.
3. Strategic Tray Placement: Allowing Room for the Sticks
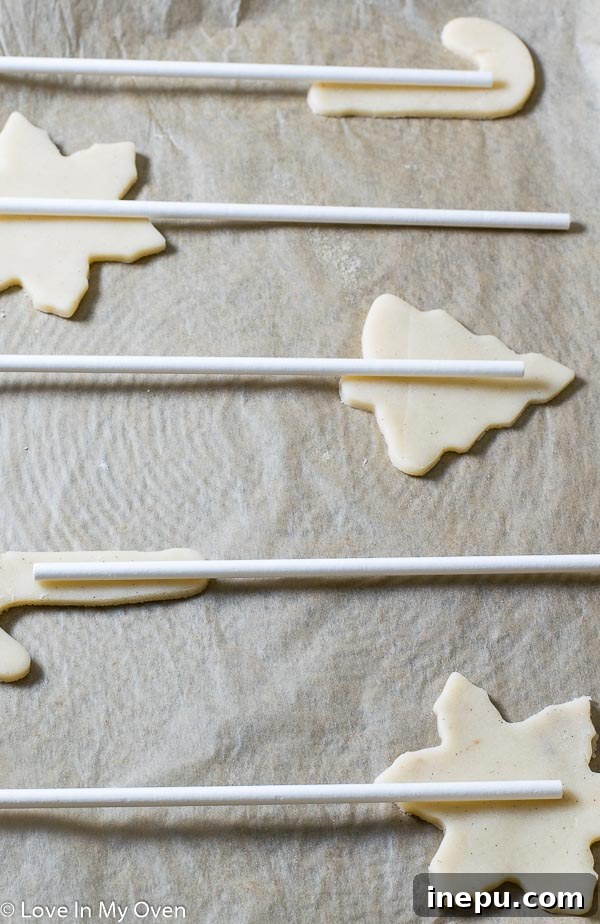
When arranging your cut-out cookies on the baking sheet, resist the urge to pack them too closely. It’s crucial to leave ample space between each cookie, at least enough for the length of your chosen stick. This is because you will insert the stick as soon as the cookies come out of the oven, while they are still hot and pliable. Spacing them out allows you the necessary room to maneuver and insert the sticks easily without disturbing adjacent cookies. This often means you’ll need multiple baking trays, but it’s a small price to pay for perfectly formed cookie pops. Properly spaced cookies also ensure even baking, preventing edges from becoming overly crisp while the centers remain undercooked.
4. Selecting the Right Sticks: Thin is In!
The type of stick you use makes a significant difference. While “cookie sticks” exist, they can often be too thick, making them difficult to insert without damaging the cookie. For optimal results, we highly recommend using standard lollipop sticks. These are generally thinner and smoother, allowing for easier insertion into the warm, freshly baked cookie. Their slender profile also creates a more refined look, giving your cookie pops that professional, polished finish. Ensure your chosen sticks are sturdy enough to support the weight of the cookie once it’s decorated but flexible enough not to snap during insertion.
5. The Toothpick Trick: Creating an Entry Point
Even with thin lollipop sticks, inserting them can sometimes be tricky. This is where the simple toothpick trick comes in handy. As soon as the cookies emerge from the oven, and while they are still warm and soft, gently poke a small pilot hole into the bottom edge of each cookie using a toothpick. This initial, smaller hole creates a clear, unobstructed path for the thicker lollipop stick to slide in smoothly and effortlessly. This technique significantly reduces the risk of the cookie crumbling, cracking, or breaking as you insert the stick, ensuring a clean and secure attachment every time.
6. Patience is Key: The Crucial Cooling Process
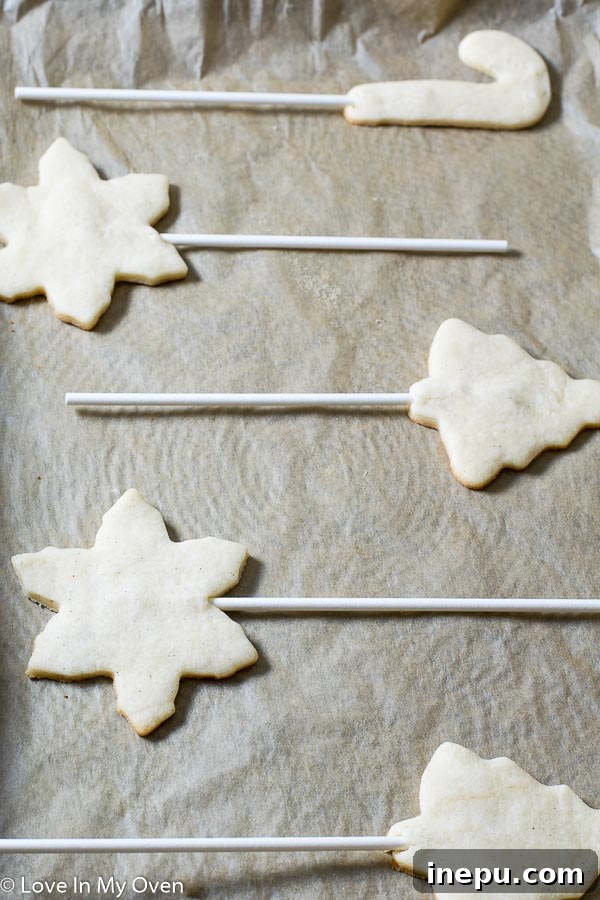
This might be the most critical step: Once the sticks are inserted, resist the urge to touch or move the cookies until they are completely cooled. This is paramount for the integrity of your cookie pops. As the warm cookie dough cools, it will firm up and naturally mold around the inserted stick, creating a secure bond. Attempting to move or lift the cookies by the stick while they are still warm will almost certainly result in the cookie detaching or breaking. Allow them to rest undisturbed on the baking sheet until they reach room temperature, then carefully transfer them to a wire rack, using a spatula to support the cookie’s base, not just lifting by the stick. This ensures the stick is firmly embedded, ready for decoration and display.
Don’t be intimidated by these steps! While they add a little extra care to your baking, the process is straightforward and incredibly rewarding. The result is a collection of charming, sturdy cookie pops that are sure to be the highlight of your holiday celebrations.
The Star Flavor: Do You Need to Use Vanilla Bean Paste?
While this recipe calls for vanilla bean paste, you might be wondering if it’s truly essential. The answer lies in the nuance of flavor and visual appeal. Vanilla bean paste is a magical ingredient that truly elevates the vanilla flavor in your baking. It imparts a much richer, more complex, and intense vanilla profile compared to standard vanilla extract. Beyond the exceptional taste, the paste leaves behind those beautiful, tiny specks of vanilla bean throughout your cookies. These visible flecks instantly tell a story of quality and sophistication, transforming a plain sugar cookie into something truly special and artisanal. It’s a subtle touch that makes a big visual difference, especially for holiday treats.
We often use Nielsen-Massey vanilla bean paste for its superior quality and incredible aroma – it’s a constant battle to resist adding it to every single baked good! However, if vanilla bean paste isn’t readily available or you prefer to use what you have on hand, don’t worry. You can absolutely use an equal amount of pure vanilla extract as a substitute. The cookies will still be delicious and full of vanilla flavor, just without the distinctive visual flecks. The most important thing is to use a good quality vanilla, whether it’s paste or extract, to ensure the best possible taste for your delightful cookie pops.
The Versatile Cookie Dough: A Baker’s Dream
Our chosen sugar cookie dough recipe isn’t just sturdy; it’s a dream to work with, offering incredible convenience for busy holiday bakers. One of its most appealing qualities is its perfect consistency: it’s incredibly easy to handle, doesn’t crumble excessively, and doesn’t demand hours of chilling time before rolling and cutting. This means you can get to baking much faster, making it ideal for those spontaneous baking sessions or when you’re short on time.
Furthermore, this dough is incredibly forgiving and versatile. It can be prepared ahead of time, wrapped tightly, and stored in the refrigerator for up to five days. This is fantastic for breaking up your baking tasks, allowing you to make the dough one day and bake the next. For even longer storage, the dough freezes beautifully in a tightly sealed freezer bag (we recommend wrapping it in plastic wrap first for extra protection) for up to two months. This make-ahead capability ensures you’re always prepared to whip up a batch of these festive cookie pops whenever the holiday spirit strikes or unexpected guests arrive. Its reliability makes it a go-to for any cut-out cookie project, not just those destined for a stick.

Beyond Christmas: Cookie Pops for Every Celebration
While these vanilla bean cookies are perfectly festive as Christmas cookie pops, their charm and versatility extend far beyond the holiday season. Imagine the possibilities! For a wedding or baby shower, elegantly decorated cookie pops in theme colors would make stunning and memorable favors. A child’s birthday party could feature cookie pops shaped like their favorite characters or animals, bringing an extra layer of delight. Really, any celebration or gathering is an opportunity to introduce these fun, handheld treats. They eliminate the need for plates and forks, making them perfect for mingling and easy cleanup. Their individual portion size also makes them ideal for custom decoration, allowing you to tailor them to any event, theme, or color scheme.
As the holiday season draws to a close, it’s bittersweet to think this might be our last holiday cookie recipe for the year. Time truly flies when you’re baking and creating! But fear not, the joy of these cookie pops can be savored all year round. Experiment with different shapes, colors, and flavors of royal icing to match any occasion. Whether it’s a spring garden party, a summer barbecue, a fall harvest festival, or a winter wonderland celebration, cookie pops are a delightful addition that always brings smiles.

Looking for more festive inspiration? Explore these other delightful Christmas cookie ideas to complete your holiday treat spread:
- Mint Chocolate Candy Cane Cookies
- Double Chocolate Peppermint Biscotti
- Chocolate Caramel Shortbread Bars

Vanilla Bean Cookie Pops
5 Stars 4 Stars 3 Stars 2 Stars 1 Star
No reviews
Author: Katherine
Total Time: 1 hour 30 minutes
Yield: 40–45 cookies
Description
Cookie pops for the holidays! These vanilla bean Christmas cookie pops are so easy to make, and so much fun to eat.
Ingredients
Cookies
- 3 cups all-purpose flour
- 2 tsp baking powder
- 1/2 tsp salt
- 1 cup unsalted butter, softened to room temperature
- 1 cup sugar
- 1 egg
- 1 tsp vanilla bean paste*
Royal Icing
- 1/2 cup egg white substitute (about 3 egg whites)
- 4 cups powdered sugar
- 1 tsp lemon juice
Instructions
- Preheat your oven to 350°F (175°C) and prepare 2 large baking sheets by lining them with parchment paper or silicone baking mats.
- In a medium mixing bowl, whisk together the all-purpose flour, baking powder, and salt until well combined. Set aside.
- In the bowl of a stand mixer fitted with the paddle attachment (or using an electric hand mixer), beat the softened unsalted butter on high speed until it becomes light and fluffy, usually about 2-3 minutes. Gradually add the granulated sugar and continue to beat until creamy and thoroughly combined. Scrape down the sides of the bowl as needed. Beat in the egg and vanilla bean paste (or vanilla extract), mixing just until incorporated. Do not overmix.
- With the mixer running on low speed, slowly add the dry flour mixture to the wet ingredients. Mix just until a soft dough begins to form and clumps together. Stop mixing as soon as the flour is combined to avoid developing too much gluten, which can make cookies tough.
- Carefully scoop the dough out onto a lightly floured surface. Gently bring the loose pieces of dough together with your hands to form a cohesive ball. Roll out the dough to an even 1/2-inch thickness. Using your favorite holiday cookie cutters, cut out desired shapes.
- Place the cut-out cookies on your prepared baking sheets, ensuring sufficient space between each cookie (approximately one cookie per row, as shown in the post images, to allow room for stick insertion). Bake for 10-12 minutes, or until the edges are just beginning to turn a light golden brown. The centers of the cookies should still be quite soft.
- Immediately upon removing the cookies from the oven, and while they are still hot and pliable, carefully poke a toothpick into the middle of the bottom edge of each cookie to create a pilot hole. Quickly insert a lollipop stick into this hole, pushing it about halfway into the cookie. Leave the cookies on the baking sheet to cool undisturbed until they are mostly firm. Once firm, gently transfer them to a wire rack to cool completely, using a spatula to support the cookie’s base and avoiding lifting by the stick alone.
- Once the cookie pops are completely cool, prepare the royal icing. In a clean mixing bowl, using an electric mixer, beat the egg white substitute (or fresh egg whites) on high speed until they start to foam. Gradually add the powdered sugar, one cup at a time, beating until the icing achieves a thick but still fairly runny consistency. Finally, add the lemon juice and mix until just combined.
- If you plan to use multiple colors for your decorations, divide the royal icing into separate bowls and add your desired food coloring (and optional flavorings). Transfer each color of icing into piping bags fitted with small tips or squeeze bottles for easy decoration. Use immediately.
- Decorate your cooled cookie pops as desired. Allow the royal icing to set completely on the cookies before handling or storing. Once set, enjoy them immediately or store them for later.
These delightful cookies will maintain their freshness when stored in an airtight container at room temperature for up to 1 week. For longer preservation, they can be kept in the freezer for up to 2 months.
Notes
*If you do not have or prefer not to use vanilla bean paste, an equal amount (1 teaspoon) of pure vanilla extract can be used as a substitute without significantly impacting the flavor.
**Should you not plan to cut out your cookie shapes immediately after mixing the dough, wrap the dough tightly in plastic wrap and store it in the refrigerator for up to 5 days. For longer storage, the dough can be frozen in a tightly sealed Ziploc bag (first wrapped in plastic wrap) for up to 2 months. Thaw in the refrigerator before rolling and cutting.
***The consistency of your royal icing is key to your decorating style. For “flooding” cookies (filling large areas with smooth icing), you’ll want the icing to be a bit runnier. For intricate details and outlines, a stiffer consistency is preferred. Adjust by adding more powdered sugar for stiffness or a tiny bit of water (a teaspoon at a time) for a thinner consistency until you reach your desired texture.
This sugar cookie recipe was originally adapted from Bake @ 350.
- Prep Time: 45 minutes
- Cook Time: 15 minutes
Need more holiday treat inspiration?
Holiday Twix Bars