
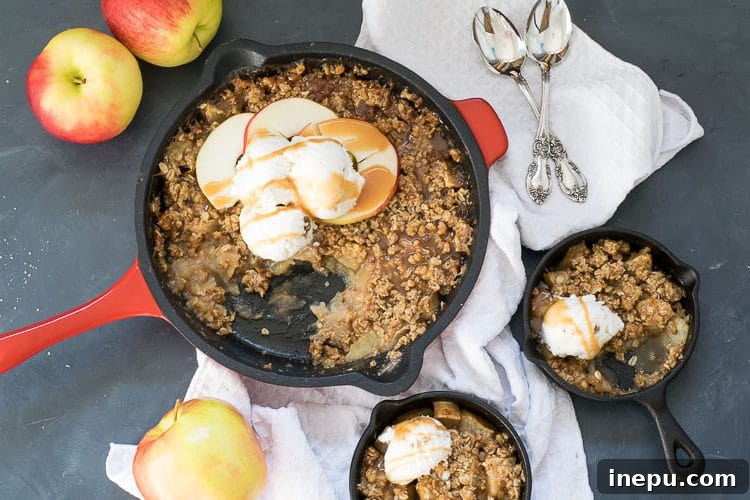
Experience the ultimate fall indulgence with our irresistible Salted Caramel Apple Crisp. This easy-to-make dessert combines tender, spiced apples with gooey salted caramel and a buttery, crisp oat topping, making it the perfect crowd-pleaser for any autumn gathering.
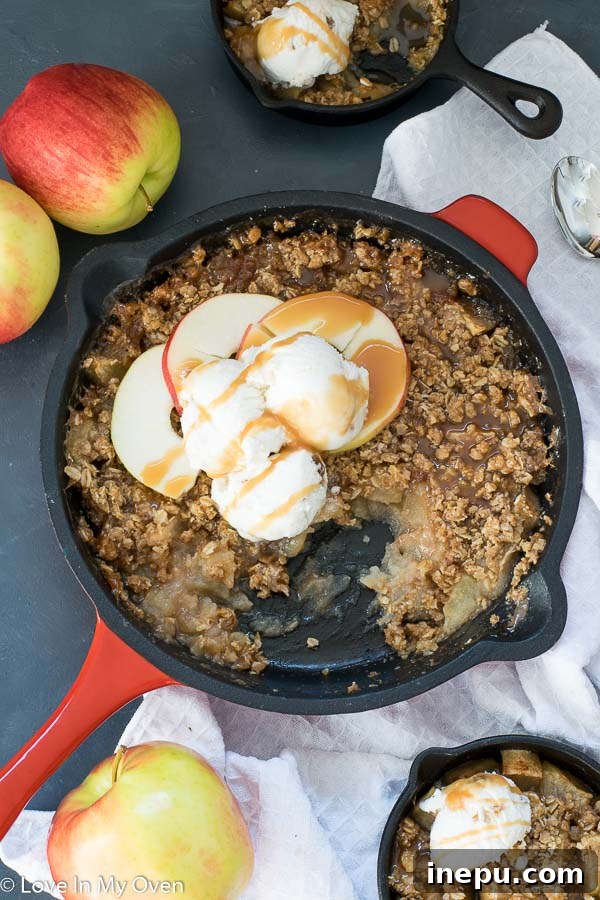
The Quintessential Fall Dessert: Salted Caramel Apple Crisp
As the leaves begin to turn and a crispness fills the air, there’s a natural yearning for comforting, warm desserts. While apple pie holds a cherished place in our hearts, there’s something truly magical about an apple crisp. It offers all the comforting flavors of fall without the fuss of a pie crust. But what if we told you there’s a way to elevate this classic to an entirely new level of deliciousness? Enter the Salted Caramel Apple Crisp – a dessert so profoundly satisfying, it might just become your new autumn obsession.
Imagine succulent, baked apples mingling with rich, buttery caramel, all crowned with a golden, crumbly oat topping. Each spoonful is a symphony of textures and flavors – the soft tang of apples, the sweet and salty notes of caramel, and the satisfying crunch of the crisp. This isn’t just a dessert; it’s an experience, a warm hug on a cool evening, and an absolute must-have for your fall recipe repertoire.
For me, apple crisp has always been the ultimate go-to dessert, especially when entertaining. It’s incredibly forgiving, demands minimal effort, and consistently delivers rave reviews. There’s an undeniable charm in serving a hot, bubbling apple crisp, especially when paired with a generous scoop of cold, melting vanilla ice cream. The contrast of temperatures and textures creates an unforgettable moment, a reason why this dessert remains a beloved classic for generations.

Choosing the Perfect Apples for Your Crisp
The foundation of any great apple crisp is, naturally, the apples themselves. While many recipes recommend Granny Smith apples for their tartness and firm texture, which hold up beautifully during baking, the truth is, you have a lot of flexibility. The best apple for your crisp is often the one you have on hand, especially if you’ve been apple picking or scored a great deal at a harvest sale!
When selecting apples, consider their characteristics:
- Tart Apples: Varieties like Granny Smith, Braeburn, and Pink Lady offer a sharp contrast to the sweetness of the caramel and crisp topping. They maintain their shape well and prevent the dessert from becoming overly sweet.
- Sweet Apples: Honeycrisp, Fuji, Gala, and Golden Delicious are excellent choices if you prefer a sweeter filling. They also have a wonderful texture when baked.
- Combination: For a more complex flavor profile, try using a mix of both tart and sweet apples. This creates a delightful balance that appeals to a wider range of palates.
No matter which apple variety you choose, ensure they are peeled and diced evenly to ensure consistent cooking. Using slightly softer apples is also perfectly fine for crisp; they’ll cook down into a wonderfully tender, chunky filling that soaks up all that delicious caramel.
The Irresistible Allure of Salted Caramel
Why introduce salted caramel to an already perfect apple crisp? Because it transforms it from delicious to absolutely divine! Salted caramel is a culinary marvel, combining the sweet, buttery richness of caramel with a hint of sea salt that enhances all its complex flavors. This salty-sweet dynamic creates an incredibly addictive profile that perfectly complements the natural tartness and sweetness of baked apples.
When you take a spoonful of this crisp, you’re not just getting soft, spiced apples and a buttery topping. You’re also diving into pockets of warm, gooey, intensely flavorful caramel that oozes through every layer. It’s an indulgence that takes the classic comfort of apple crisp “over the top,” as many would say, delivering an unparalleled depth of flavor.
While my homemade salted caramel sauce is always my preferred choice for its fresh, rich flavor and satisfying texture, don’t hesitate to use a high-quality store-bought caramel sauce if you’re short on time. Preparing your own caramel can seem intimidating, but it’s surprisingly simple and definitely worth the effort for that extra touch of gourmet goodness. It doesn’t require a lot of time, and the reward is a truly superior flavor that you control.

Selecting the Perfect Baking Dish
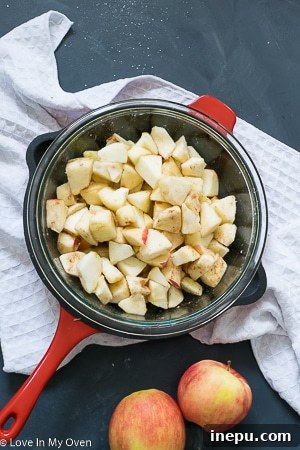
The vessel you choose for your apple crisp can impact both its baking and serving experience. While a traditional 8″ x 8″ or 9″ x 13″ baking pan works perfectly fine, I often opt for my 10-inch cast iron skillet. There’s an undeniable rustic charm and an elevated aesthetic that comes with serving dessert directly from a warm cast iron skillet, don’t you agree?
- Cast Iron Skillet: Cast iron provides excellent heat retention, ensuring an even bake and a beautifully caramelized crust on the bottom. It also transitions seamlessly from oven to table, making for a stunning presentation.
- Glass or Ceramic Baking Dish: These are versatile options that also bake evenly. They are easy to clean and readily available in most kitchens.
Regardless of your choice, ensure the dish is adequately greased to prevent sticking and allow for easy serving. The goal is to have a dish that allows the apples to bubble and the crisp topping to turn golden brown and crunchy.
Preparation and Baking Tips for Success
The beauty of this salted caramel apple crisp lies in its straightforward preparation. First, you’ll combine your diced apples with granulated sugar, cinnamon, and a splash of lemon juice. The lemon juice helps brighten the apple flavor and prevents browning. In a separate bowl, you’ll prepare the irresistible crisp topping, a delightful mixture of rolled oats, brown sugar, more cinnamon, all-purpose flour, and cold cubed butter. Cutting the cold butter into the dry ingredients until it resembles coarse crumbs is crucial for achieving that signature crumbly texture.
Once your apples are seasoned, they go into your chosen baking dish. This is where the magic happens: a generous pour of salted caramel sauce over the apples before adding the oat topping. This ensures every bite is infused with that luxurious caramel flavor. Bake until the topping is golden brown and the apple filling is bubbling around the edges – a clear sign of deliciousness to come.
Allowing the crisp to cool for 5-10 minutes after baking is a critical step. Not only does it prevent you from burning your tongue on piping hot caramel (speaking from experience!), but it also allows the filling to set slightly, making it easier to serve. This brief cooling period is also when the aromas intensify, building anticipation for that first delectable bite.


Make-Ahead Convenience and Serving Suggestions
One of the many advantages of apple crisp is its make-ahead potential. You can assemble the entire crisp, cover it with plastic wrap, and store it in the refrigerator for up to a day before baking. This makes it an ideal dessert for dinner parties or holiday gatherings, allowing you to do most of the work in advance and simply pop it in the oven when your guests arrive. Freshly baked, warm desserts always make a lasting impression!
When it comes to serving, a warm salted caramel apple crisp truly shines with a cold accompaniment. A scoop of premium vanilla bean ice cream is a classic pairing, creating that wonderful hot-and-cold contrast. However, don’t limit yourself! Consider these other delightful serving suggestions:
- A dollop of freshly whipped cream, perhaps infused with a hint of cinnamon or maple.
- A drizzle of extra salted caramel sauce for an even more decadent experience.
- A sprinkle of toasted pecans or walnuts over the top for added crunch and nutty flavor.
Leftovers, if there are any, can be stored in an airtight container in the fridge for 2-3 days. Reheat gently in the oven or microwave for a quick treat that’s almost as good as fresh.
Ready to Indulge?
Whether you’re hosting company this weekend, looking for the perfect autumn treat, or simply craving something comforting and sweet, this Salted Caramel Apple Crisp is an absolute winner. Its ease of preparation combined with its incredibly decadent flavor makes it a dessert you’ll want to make again and again. Get ready to fill your home with the inviting aroma of cinnamon, apples, and caramel, and prepare for a truly memorable dessert experience.
Easy desserts are the best, and if you’re looking for more simple yet impressive sweet treats, I have a few suggestions that might pique your interest:
- Mini Skillet Lava Cakes for 2
- Funfetti Crepe Cake
- Easy Raspberry and Chocolate Mousse
- Rolo No-Churn Ice Cream
Print Recipe

Salted Caramel Apple Crisp
5 Stars 4 Stars 3 Stars 2 Stars 1 Star
5 from 13 reviews
Author: Katherine | Love In My Oven
Total Time: 1 hour 5 minutes
Yield: 4–5 servings 1x
Description
The only thing better than apple pie is salted caramel apple crisp! An easy caramel apple crisp makes for the perfect fall dessert that easily feeds a crowd
Ingredients
Scale
- 4–5 apples*, peeled and diced
- 2 tbsp granulated sugar
- 2 tsp ground cinnamon
- 1 tsp lemon juice
- 1 cup rolled oats
- 1/4 cup brown sugar
- pinch salt
- 1 tsp ground cinnamon
- 1/3 cup all-purpose flour
- 1/2 cup unsalted butter, cubed (cold)
- 1 cup salted caramel sauce*, plus more for drizzling
- optional: ice cream, for serving
Instructions
- Preheat the oven to 350 F and grease a 10″ or 11″ cast iron skillet, or 8″x8″ baking pan. Set aside.
- In a large bowl, combine the diced apples, granulated sugar, cinnamon and lemon juice. Toss to coat the apples. In another medium-sized bowl, combine the rolled oats, brown sugar, salt, cinnamon and all-purpose flour. Using a pastry cutter or a fork, cut in the cubed butter until the mixture resembles pea-sized crumbs.
- Empty the apples in an even layer in the bottom of the baking dish. Pour the salted caramel sauce all over the apples, and stir to combine. Scatter the oat mixture over the apples, in an even layer. The mixture should thoroughly cover the apples. Place the dish in the oven, and cook for 45-50 minutes until bubbling and hot. Remove, and allow to cool for 5-10 minutes before serving with a dollop of ice cream!
Leftovers can be stored in the fridge, in an airtight container for 2-3 days.
Make ahead: the crisp can be made ahead of time and assembled, and kept in the fridge, covered with plastic wrap up to 1 day ahead.
Notes
- I would recommend using a crisp, tart apple like a Granny Smith, but really, any apple you have on hand works!
- Prep Time: 20 minutes
- Cook Time: 45 minutes