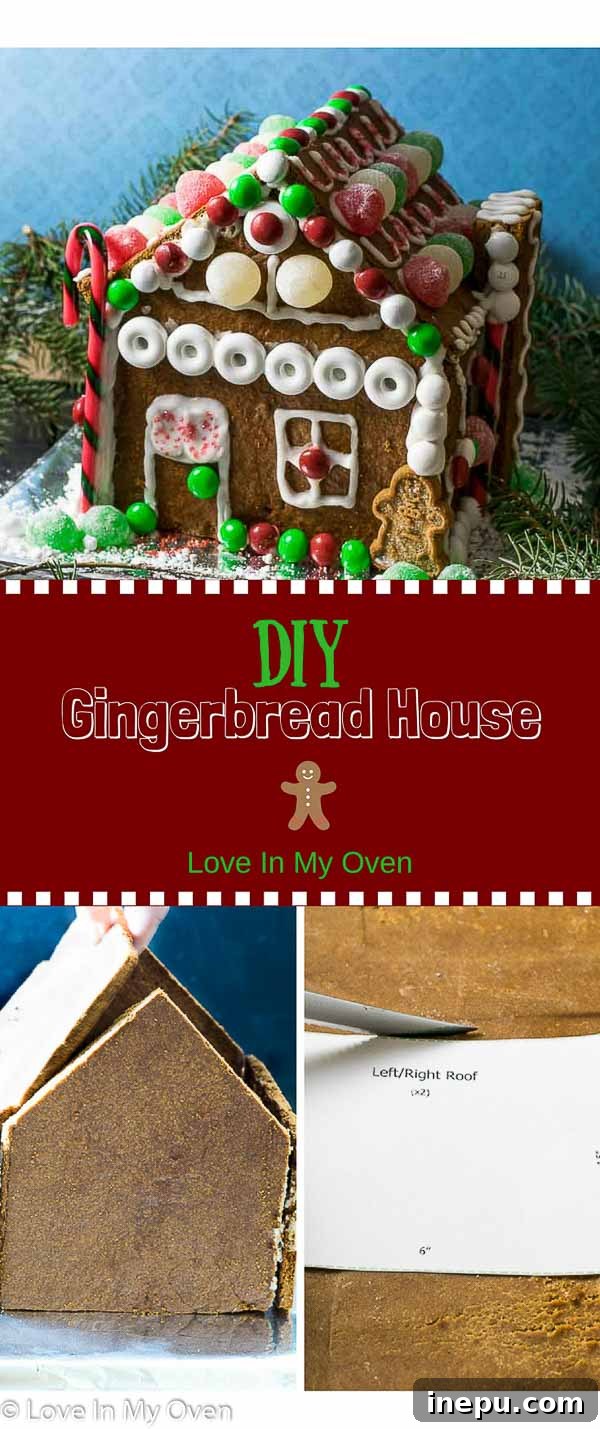
Craft Your Dream Holiday Centerpiece: The Ultimate DIY Gingerbread House Guide
This holiday season, immerse yourself in the delightful tradition of creating a homemade gingerbread house. Forget the flimsy, tasteless store-bought kits; our easy-to-follow guide and delicious recipe will help you construct a sturdy, beautiful, and utterly delicious edible masterpiece. Get ready for a joyful baking experience that culminates in a charming, custom-decorated gingerbread house that truly tastes as good as it looks!

*A Note to Our Readers* This post was originally published in December 2017. While the cherished recipe remains the same, the text has been thoroughly updated to enhance your crafting and baking experience.
Why Embark on Your Own DIY Gingerbread House Adventure?
In a world bustling with pre-assembled gingerbread house kits available at every corner store during the festive season, you might be asking yourself, “Why bother making my own gingerbread house from scratch?” It’s a valid question, and while there’s no single universal answer, the reasons are often deeply rooted in the joy of creation, the warmth of tradition, and an unparalleled taste experience.
If you’ve landed on this page, chances are you share a passion for baking, relish the satisfaction of crafting things by hand, and appreciate the entire process, not just the end result. There’s something uniquely fulfilling about transforming simple ingredients into a tangible, edible piece of art. Beyond the creative fulfillment, there’s a significant difference in flavor. Let’s be honest, many mass-produced gingerbread houses often taste more like the cardboard box they came in than a delightful spiced cookie. Our gingerbread house recipe, however, is designed to be as delicious as it is decorative, ensuring every bite is a true treat.
This recipe isn’t just easy and straightforward; it’s also incredibly versatile. You’ll likely have leftover dough scraps, which are perfect for cutting into charming gingerbread men, stars, or other festive shapes. Consider it a two-for-one baking project: a stunning gingerbread house and a batch of delightful cookies to enjoy alongside it. You’re welcome!

The Gingerbread Dough: Foundation of Your Festive Home
Creating a sturdy yet flavorful gingerbread dough is the first and most crucial step in building your dream gingerbread house. Don’t let thoughts of complex dimensions and precise measurements deter you; we’ve made the process incredibly simple with our printable templates, found at the very end of this comprehensive guide. (Pro tip: A kitchen ruler is an unsung hero and surprisingly handy for all sorts of baking, from cutting perfect biscotti to ensuring straight gingerbread walls!)
Begin by preparing your dough, as it requires at least 30 minutes of chilling time before you can roll it out. This particular recipe delivers that quintessential, comforting molasses taste we all associate with classic gingerbread, perfectly balanced with a blend of warm spices. The ingredient list is straightforward, utilizing pantry staples like butter, flour, and brown sugar. One of the recipe’s best features? No raw eggs! This means you can indulge in those irresistible dough scraps without a single worry. Pure, shameless bliss.
Getting Ready to Bake: Rolling, Cutting, and Baking Tips
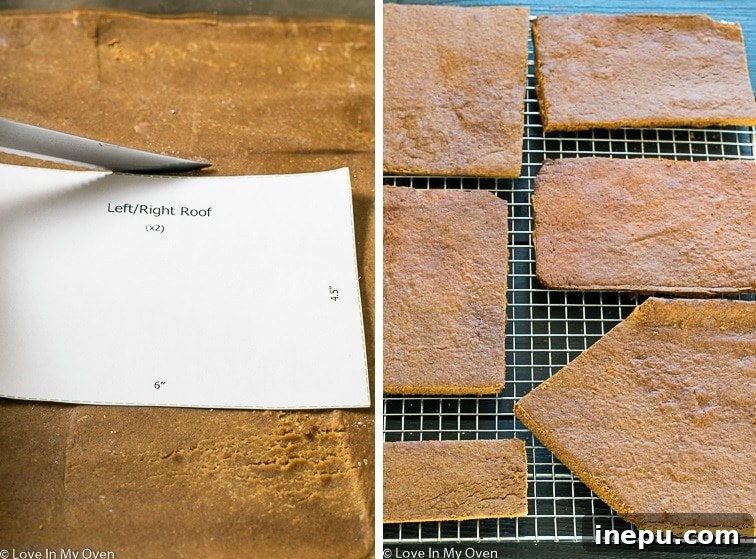
While your gingerbread dough is happily chilling, take the opportunity to print out your gingerbread house templates and carefully cut along the lines. Precision here will lead to a more stable and aesthetically pleasing house. Once the dough is adequately chilled and ready to roll, divide it into two manageable sections. On a lightly floured surface, use a rolling pin to flatten each piece into a large rectangle, aiming for an even 1/4 inch thickness. If you’re lucky enough to own rimless cookie sheets, you can even roll the dough directly onto them for easier transfer.
Now, place your paper templates directly onto the rolled-out dough and use a sharp knife to cut as close to the edges of the paper as possible. Leave the newly outlined dough pieces in place on the baking sheet and bake them as is. Baking time is typically between 13-15 minutes, or until the gingerbread feels firm to the touch. Once baked, remove the sheets from the oven and, while the gingerbread is still warm and slightly pliable, place the paper patterns back onto the outlined sections and carefully trim any irregularities. This post-bake trim is vital for ensuring your house pieces fit together perfectly during assembly.
A crucial check: ensure that the side wall pieces are slightly shorter than the roof pieces after trimming – ideally by about 1/2 inch. Sometimes the dough can spread a little in the oven, so don’t hesitate to trim the sides if necessary to achieve this. Transfer all the baked and trimmed gingerbread pieces to a wire rack to cool completely. Patience is key here; fully cooled pieces are much sturdier and less likely to break during assembly.
Assembling Your Edible Masterpiece: The Secret “Glue” for Success
Assembling a gingerbread house can often be the most challenging part of the process, with pieces sliding and collapsing before the “glue” sets. While classic royal icing is fantastic for decorations, a crafty friend shared an ingenious tip that revolutionized our gingerbread house assembly: a simple, homemade caramel syrup. This sticky, quick-drying concoction is a game-changer, eliminating the need for tedious propping and waiting.
Crafting Your Caramel Syrup
The caramel syrup is a straightforward mixture of sugar and water, cooked until it caramelizes and achieves a thick, sticky consistency. The beauty of this syrup is that it dries almost clear, providing a discreet yet incredibly strong bond. Most importantly, it dries exceptionally fast, allowing for quick assembly without prolonged waiting periods for each section to set.
Important Tip for Caramel Syrup: When preparing the syrup, be mindful not to simmer it for too long. You’re looking for a thick, syrupy consistency, not a hard candy stage. If it cooks past the syrup stage, it will crystalize, making it unusable for assembly. As soon as the mixture looks thick and sticky, remove it from the heat and take the pan off the stove immediately.
Assembling Your Gingerbread House with Caramel
Once your caramel syrup is ready, work quickly, as it sets rapidly. The best way to apply the syrup is with a pastry brush. Start by attaching the front and back walls to the side walls. Apply a generous amount of caramel to the edges you want to join, press them together firmly, and hold them in place for just a minute or two until the caramel sets. You’ll be amazed at how quickly it hardens!
Once the basic four walls are stable, you can add the roof pieces. Again, use the pastry brush to apply caramel along the top edges of the walls and the connecting edges of the roof. Secure them in place until they are firm. Finally, add the chimney once the main structure is completely dry and stable. If you’ve chosen to place your chimney on the side of the house, you may need to trim an inch or two off the bottom to ensure it fits without being too tall. This method significantly speeds up the assembly process, making it far less frustrating and much more enjoyable.
Deck the Halls: Decorating Your Gingerbread House
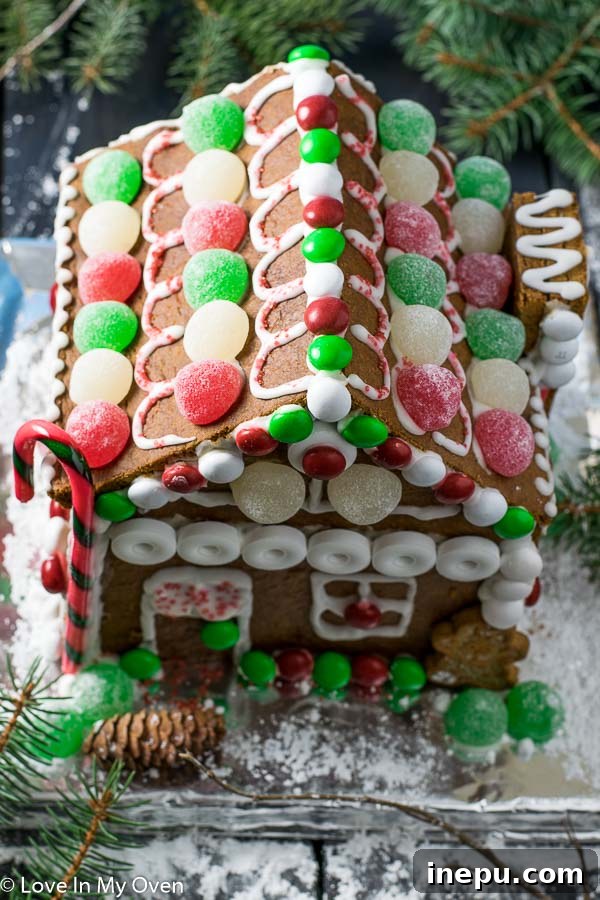
With the structure of your gingerbread house firmly in place, it’s time for the most whimsical and creative part: decorating! This is where you can let your imagination run wild and truly personalize your edible home. First, whip up a batch of royal icing. This versatile icing acts as both a decorative element and a secondary adhesive for your candies.
You can use virtually any candy you desire, but for best results, consider our recommendations. We love using colorful peppermint M&M’s, vibrant mint Lifesavers, and cheerful holiday gum drops. The key is to avoid very heavy candies, as they can slide off before the icing sets. Flatter, smaller candies (think M&M size or smaller) tend to work best and adhere securely. Create intricate patterns, add festive garlands, or simply cover every inch with a riot of sugary delights!
A Friendly Warning: It’s nearly impossible not to sample a few (or a dozen!) candies while decorating. We highly recommend starting this joyful task on an empty stomach to fully appreciate the decorating process and all its sugary perks!
Preservation and Enjoyment: How Long Can a Gingerbread House Last?
Once your magnificent gingerbread house is complete and proudly displayed, you might wonder how long it will remain edible. Generally, a gingerbread house will stay edible for about 1 to 2 weeks. However, it’s important to note that after approximately one week, the gingerbread will start to become quite hard. While still technically edible, biting into it might pose a risk to your teeth!
If you have young, curious children like mine, you’ll likely find that the house won’t even last a week before being meticulously picked over and devoured. The charm and allure of a candy-covered house are simply too strong to resist for little hands. So, don’t fret too much about its longevity; embrace the festive spirit and enjoy your creation while it lasts!
So, gather your rolling pin, prepare your piping bag, and embark on this wonderful holiday tradition. Create a DIY gingerbread house so inviting, even Hansel and Gretel would come running!

More Fun Christmas Goodies:
- Mint Nanaimo Bars
- Christmas Cookie Pops
- Chocolate Candy Cane Cookies
DIY Gingerbread House Recipe

DIY Gingerbread House
5 Stars
4 Stars
3 Stars
2 Stars
1 Star
4 from 1 review
- Author: Katherine
- Total Time: 2 hours 20 minutes
- Yield: 1 house
Description
Forget the store-bought house in a cardboard box. Use this super simple recipe and template to craft your very own made-from-scratch gingerbread house!
Ingredients
Scale
Gingerbread Dough
- 1 cup unsalted butter, softened to room temperature
- 3/4 cup brown sugar
- 1/2 cup fancy molasses
- 1 tsp pure vanilla extract
- 2 tbsp cinnamon
- 1 tbsp ground ginger
- 1 tsp all-spice
- 1 tsp baking soda
- 3 3/4 cups all-purpose flour
- 1/4 cup water
Caramel Syrup
- 1 1/3 cups sugar
- 3/4 cup water
Royal Icing
- 1 tbsp egg-white substitute
- 3 1/2 – 4 cups powdered sugar
- 1 tsp water
Assorted candy, for decorating
Instructions
- Prepare the dough. Using an electric mixer or a stand mixer fitted with the paddle attachment, cream the butter until soft and fluffy. Add the brown sugar, molasses, and vanilla extract and beat until combined. Add the spices and baking soda. Slowly add the flour and water and mix just until a stiff dough forms. Place the dough in the fridge for at least 30 minutes to chill.
- While the dough chills, print and cut out the templates for the house (found at the end of this recipe). You will need two of each, other than the chimney.
- Preheat the oven to 375 F and line two large baking sheets with parchment paper or a silicone baking mat*. Divide the chilled dough into two, and using a lightly floured surface, roll each section out into a large rectangle, about 1/4″ thick. Place the cut-outs on top of the dough and using a sharp knife, outline around the cut-outs, keeping the outlined pieces in place. Remove the paper, and bake the dough for 13-15 minutes or until the dough feels firm to the touch. Allow to cool 5 minutes.
- Place the cut-out patterns on top of the outlines again and trim to ensure the pieces are the correct size. You will want to make sure the sides are shorter than the roof, at least by 1/2″. Sometimes the pieces spread in the oven, so trim the sides as necessary. Place them on top of the roof pieces to see. Remove the cut-out pieces and place on a wire rack to cool completely.
- Once the shapes have cooled, prepare the surface for the gingerbread house. I used a small cookie sheet wrapped in foil.
- Prepare the caramel syrup*** Stir together the sugar and water until combined, in a small saucepan. Bring the mixture to a boil, then reduce heat and simmer until a caramel syrup is formed, about 15 minutes. It will look thick and syrupy. Once the syrup forms, turn off the heat and remove the saucepan, or the syrup will crystalize. Using a pastry brush, use the caramel immediately to glue the house together. Starting with the sides of the house, apply the caramel to one end and hold it against the front or back of the house, holding in place for a few minutes until hardened. You can also use chip clips or any other props you have around to keep the pieces propped up while drying. Work quickly to assemble the rest of the house. If you’re using royal icing instead of the syrup, wait 30 minutes before adding the roof to the house. I glued the chimney last. If you’ve chosen to place the chimney on the side vs the back of the house, it may be too tall. Trim 1-2 inches off the end.
- Prepare the royal icing. Allow the house to rest for at least a couple of hours to really set before preparing the icing to decorate. In a medium bowl, use an electric mixer to beat together the egg whites and water with the powdered sugar. Add more water or more powdered sugar to achieve the right consistency. It should be thick enough to hold candy in place, but thin enough to pipe through a piping bag.
- Use a piping bag to decorate the house, holding candy in place for a few seconds until it sticks. Leave the house in place until everything has hardened, about 15 minutes. Display, then enjoy immediately!
Gingerbread house will keep at room temperature for 3-4 weeks, but will be much less edible after 1 week.
Notes
- If you own rimless baking sheets, roll the dough right onto the baking sheet.
- Use gum drops, M&M’s, licorice, marshmallows, gum drops and lifesavers to decorate.
- If you’d prefer not to use syrup to glue the house together, you can also just make extra royal icing and use that instead!
Caramel syrup adapted from Martha Stewart.
- Prep Time: 1 hours
- Cook Time: 20 minutes
- Category: sweet tooth
- Method: DIY
- Cuisine: Christmas Baking
Gingerbread House Templates
For a complete gingerbread house, print two copies of the “Front and Back” template as well as two copies of the “Chimney” template. You’ll need one copy of the “Sides and Roof” template.
Front and Back Template
Sides and Roof Template
Chimney Template